Page 164 of 376
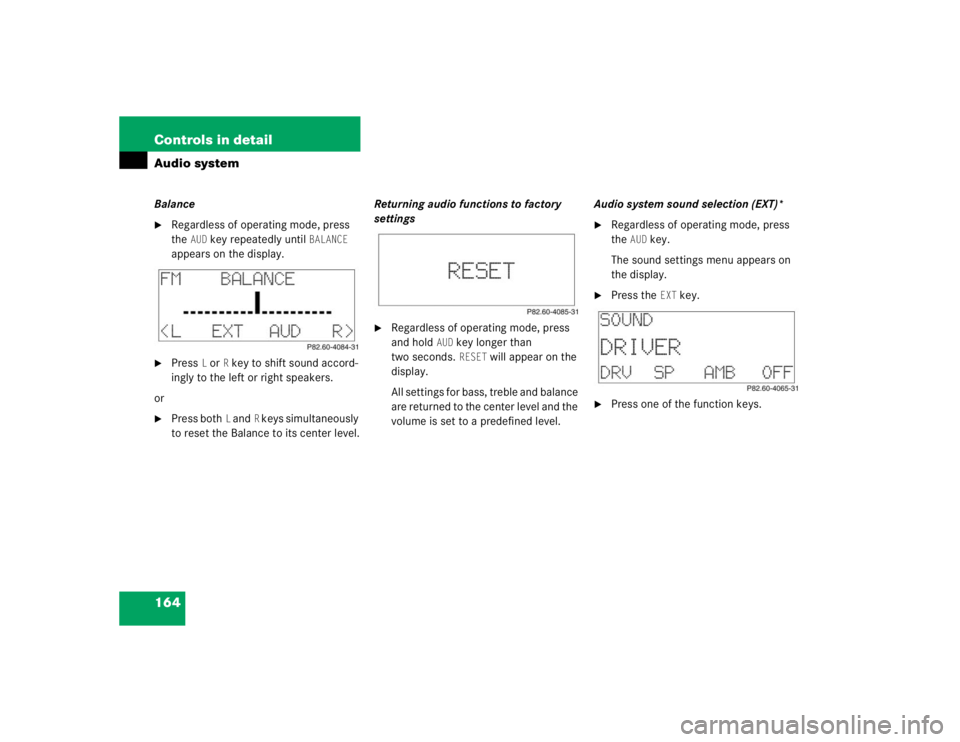
164 Controls in detailAudio systemBalance�
Regardless of operating mode, press
the
AUD
key repeatedly until
BALANCE
appears on the display.
�
Press
L or
R key to shift sound accord-
ingly to the left or right speakers.
or
�
Press both
L and
R keys simultaneously
to reset the Balance to its center level. Returning audio functions to factory
settings
�
Regardless of operating mode, press
and hold
AUD
key longer than
two seconds. RESET
will appear on the
display.
All settings for bass, treble and balance
are returned to the center level and the
volume is set to a predefined level. Audio system sound selection (EXT)*
�
Regardless of operating mode, press
the
AUD
key.
The sound settings menu appears on
the display.
�
Press the
EXT
key.
�
Press one of the function keys.
Page 171 of 376
 mode
In PTY mode, you can tune in and select
channels of a specific program type.
Calling up PTY mode�
Start SAT radio mode.
�
Press the
PTY
key")
171
Controls in detail
Audio system
Program type (PTY) mode
In PTY mode, you can tune in and select
channels of a specific program type.
Calling up PTY mode�
Start SAT radio mode.
�
Press the
PTY
key.
The name of the channel currently
being received is shown.
Leaving PTY mode
�
Press the
CH
key.
The number of the channel currently
being received is shown. Selecting channel category
�
Press
d or c button.
The individual program types are se-
lected.
Tuning in a PTY channel
Once you have selected a program type,
you can tune in channels broadcasting a
program that corresponds to the selected
program type.
�
Press f or e button.
The radio will tune to the next highest
or lowest channel broadcasting this
type of program. Program Descriptive Text (PDT)
In PDT mode, you can call up additional in-
formation on the channel, the current track
and the performing artists(s).
�
Press the
TXT
key.
The station category appears on the
display.
�
Press the
TXT
key again within
four seconds.
The title of the current track appears.
�
Press the
TXT
key again within
four seconds.
The name of the musician(s) of the cur-
rent track appear on the display.
Page 172 of 376

172 Controls in detailAudio systemCassette operation
Playing cassettes�
Press3button.
The display panel folds down and the
cassette compartment becomes ac-
cessible.
�
Insert cassette into the cassette com-
partment until it engages and tap it
gently.
The cassette will be pulled in automati-
cally. The system switches to cassette
mode. Side 1 will be played and
SIDE 1
appears in the display. Side 1 is the
side of the cassette which is facing up-
ward. The cassette deck will automati-
cally detect the type of tape.
�
Fold display panel back up and press
gently on the display panel frame to
lock it in place.
or
�
If a cassette is already in the
mechanism, press jbutton. Track selection
�
Press the
TRK
key.
The current track will be displayed as
SIDE 1
or
SIDE 2
.
�
You can switch sides at any time.
The side will be changed automatically
at the end of the tape.
!Do not press directly on the display
face. Otherwise the display will be
damaged.
iA warning signal will sound after
20 seconds if the display panel is left in
the down position. Fold display panel
back up. If the display panel is not
closed, a warning signal will sound and
the radio will be muted.
Page 173 of 376

173
Controls in detail
Audio system
Cassette eject�
Press eject button
3.
The display folds down and the cas-
sette is ejected. The system will switch
back to radio mode automatically.
�
Fold display panel back up and press
gently on the display panel frame to
lock it. Track search
Track search forward
�
Press
fbutton.SEEK FWD
will appear in the display.
Track search will run the tape forward
to the start of the next track and switch
to Play. Track search backward
�
Press
ebutton.SEEK RWD
will appear on the display.
Track search will run the tape back-
ward to the start of the track currently
playing and switch to Play.
Stopping track search
�
Press d, c , f or
e button.
The cassette will switch over to Play.
!Do not press directly on the display
face. Otherwise the display will be
damaged.iThe cassette will not be ejected when
the system is switched off or switched
to another operating mode.
iThe beginning of a track can only be
found if there is pause of at least
four seconds between tracks.
Page 175 of 376

To enable optimum sound reproduction of
cassettes recorded using Dolby B NR, the
Dolby NR system should be switched on. Switch")
175
Controls in detail
Audio system
Dolby NR
1 (noise reduction system)
To enable optimum sound reproduction of
cassettes recorded using Dolby B NR, the
Dolby NR system should be switched on. Switching on
�
Press the
NR key.
NR is highlighted in the display.
Switching off
�
Press the
NR key.
The highlighted
NR in the display disap-
pears.
CD changer* operation
General notes
Should excessively high temperatures oc-
cur while in CD mode,
CD TEMP HIGH
will
appear on the display and the CD will be
muted. The unit will then switch back to
the last operating mode used until the tem-
perature has decreased to a safe operating
level.
Should excessively low temperatures oc-
cur while in CD mode,
CD TEMP LOW
will ap-
pear on the display, but the CD will
continue to play.
Handle CDs carefully to prevent interfer-
ence during playback. Avoid fingerprints
and dust on CDs. Do not write on CDs or
apply any labels or other material to them.
1DOLBY and the double-D symbol Ù are trade-
marks of Dolby Laboratories Licensing Corpora-
tion.
The Dolby noise reduction system is manufactured
under license from Dolby Laboratories Licensing
Corporation.iThe Dolby NR function should be
switched off when playing cassettes
not recorded with Dolby B NR.
Page 184 of 376
.
You can make an emergency call to an
emergency rescu")
184 Controls in detailAudio systemEmergency call�
Press button4 longer than
one second.
�
A call will be placed to the saved num-
ber (e.g. 911).
You can make an emergency call to an
emergency rescue station with a mobile
communications network.
The emergency call will be placed as long
as the corresponding mobile communica-
tions network is available. To do this,
switch the telephone on if this has not al-
ready been done. The call will also be placed even if the un-
lock code is not entered.
Emergency calls may not be possible with
all telephone networks or if certain net-
work services and/or telephone functions
are active. Check with your local network
operation company. It may take some time
to set up an emergency call.
To use this function you must ensure that
the number stored in memory location 1 is
the number to be dialed in case of emer-
gency.
If an emergency call cannot be connected,
the message
SYSTM BUSY
appears.
Accepting an incoming call
Accepting an incoming call in telephone
mode
With an incoming call, a ringing tone can
be heard and the caller’s telephone num-
ber, or the name under which this tele-
phone number has been saved in the
telephone book, appears on the display. If
the caller’s number is not transmitted,
CALL
will appear in the display.
�
Press the
SND
key to accept call.
!Please be aware that the 911 emergen-
cy call system is a public service. Using
it without due cause is a criminal of-
fense.
Page 185 of 376
, the audio so")
185
Controls in detail
Audio system
Accepting an incoming call in cassette,
CD or radio mode
If the telephone is activated in the back-
ground (receiving symbol
S visible on dis-
play), the audio souce is muted when a call
is received. The ringing tone is heard and
the caller’s telephone number or the name
under which this telephone number has
been saved in the telephone book appears
on the display. If the caller’s number is not
transmitted,
CALL
appears in the display.
�
Press the
SND
key to accept the call. Muting a call
It is possible to mute a call; the caller is
then no longer able to hear you.
Mute on
�
Press the
MUT
key.
Mute off
�
Press the
MUT
key.
Terminating a call
�
Press the
END
key.
The current call is terminated. Call waiting
If you receive another call during an al-
ready active call, you can accept the sec-
ond call and switch between the two.
Accepting a second call
�
Press the
SND
key.
You are connected with the second
caller, the first call is muted.
Switching between the calls
�
Press the
SND
key.
Terminating the second call
�
Press the
END
key.
The current call will be terminated. You
are connected with the muted call
again.
Page 208 of 376

or airbags deploy
�
if th")
208 Controls in detailUseful featuresEmergency calls
An emergency call is initiated automatical-
ly:�
following an accident in which the
emergency tensioning devices (ETDs)
or airbags deploy
�
if the anti-theft alarm or the tow-away
alarm stays on for more than
20 seconds. See anti-theft alarm sys-
tem (
�page 78)and tow-away alarm
(
�page 79).
An emergency call can also be initiated
manually by opening the cover next to the
inside rear view mirror labeled “SOS”, then
briefly pressing the button located under
the cover. See below for instructions on
initiating an emergency call manually.
Once the emergency call is in progress, the
indicator lamp in the “SOS” button will be-
gin to flash. The message
EMERGENCY CALL
– CONNECTING CALL
appears in the multi-
function display. When the connection is
established, the message
EMERGENCY CALL
– CALL CONNECTED
appears in the multi- function display. All information relevant to
the emergency, such as the location of the
vehicle (determined by the GPS satellite lo-
cation system), vehicle model, identifica-
tion number and color are generated.
A voice connection between the Response
Center and the occupants of the vehicle
will be established automatically soon af-
ter the emergency call has been initiated.
When a voice connection is established the
audio system mutes and the message
TELE AID – EMERGENCY CALL ACTIVE
ap-
pears in the multifunction display. The Re-
sponse Center will attempt to determine
more precisely the nature of the accident
provided they can speak to an occupant of
the vehicle. The Tele Aid system is available if:
�
it has been activated and is operation-
al. Activation requires a subscription
for monitoring services, connection
and cellular air time
�
the relevant cellular phone network
and GPS signals are available and pass
the information on to the response cen-
teriLocation of the vehicle on a map is only
possible if the vehicle is able to receive
signals from the GPS satellite network
and pass the information on to the re-
sponse center.