Page 3503 of 4264
FRONT SUSPENSION 3C-11
NOTE: Paint mark to be outer side of after assembly to
vehicle.
2. Install nut (2), then tighten it to the specified
torque.
Torque: 55N
�
�� �m (5.6kg
�
�� �m/41lb ft)
3. Install bolt (7) and nut (4), then tighten to the
specified torque.
Buffer clearance: 25.9 mm (1.02 in)
Torque: 137N�
�� �m (14.0kg�
�� �m/101 lb ft)
NOTE: Apply oil to the thread.
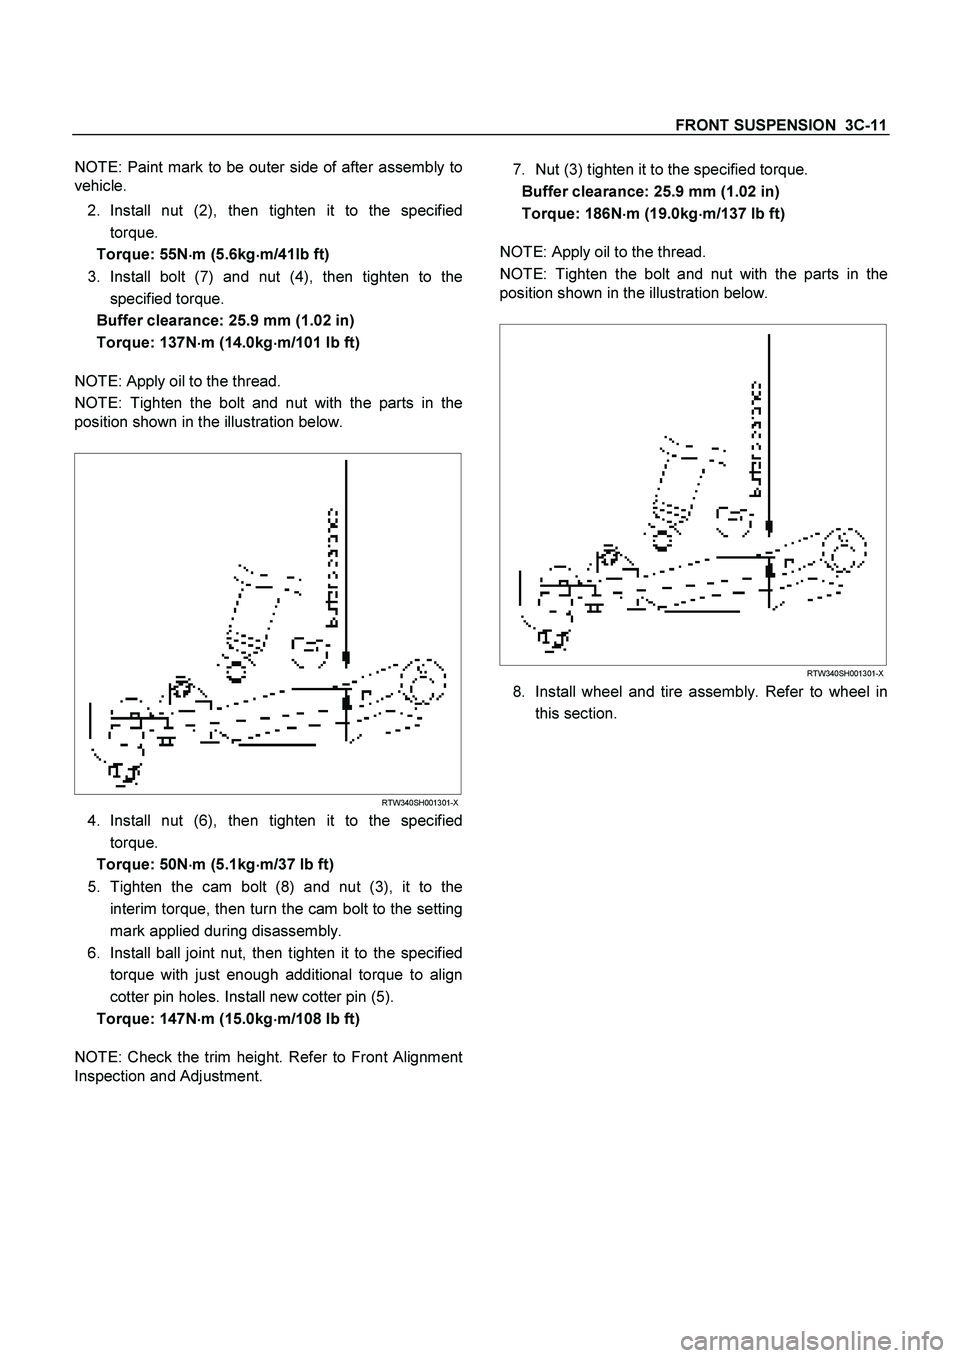
NOTE: Tighten the bolt and nut with the parts in the
position shown in the illustration below.
RTW340SH001301-X
4. Install nut (6), then tighten it to the specified
torque.
Torque: 50N�
�� �m (5.1kg�
�� �m/37 lb ft)
5. Tighten the cam bolt (8) and nut (3), it to the
interim torque, then turn the cam bolt to the setting
mark applied during disassembly.
6. Install ball joint nut, then tighten it to the specified
torque with just enough additional torque to align
cotter pin holes. Install new cotter pin (5).
Torque: 147N�
�� �m (15.0kg�
�� �m/108 lb ft)
NOTE: Check the trim height. Refer to Front Alignment
Inspection and Adjustment.
7. Nut (3) tighten it to the specified torque.
Buffer clearance: 25.9 mm (1.02 in)
Torque: 186N�
�� �m (19.0kg�
�� �m/137 lb ft)
NOTE: Apply oil to the thread.
NOTE: Tighten the bolt and nut with the parts in the
position shown in the illustration below.
RTW340SH001301-X
8. Install wheel and tire assembly. Refer to wheel in
this section.
Page 3523 of 4264
FRONT SUSPENSION 3C-31
Shock Absorber
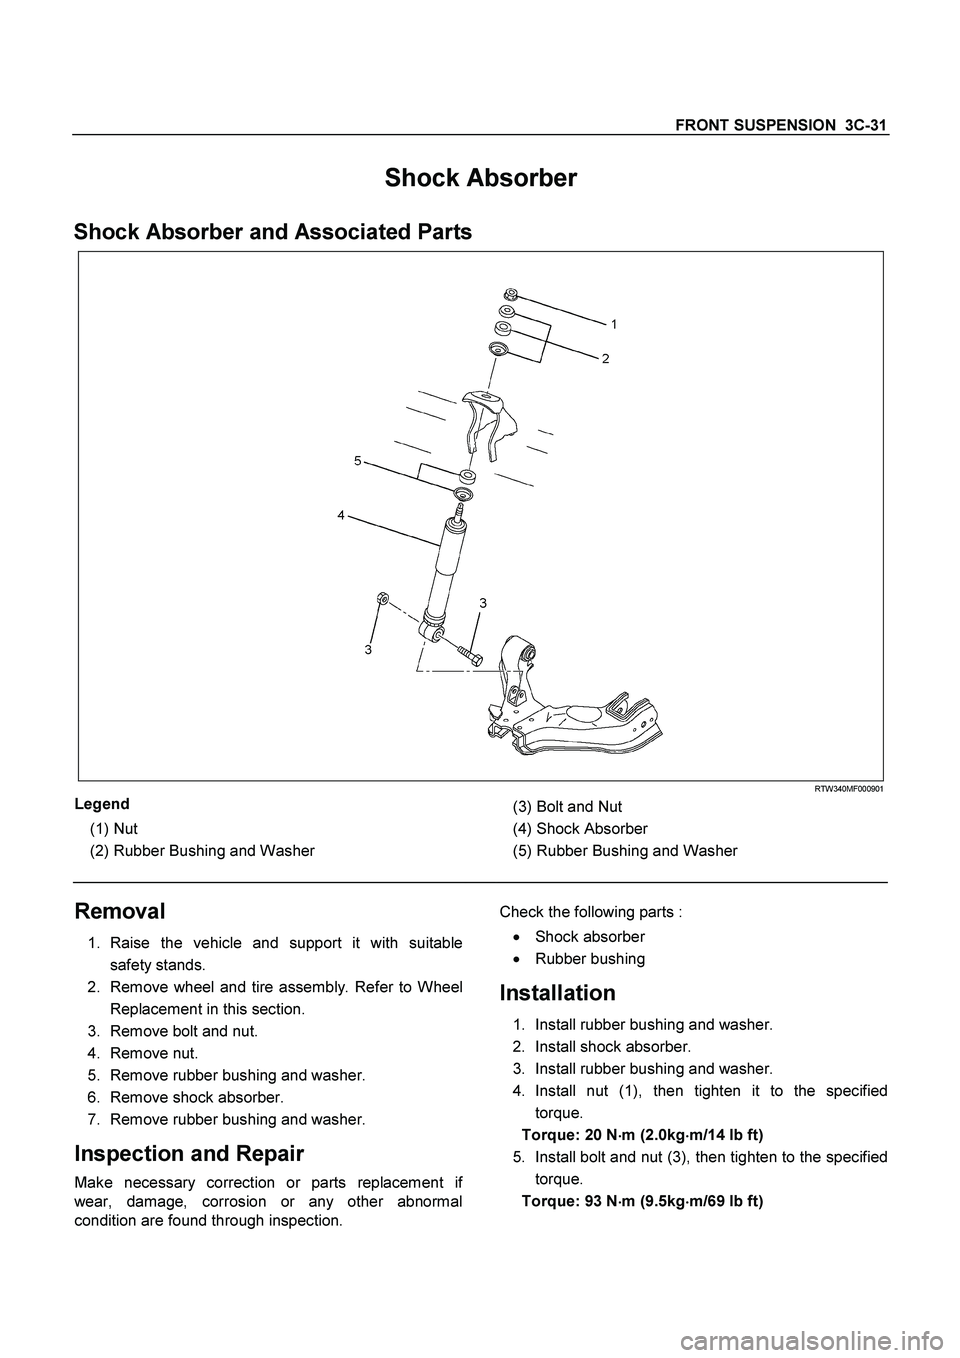
Shock Absorber and Associated Parts
RTW340MF000901
Legend
(1)
Nut
(2)
Rubber Bushing and Washer
(3) Bolt and Nut
(4)
Shock Absorber
(5) Rubber Bushing and Washer
Removal
1. Raise the vehicle and support it with suitable
safety stands.
2. Remove wheel and tire assembly. Refer to Wheel
Replacement in this section.
3. Remove bolt and nut.
4. Remove nut.
5. Remove rubber bushing and washer.
6. Remove shock absorber.
7. Remove rubber bushing and washer.
Inspection and Repair
Make necessary correction or parts replacement if
wear, damage, corrosion or any other abnormal
condition are found through inspection.
Check the following parts :
�
Shock absorber
�
Rubber bushing
Installation
1. Install rubber bushing and washer.
2. Install shock absorber.
3. Install rubber bushing and washer.
4. Install nut (1), then tighten it to the specified
torque.
Torque: 20 N�
�� �m (2.0kg�
�� �m/14 lb ft)
5. Install bolt and nut (3), then tighten to the specified
torque.
Torque: 93 N�
�� �m (9.5kg�
�� �m/69 lb ft)
Page 3573 of 4264
WHEELS AND TIRES 3E-1
SECTION 3E
WHEELS AND TIRES
TABLE OF CONTENTS
PAGE
Main Data and Specifications ........................................................................................... 3E- 2
Torque Specifications ....................................................................................................... 3E- 3
Special Parts Fixing Nuts and Bolts ............................................................................ 3E- 3
Wheels and Tires ...............................................................................................................3E- 4
General Description ...................................................................................................... 3E- 4
Servicing ........................................................................................................................ 3E- 6
Disassembly and Reassembly ..................................................................................... 3E- 7
Inspection and Repair................................................................................................... 3E- 8
Troubleshooting ................................................................................................................3E- 10
Page 3575 of 4264
WHEELS AND TIRES 3E-3
TORQUE SPECIFICATIONS
SPECIAL PARTS FIXING NUTS AND BOLTS
WHEELS AND TIRES
kgf�
m (lb�
ft/N�
m)
Page 4155 of 4264
ON-VEHICLE SERVICE (JR405E) 7A3-3
Cold Level
The vehicle must not have been driven so that the
temperature reaches around 20�C (68�F) before the
cold level check is made.
1. Park the vehicle on a level surface.
2. Apply the parking brake firmly.
3. Start the engine and allow it to warm up.
The engine coolant temperature gauge needle
should be midway between the “C” mark and “H”
mark.
4. Let the engine run at idle.
Move the select lever slowly through all the gea
r
ranges.
Stop in each range just long enough for the
transmission to engage.
5. Return the select lever either “P” or “N”.
6. Remove the ATF level dipstick.
7. Wipe the dipstick clean with a paper towel.
8. Reinsert the dipstick and wait several seconds.
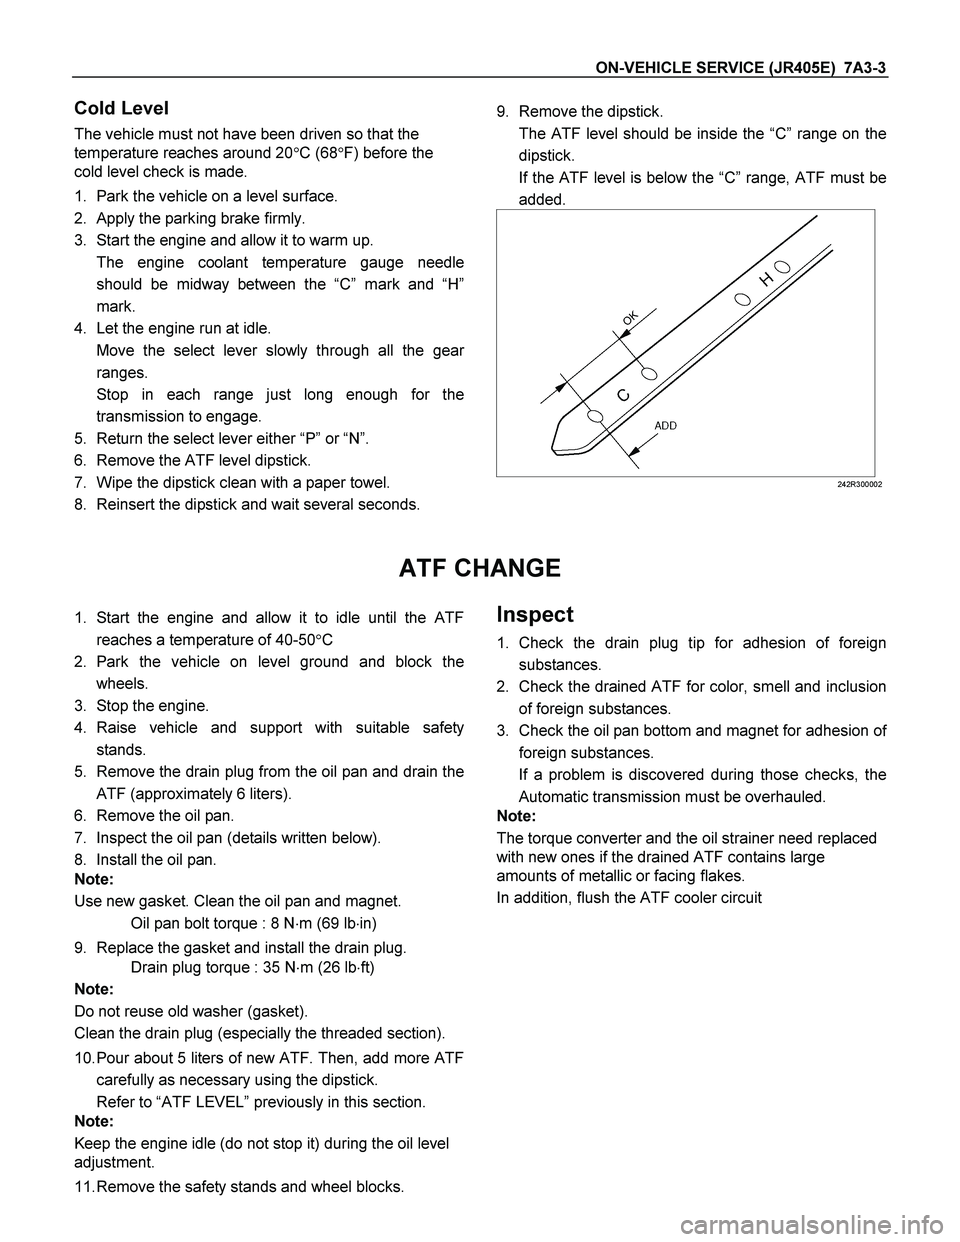
9. Remove the dipstick.
The ATF level should be inside the “C”range on the
dipstick.
If the ATF level is below the “C” range, ATF must be
added.
242R300002
ATF CHANGE
1. Start the engine and allow it to idle until the ATF
reaches a temperature of 40-50�C
2. Park the vehicle on level ground and block the
wheels.
3. Stop the engine.
4. Raise vehicle and support with suitable safety
stands.
5. Remove the drain plug from the oil pan and drain the
ATF (approximately 6 liters).
6. Remove the oil pan.
7. Inspect the oil pan (details written below).
8. Install the oil pan.
Note:
Use new gasket. Clean the oil pan and magnet.
Oil pan bolt torque : 8 N�m (69 lb�in)
9. Replace the gasket and install the drain plug.
Drain plug torque : 35 N�m (26 lb�ft)
Note:
Do not reuse old washer (gasket).
Clean the drain plug (especially the threaded section).
10. Pour about 5 liters of new ATF. Then, add more ATF
carefully as necessary using the dipstick.
Refer to “ATF LEVEL” previously in this section.
Note:
Keep the engine idle (do not stop it) during the oil level
adjustment.
11. Remove the safety stands and wheel blocks. Inspect
1. Check the drain plug tip for adhesion of foreign
substances.
2. Check the drained ATF for color, smell and inclusion
of foreign substances.
3. Check the oil pan bottom and magnet for adhesion o
f
foreign substances.
If a problem is discovered during those checks, the
Automatic transmission must be overhauled.
Note:
The torque converter and the oil strainer need replaced
with new ones if the drained ATF contains large
amounts of metallic or facing flakes.
In addition, flush the ATF cooler circuit
Page 4158 of 4264
7A3-6 ON-VEHICLE SERVICE (JR405E)
INHIBITOR SWITCH
The inhibitor switch is attached to the right side of the
transmission.
Inspect
1. Block the wheels.
2. Disconnect the negative battery cable.
3. Disconnect the harness connectors.
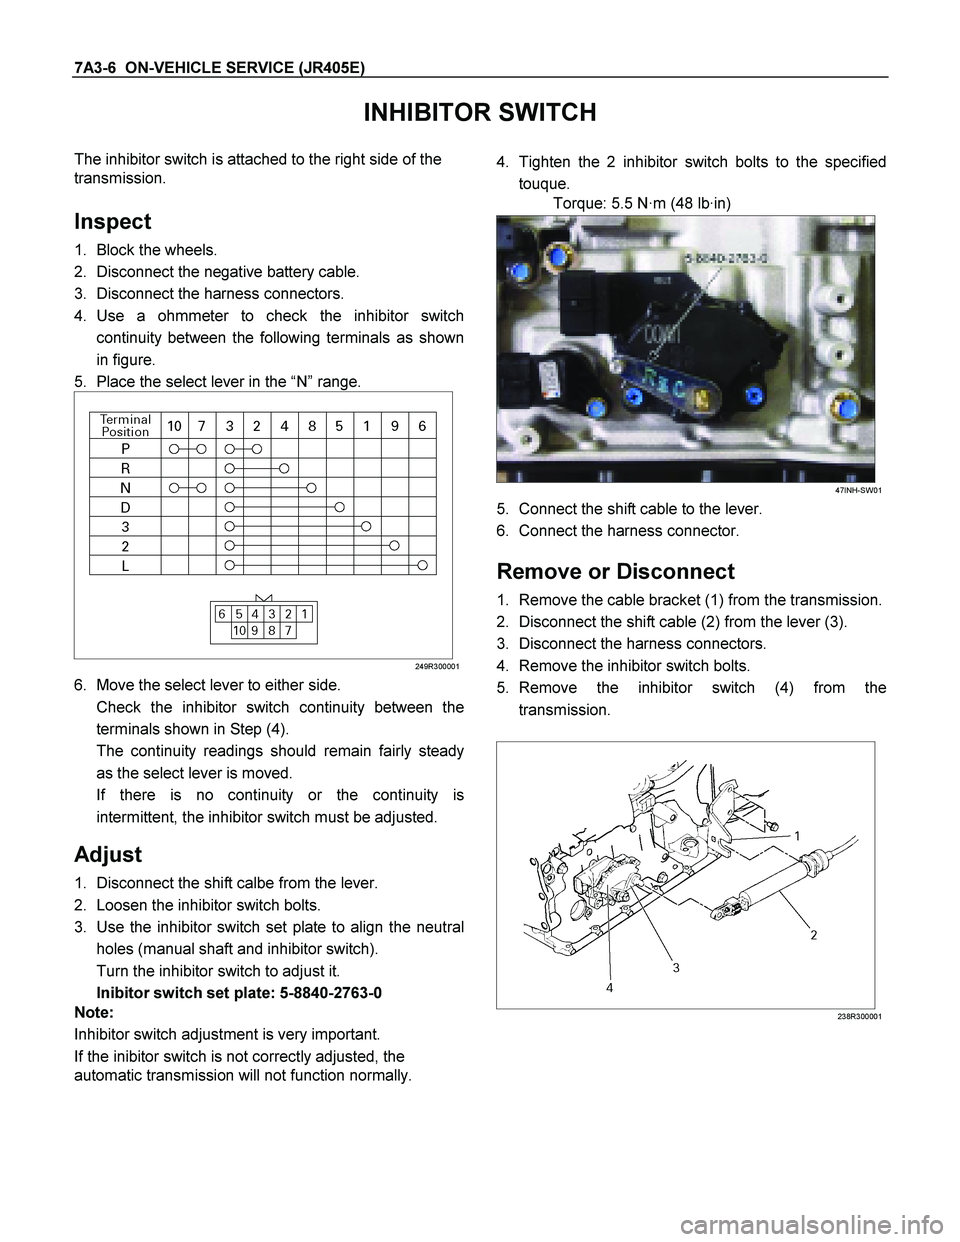
4. Use a ohmmeter to check the inhibitor switch
continuity between the following terminals as shown
in figure.
5. Place the select lever in the “N” range.
249R300001
6. Move the select lever to either side.
Check the inhibitor switch continuity between the
terminals shown in Step (4).
The continuity readings should remain fairly steady
as the select lever is moved.
If there is no continuity or the continuity is
intermittent, the inhibitor switch must be adjusted.
Adjust
1. Disconnect the shift calbe from the lever.
2. Loosen the inhibitor switch bolts.
3. Use the inhibitor switch set plate to align the neutral
holes (manual shaft and inhibitor switch).
Turn the inhibitor switch to adjust it.
Inibitor switch set plate: 5-8840-2763-0
Note:
Inhibitor switch adjustment is very important.
If the inibitor switch is not correctly adjusted, the
automatic transmission will not function normally.
4. Tighten the 2 inhibitor switch bolts to the specified
touque.
Torque: 5.5 N·m (48 lb·in)
47INH-SW01
5. Connect the shift cable to the lever.
6. Connect the harness connector.
Remove or Disconnect
1. Remove the cable bracket (1) from the transmission.
2. Disconnect the shift cable (2) from the lever (3).
3. Disconnect the harness connectors.
4. Remove the inhibitor switch bolts.
5. Remove the inhibitor switch (4) from the
transmission.
238R300001
Page 4159 of 4264
ON-VEHICLE SERVICE (JR405E) 7A3-7
Install or Connect
1. Install the inhibitor switch (4) to the transmission.
Temporarily tighten the inhibitor switch bolts.
2. Move the manual shaft select lever to the “N” range.
249R300002
3. Use the inhibitor switch set plate to align the neutral
holes (manual shaft and inhibitor switch).
Turn the inhibitor switch to adjust it.
Inhibitor switch set plate: 5-8840-2763-0
Note:
Inhibitor switch adjustment is very important.
If the inhibitor switch is not correctly adjusted, the
automatic transmission will not function normally.
4. Tighten the 2 inhibitor switch bolts to the specified
torque.
Torque: 5.5 N·m (48 lb·in)
47INH-SW01
5. Install the cable bracket (1) to the transmission.
6. Connect the shift cable (2) to the lever (3).
7. Connect the harness connector.
8. Connect the negative battery cable.
9. Remove the wheel blocks.
Page 4169 of 4264
ON-VEHICLE SERVICE (JR405E) 7A3-17
Remove or Disconnect
1. Block the wheels.
2. Disconnect the negative battery cable.
3. Drain the fluid.
Refer to “ATF CHANGE” in this section.
4. Remove the 19 bolts and oil pan.
5. Inspect the bottom of the oil pan and strainer netting
for foreign material (clutch facing and metal
shavings).
If there is an excessive accumulation of foreign
material, the oil strainer must be replaced.
Further inspection is required to determine the
source of the foreign material.
6. Remove the harness assembly (including oil
temperature sensor).
7. Remove the 11 bolts and the solenoid fixing plate.
8. Remove the 6 solenoids and 3 oil pressure switchs.
Inspect
Oil pressure switch
Apply compressed air (392 kPa/4.0 kg/cm2) to the oil
pressure switch to check the oil pressure switch
continuity between the connector and screw.
Oil temperature sensor (harness assembly)
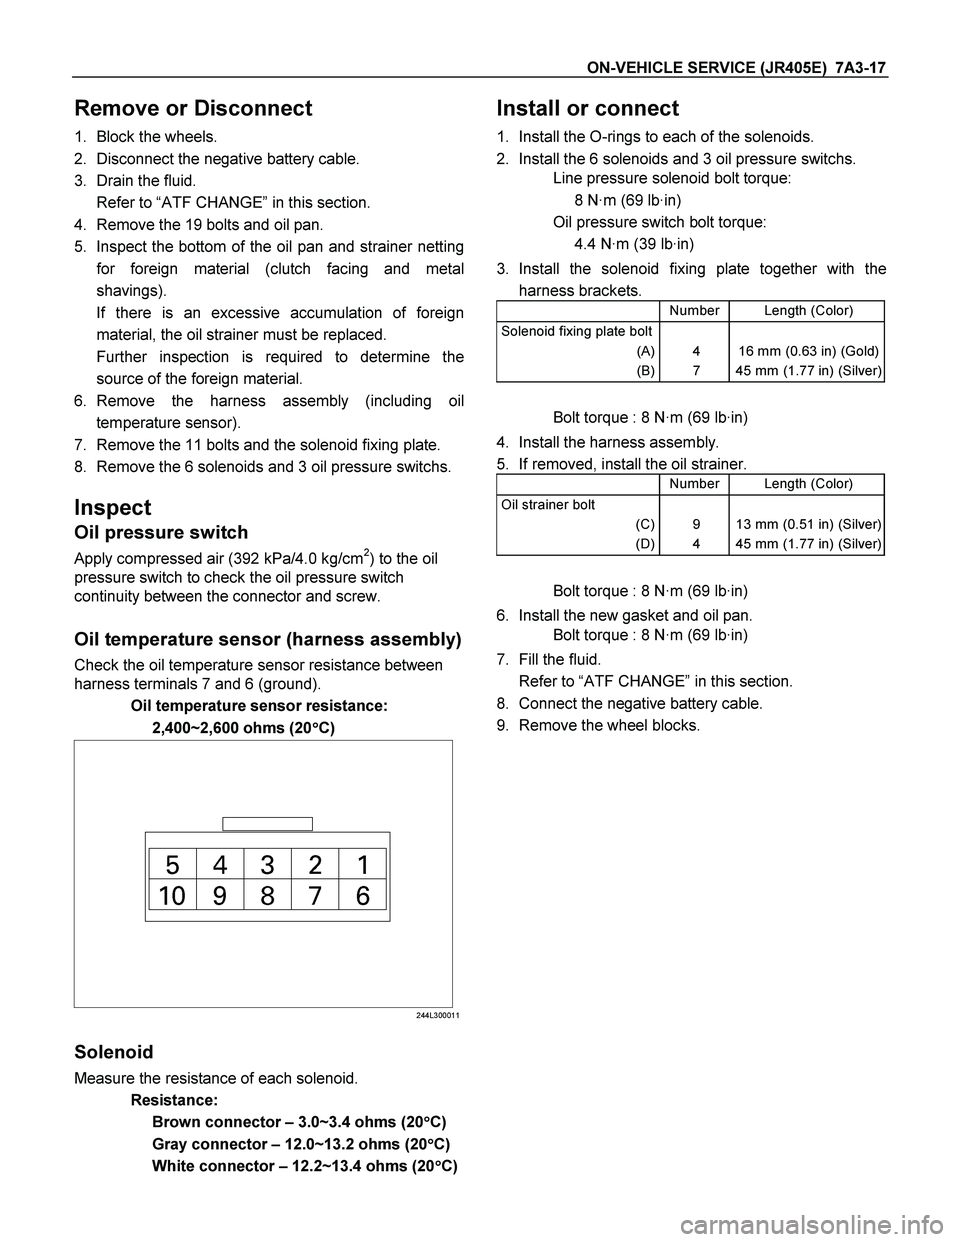
Check the oil temperature sensor resistance between
harness terminals 7 and 6 (ground).
Oil temperature sensor resistance:
2,400~2,600 ohms (20�
�� �C)
244L300011
Solenoid
Measure the resistance of each solenoid.
Resistance:
Brown connector – 3.0~3.4 ohms (20�
�� �C)
Gray connector – 12.0~13.2 ohms (20�
�� �C)
White connector – 12.2~13.4 ohms (20�
�� �C)
Install or connect
1. Install the O-rings to each of the solenoids.
2. Install the 6 solenoids and 3 oil pressure switchs.
Line pressure solenoid bolt torque:
8 N·m (69 lb·in)
Oil pressure switch bolt torque:
4.4 N·m (39 lb·in)
3. Install the solenoid fixing plate together with the
harness brackets.
Number Length (Color)
Solenoid fixing plate bolt
(A)
(B)
4
7
16 mm (0.63 in) (Gold)
45 mm (1.77 in) (Silver)
Bolt torque : 8 N·m (69 lb·in)
4. Install the harness assembly.
5. If removed, install the oil strainer.
Number Length (Color)
Oil strainer bolt
(C)
(D)
9
4
13 mm (0.51 in) (Silver)
45 mm (1.77 in) (Silver)
Bolt torque : 8 N·m (69 lb·in)
6. Install the new gasket and oil pan.
Bolt torque : 8 N·m (69 lb·in)
7. Fill the fluid.
Refer to “ATF CHANGE” in this section.
8. Connect the negative battery cable.
9. Remove the wheel blocks.