2004 ISUZU TF SERIES section 8
[x] Cancel search: section 8Page 2836 of 4264
6E–260 ENGINE DRIVEABILITY AND EMISSIONS
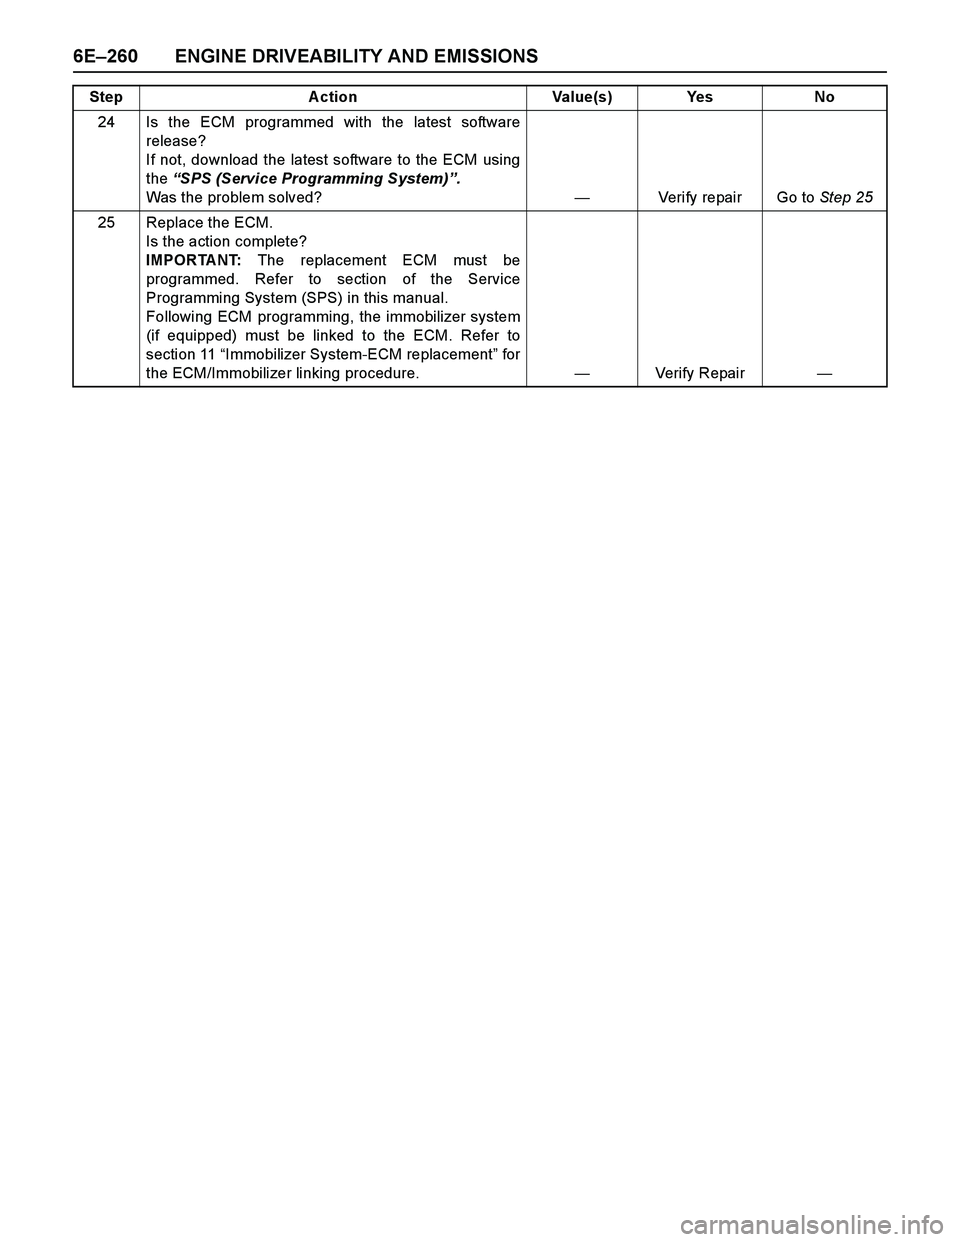
24 Is the ECM programmed with the latest software
release?
If not, download the latest software to the ECM using
the “SPS (Service Programming System)”.
Was the problem solved?—Verify repair Go to Step 25
25 Replace the ECM.
Is the action complete?
IMPORTANT: The replacement ECM must be
programmed. Refer to section of the Service
Programming System (SPS) in this manual.
Following ECM programming, the immobilizer system
(if equipped) must be linked to the ECM. Refer to
section 11 “Immobilizer System-ECM replacement” for
the ECM/Immobilizer linking procedure.—Verify Repair— Step Action Value(s) Yes No
Page 2837 of 4264
ENGINE DRIVEABILITY AND EMISSIONS 6E–261
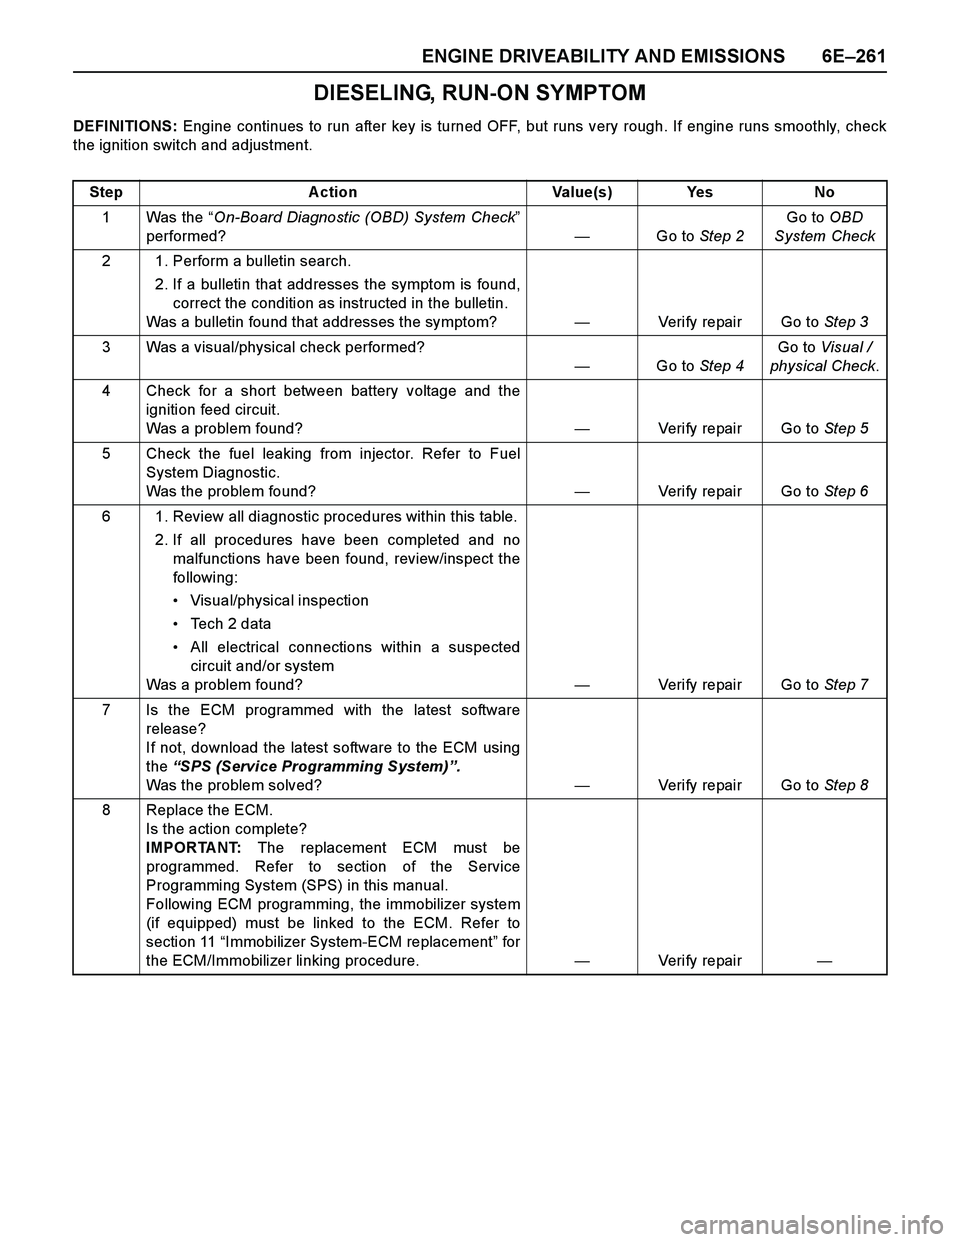
DIESELING, RUN-ON SYMPTOM
DEFINITIONS: Engine continues to run after key is turned OFF, but runs very rough. If engine runs smoothly, check
the ignition switch and adjustment.
Step Action Value(s) Yes No
1Was the “On-Board Diagnostic (OBD) System Check”
performed?—Go to Step 2Go to OBD
System Check
2 1. Perform a bulletin search.
2. If a bulletin that addresses the symptom is found,
correct the condition as instructed in the bulletin.
Was a bulletin found that addresses the symptom?—Verify repair Go to Step 3
3 Was a visual/physical check performed?
—Go to Step 4Go to Visual /
physical Check.
4 Check for a short between battery voltage and the
ignition feed circuit.
Was a problem found?—Verify repair Go to Step 5
5 Check the fuel leaking from injector. Refer to Fuel
System Diagnostic.
Was the problem found?—Verify repair Go to Step 6
6 1. Review all diagnostic procedures within this table.
2. If all procedures have been completed and no
malfunctions have been found, review/inspect the
followi ng:
Visual/physical inspection
Te c h 2 d a t a
All electrical connections within a suspected
circuit and/or system
Was a problem found?—Verify repair Go to Step 7
7 Is the ECM programmed with the latest software
release?
If not, download the latest software to the ECM using
the “SPS (Service Programming System)”.
Was the problem solved?—Verify repair Go to Step 8
8 Replace the ECM.
Is the action complete?
IMPORTANT: The replacement ECM must be
programmed. Refer to section of the Service
Programming System (SPS) in this manual.
Following ECM programming, the immobilizer system
(if equipped) must be linked to the ECM. Refer to
section 11 “Immobilizer System-ECM replacement” for
the ECM/Immobilizer linking procedure.—Veri fy repai r—
Page 2839 of 4264
ENGINE DRIVEABILITY AND EMISSIONS 6E–263
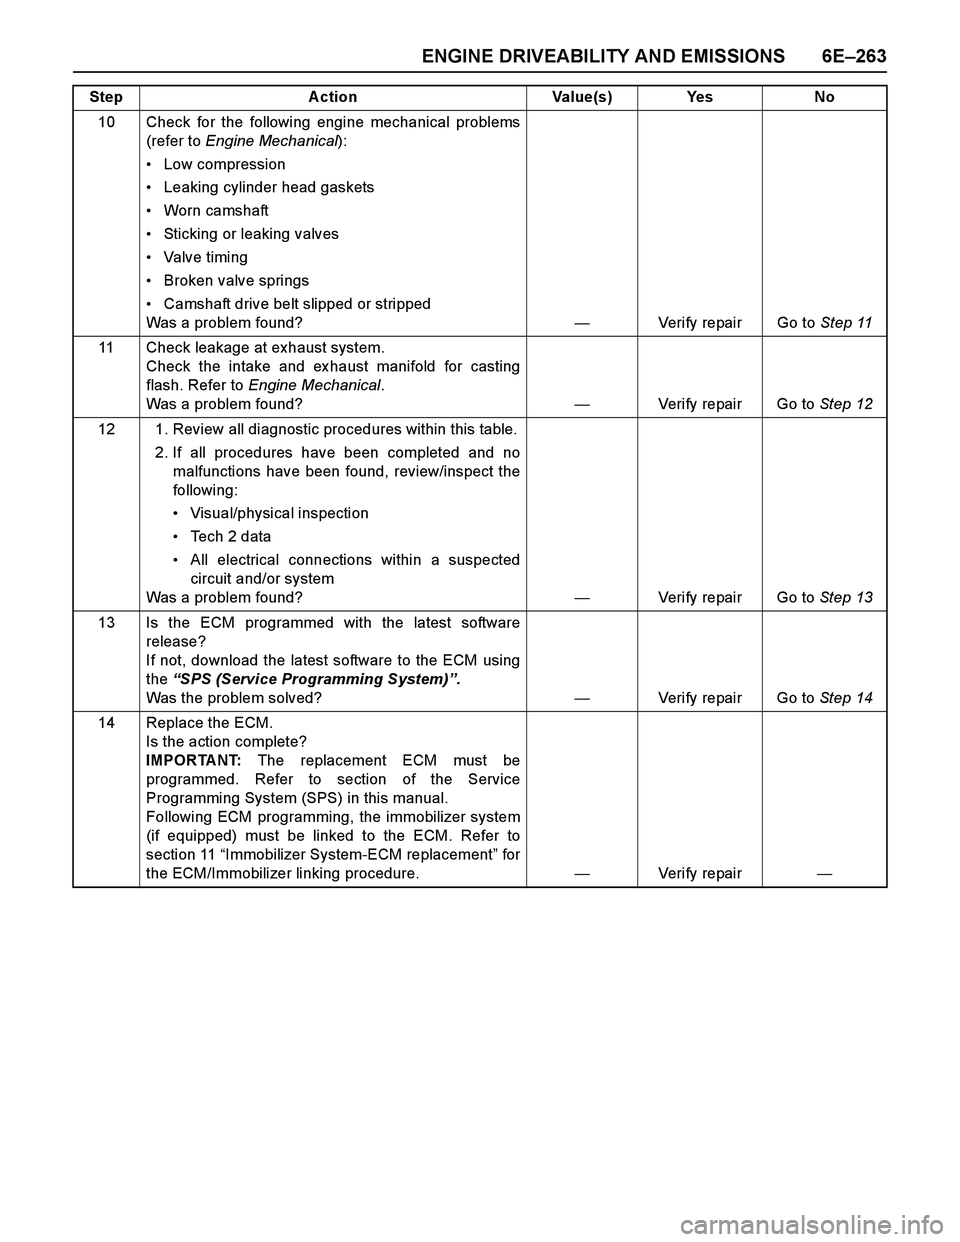
10 Check for the following engine mechanical problems
(refer to Engine Mechanical):
Low compression
Leaking cylinder head gaskets
Worn camshaft
Sticking or leaking valves
Valve timing
Broken valve springs
Camshaft drive belt slipped or stripped
Was a problem found?—Verify repair Go to Step 11
11 Check leakage at exhaust system.
Check the intake and ex haust manifold for casting
flash. Refer to Engine Mechanical.
Was a problem found?—Verify repair Go to Step 12
12 1. Review all diagnostic procedures within this table.
2. If all procedures have been completed and no
malfunctions have been found, review/inspect the
followi ng:
Visual/physical inspection
Te c h 2 d a t a
All electrical connections within a suspected
circuit and/or system
Was a problem found?—Verify repair Go to Step 13
13 Is the ECM programmed with the latest software
release?
If not, download the latest software to the ECM using
the “SPS (Service Programming System)”.
Was the problem solved?—Verify repair Go to Step 14
14 Replace the ECM.
Is the action complete?
IMPORTANT: The replacement ECM must be
programmed. Refer to section of the Service
Programming System (SPS) in this manual.
Following ECM programming, the immobilizer system
(if equipped) must be linked to the ECM. Refer to
section 11 “Immobilizer System-ECM replacement” for
the ECM/Immobilizer linking procedure.—Veri fy repai r— Step Action Value(s) Yes No
Page 2840 of 4264
6E–264 ENGINE DRIVEABILITY AND EMISSIONS
ON-VEHICLE SERVICE PROCEDURE
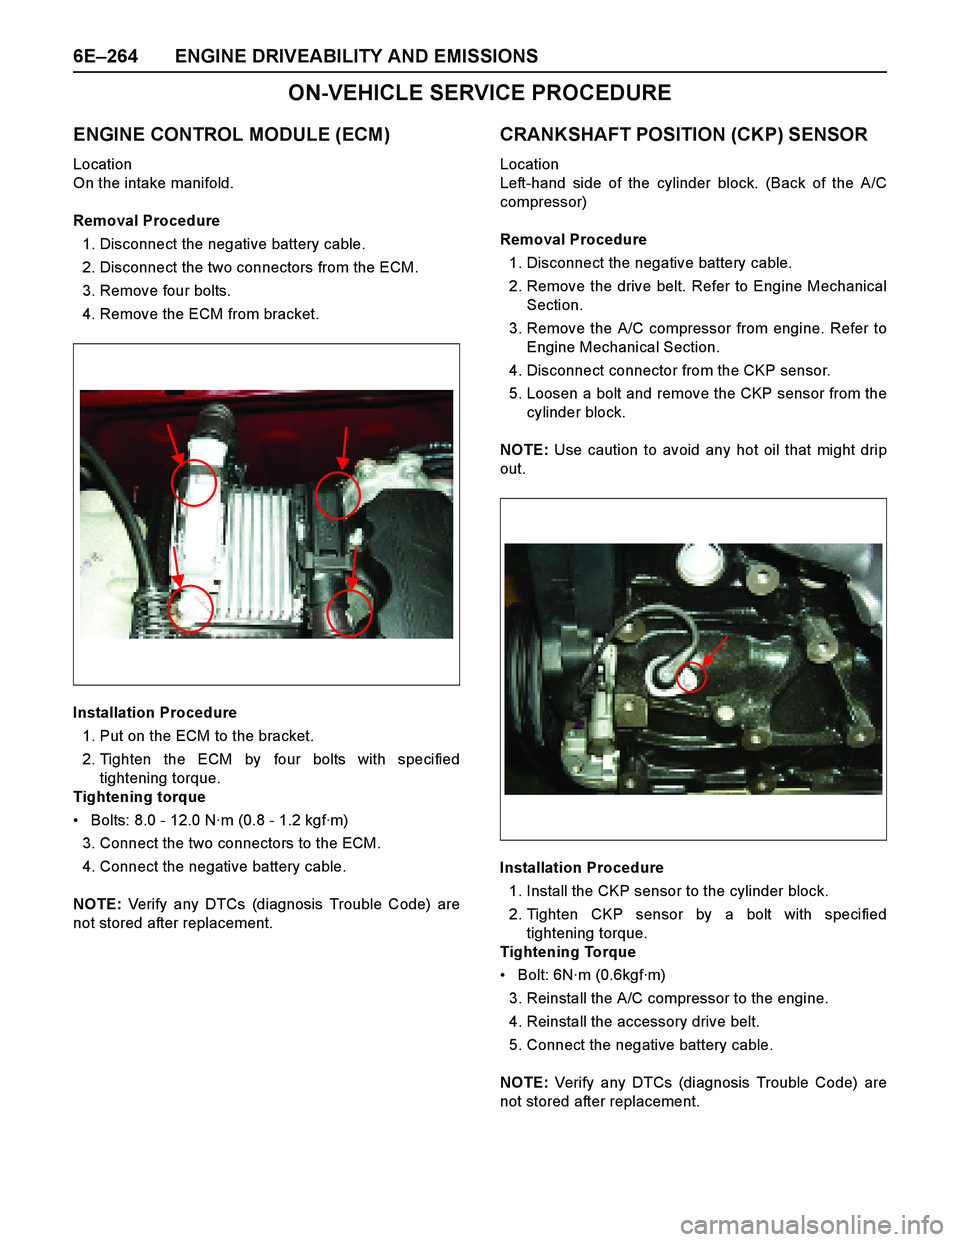
ENGINE CONTROL MODULE (ECM)
Location
On the intake manifold.
Removal Procedure
1. Disconnect the negative battery cable.
2. Disconnect the two connectors from the ECM.
3. Remove four bolts.
4. Remove the ECM from bracket.
Installation Procedure
1. Put on the ECM to the bracket.
2. Tighten the ECM by four bolts with specified
tightening torque.
Tightening torque
Bolts: 8.0 - 12.0 N·m (0.8 - 1.2 kgf·m)
3. Connect the two connectors to the ECM.
4. Connect the negative battery cable.
NOTE: Verify any DTCs (diagnosis Trouble Code) are
not stored after replacement.
CRANKSHAFT POSITION (CKP) SENSOR
Location
Left-hand side of the cylinder block. (Back of the A/C
compressor)
Removal Procedure
1. Disconnect the negative battery cable.
2. Remove the drive belt. Refer to Engine Mechanical
Section.
3. Remove the A/C compressor from engine. Refer to
Engine Mechanical Section.
4. Disconnect connector from the CKP sensor.
5. Loosen a bolt and remove the CKP sensor from the
cylinder block.
NOTE: Use caution to avoid any hot oil that might drip
out.
Installation Procedure
1. Install the CKP sensor to the cylinder block.
2. Tighten CKP sensor by a bolt with specified
tightening torque.
Tightening Torque
Bolt: 6N·m (0.6kgf·m)
3. Reinstall the A/C compressor to the engine.
4. Reinstall the accessory drive belt.
5. Connect the negative battery cable.
NOTE: Verify any DTCs (diagnosis Trouble Code) are
not stored after replacement.
Page 2857 of 4264
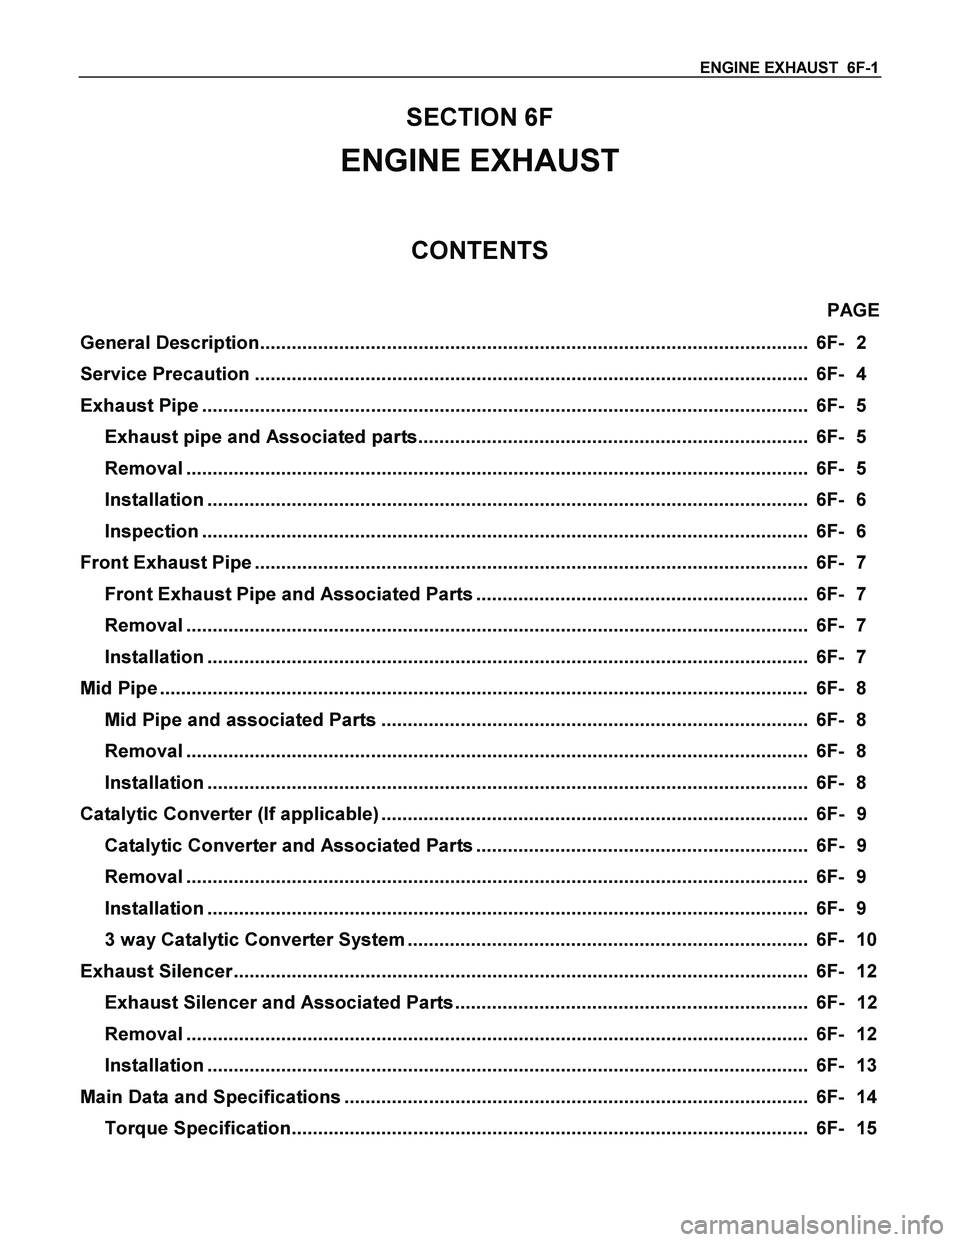
ENGINE EXHAUST 6F-1
SECTION 6F
ENGINE EXHAUST
CONTENTS
PAGE
General Description........................................................................................................ 6F- 2
Service Precaution ......................................................................................................... 6F- 4
Exhaust Pipe ................................................................................................................... 6F- 5
Exhaust pipe and Associated parts.......................................................................... 6F- 5
Removal ...................................................................................................................... 6F- 5
Installation .................................................................................................................. 6F- 6
Inspection ................................................................................................................... 6F- 6
Front Exhaust Pipe ......................................................................................................... 6F- 7
Front Exhaust Pipe and Associated Parts ............................................................... 6F- 7
Removal ...................................................................................................................... 6F- 7
Installation .................................................................................................................. 6F- 7
Mid Pipe ........................................................................................................................... 6F- 8
Mid Pipe and associated Parts ................................................................................. 6F- 8
Removal ...................................................................................................................... 6F- 8
Installation .................................................................................................................. 6F- 8
Catalytic Converter (If applicable) ................................................................................. 6F- 9
Catalytic Converter and Associated Parts ............................................................... 6F- 9
Removal ...................................................................................................................... 6F- 9
Installation .................................................................................................................. 6F- 9
3 way Catalytic Converter System ............................................................................ 6F- 10
Exhaust Silencer ............................................................................................................. 6F- 12
Exhaust Silencer and Associated Parts ................................................................... 6F- 12
Removal ...................................................................................................................... 6F- 12
Installation .................................................................................................................. 6F- 13
Main Data and Specifications ........................................................................................ 6F- 14
Torque Specification.................................................................................................. 6F- 15
Page 2870 of 4264
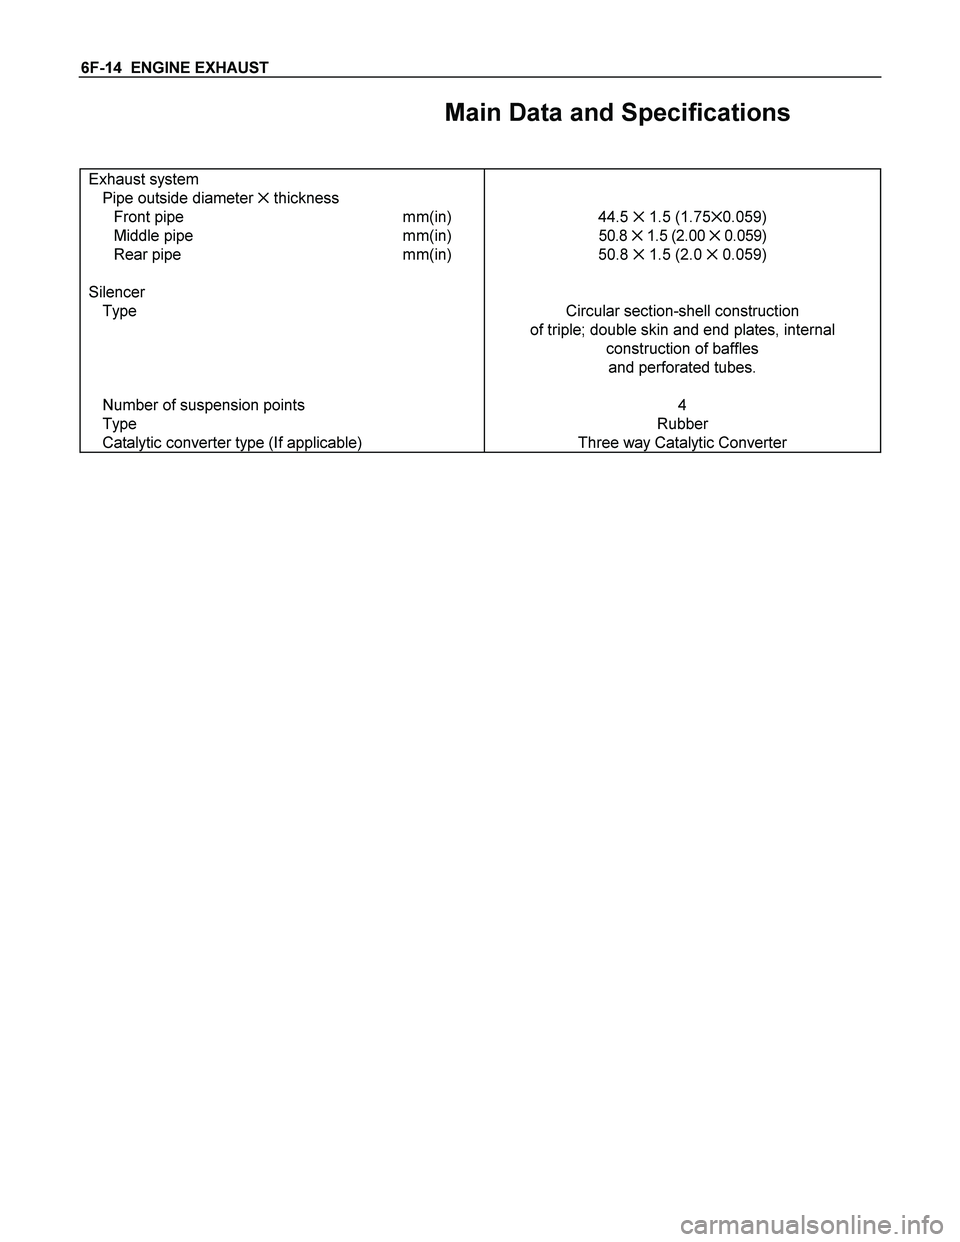
6F-14 ENGINE EXHAUST
Main Data and Specifications
Exhaust system
Pipe outside diameter ✕ thickness
Front pipe mm(in) 44.5 ✕ 1.5 (1.75✕0.059)
Middle pipe mm(in) 50.8 ✕ 1.5 (2.00 ✕ 0.059)
Rear pipe mm(in) 50.8 ✕ 1.5 (2.0 ✕ 0.059)
Silencer
Type Circular section-shell construction
of triple; double skin and end plates, internal
construction of baffles
and perforated tubes.
Number of suspension points
Type
Catalytic converter type (If applicable) 4
Rubber
Three way Catalytic Converter
Page 2873 of 4264
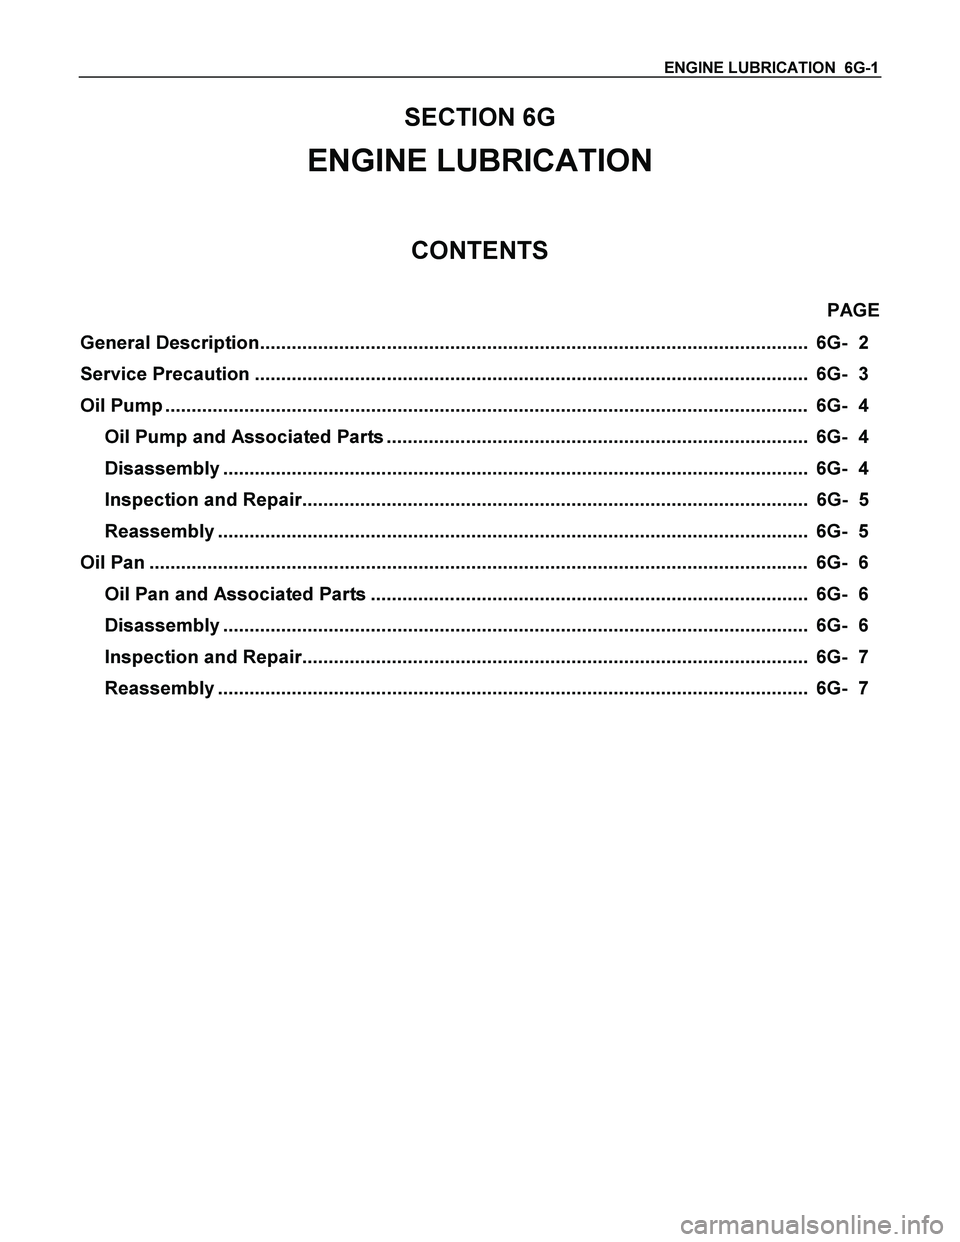
ENGINE LUBRICATION 6G-1
SECTION 6G
ENGINE LUBRICATION
CONTENTS
PAGE
General Description........................................................................................................ 6G- 2
Service Precaution ......................................................................................................... 6G- 3
Oil Pump .......................................................................................................................... 6G- 4
Oil Pump and Associated Parts ................................................................................ 6G- 4
Disassembly ............................................................................................................... 6G- 4
Inspection and Repair................................................................................................ 6G- 5
Reassembly ................................................................................................................ 6G- 5
Oil Pan ............................................................................................................................. 6G- 6
Oil Pan and Associated Parts ................................................................................... 6G- 6
Disassembly ............................................................................................................... 6G- 6
Inspection and Repair................................................................................................ 6G- 7
Reassembly ................................................................................................................ 6G- 7
Page 2885 of 4264
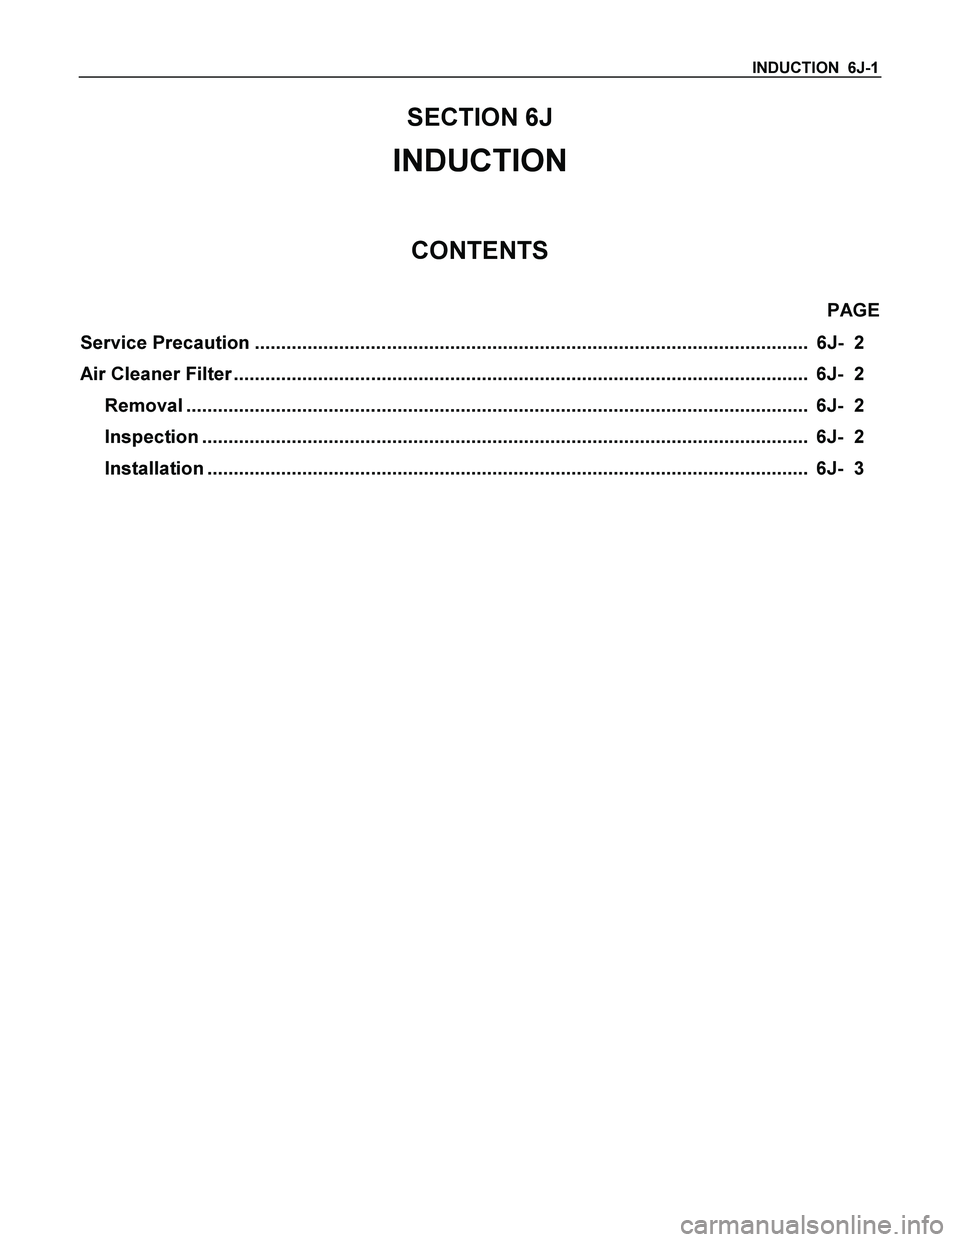
INDUCTION 6J-1
SECTION 6J
INDUCTION
CONTENTS
PAGE
Service Precaution ......................................................................................................... 6J- 2
Air Cleaner Filter ............................................................................................................. 6J- 2
Removal ...................................................................................................................... 6J- 2
Inspection ................................................................................................................... 6J- 2
Installation .................................................................................................................. 6J- 3