DOOR MIRROR
GW-113
C
D
E
F
G
H
J
K
L
MA
B
GW
Revision: 2004 November 2004 FX35/FX45
Removal and InstallationAIS003AQ
CAUTION:
Be careful not to damage the mirror body.
REMOVAL
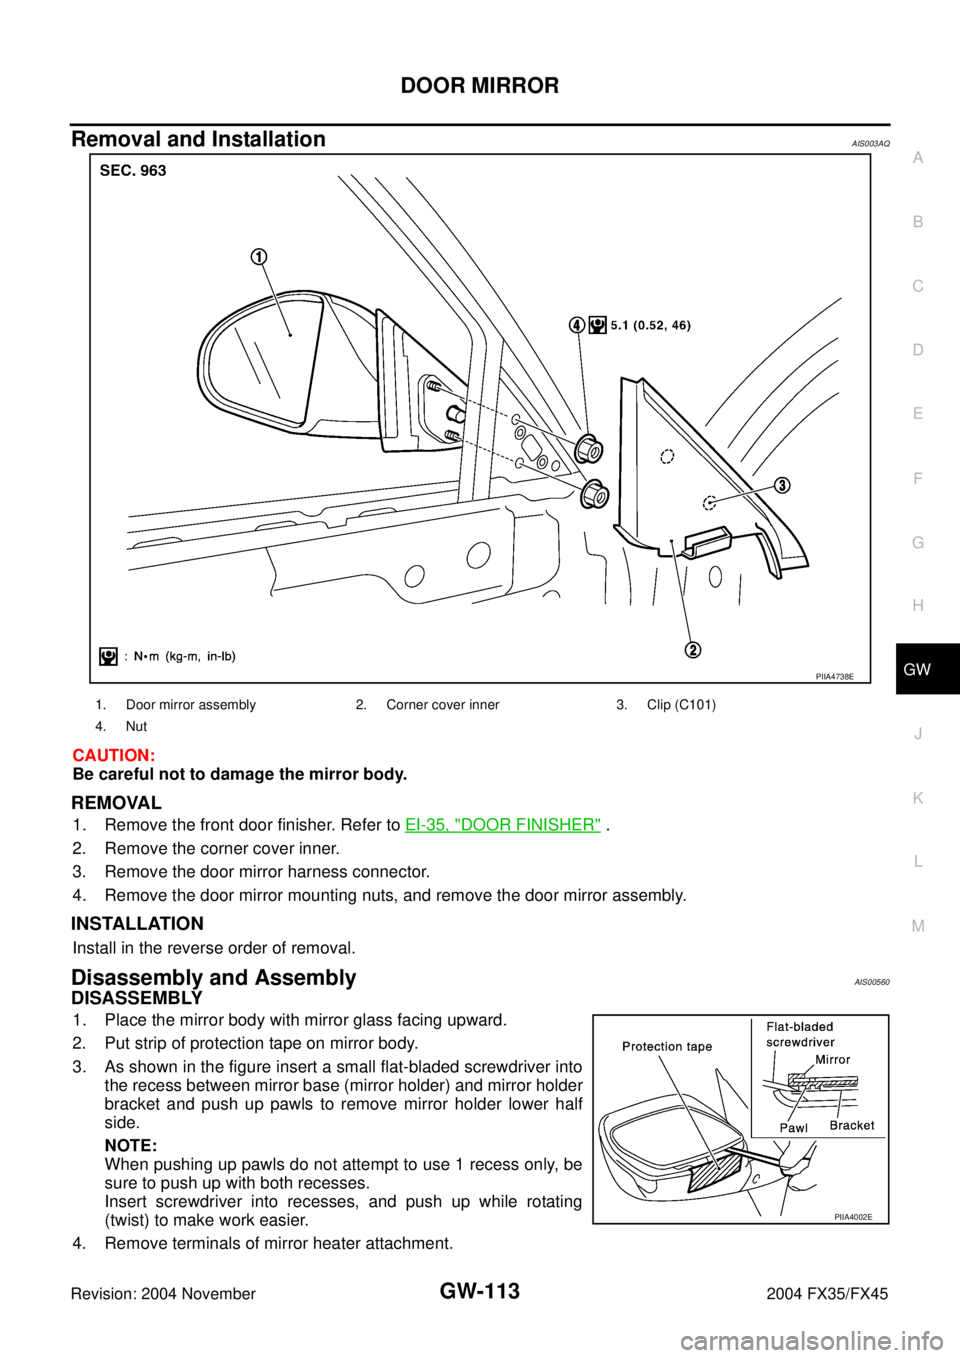
1. Remove the front door finisher. Refer to EI-35, "DOOR FINISHER" .
2. Remove the corner cover inner.
3. Remove the door mirror harness connector.
4. Remove the door mirror mounting nuts, and remove the door mirror assembly.
INSTALLATION
Install in the reverse order of removal.
Disassembly and AssemblyAIS00560
DISASSEMBLY
1. Place the mirror body with mirror glass facing upward.
2. Put strip of protection tape on mirror body.
3. As shown in the figure insert a small flat-bladed screwdriver into
the recess between mirror base (mirror holder) and mirror holder
bracket and push up pawls to remove mirror holder lower half
side.
NOTE:
When pushing up pawls do not attempt to use 1 recess only, be
sure to push up with both recesses.
Insert screwdriver into recesses, and push up while rotating
(twist) to make work easier.
4. Remove terminals of mirror heater attachment.
PIIA4738E
1. Door mirror assembly 2. Corner cover inner 3. Clip (C101)
4. Nut
PIIA4002E