2004 Hyundai Santa Fe door lock
[x] Cancel search: door lockPage 24 of 253

1FEATURES OF YOUR HYUNDAI
11SEATS
!
In order to prevent operation of the passenger
front and rear windows, a window lock switch(2)
is provided on the armrest of the driver's door.
To disable the power windows, press the win-
dow lock switch. To revert to normal operation,
press the window lock switch a second time.
NOTE:The power windows can be operated for 30
seconds after the ignition key is turned to
the "ACC" or "LOCK" positions, or removed
from the ignition switch.
If the front doors are opened during this 30
second period, the power windows can no
longer be operated without the ignition key
turned to the "ON" position.
WARNING:(1) Be careful that someone's head, hands
and body are not trapped by a closing
window.
(2) Never try to operate the main switch on
the driver's door and the individual door
window switch in opposing directions
at the same time. If this is done, the
window will stop and cannot be opened
or closed.
(3) Do not leave children alone in the car.
Always remove the ignition key for their
safety.
HSM050
HSM441-A
(2)Open Close
B080A01A-AAT
ADJUSTABLE FRONT SEATS
!WARNING:Never attempt to adjust the seat while the
vehicle is moving. This could result in loss
of control or an accident which may cause
death, serious injury, or property damage.
Page 34 of 253

1FEATURES OF YOUR HYUNDAI
21
!WARNING:o The height adjuster must be in the locked
position when the vehicle is moving.
o The misadjustment of height of the
shoulder belt could reduce the effective-
ness of the seat belt in a crash.
B180A01A-AAT
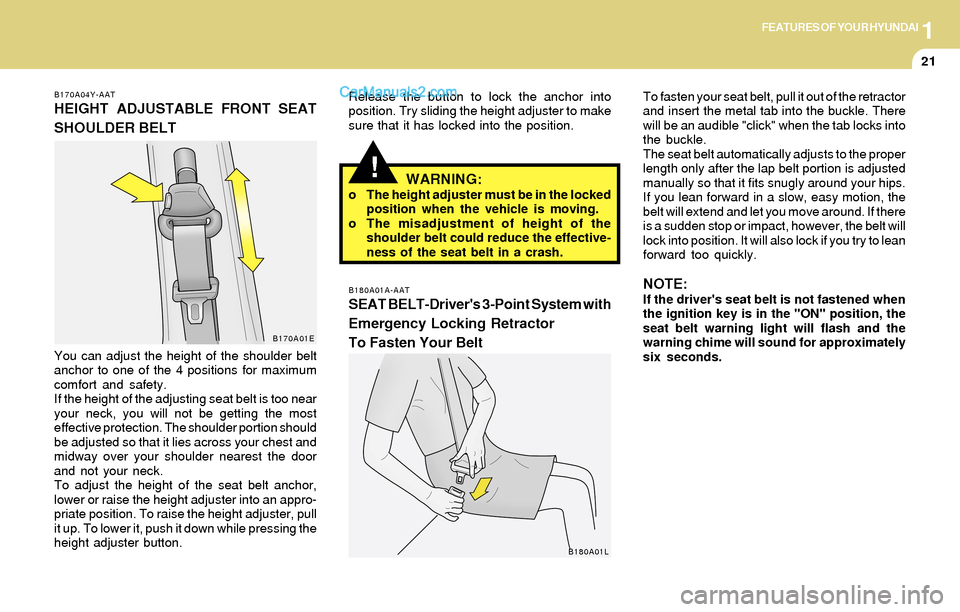
SEAT BELT-Driver's 3-Point System with
Emergency Locking Retractor
To Fasten Your Belt
To fasten your seat belt, pull it out of the retractor
and insert the metal tab into the buckle. There
will be an audible "click" when the tab locks into
the buckle.
The seat belt automatically adjusts to the proper
length only after the lap belt portion is adjusted
manually so that it fits snugly around your hips.
If you lean forward in a slow, easy motion, the
belt will extend and let you move around. If there
is a sudden stop or impact, however, the belt will
lock into position. It will also lock if you try to lean
forward too quickly.
NOTE:If the driver's seat belt is not fastened when
the ignition key is in the "ON" position, the
seat belt warning light will flash and the
warning chime will sound for approximately
six seconds.
B170A04Y-AAT
HEIGHT ADJUSTABLE FRONT SEAT
SHOULDER BELT
You can adjust the height of the shoulder belt
anchor to one of the 4 positions for maximum
comfort and safety.
If the height of the adjusting seat belt is too near
your neck, you will not be getting the most
effective protection. The shoulder portion should
be adjusted so that it lies across your chest and
midway over your shoulder nearest the door
and not your neck.
To adjust the height of the seat belt anchor,
lower or raise the height adjuster into an appro-
priate position. To raise the height adjuster, pull
it up. To lower it, push it down while pressing the
height adjuster button.
B170A01E
B180A01L
Release the button to lock the anchor into
position. Try sliding the height adjuster to make
sure that it has locked into the position.
Page 35 of 253

1FEATURES OF YOUR HYUNDAI
22
!
NOTE:Although the combination retractor pro-
vides the same level of protection for seated
passengers in either emergency or auto-
matic locking modes, it is recommended
that seated passengers use the emergency
locking feature for improved convenience.
The automatic locking function is intended
to facilitate child restraint installation. To
convert from the automatic locking feature
to the emergency locking operation mode,
allow the unbuckled seat belt to fully re-
tract.
WARNING:o For maximum restraint system protec-
tion, the seat belts must always be used
whenever the car is moving.
o Seat belts are most effective when
seatbacks are in the upright position.
o Children must always be seatbelted in
the rear seats. Never allow children to
ride in the front passanger seat.
o The shoulder belt should be positioned
midway over the shoulder nearest the
door for the most effective protection.
Never wear the seat belt under the arm
nearest the door. Wearing the belt under
the arm nearest the door could cause
serious or fatal injuries in an accident.
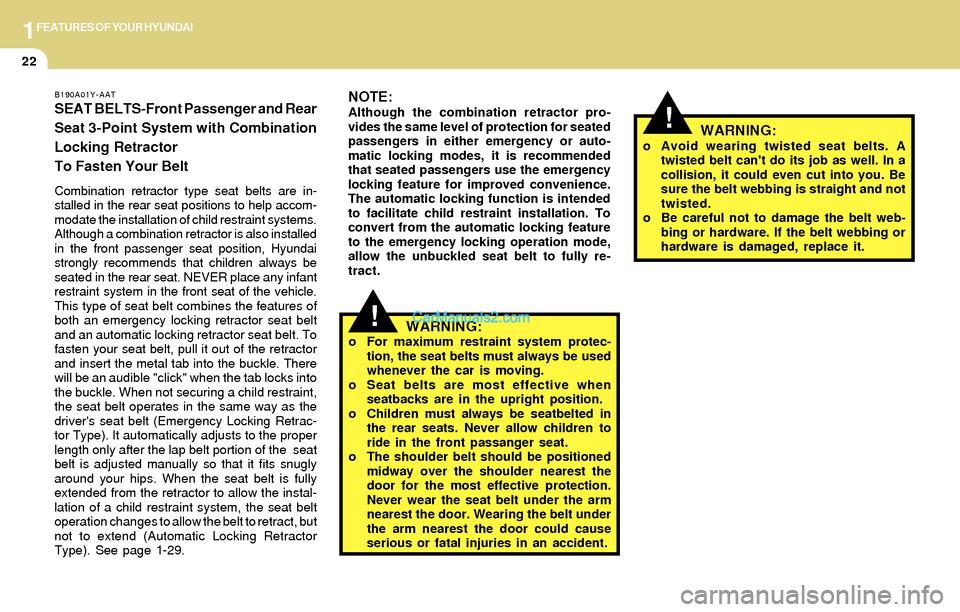
B190A01Y-AAT
SEAT BELTS-Front Passenger and Rear
Seat 3-Point System with Combination
Locking Retractor
To Fasten Your Belt
Combination retractor type seat belts are in-
stalled in the rear seat positions to help accom-
modate the installation of child restraint systems.
Although a combination retractor is also installed
in the front passenger seat position, Hyundai
strongly recommends that children always be
seated in the rear seat. NEVER place any infant
restraint system in the front seat of the vehicle.
This type of seat belt combines the features of
both an emergency locking retractor seat belt
and an automatic locking retractor seat belt. To
fasten your seat belt, pull it out of the retractor
and insert the metal tab into the buckle. There
will be an audible "click" when the tab locks into
the buckle. When not securing a child restraint,
the seat belt operates in the same way as the
driver's seat belt (Emergency Locking Retrac-
tor Type). It automatically adjusts to the proper
length only after the lap belt portion of the seat
belt is adjusted manually so that it fits snugly
around your hips. When the seat belt is fully
extended from the retractor to allow the instal-
lation of a child restraint system, the seat belt
operation changes to allow the belt to retract, but
not to extend (Automatic Locking Retractor
Type). See page 1-29.
WARNING:o Avoid wearing twisted seat belts. A
twisted belt can't do its job as well. In a
collision, it could even cut into you. Be
sure the belt webbing is straight and not
twisted.
o Be careful not to damage the belt web-
bing or hardware. If the belt webbing or
hardware is damaged, replace it.
!
Page 36 of 253

1FEATURES OF YOUR HYUNDAI
23
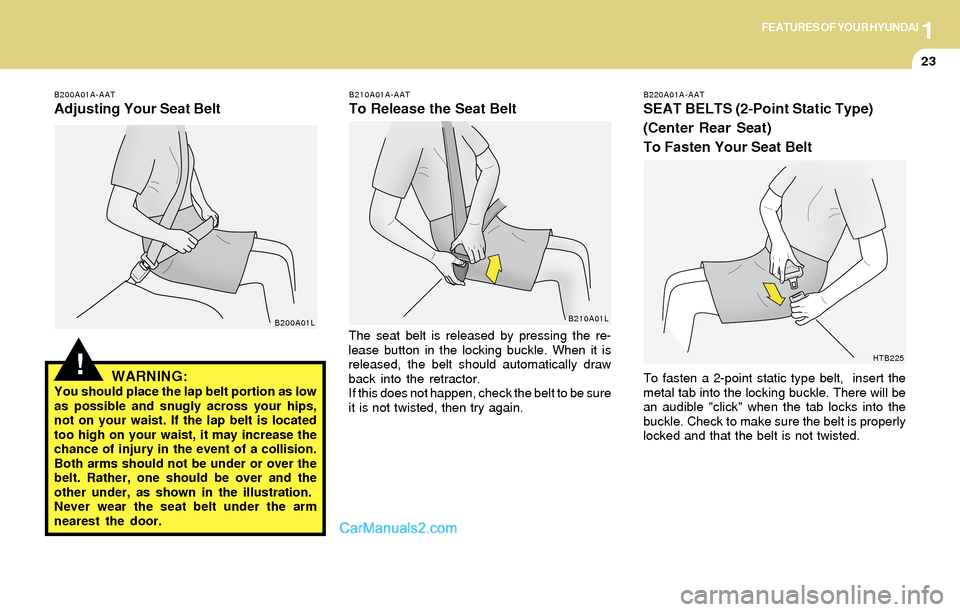
The seat belt is released by pressing the re-
lease button in the locking buckle. When it is
released, the belt should automatically draw
back into the retractor.
If this does not happen, check the belt to be sure
it is not twisted, then try again.
B220A01A-AAT
SEAT BELTS (2-Point Static Type)
(Center Rear Seat)
To Fasten Your Seat Belt
To fasten a 2-point static type belt, insert the
metal tab into the locking buckle. There will be
an audible "click" when the tab locks into the
buckle. Check to make sure the belt is properly
locked and that the belt is not twisted.WARNING:You should place the lap belt portion as low
as possible and snugly across your hips,
not on your waist. If the lap belt is located
too high on your waist, it may increase the
chance of injury in the event of a collision.
Both arms should not be under or over the
belt. Rather, one should be over and the
other under, as shown in the illustration.
Never wear the seat belt under the arm
nearest the door.
B210A01A-AAT
To Release the Seat Belt
B210A01L
HTB225
!
B200A01A-AAT
Adjusting Your Seat Belt
B200A01L
Page 49 of 253

1FEATURES OF YOUR HYUNDAI
36
!
B240C01O-AAT
SRS Care
o The SRS is virtually maintenance free and
there are no parts you can safely service by
yourself. The entire SRS system must be
inspected by an authorized Hyundai dealer
in 10 years after the date that the vehicle was
manufactured.
o Any work on the SRS system, such as
removing, installing, repairing, or any work
on the steering wheel must be performed by
a qualified Hyundai technician. Improper
handling of the airbag system may result in
serious personal injury.WARNING:o Do not install a child restraint system in
the front passenger seat position.
A child restraint system must never be
placed in the front seat. The infant or
baby could be severely injured or killed
by an airbag deployment in case of an
accident.
o Modification to SRS components or wir-
ing, including the addition of any kind of
badges to the pad covers or modifica-
tions to the body structure, can ad-
versely affect SRS performance and lead
to possible injury.
o For cleaning the airbag pad covers, use
only a soft, dry cloth or one which has
been moistened with plain water. Sol-
vents or cleaners could adversely affect
the airbag covers and proper deploy-
ment of the system.
o No objects should be placed over or near
the airbag modules on the steering
wheel, instrument panel, and the front
passenger's panel above the glove box,
because any such object could cause
harm if the vehicle is in a crash severe
enough to cause the airbags to inflate.
o If the airbags inflate, they must be re-
placed by an authorized Hyundai dealer.
HSM393
WARNING:o For best protection from the side impact
airbag system and to avoid being injured
by the deploying side impact airbag,
both front seat occupants should sit in
an upright position with the seat belt
properly fastened. The driver's hands
should be placed on the steering wheel
at the 9:00 and 3:00 o'clock positions.
The passenger's arms and hands should
be placed on their laps.
o Do not use any accessory seat covers.
o Use of seat covers could reduce or pre-
vent the effectiveness of the system.
o Do not install any accessories on the
side or near the side impact airbag.
o Do not use excessive force on the side of
the seat.
o Do not place any objects over the airbag
or between the airbag and yourself.
o Do not place any objects (an umbrella,
bag, etc.) between the front door and the
front seat. Such objects may become
dangerous projectiles and cause injury
if the supplemental side impact air bag
inflates.
o To prevent unexpected deployment of
the side impact air bag that may result in
personal injury,avoid impact to the side
airbag sensor when the ignition key is on.
!
Page 57 of 253

1FEATURES OF YOUR HYUNDAI
44
B260L01Y-AAT
Door Ajar Warning Light
and Chime
The door ajar warning light warns you that a door
is not completely closed and the chime warns
you that the driver's side front door is not
completely closed.
NOTE:To remind you not to lock the key inside the
car, the warning light comes on whenever
the key is in the "LOCK" position and a door
is open. The warning chime only sounds
whenever the key is in the "LOCK" position
and driver's side front door is open. The
chime sounds and the light remains on
until the key is removed from the ignition.
!
B260M01A-AATLow Fuel Level Warning Light
The low fuel level warning light comes on when
the fuel tank is approaching empty. When it
comes on, you should add fuel as soon as
possible. Driving with the fuel level warning light
on or with the fuel level below "E" can cause the
engine to misfire and damage the catalytic
converter.
B260N01A-AAT
Malfunction Indicator Light
This light illuminates when there is a malfunction
of an exhaust gas related component, and the
system is not functioning properly so that the
exhaust gas regulation values are not satisfied.
This light will also illuminate when the ignition key
is turned to the "ON" position, and will go out in
a few seconds. If it illuminates while driving, or
does not illuminate when the ignition key is
turned to the "ON" position, take your car to your
nearest authorized Hyundai dealer and have
the system checked.
B260P02Y-GAT
ABS Service Reminder
Indicator (If installed)
When the key is turned to the "ON" position, the
Anti-Lock Brake System indicator will come on
and then go off in a few seconds. If the ABS SRI
remains on, comes on while driving, or does not
come on when the key is turned to the "ON"
position, this indicates that there may be a
problem with the ABS.
If this occurs, have your vehicle checked by
your Hyundai dealer as soon as possible. The
normal braking system will still be operational,
but without the assistance of the anti-lock brake
system.
WARNING:If both the ABS SRI and Parking Brake/
Brake fluid level warning lights remain "ON"
or come on while driving, there may be a
problem with E.B.D. (Electronic Brake Force
Distribution).
If this occurs, avoid sudden stops and have
your vehicle checked by your Hyundai dealer
as soon as possible.
B260C02O-GAT
Traction Control Indicator
Light (If installed)
The traction control indicator changes opera-
tion according to the ignition switch position and
whether or not the system is in operation.
It will also illuminate when the ignition key is
turned to the "ON" position, but should go out
after the engine starts. If the TCS indicator stays
on, take your car to your authorized Hyundai
dealer and have the system checked. See
section 2 for more information about the TCS.
Page 73 of 253

1FEATURES OF YOUR HYUNDAI
60GLOVE BOXSPECTACLE CASE
!
B500A01S-AAT
WARNING:To avoid the possibility of injury in case of
an accident or a sudden stop, the glove box
door should be kept closed when the car is
in motion.
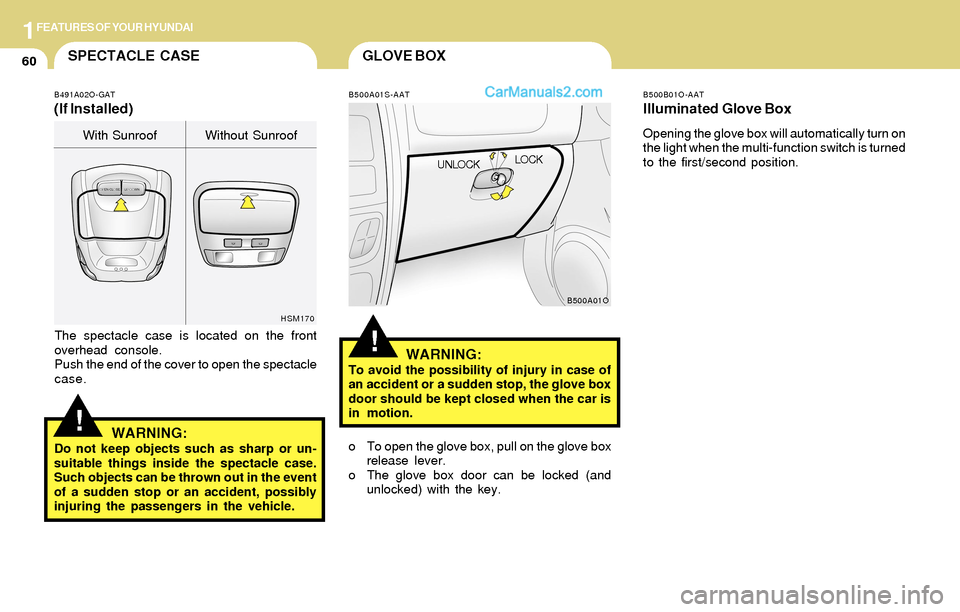
o To open the glove box, pull on the glove box
release lever.
o The glove box door can be locked (and
unlocked) with the key.
B500A01O
UNLOCKLOCK
!
B491A02O-GAT
(If Installed)
HSM170
The spectacle case is located on the front
overhead console.
Push the end of the cover to open the spectacle
case.
WARNING:Do not keep objects such as sharp or un-
suitable things inside the spectacle case.
Such objects can be thrown out in the event
of a sudden stop or an accident, possibly
injuring the passengers in the vehicle.With Sunroof Without Sunroof
B500B01O-AAT
Illuminated Glove Box
Opening the glove box will automatically turn on
the light when the multi-function switch is turned
to the first/second position.
Page 79 of 253

1FEATURES OF YOUR HYUNDAI
66
Reprogramming a Single HomeLink
Button
To program a device to HomeLink using a
HomeLink button previously trained, follow these
steps:
1. Press and hold the desired HomeLink but-
ton. Do not release until step 4 has been
completed.
2. When the indicator light begins to flash slowly
(after 20 seconds), hold the handheld trans-
mitter 1 to 3 inches away from the bottom of
the mirror.
3. Press and hold the transmitter button (or, if
necessary, press and "cycle," as described
in the '"Gate Operator & Canadian Program-
ming" portion of this text).
4. The HomeLink indicator light will flash slowly
at first, then rapidly, indicating successful
programming. Release both buttons.
Operating HomeLink
Simply press the appropriate HomeLink button
to activate the trained product (garage door,
security system, entry door lock, estate gate,
lighting, etc.). The original handheld transmit-
ters may also be used at any time.
Erasing Programmed Buttons
To erase the three HomeLink buttons, press
and hold the two outside buttons until the indica-
tor light begins to flash (after 20 seconds).
Release both buttons.
Individual buttons cannot be erased, but can be
reprogrammed.
B520C02L
Flashing 3. Return to the vehicle and firmly press and
release the programmed HomeLink button.
Press and release the same HomeLink but-
ton a second time to complete the program-
ming process. (Some devices may require
you to press and release a third time to
complete the programming.)
4. Now HomeLink mirror and rolling-code-
equipped device should be synchronized.
The remaining HomeLink buttons may now
be programmed if this has not been done
previously.