2004 Hyundai Grandeur sensor
[x] Cancel search: sensorPage 44 of 235

FEATURES OF YOUR HYUNDAI 1- 31
o Do not attempt to service or re-
pair the pre-tensioner seat belt system in any manner.
o Improper handling of the pre- tensioner seat belt assemblies,and failure to heed the warnings to not strike, modify, inspect, re-place, service or repair the pre- tensioner seat belt assemblies may lead to improper operationor inadvertent activation and se- rious injury.
o Always wear seat belts when driv-
ing or riding in a motor vehicle.vehicle is being driven, please have an authorized Hyundai deal-er inspect the pre-tensioner seat belts and SRS airbag system as soon as possible.
o Although it is harmless, the fine
dust may cause skin irritationand should not be breathed forprolonged periods. Wash your hands and face thoroughly after an accident in which the pre-tensioner seat belts were acti- vated.
CAUTION:
o Because the sensor that activates the SRS airbag is connected with pre-tensioner seat belt, the SRSairbag warning light on the instrument panel will blink for approximately 6 seconds afterthe ignition key has been turned to the "ON" position, and then it should turn off.
o If pre-tensioner seat belt is not working properly, this warninglight will illuminate even if thereis no malfunction of the SRS airbag. If the SRS airbag warning light does not illuminate whenthe ignition key is turned to "ON" or if it remains illuminated after blinking for approximately 6 sec-onds, or if it illuminates while the
!
WARNING:
o Pre-tensioners are designed to operate only one time. After acti- vation, pre-tensioner seat belts must be replaced. All seat belts, of any type, should always bereplaced after they have been worn during a collision.
o The pre-tensioner seat belt as- sembly mechanisms become hotduring activation. Do not touch the pre-tensioner seat belt as-semblies for several minutes af- ter they have been activated.
o Do not attempt to inspect or re- place the pre-tensioner seat beltsyourself. This must be done by an authorized Hyundai dealer.
o Do not strike the pre-tensioner seat belt assemblies.!
AIR
BAG
Page 50 of 235

FEATURES OF YOUR HYUNDAI 1- 37
o Do not place any objects (an
umbrella, bag, etc.) between the front door and the front seat. Such objects may become dan-gerous projectiles and cause in- jury if the supplemental side im- pact air bag inflates.
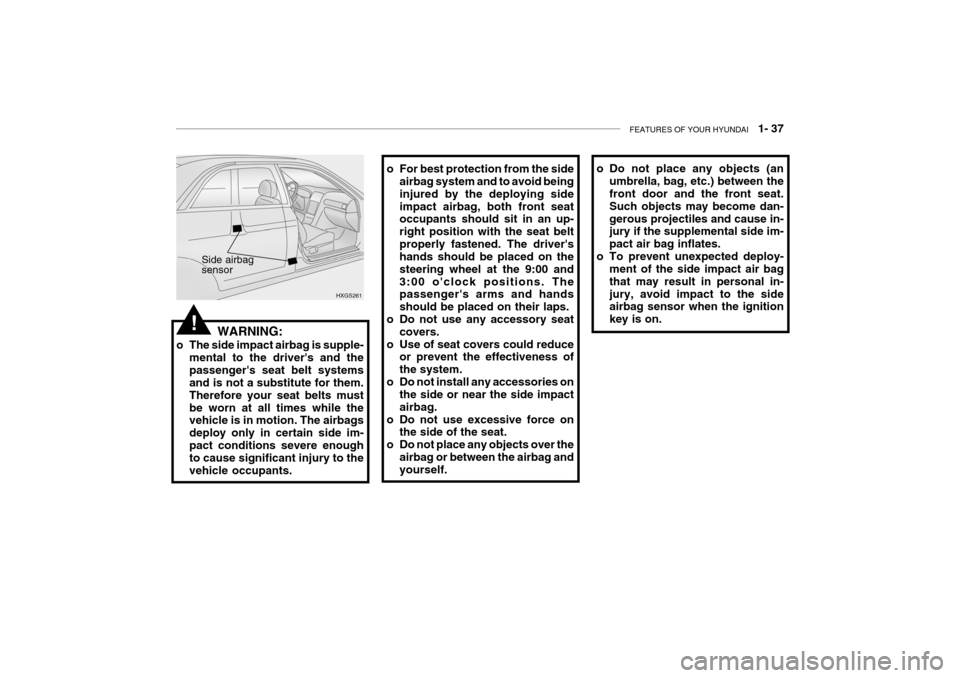
o To prevent unexpected deploy- ment of the side impact air bagthat may result in personal in-jury, avoid impact to the side airbag sensor when the ignition key is on.o For best protection from the side
airbag system and to avoid being injured by the deploying sideimpact airbag, both front seat occupants should sit in an up- right position with the seat beltproperly fastened. The driver's hands should be placed on the steering wheel at the 9:00 and3:00 o'clock positions. The passenger's arms and hands should be placed on their laps.
o Do not use any accessory seat covers.
o Use of seat covers could reduce or prevent the effectiveness ofthe system.
o Do not install any accessories on the side or near the side impactairbag.
o Do not use excessive force on the side of the seat.
o Do not place any objects over the
airbag or between the airbag and yourself.
WARNING:
o The side impact airbag is supple- mental to the driver's and the passenger's seat belt systems and is not a substitute for them. Therefore your seat belts mustbe worn at all times while the vehicle is in motion. The airbags deploy only in certain side im-pact conditions severe enough to cause significant injury to the vehicle occupants. HXGS261
Side airbag sensor
!
Page 66 of 235

FEATURES OF YOUR HYUNDAI 1- 53
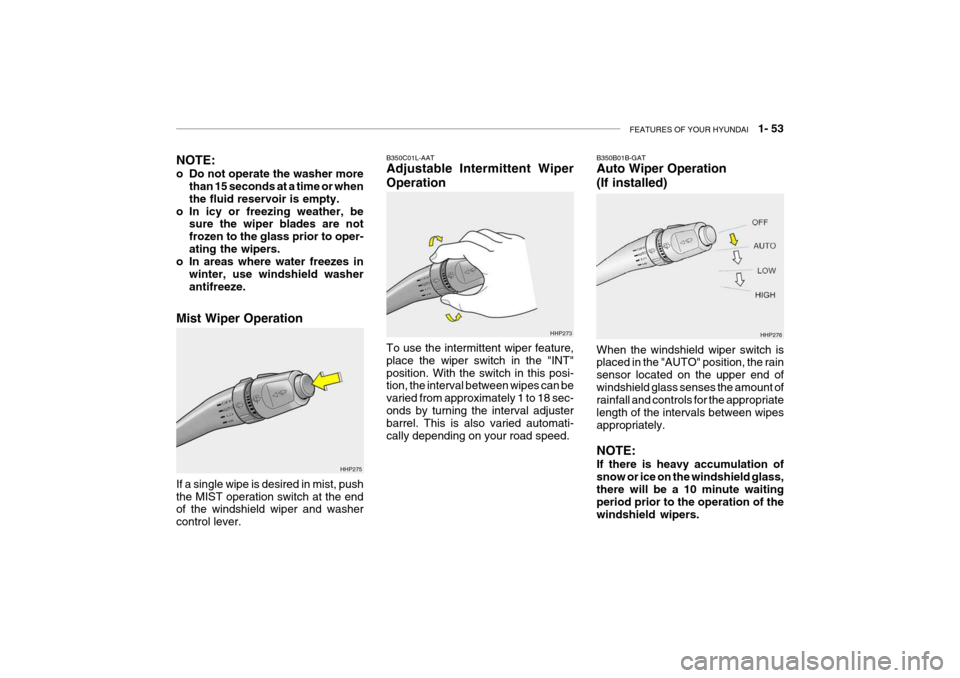
B350C01L-AAT Adjustable Intermittent Wiper Operation To use the intermittent wiper feature, place the wiper switch in the "INT"position. With the switch in this posi- tion, the interval between wipes can be varied from approximately 1 to 18 sec-onds by turning the interval adjuster barrel. This is also varied automati- cally depending on your road speed. HHP273B350B01B-GAT Auto Wiper Operation (If installed)
HHP276
When the windshield wiper switch is placed in the "AUTO" position, the rain sensor located on the upper end ofwindshield glass senses the amount of rainfall and controls for the appropriate length of the intervals between wipesappropriately. NOTE: If there is heavy accumulation of snow or ice on the windshield glass,there will be a 10 minute waiting period prior to the operation of the windshield wipers.
Mist Wiper Operation If a single wipe is desired in mist, push the MIST operation switch at the end of the windshield wiper and washer control lever. HHP275
NOTE:
o Do not operate the washer more
than 15 seconds at a time or when the fluid reservoir is empty.
o In icy or freezing weather, be sure the wiper blades are notfrozen to the glass prior to oper-ating the wipers.
o In areas where water freezes in
winter, use windshield washerantifreeze.
Page 67 of 235

1- 54 FEATURES OF YOUR HYUNDAI
WARNING:
When the ignition switch is on and the windshield wiper switch is placed in the "AUTO" mode, please use caution in the following casesto avoid any hand injury: As the wiper system may automati- cally activate, the fingers or handmight be caught in the wiper.
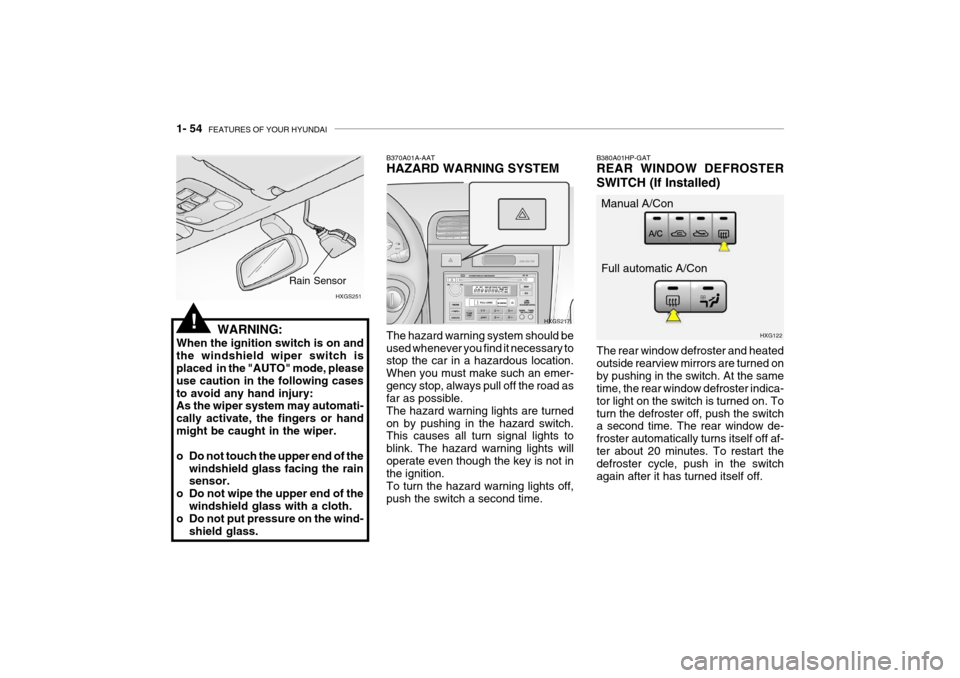
o Do not touch the upper end of the windshield glass facing the rain sensor.
o Do not wipe the upper end of the
windshield glass with a cloth.
o Do not put pressure on the wind-
shield glass. HXGS251
Rain Sensor
The rear window defroster and heated outside rearview mirrors are turned onby pushing in the switch. At the same time, the rear window defroster indica- tor light on the switch is turned on. Toturn the defroster off, push the switch a second time. The rear window de- froster automatically turns itself off af-ter about 20 minutes. To restart the defroster cycle, push in the switch again after it has turned itself off.
B380A01HP-GAT REAR WINDOW DEFROSTER SWITCH (If Installed)
B370A01A-AAT HAZARD WARNING SYSTEM The hazard warning system should be used whenever you find it necessary to stop the car in a hazardous location. When you must make such an emer-gency stop, always pull off the road as far as possible. The hazard warning lights are turnedon by pushing in the hazard switch. This causes all turn signal lights to blink. The hazard warning lights willoperate even though the key is not in the ignition. To turn the hazard warning lights off,push the switch a second time. HXGS217
HXG122
Manual A/Con Full automatic A/Con
!
Page 102 of 235

FEATURES OF YOUR HYUNDAI 1- 89
2. Push the "TEMP" button to set the
desired temperature. The temperature will increase to the maximum 32 C(90 F) by pushing on the button. Each push of thebutton will cause the temperature to increase by 0.5 C(1 F). The temperature will decrease tothe minimum 17 C(62 F) by push- ing on the button. Each push of the button will cause the tempera-ture to decrease by 0.5 °C(1 F).
NOTE: If the battery has been discharged or disconnected, the temperaturemode will reset to centigrade de- gree.
The FATC (Full Automatic Tempera- ture Control) system automatically controls the heating and cooling by doing as follows:
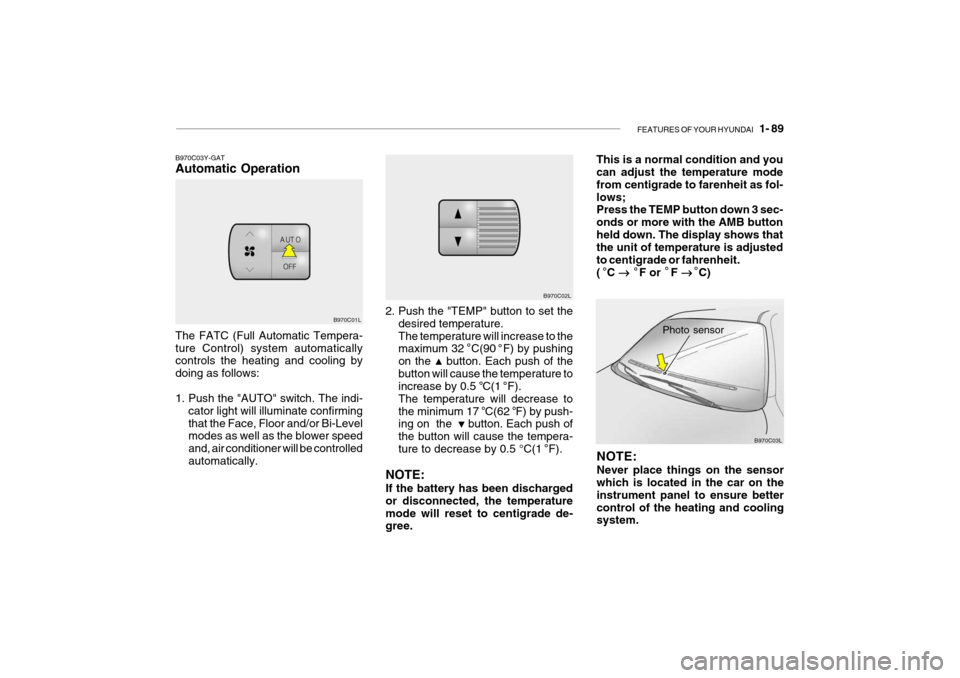
1. Push the "AUTO" switch. The indi- cator light will illuminate confirming that the Face, Floor and/or Bi-Level modes as well as the blower speed and, air conditioner will be controlledautomatically. Photo sensor
B970C01L
B970C03Y-GAT Automatic Operation
NOTE: Never place things on the sensor which is located in the car on the instrument panel to ensure bettercontrol of the heating and cooling system.
B970C02L
B970C03L
This is a normal condition and youcan adjust the temperature mode from centigrade to farenheit as fol-lows; Press the TEMP button down 3 sec- onds or more with the AMB buttonheld down. The display shows that the unit of temperature is adjusted to centigrade or fahrenheit.( C
� �
� �
� F or F
� �
� �
� C)
Page 216 of 235

6- 34 DO-IT-YOURSELF MAINTENANCE
G200C01L-GAT JUNCTION BOX DESCRIPTION Under Hood Junction Box
G200C01L
NOTE: Not all junction box description in this manual
may be applicable to your vehicle. It is accurate at the time of printing. When you inspect the junction box on your vehicle, refer to the junction box label. DESCRIPTION
FUEL PUMP
HEAD LIGHT(Lo-LH) ABS
INJECTOR
A/C COMPRESSOR A/T
MAIN
IGNITION COIL
OXYGEN SENSOR EGR
HORN
HEAD LIGHT(HI)
HEAD LIGHT(Lo-RH) DRL
FOG LIGHT DIODE 1
SPARE
SPARE
SPARE
SPARE
DIODE 2
BLOWER
POWER FUSE 2 POWER AMPSUNROOF
TAIL LIGHT
POWER FUSE 1 ECU
REAR DEFOGGER CONDENSER
POWER WINDOW IGNITION1/2ABS 1/2
RADIATOR FUSE
RATING
20A15A10A10A10A20A30A 20A 15A 15A15A15A15A15A15A 30A 20A15A10A 30A 30A20A15A20A30A10A30A20A40A
30A/30A30A/30A 30A PROTECTED COMPONENTS
Fuel pump relay
Head light relay (Low-LH)
ABS controls, Cruise control module, ETS control module
Limp home valve, ETS controls, Injector
A/C relay
A/T control relay, TCM, Engine control relayMFI controls
Ignition coil, A/T pulse generator, ECM, Ignition failure
sensor, E/TCM
ETS relay, MFI controls
A/C relay, MFI controls, EGR solenoid
Horn relay
Head light relay (High)
HID head light relay
DRL control module, Siren
Fog light relay - -----
Blower relayFuse 4, 20, 24, 25
Audio amp module
Data link connector, Sunroof relay, Home link connector
Tail light relayFuse 1, 7, 17, 18, 19
ETS control module, ECM, E/TCM, Generator
Rear window defogger relay
A/C fan relay #1
Power window relay, IMS controls
Ignition switchABS controlsRadiator fan relay
Page 217 of 235

DO-IT-YOURSELF MAINTENANCE 6- 35
FUSE RATING
25A 20A10A15A10A10A10A15A10A10A20A 10A 10A 10A20A10A 15A 10A20A10A10A15A10A20A 10A 10A 10A 10A10A10A 10A 10A PROTECTED COMPONENTS
Power seat
Seat warmerEPS controls
ETS relay
(HID) Head lights, DRL controls, AQS sensor
Blower & A/C controls
Turn & Hazard controlsNot used
Cruise switch, Instrument cluster
Head light leveling switch, Rain sensor, IMS controls
Rain sensor relay, Wiper & Washer controls
Home link connector, Left (Right) vanity lights, Sunroof, Blower & A/C controls,Electronic chrome mirrorNot used
Audio
Front (Rear) cigarette lighter, Accessory socket
IMS controls, Driver door module, RheostatNot used
Rear for light relay
Stop lights, Left (Right) personal lights, Left (Right) rear door lights
Door warning & Ignition key illumination, Courtesy lightsInstrument clusterSRS controls
Automatic transaxle controls, Back-up light switch, Vehicle speed sensor
Fuel filler door & Trunk lid opener, Driver (Assister) door module
Multipurpose check connector, Audio, lmmobiilizer controls, Trip computers, Digital
clock, Blower & A/C controls, Instrument cluster
Left (Right) inside lights, (HID) Head lights, Fog light relay, Right HID turn signal light,Right rear combination light
Stop light failure relay
Immobilizer controls, TCS switch, Trip computers, Instrument cluster
ETACM, Hazard switch, Auto light sensor
Antenna, Blower & A/C controls, Left (Right) outside mirror motor & Folding motor
(HID) Head lights, Front (Rear) cigarette lighters, Left (Right) license lights, Left HID
Turn signal light, Left rear combination lightBurglar alarm relay, Transaxle range switch, Start relay, ETS controlsDESCRIPTION P/SEAT
S/HTR EPSETS
H/LP
A/CON SW HAZARDSPARE
CRUISE IMS
WIPER
ETACS
SPARE AUDIO
C/LIGHTER MIRRORSPARE
RR FOG
STOP LP
ROOM LP
A/BAG IND A/BAGB/UP
T/LID
D/CLOCK
RH TAILSPARE
CLUSTER T/SIG
RR HTD IND
LH TAIL
START
G200D01L-GAT
Instrument Panel Junction Box
G200D01L