2004 Hyundai Grandeur tire pressure
[x] Cancel search: tire pressurePage 145 of 235

2- 12 DRIVING YOUR HYUNDAI
On slippery road surfaces, the traction control system (TCS) limits the drive wheels from spinning excessively, thushelping the car to accelerate. It also provides sufficient driving force and steering performance as the car turnsat accelerated speeds. SLIP Control Limits the drive wheels from spinning excessively during starting or while making accelerated turns on slipperyroads to avoid losing the driving force of the front wheels. Driving hints TCS does not actively apply brakes. Be sure to decelerate the car suffi- ciently before entering curves.
CAUTION:
When the TCS indicator blinks, SLIPcontrol function has been activat- ed. It also means that the road is slippery or your car is acceleratingexcessively. In this situation, gen- tly release foot pressure from the accelerator pedal and maintainmoderate speed.
C300A01L-DAG
Right-Hand Drive
C300A02Y-GAT TRACTION CONTROL SYSTEM (TCS)(If installed)
C300A01L
Left-Hand Drive
!
o Rough, gravel or snow-covered
roads.
o With tire chains installed.
o On roads where the road surface
is pitted or has different surface height.
The safety features of an ABSequipped vehicle should not be tested by high speed driving or cornering. This could endanger thesafety of yourself or others.
Page 151 of 235

2- 18 DRIVING YOUR HYUNDAI
C180A01A-AAT USE OF LIGHTS Check your lights regularly for correct operation and always keep them clean.When driving during the day in condi- tions of poor visibility, it is helpful to drive with headlights on low beam.This enables you to be seen as well as to see.
C190A01A-GAT TRAILER OR VEHICLE TOWING If you are considering towing with your car, you should first check with your Province Department of Motor Vehicles
to determine their legal requirements.Since laws vary from province to prov- ince the requirements for towing trail- ers, cars, or other types of vehicles orapparatus may differ. Ask your Hyundai dealer for further details before towing.
C170A01A-AAT HIGH SPEED MOTORING Pre-Trip Inspections 1. Tires: Adjust the tire inflation pressures to specification. Low tire inflation pres-sures will result in overheating and possible failure of the tires. Avoid using worn or damaged tireswhich may result in reduced traction or tire failure. NOTE: Never exceed the maximum tire in- flation pressure shown on the tires. 2. Fuel, engine coolant and engine oil: High speed travel consumes more fuel than urban motoring. Do not forget tocheck both engine coolant and engine oil. 3. Drive belt: A loose or damaged drive belt may result in overheating of the engine.
C160K01A-AAT Carry Emergency Equipment Depending on the severity of the weather where you drive your car, you should carry appropriate emergency equipment. Some of the items youmay want to carry include tire chains, tow straps or chains, flashlight, emer- gency flares, sand, a shovel, jumpercables, a window scraper, gloves, ground cloth, coveralls, a blanket, etc.
C160J01A-AAT Don't Let Ice and Snow Accumu- late Underneath Under some conditions, snow and ice can build up under the fenders and interfere with the steering. When driv-ing in severe winter conditions where this may happen, you should periodi- cally check underneath the car to besure the movement of the front wheels and the steering components is not obstructed.
Page 154 of 235

DRIVING YOUR HYUNDAI 2- 21
With Brake
WithoutBrake Tongue
75 (165.4)
Maximum Towable Weight
kg. (Lbs)
Trailer
1800 (3968)
750 (1653)
WARNING:
Improperly loading your car and trailer can seriously affect its steer- ing and braking performance caus- ing a crash which could cause seri-ous injury or death. C190F01Y-GAT Trailer or Vehicle Towing Tips
1. Before towing, check hitch and
safety chain connections as well as proper operation of the trailer run- ning lights, brake lights, and turn signals.
2. Always drive your vehicle at a mod- erate speed (Less than 100 km/h)
3. Trailer towing requires more fuel than normal conditions.
4. To maintain engine braking effi-
ciency and electrical charging per-formance, do not use fifth gear (manual transaxle).
5. Always secure items in the trailer to prevent load shift while driving.
6. Check the condition and air pres-
sure of all tires on the trailer and your car. Low tire pressure can seriously affect the handling. Also check the spare tire.
CAUTION:
The following specifications are rec- ommended when towing a trailer. The loaded trailer weight cannotsafely exceed the values in the chart below.
!
!
7. The vehicle/trailer combination is more affected by crosswind and buffeting.When being passed by a large ve- hicle, keep a constant speed and steer straight ahead. If there is toomuch wind buffeting, slow down to get out of the other vehicle's air turbulence.
8. When parking your car and trailer, especially on a hill, be sure to followall the normal precautions. Turnyour front wheel into the curb, set the parking brake firmly, and put the transaxle in 1st or Reverse(manual) or Park (automatic). In addition, place wheel chocks at each of the trailer's tires.
9. If the trailer has electric brakes, start your vehicle and trailer mov-ing, and then apply the trailer brakecontroller by hand to be sure the brakes are working. This lets you check your electrical connection atthe same time.
Page 160 of 235

WHAT TO DO IN AN EMERGENCY 3- 5
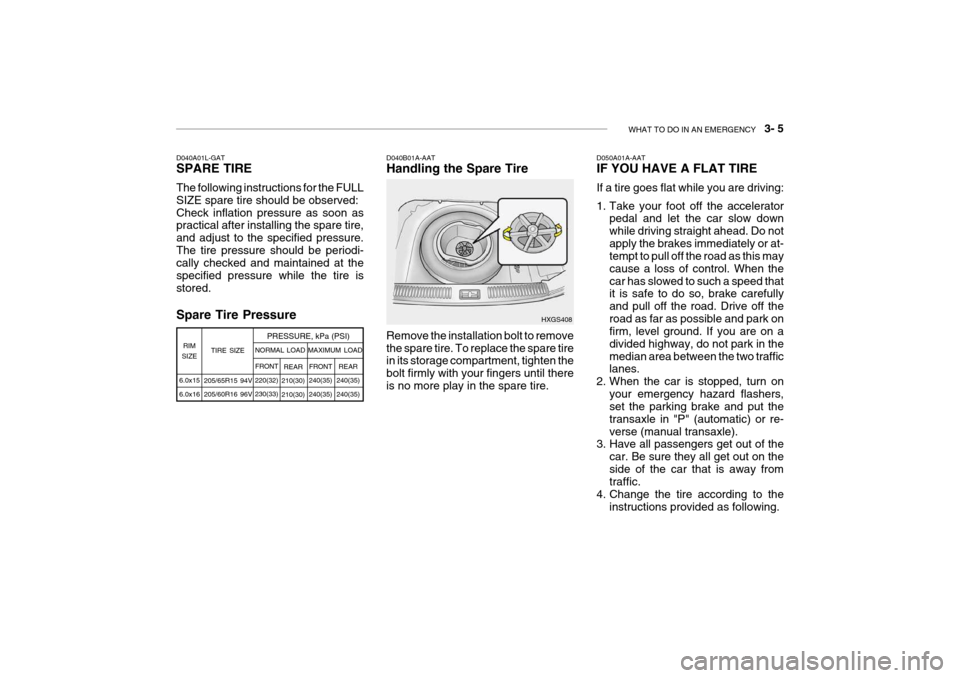
Spare Tire Pressure D040B01A-AAT Handling the Spare Tire Remove the installation bolt to remove the spare tire. To replace the spare tire in its storage compartment, tighten the bolt firmly with your fingers until thereis no more play in the spare tire. D050A01A-AAT IF YOU HAVE A FLAT TIRE If a tire goes flat while you are driving:
1. Take your foot off the accelerator
pedal and let the car slow down while driving straight ahead. Do notapply the brakes immediately or at- tempt to pull off the road as this may cause a loss of control. When thecar has slowed to such a speed that it is safe to do so, brake carefully and pull off the road. Drive off theroad as far as possible and park on firm, level ground. If you are on a divided highway, do not park in themedian area between the two traffic lanes.
2. When the car is stopped, turn on your emergency hazard flashers,set the parking brake and put the transaxle in "P" (automatic) or re-verse (manual transaxle).
3. Have all passengers get out of the
car. Be sure they all get out on theside of the car that is away from traffic.
4. Change the tire according to the instructions provided as following.
HXGS408
D040A01L-GAT SPARE TIRE The following instructions for the FULL SIZE spare tire should be observed:Check inflation pressure as soon as practical after installing the spare tire, and adjust to the specified pressure.The tire pressure should be periodi- cally checked and maintained at the specified pressure while the tire isstored.
6.0x15 6.0x16 TIRE SIZE
RIM
SIZE PRESSURE, kPa (PSI)
205/65R15 94V 205/60R16 96V REAR
210(30) 210(30) FRONT
240(35)240(35)
NORMAL LOAD MAXIMUM LOAD
REAR
240(35)240(35)
FRONT
220(32)230(33)
Page 165 of 235

3- 10 WHAT TO DO IN AN EMERGENCY
Lower the car to the ground by turning the wheel nut wrench counterclock- wise. Then position the wrench asshown in the drawing and tighten the wheel nuts. Be sure the socket is seated completely over the nut. Do not
stand on the wrench handle or use an extension pipe over the wrench handle. Go around the wheel tightening everyother nut until they are all tight. Then double-check each nut for tightness. After changing wheels, have a techni-cian tighten the wheel nuts to their proper torque as soon as possible.
D060I01E-GAT 8. Lower Vehicle and Tighten
Nuts
HXGS414Wheel nut tightening torque: Steel wheel & aluminium alloy wheel: 900-1,100 kg.cm (65-80 lb.ft)
D060J01E-AAT After Changing Wheels If you have a tire gauge, remove the valve cap and check the air pressure. If the pressure is lower than recom-mended, drive slowly to the nearest service station and inflate to the cor- rect pressure. If it is too high, adjust ituntil it is correct. Always reinstall the valve cap after checking or adjusting tire pressure. If the cap is not replaced,air may leak from the tire. If you lose a valve cap, buy another and install it as soon as possible.
D060J01LAfter you have changed wheels, al- ways secure the flat tire in its place in the trunk and return the jack and toolsto their proper storage locations.
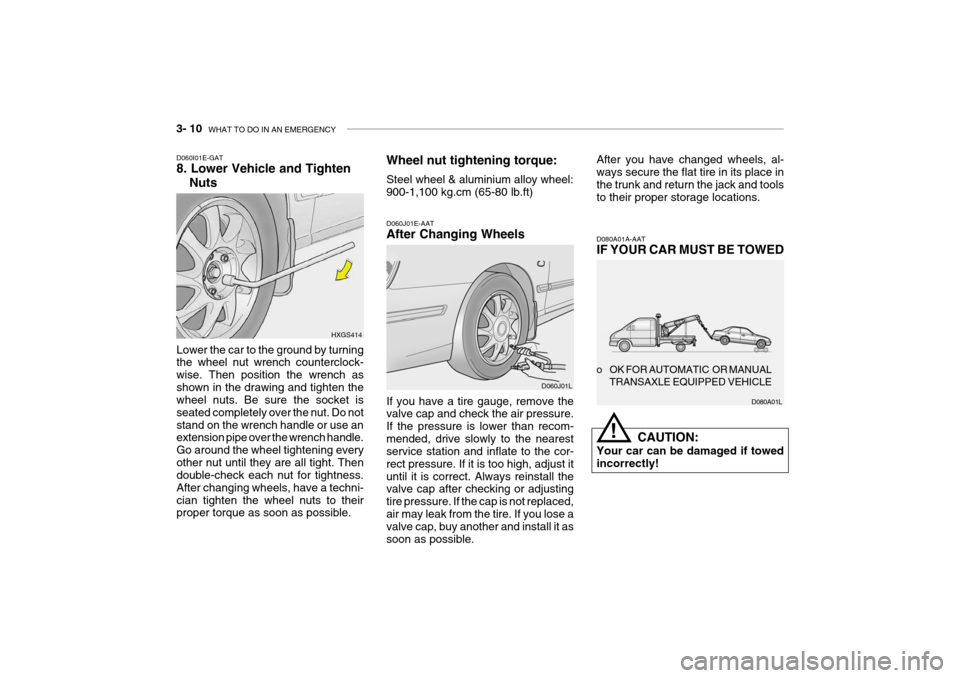
D080A01A-AAT IF YOUR CAR MUST BE TOWED
CAUTION:
Your car can be damaged if towed incorrectly!
o OK FOR AUTOMATIC OR MANUAL
TRANSAXLE EQUIPPED VEHICLE
D080A01L
!
Page 171 of 235

4- 4 CORROSION PREVENTION AND APPEARANCE CARE
auto parts outlet. Don't use strong household detergents, gasoline, strong solvents or abrasive cleaning powdersas these may damage the finish. Use a clean sponge or cloth, rinse it frequently and don't damage the finishby rubbing too hard. For stubborn spots, dampen them frequently and remove them a little at a time. To clean whitewall tires, use a stiff brush or soapy steel-wool scouringpad. To clean plastic wheel covers, use a clean sponge or soft cloth and water. To clean cast aluminum alloy wheels, use a mild soap or neutral detergent.Do not use abrasive cleaners. Protect the bare-metal surfaces by cleaning, polishing and waxing. Because alumi-num is subject to corrosion, be sure to give aluminum alloy wheels special attention in winter. If you drive onsalted roads, clean the wheels thor- oughly afterwards. After washing, be sure to rinse thor-oughly. If soapy water dries on the finish, streaking will result. When the weather is warm and the humidity low, you may find it neces-sary to rinse each section immediately after washing to avoid streaking. After rinsing, dry the car using a damp chamois or soft, absorbent cloth. The reason for drying the car is to removewater from the car so it will dry without water spots. Don't rub, this can dam- age the finish. If you find any nicks or scratches in the paint, use touch-up paint to coverthem to prevent corrosion. To protect the paintwork of the car against corro- sion, you must clean your Hyundai (atleast once a month). Give special at- tention to the removal of salt, mud and other substances on the underside ofthe splashboards of the car. Make sure that the outlets and the underside of the doors are open. Paint damagecan be caused by small accumulation of tar, industrial precipitation, tree resin, insects and bird droppings, when notremoved immediately. If water alone is
E030A01GK-AAT WASHING AND WAXING Washing Your Hyundai Never wash your car when the surface is hot from being in the sun. Always wash your car in the shade. Wash your car frequently. Dirt is abra- sive and can scratch the paint if it is notremoved. Air pollution or acid rain may damage the paint and trim through chemical action if pollutants are al-lowed to remain in contact with the surface. If you live near the ocean or in an area where road salts or dust con-trol chemicals are used, you should pay particular attention to the under- side of the car. Start by rinsing the carto remove dust and loose dirt. In win- ter, or if you have driven through mud or muddy water, be sure to thoroughlyclean the underside as well. Use a hard direct stream of water to remove accumulations of mud or corrosivematerials. High pressure car washes may cause water to enter your vehicle. Use a good quality car-washing solu-tion and follow the manufacturer's di- rections on the package. These are available at your Hyundai dealer or
Page 187 of 235

DO-IT-YOURSELF MAINTENANCE 6- 5
G020A02A-AAT
GENERAL CHECKS Engine Compartment
The following should be checked regu- larly:
o Engine oil level and condition
o Transaxle fluid level and condition
o Brake fluid level
o Clutch fluid level
o Coolant level
o Windshield washer fluid level
o Accessory drive belt condition
o Coolant hose condition
o Fluid leaks (on or below compo- nents)
o Power steering fluid level and con- dition
o Battery condition
o Air filter condition G020C01A-AAT Vehicle Interior The following should be checked each time when the vehicle is driven:
o Lights operation
o Windshield wiper operation
o Horn operation
o Defroster, heater system operation
(and air conditioning, if installed)
o Steering operation and condition
o Mirror condition and operation
o Turn signal operation
o Accelerator pedal operation
o Brake operation, including parking
brake
o Manual transaxle operation, includ- ing clutch operation
o Automatic transaxle operation, in- cluding "Park" mechanism opera-tion
o Seat control condition and opera- tion
o Seat belt condition and operation
o Sunvisor operation If you notice anything that does not operate correctly or appears to befunctioning incorrectly, inspect it care- fully and seek assistance from your Hyundai dealer if service is needed.
G020B01A-AAT
Vehicle Exterior
The following should be checked
monthly:
o Overall appearance and condition
o Wheel condition and wheel nut torgue
o Exhaust system condition
o Light condition and operation
o Windshield glass condition
o Wiper blade condition
o Paint condition and body corrosion
o Fluid leaks
o Door and hood lock condition
o Tire pressure and condition (including spare tire)
Page 207 of 235

DO-IT-YOURSELF MAINTENANCE 6- 25
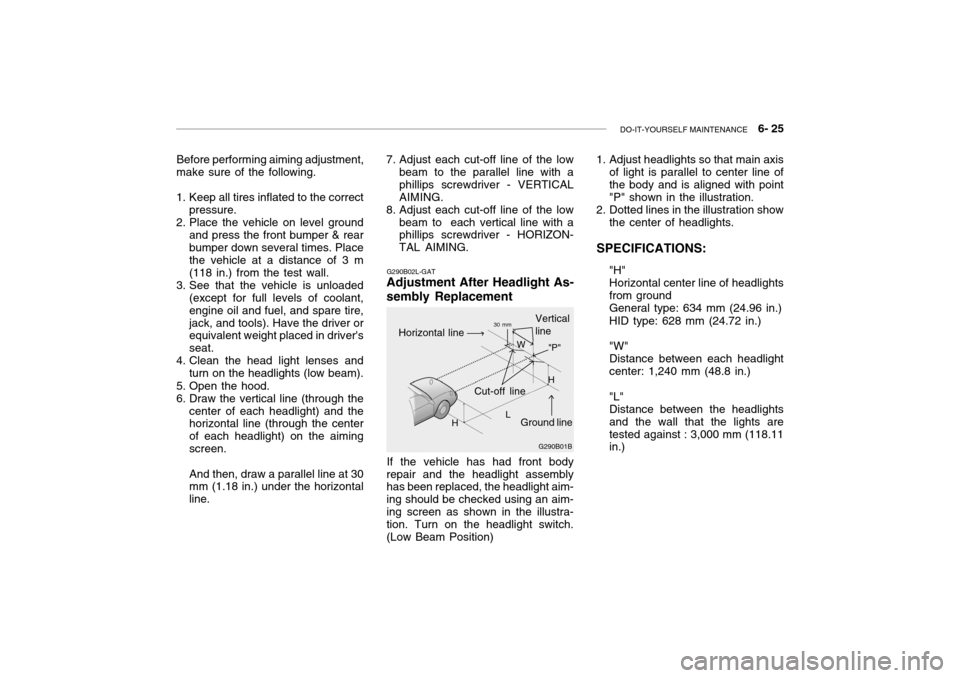
Before performing aiming adjustment,
make sure of the following.
1. Keep all tires inflated to the correct
pressure.
2. Place the vehicle on level ground
and press the front bumper & rear bumper down several times. Place the vehicle at a distance of 3 m (118 in.) from the test wall.
3. See that the vehicle is unloaded (except for full levels of coolant,engine oil and fuel, and spare tire,jack, and tools). Have the driver or equivalent weight placed in driver's seat.
4. Clean the head light lenses and
turn on the headlights (low beam).
5. Open the hood.
6. Draw the vertical line (through the center of each headlight) and the horizontal line (through the center of each headlight) on the aimingscreen. And then, draw a parallel line at 30 mm (1.18 in.) under the horizontal line. G290B02L-GAT
Adjustment After Headlight As- sembly Replacement
If the vehicle has had front body
repair and the headlight assembly has been replaced, the headlight aim- ing should be checked using an aim-ing screen as shown in the illustra- tion. Turn on the headlight switch. (Low Beam Position)
7. Adjust each cut-off line of the low
beam to the parallel line with aphillips screwdriver - VERTICALAIMING.
8. Adjust each cut-off line of the low
beam to each vertical line with a phillips screwdriver - HORIZON- TAL AIMING. 1. Adjust headlights so that main axis
of light is parallel to center line ofthe body and is aligned with point"P" shown in the illustration.
2. Dotted lines in the illustration show
the center of headlights.
SPECIFICATIONS: "H"Horizontal center line of headlightsfrom groundGeneral type: 634 mm (24.96 in.) HID type: 628 mm (24.72 in.) "W" Distance between each headlightcenter: 1,240 mm (48.8 in.) "L" Distance between the headlightsand the wall that the lights aretested against : 3,000 mm (118.11 in.)
G290B01B
L W
Cut-off line Ground line
"P"
Horizontal line
Vertical line30 mm
H H