2004 HONDA CIVIC HYBRID check engine
[x] Cancel search: check enginePage 1 of 231

2004 Civic Hybrid Online Reference Owner's Manual Use these links (and links throughout this manual) to navigate through this reference.
For a printed owner's manual, click on authorized manuals or go to www.helminc.com. Contents
Owner's Identification Form
Introduction ........................................................................\
............................................................................. i
A Few Words About Safety ........................................................................\
.................................................. ii
Your Vehicle at a Glance........................................................................\
.......................................................2
Driver and Passenger Safety ........................................................................\
...............................................5
Important information about proper use and care of your vehicle's seat b\
elts, an overview of Supplemental
Instruments and Controls........................................................................\
.................................................. .49
Explains the purpose of each instrument panel indica tor and gauge, and how to use controls on
Comfort and Convenience Features........................................................................\
.................................87
How to operate the heating and air conditioning system, the audio system, and other convenience
Before Driving ........................................................................\
.....................................................................113
What gasoline to use, how to break-in your new vehicle, and how to load luggage and other cargo.
Driving........................................................................\
...................................................... .............................127
The proper way to start the engine, shift the transmission, and park.
Maintenance........................................................................\
...................................................... ...................143
The Maintenance Schedule shows you when you need to take your vehicle to the dealer. There is also
Taking Care of the Unexpected........................................................................\
.......................................177
This section covers several problems motorists sometimes experience, and details how to handle them.
Technical Information........................................................................\
...................................................... .201
ID numbers, dimensions, capaciti es, and technical information.
Warranty and Customer Relations (U.S. and Canada only).............................................................213
A summary of the warranties covering your new Honda, and how to contact us for any reason. Refer to
Authorized Manuals (U.S. only)........................................................................\
.......................................217
How to order manuals and other technical literature.
Index ........................................................................\
......................................................................................... I
Service Information Summary
A summary of information you need when you pull up to the fuel pump.
Restraint System, and valuable information on how to protect children w\
ith child restraints.
the dashboard and steering column.
features.
a list of things to check and instructions on how to check them.
your warranty manual for detailed information.
Page 19 of 231

If a seat belt does not seem to work
as it should, it may not protect the
occupant in a crash.Using a seat
belt that is not working properly can
result in serious injury or death.
Have your Honda dealer check the
belt as soon as possible.
See page f or additional
inf ormation about your seat belts
and how to take care of them.
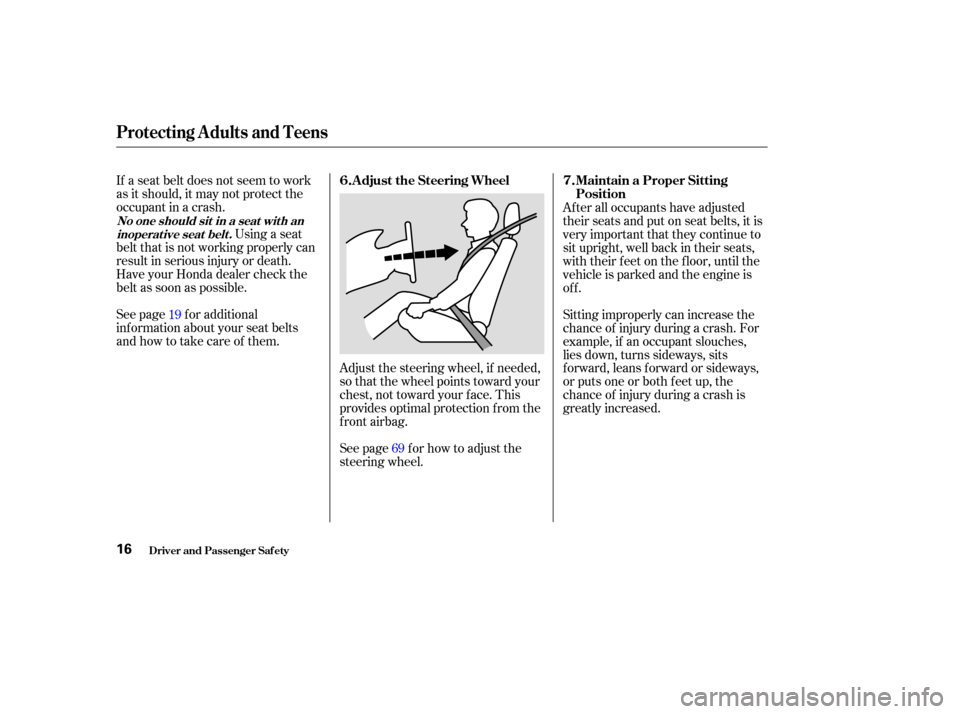
Adjust the steering wheel, if needed,
so that the wheel points toward your
chest, not toward your f ace. This
provides optimal protection f rom the
f ront airbag.
See page f or how to adjust the
steering wheel.After all occupants have adjusted
their seats and put on seat belts, it is
very important that they continue to
sit upright, well back in their seats,
with their feet on the floor, until the
vehicle is parked and the engine is
of f .
Sitting improperly can increase the
chance of injury during a crash. For
example, if an occupant slouches,
lies down, turns sideways, sits
forward, leans forward or sideways,
or puts one or both f eet up, the
chance of injury during a crash is
greatly increased.
19
69
Protecting A dults and Teens
Driver and Passenger Saf ety
No one should sit in a seat wit h aninoperat ive seat belt .
Adjust the Steering Wheel Maintain a Proper Sitting
Position
6.
7.
16
Page 29 of 231

If the indicator comes on at any
other time, or does not come on at all,
you should have the system checked
by your dealer. For example:If the SRS indicator does not come
on after you turn the ignition
switch to ON (II).
If the indicator stays on after the
engine starts.
If the indicator comes on or
flashesonandoff whileyoudrive.
If you see any of these indications,
the airbags and seat belt tensioners
may not work properly when you
need them.
The SRS indicator alerts
you to a potential problem
with your f ront airbags, see side
airbags, or f ront seat belt tensioners
(see page ).
When you turn the ignition to ON
(II), this indicator will light brief ly
then go out. This tells you that the
system is working properly. 53
Additional Inf ormation About Your Airbags
Driver and Passenger Saf ety
How the SRS Indicator Works
26
Ignoring the SRS indicator light
can result in serious injury or
death if the airbag systems, or
tensioners do not work properly.
Have your vehicle checked by a
dealer as soon as possible if
the SRS indicator alerts you to
a possible problem.
Page 57 of 231

The engine can be severely damaged
if this indicator f lashes or stays on
when the engine is running. For
complete inf ormation, see page .This indicator has two f unctions:
If it remains lit af ter you have f ully
released the parking brake while
the engine is running, or if it
comes on while driving, there
could be a problem with the brake
system. For complete inf ormation,
see page . Itcomesonwhenyouturnthe
ignition switch to ON (II). It is a
reminder to check the parking
brake. Driving with the parking
brake not f ully released can
damage the brakes and tires.
See page . If this indicator comes on when the
engine is running, the 12volt battery
is not being charged. For complete
inf ormation, see page . This indicator normally comes on f or
a f ew seconds when you turn the
ignition switch to ON (II), and when
the ignition switch is turned to
START (III). If it comes on at any
other time, there is a problem in the
ABS. If this happens, have your
vehicle checked at a dealer. With
this indicator on, your vehicle still
has normal braking ability but no
anti-lock. For complete inf ormation,
see page .
1.
2.
190
191
141
193
192
If equipped
Charging System
Indicator
L ow Oil Pressure
Indicator Parking Brake
and Brake
System
Indicator
Anti-lock Brake System
(A BS) Indicator
Malf unction Indicator
Lamp
Inst rument s and Cont rols
Instrument Panel
54
U.S. Canada
Page 58 of 231

This indicator normally comes on
when you turn the ignition to ON (II)
and goes off after the engine starts.
If it comes on at any other time,
there is a problem in the Electric
Power Steering system. If this
happens, stop the vehicle in a saf e
place and turn of f the engine. Reset
the system by restarting the engine.
The indicator will not turn of f
immediately. If it does not go of f
after driving a short distance, or
comes back on again while driving,
take the vehicle to your dealer to
have it checked. With the indicator
on, the EPS may be turned of f ,
making the vehicle harder to steer.This indicator normally comes on f or
a f ew seconds when you turn the
ignition switch to ON (II). If it comes
on at any other time, it indicates a
problem in the Integrated Motor
Assist (IMA) system. With the IMA
indicator on, the vehicle may not
accelerate as it normally does. Have
the vehicle checked by the dealer as
soon as possible.
See pages and .
If you drive with the system
overheated continuously or
repeatedly, this can damage the
power steering system.
If the power steering system
overheats while driving, the assisting
power is reduced and steering may
f eel slightly harder. This indicator comes on f or a f ew
seconds when you turn the ignition
switch to ON (II). It will then go of f
if you have inserted a properly-coded
ignition key. If it is not a properly-
coded key, the indicator will blink
and the engine will not start (see
page ).
This indicator also blinks several
times when you turn the ignition
switch f rom ON (II) to ACCESSORY
(I) or LOCK (0).
71
132 137
Inst rument s and Cont rols
Electric Power Steering
(EPS) Indicator IMA System Indicator
A uto Idle Stop Indicator
Immobilizer System
Indicator
Instrument Panel
55
Page 65 of 231

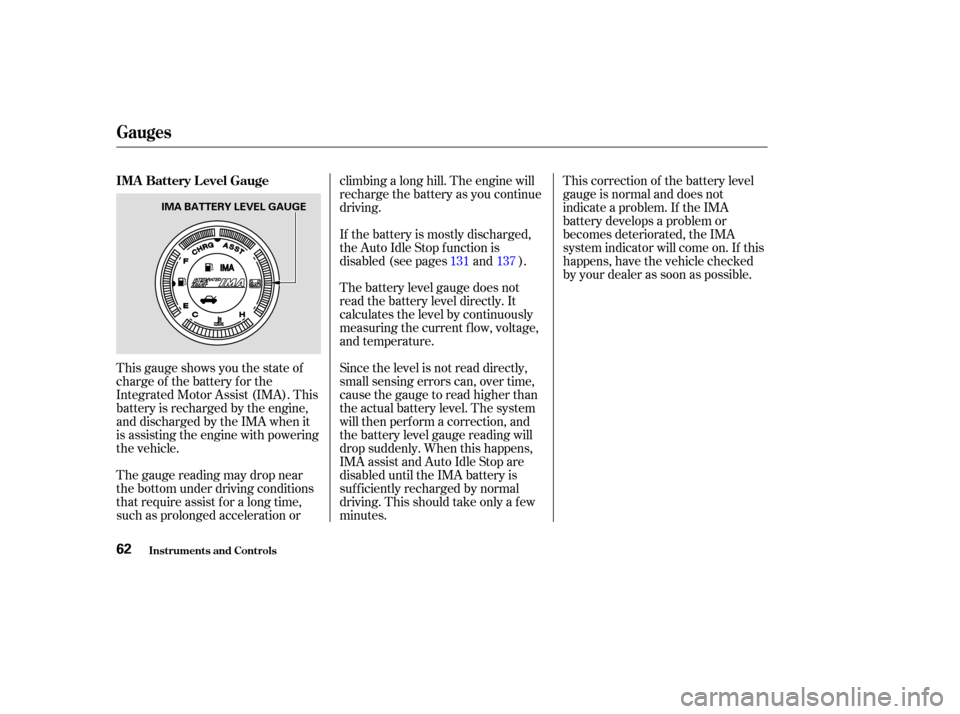
This gauge shows you the state of
charge of the battery for the
Integrated Motor Assist (IMA). This
battery is recharged by the engine,
anddischargedbytheIMAwhenit
is assisting the engine with powering
the vehicle.
The gauge reading may drop near
the bottom under driving conditions
that require assist f or a long time,
such as prolonged acceleration orclimbing a long hill. The engine will
recharge the battery as you continue
driving.
If the battery is mostly discharged,
the Auto Idle Stop f unction is
disabled (see pages and ).
The battery level gauge does not
read the battery level directly. It
calculates the level by continuously
measuring the current f low, voltage,
and temperature.
Since the level is not read directly,
small sensing errors can, over time,
cause the gauge to read higher than
the actual battery level. The system
will then perf orm a correction, and
the battery level gauge reading will
drop suddenly. When this happens,
IMA assist and Auto Idle Stop are
disabled until the IMA battery is
suf f iciently recharged by normal
driving. This should take only a f ew
minutes.This correction of the battery level
gauge is normal and does not
indicate a problem. If the IMA
battery develops a problem or
becomes deteriorated, the IMA
system indicator will come on. If this
happens, have the vehicle checked
by your dealer as soon as possible.
137
131
IMA Battery Level Gauge
Gauges
Inst rument s and Cont rols62
IMA BATTERY LEVEL GAUGE
Page 66 of 231

If the IMA battery is too hot or too
cold, the IMA system shuts down to
protect the battery. This disables the
IMA assist and Auto Idle Stop, even
though the Battery Level Gauge may
show that the battery is well-charged.
Theref ore, those f unctions may not
operate when you f irst start driving
in very hot or cold weather.This shows the temperature of the
engine’s coolant. During normal
operation, the reading should be in
the middle of the gauge. In severe
driving conditions, the reading may
reach near the red mark. If it
reaches the red (Hot) mark, pull
safely to the side of the road. Turn to
page f or instructions and
precautions on checking the engine’s
cooling system.
The battery temperature will
normalize af ter a f ew minutes of
driving, and the IMA system will
work normally.
This gauge shows you the status of
the Integrated Motor Assist (IMA).
When the IMA battery is being
charged, the lef t side of the gauge
illuminates. When the IMA is
assisting the engine, the right side of
the gauge illuminates. 187
Charge/Assist Gauge
Temperature Gauge
Gauges
Inst rument s and Cont rols63
IMA CHARGE
GAUGEIMA ASSIST
GAUGE
Page 121 of 231

Wait a f ew minutes af ter turning the
engine of f bef ore you check the oil.Remove the dipstick (orange loop).
Wipe the dipstick with a clean
cloth or paper towel.
Insert it all the way back in its tube. Remove the dipstick again and
check the level. It should be
between the upper and lower
marks.
If it is near or below the lower mark,
see on page . Look at the coolant level in the
radiator reserve tank. Make sure it is
between the MAX and MIN lines. If
it is below the MIN line, see
on page f or
inf ormation on adding the proper
coolant.
Refer to on page f or inf ormation
on checking other items in your
Honda.
2.
3. 1.
4.
152 155
146
Oil Check
A dding Oil A dding
Engine Coolant Engine Coolant Check
Owner’s Maintenance
Checks
Service Station Procedures
Bef ore Driving118
DIPSTICK
UPPER MARK
LOWER MARKRESERVE TANK
MINMAX