2004 GMC SIERRA reset
[x] Cancel search: resetPage 424 of 588

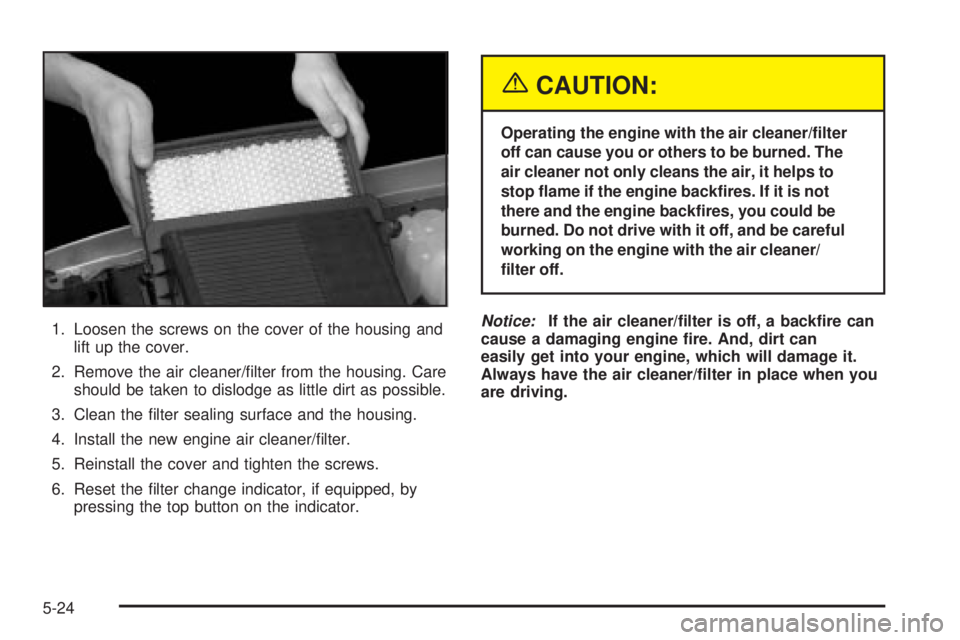
1. Loosen the screws on the cover of the housing and
lift up the cover.
2. Remove the air cleaner/®lter from the housing. Care
should be taken to dislodge as little dirt as possible.
3. Clean the ®lter sealing surface and the housing.
4. Install the new engine air cleaner/®lter.
5. Reinstall the cover and tighten the screws.
6. Reset the ®lter change indicator, if equipped, by
pressing the top button on the indicator.
{CAUTION:
Operating the engine with the air cleaner/®lter
off can cause you or others to be burned. The
air cleaner not only cleans the air, it helps to
stop ¯ame if the engine back®res. If it is not
there and the engine back®res, you could be
burned. Do not drive with it off, and be careful
working on the engine with the air cleaner/
®lter off.
Notice:If the air cleaner/®lter is off, a back®re can
cause a damaging engine ®re. And, dirt can
easily get into your engine, which will damage it.
Always have the air cleaner/®lter in place when you
are driving.
5-24
Page 436 of 588

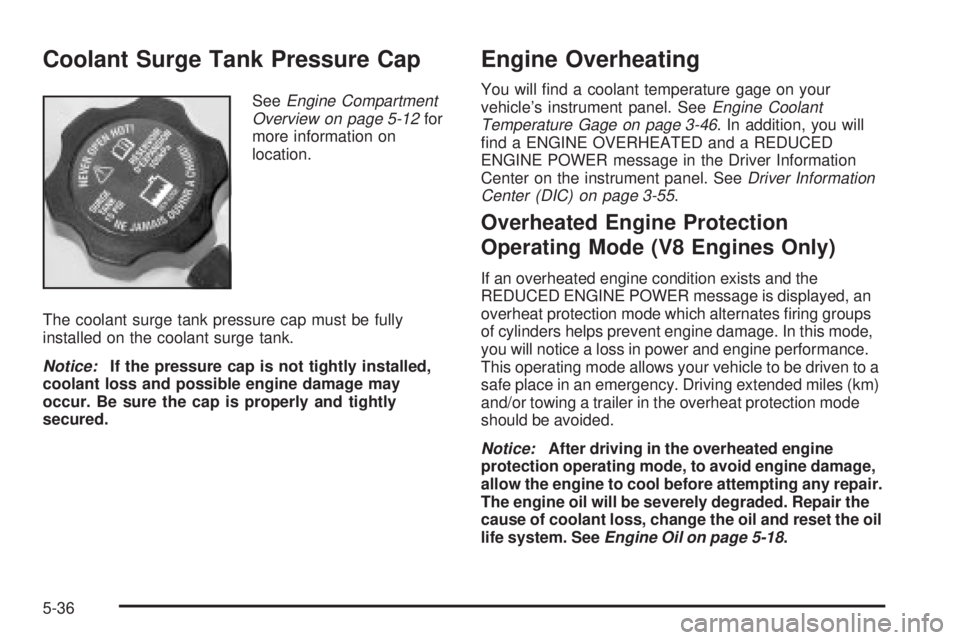
Coolant Surge Tank Pressure Cap
SeeEngine Compartment
Overview on page 5-12for
more information on
location.
The coolant surge tank pressure cap must be fully
installed on the coolant surge tank.
Notice:If the pressure cap is not tightly installed,
coolant loss and possible engine damage may
occur. Be sure the cap is properly and tightly
secured.
Engine Overheating
You will ®nd a coolant temperature gage on your
vehicle's instrument panel. SeeEngine Coolant
Temperature Gage on page 3-46. In addition, you will
®nd a ENGINE OVERHEATED and a REDUCED
ENGINE POWER message in the Driver Information
Center on the instrument panel. See
Driver Information
Center (DIC) on page 3-55.
Overheated Engine Protection
Operating Mode (V8 Engines Only)
If an overheated engine condition exists and the
REDUCED ENGINE POWER message is displayed, an
overheat protection mode which alternates ®ring groups
of cylinders helps prevent engine damage. In this mode,
you will notice a loss in power and engine performance.
This operating mode allows your vehicle to be driven to a
safe place in an emergency. Driving extended miles (km)
and/or towing a trailer in the overheat protection mode
should be avoided.
Notice:After driving in the overheated engine
protection operating mode, to avoid engine damage,
allow the engine to cool before attempting any repair.
The engine oil will be severely degraded. Repair the
cause of coolant loss, change the oil and reset the oil
life system. See
Engine Oil on page 5-18.
5-36
Page 491 of 588

Traction ± AA, A, B, C
The traction grades, from highest to lowest, are AA, A,
B, and C. Those grades represent the tire's ability
to stop on wet pavement as measured under controlled
conditions on speci®ed government test surfaces of
asphalt and concrete. A tire marked C may have poor
traction performance. Warning: The traction grade
assigned to this tire is based on straight-ahead braking
traction tests, and does not include acceleration,
cornering, hydroplaning, or peak traction characteristics.
Temperature ± A, B, C
The temperature grades are A (the highest), B, and C,
representing the tire's resistance to the generation
of heat and its ability to dissipate heat when tested
under controlled conditions on a speci®ed indoor
laboratory test wheel. Sustained high temperature can
cause the material of the tire to degenerate and
reduce tire life, and excessive temperature can lead to
sudden tire failure. The grade C corresponds to a
level of performance which all passenger car tires must
meet under the Federal Motor Vehicle Safety Standard
No. 109. Grades B and A represent higher levels of
performance on the laboratory test wheel than the
minimum required by law.Warning: The temperature grade for this tire is
established for a tire that is properly in¯ated and not
overloaded. Excessive speed, underin¯ation, or
excessive loading, either separately or in combination,
can cause heat buildup and possible tire failure.
Wheel Alignment and Tire Balance
The wheels on your vehicle were aligned and balanced
carefully at the factory to give you the longest tire life
and best overall performance.
Scheduled wheel alignment and wheel balancing are
not needed. However, if you notice unusual tire wear or
your vehicle pulling one way or the other, the alignment
may need to be reset. If you notice your vehicle
vibrating when driving on a smooth road, your wheels
may need to be rebalanced.
5-91
Page 540 of 588

Owner Checks and Services on page 6-10tells you
what should be checked, when to check it and what you
can easily do to help keep your vehicle in good
condition.
The proper replacement parts, ¯uids and lubricants to
use are listed in
Recommended Fluids and Lubricants
on page 6-14andNormal Maintenance Replacement
Parts on page 6-17. When your vehicle is serviced,
make sure these are used. All parts should be replaced
and all necessary repairs done before you or anyone
else drives the vehicle. We recommend the use of
genuine GM parts.
Scheduled Maintenance
When the CHANGE ENGINE OIL message comes on, it
means that service is required for your vehicle. Have
your vehicle serviced as soon as possible within the next
600 miles (1 000 km). It is possible that, if you are
driving under the best conditions, the engine oil
life system may not indicate that vehicle service is
necessary for over a year. However, your engine oil and
®lter must be changed at least once a year and at
this time the system must be reset. Your GM
Goodwrench dealer has GM-trained service technicians
who will perform this work using genuine GM parts
and reset the system.If the engine oil life system is ever reset accidentally,
you must service your vehicle within 3,000 miles
(5 000 km) since your last service. Remember to reset
the oil life system whenever the oil is changed. See
Engine Oil on page 5-18for information on the Engine
Oil Life System and resetting the system.
When the CHANGE ENGINE OIL message appears,
certain services, checks and inspections are required.
Required services are described in the following for
ªMaintenanceIº and ªMaintenanceII.º Generally,
it is recommended that your ®rst service be
MaintenanceI, your second service be MaintenanceII
and that you alternate MaintenanceIand MaintenanceII
thereafter. However, in some cases, MaintenanceII
may be required more often.
MaintenanceIÐ Use MaintenanceIif the CHANGE
ENGINE OIL message comes on within ten months
since vehicle was purchased or MaintenanceII
was performed.
MaintenanceIIÐ Use MaintenanceIIif the previous
service performed was MaintenanceI. Always use
MaintenanceIIwhenever the message comes on ten
months or more since the last service or if the message
has not come on at all for one year.
6-4
Page 541 of 588

Scheduled Maintenance
Service MaintenanceIMaintenanceII
Change engine oil and ®lter. Reset oil life system. See
Engine Oil on
page 5-18.An Emission Control Service.··
Lubricate chassis components.
See footnote #.··
Visually check for any leaks or damage.
See footnote (j).··
Inspect engine air cleaner ®lter or change indicator (if equipped). If necessary,
replace ®lter. See
Engine Air Cleaner/Filter on page 5-23.An Emission Control
Service. See footnote ².··
Rotate tires and check in¯ation pressures and wear. See
Tires on page 5-76.··
Inspect brake system.
See footnote (a).··
Check engine coolant and windshield washer ¯uid levels and add ¯uid as
needed.··
Perform any needed additional services. See ªAdditional Required Servicesº in
this section.··
Inspect suspension and steering components.
See footnote (b).·
Inspect engine cooling system.
See footnote (c).·
Inspect wiper blades.
See footnote (d).·
Inspect restraint system components.
See footnote (e).·
Lubricate body components.
See footnote (f).·
Check transmission ¯uid level and add ¯uid as needed.·
6-5
Page 581 of 588

N
New Vehicle Break-In......................................2-21
Noise Control System, Tampering......................5-62
Normal Maintenance Replacement Parts............6-17
O
Odometer......................................................3-35
Off-Road Recovery..........................................4-17
Oil
Engine.......................................................5-18
Pressure Gage............................................3-52
OIL LIFE RESET............................................3-69
OIL PRESSURE LOW.....................................3-69
Older Children, Restraints................................1-33
Online Owner Center........................................ 7-3
OnStar
žPersonal Calling.................................2-65
OnStaržServices............................................2-65
OnStaržSteering Wheel Controls......................2-66
OnStaržSystem.............................................2-64
OnStaržVirtual Advisor....................................2-65
Operating Your All-Wheel-Drive Vehicle Off
Paved Roads..............................................4-20
Other Warning Devices...................................... 3-6
Outlet Adjustment...................................3-25, 3-32
Outside
Automatic Dimming Mirror.............................2-63
Camper-Type Mirrors....................................2-60
Convex Mirror.............................................2-64Outside (cont.)
Curb View Assist Mirrors..............................2-63
Heated Mirrors............................................2-64
Manual Mirrors............................................2-60
Power Foldaway Mirrors...............................2-62
Power Mirrors.............................................2-61
West Coast-Type Mirrors..............................2-61
Outside Power Camper-Type Mirror...................2-62
Overdrive Disable...........................................3-53
Overdrive Disable
(Allison Transmission
ž) .................................2-29
Overheated Engine Protection Operating Mode
(V8 Engines Only).......................................5-36
Owner Checks and Services.............................6-10
Owners, Canadian............................................... ii
Owner's Information........................................7-13
P
Park (P)
Shifting Into................................................2-49
Shifting Out of............................................2-51
Parking
Brake........................................................2-48
Over Things That Burn.................................2-52
Parking on Hills..............................................4-94
Parking Your Vehicle.......................................2-52
Passenger Air Bag Indicator.....................2-57, 2-59
Passenger Air Bag Status Indicator...................3-40
11
Page 584 of 588

Safety Belts (cont.)
Driver Position............................................1-16
How to Wear Safety Belts Properly................1-16
Questions and Answers About Safety Belts.....1-15
Rear Safety Belt Comfort Guides for Children
and Small Adults......................................1-30
Rear Seat Passengers.................................1-27
Right Front Passenger Position......................1-25
Safety Belt Extender....................................1-32
Safety Belt Use During Pregnancy.................1-24
Safety Belts Are for Everyone.......................1-11
Safety Chains.................................................4-90
Safety Warnings and Symbols.............................. iii
Scanning the Terrain.......................................4-25
Scheduled Maintenance..................................... 6-4
Seatback Latches............................................. 1-8
Seats
Head Restraints............................................ 1-8
Heated Seats............................................... 1-6
Manual........................................................ 1-3
Memory.....................................................2-69
Power Lumbar.............................................. 1-5
Power Seats................................................. 1-4
Rear Seat Operation...................................... 1-9
Reclining Seatbacks...................................... 1-6
Seatback Latches.......................................... 1-8
Secondary Latch System................................5-112
Securing a Child Restraint
Center Front Seat Position............................1-60
Center Rear Seat Position............................1-58Securing a Child Restraint (cont.)
Designed for the LATCH System...........1-50, 1-51
Rear Outside Seat Position...........................1-55
Security While You Travel.................................. 7-6
Select Button.................................................3-66
Service........................................................... 5-3
Adding Equipment to the Outside of Your
Vehicle..................................................... 5-4
Doing Your Own Work................................... 5-3
Engine Soon Light.......................................3-49
Publications Ordering Information...................7-12
SERVICE 4 WHEEL STEER.............................3-71
SERVICE 4WD...............................................3-71
SERVICE AIRBAG..........................................3-70
SERVICE BRAKE BOOSTER...........................3-70
SERVICE BRAKE SYSTEM.............................3-70
Service Bulletins.............................................7-12
Service Manuals.............................................7-12
SERVICE RIDE CONTROL..............................3-71
Setting Preset PTYs (RDS Only).....3-81, 3-93, 3-106
Setting Preset Stations..........3-75, 3-79, 3-90, 3-104
Setting the Time
Radios with Radio Data Systems (RDS).........3-74
Radios without Radio Data Systems (RDS).....3-74
Setting the Tone
(Bass/Treble)....................3-75, 3-79, 3-91, 3-104
Sheet Metal Damage.....................................5-122
Shift Speeds..................................................2-34
Shifting Into Park (P).......................................2-49
Shifting Out of Park (P)...................................2-51
14