2004 GMC SIERRA reset
[x] Cancel search: resetPage 293 of 588
DVD Distortion
You may experience audio distortion in the
IR headphones when operating cellular phones,
scanners, CB radios, Global Positioning Systems
(GPS)*, two-way radios, mobile fax, or walkie talkies.
It may be necessary to turn off the DVD player
when operating one of these devices in or near the
vehicle.
* Excludes the OnStar
žSystem.
Radio Reception
AM
The range for most AM stations is greater than for FM,
especially at night. The longer range, however, can
cause stations to interfere with each other. AM can pick
up noise from things like storms and power lines. Try
reducing the treble to reduce this noise.
FM Stereo
FM stereo will give you the best sound, but FM signals
will reach only about 10 to 40 miles (16 to 65 km).
Tall buildings or hills can interfere with FM signals,
causing the sound to come and go.
XMŸ Satellite Radio Service
(48 Contiguous US States)
XMŸ Satellite Radio gives you digital radio reception
from coast to coast. Just as with FM, tall buildings
or hills can interfere with satellite radio signals, causing
the sound to come and go. Your radio may display
NO SIGNAL to indicate interference.
Care of Your Cassette Tape Player
A tape player that is not cleaned regularly can cause
reduced sound quality, ruined cassettes, or a damaged
mechanism. Cassette tapes should be stored in their
cases away from contaminants, direct sunlight, and
extreme heat. If they are not, they may not operate
properly or may cause failure of the tape player.
Your tape player should be cleaned regularly after every
50 hours of use. Your radio may display CLEAN to
indicate that you have used your tape player for
50 hours without resetting the tape clean timer. If this
message appears on the display, your cassette
tape player needs to be cleaned. It will still play tapes,
but you should clean it as soon as possible to
prevent damage to your tapes and player. If you notice
a reduction in sound quality, try a known good
cassette to see if the tape or the tape player is at fault.
If this other cassette has no improvement in sound
quality, clean the tape player.
3-129
Page 294 of 588
For best results, use a scrubbing action, non-abrasive
cleaning cassette with pads which scrub the tape
head as the hubs of the cleaner cassette turn. The
recommended cleaning cassette is available through
your dealer.
When cleaning the cassette tape player with the
recommended non-abrasive cleaning cassette, it is
possible that the cassette may eject, because the cut
tape detection feature on your radio may recognize it as
a broken tape, in error. To prevent the cleaning
cassette from being ejected, use the following steps:
1. Turn the ignition on.
2. Turn the radio off.
3. Press and hold the TAPE DISC button for ®ve
seconds. READY will appear on the display and
the cassette symbol will ¯ash for ®ve seconds.
4. Insert the scrubbing action cleaning cassette.
5. Eject the cleaning cassette after the manufacturer's
recommended cleaning time.
When the cleaning cassette has been ejected, the cut
tape detection feature is active again.
You may also choose a non-scrubbing action, wet-type
cleaner which uses a cassette with a fabric belt to
clean the tape head. This type of cleaning cassette will
not eject on its own. A non-scrubbing action cleanermay not clean as thoroughly as the scrubbing type
cleaner. The use of a non-scrubbing action, dry-type
cleaning cassette is not recommended.
After you clean the player, press and hold the eject
button for ®ve seconds to reset the CLEAN indicator.
The radio will display --- or CLEANED to show the
indicator was reset.
Cassettes are subject to wear and the sound quality
may degrade over time. Always make sure the cassette
tape is in good condition before you have your tape
player serviced.
Care of Your CDs and DVDs
Handle discs carefully. Store them in their original cases
or other protective cases and away from direct sunlight
and dust. If the surface of a disc is soiled, dampen
a clean, soft cloth in a mild, neutral detergent solution
and clean it, wiping from the center to the edge.
Be sure never to touch the side without writing when
handling discs. Pick up discs by grasping the outer
edges or the edge of the hole and the outer edge.
3-130
Page 397 of 588
Power Winches
If you wish to use a power winch on your vehicle, only
use it when your vehicle is stationary or anchored.
Power Take-Off (PTO)
Before using a PTO, if equipped, refer to the
manufacturer's or installer's instructions.
To engage a PTO on a vehicle with a manual
transmission do the following:
1. Hold the clutch pedal down.
2. Set the parking brake.
3. Shift the transmission into NEUTRAL (N).
4. Engage the PTO. Refer to the manufacturer's or
installer's for instructions on electrically
engaged PTOs.
5. For mobile operations, shift the transmission into
the gear you want, apply the regular brakes and
release the parking brake. For stationary operations,
leave the parking brake applied.
6. Release the clutch and regular brakes as you
normally would. When the clutch is released,
the PTO will start.
7. Turn the PTO rotary switch to ON.To engage a PTO on a vehicle with an automatic
transmission do the following:
1. For stationary use shift the transmission into
PARK (P).
2. Turn the PTO rotary switch ON.
3. If the engine speed is below the PTO engage
speed limit, the PTO will start. The blinking LED
on the PTO control switch indicates PTO engage is
requested. When PTO engages the LED will
switch from blinking to a steady light.
To use PTO speed control in Preset Mode (Factory
Setting) do the following:
1. Engage the PTO
2. Select PARK (P) or NEUTRAL (N) range. Apply the
parking brake if NEUTRAL (N) is selected. Torque
Converter Clutch (TCC) is not available in
NEUTRAL (N) and is available only in PARK (P)
when engine speed is above 1,100 rpm.
3. Make sure your foot is off the brake pedal (and off
the clutch on vehicles equipped with a manual
transmission).
4. Select the desired engine speed for PTO operation.
Read the following preset mode information
regarding operation.
4-101
Page 398 of 588
Preset Mode:PTO speed control mode is used for
stationary applications. (PTO will remain engaged while
mobile in the preset mode, however PTO set and
resume speed controls will be inoperative). This mode
provides a default standby speed of 800 or 850 rpm
(depending on the engine/transmission combination) and
two default PTO control speeds which follow:
1. PTO Set Speed of 1,250 rpm, or
2. PTO Resume Speed of 1,700 rpm.
Please note that the standby speed (800/850 rpm) is
not to be used as a PTO control speed. Vehicles
not equipped with cruise control will not have the resume
speed capability.
To use PTO speed control in variable mode (while
mobile) do the following:
1. Engage the PTO.
2. Vehicle speed must be greater than 5 mph.
3. Make sure your foot is off the brake pedal (and off
the clutch for vehicles equipped with a manual
transmission).
4. Select the desired engine speed by using the foot
pedal, and select SET on the PTO switch or the
cruise control.To use PTO speed control in variable mode (while
stationary) do the following:
1. Engage the PTO.
2. Vehicle speed must be less than 5 mph.
3. Make sure your foot is off the brake pedal (and off
the clutch for vehicles equipped with a manual
transmission).
4. Select the desired engine speed by using the foot
pedal, and select SET on the PTO switch or the
cruise control.
Variable Mode:PTO speed control mode can be used
for both stationary and mobile applications. This
mode allows PTO to be controlled in a fashion similar to
how cruise control sets vehicle speed. The operator
can set to an rpm (between 800 and 2,200) with
the cruise control feature or with the SET position on
the PTO switch. The operator is then able to increase
rpm in increments of 100, or²tap up²with the resume
position on the cruise control. Or, the operator can
decrease rpm in increments of 100 with the SET switch
on the PTO or the cruise control.Vehicles not
equipped with cruise control will not have the ªtap
upº capability..
4-102
Page 399 of 588
All engine speed values listed above are factory preset
values. With the exception of the TCC lockup speed
(1,100 rpm) and the ªtap²increment (100 rpm), all
of these values are programmable and can be adjusted
by your dealer or body up®tter. If the PTO software
settings do not match the settings shown here, then they
may have already been altered in order to satisfy the
requirements of the installed PTO system and body
equipment.
When the PTO switch is turned on, the engine is limited
to 2200 rpms. If there are no accessories installed on
the vehicle, make sure the PTO switch is turned off.Step-Bumper Pad
Your vehicle has a rear step bumper with a rear step
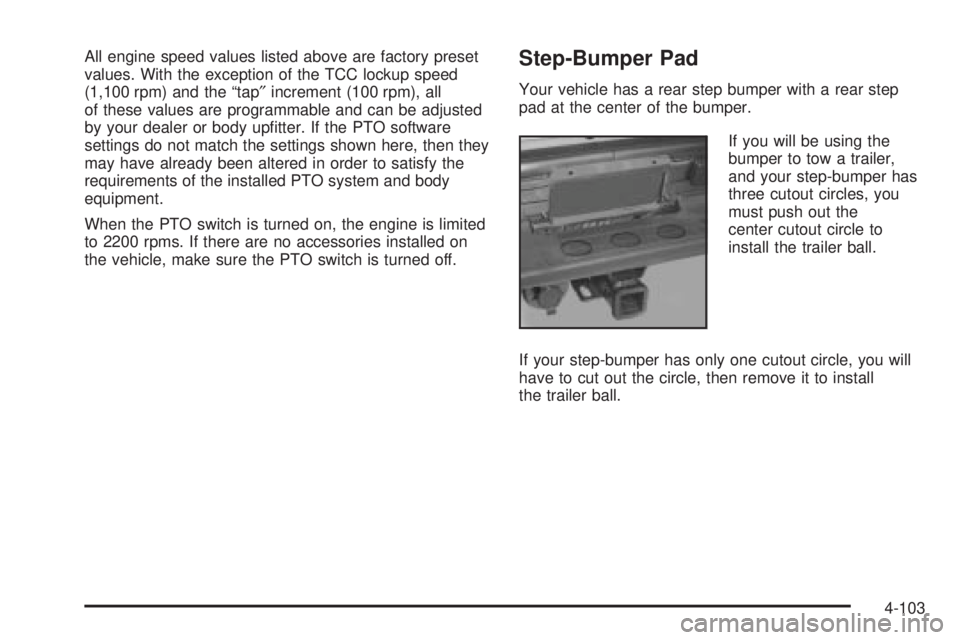
pad at the center of the bumper.
If you will be using the
bumper to tow a trailer,
and your step-bumper has
three cutout circles, you
must push out the
center cutout circle to
install the trailer ball.
If your step-bumper has only one cutout circle, you will
have to cut out the circle, then remove it to install
the trailer ball.
4-103
Page 421 of 588

Notice:Use only engine oil identi®ed as meeting
GM Standard GM6094M and showing the American
Petroleum Institute Certi®ed For Gasoline Engines
starburst symbol. Failure to use the recommended
oil can result in engine damage not covered by
your warranty.
GM Goodwrench
žoil meets all the requirements for
your vehicle.
If you are in an area of extreme cold, where the
temperature falls below-20ÉF (-29ÉC), it is
recommended that you use either an SAE 5W-30
synthetic oil or an SAE 0W-30 oil. Both will provide
easier cold starting and better protection for your engine
at extremely low temperatures.
Engine Oil Additives
Do not add anything to your oil. The recommended oils
with the starburst symbol that meet GM Standard
GM6094M are all you will need for good performance
and engine protection.
When to Change Engine Oil
(GM Oil Life System)
Your vehicle has a computer system that lets you know
when to change the engine oil and ®lter. This is based on
engine revolutions and engine temperature, and not on
mileage. Based on driving conditions, the mileage at
which an oil change will be indicated can vary
considerably. For the oil life system to work properly, you
must reset the system every time the oil is changed.
When the system has calculated that oil life has been
diminished, it will indicate that an oil change is
necessary. A CHANGE ENGINE OIL message will
come on. Change your oil as soon as possible within
the next two times you stop for fuel. It is possible that, if
you are driving under the best conditions, the oil life
system may not indicate that an oil change is necessary
for over a year. However, your engine oil and ®lter
must be changed at least once a year and at this time
the system must be reset. Your dealer has GM-trained
service people who will perform this work using
genuine GM parts and reset the system. It is also
important to check your oil regularly and keep it at the
proper level.
If the system is ever reset accidentally, you must
change your oil at 3,000 miles (5 000 km) since your
last oil change. Remember to reset the oil life system
whenever the oil is changed.
5-21
Page 422 of 588
How to Reset the CHANGE ENGINE OIL
Message
The GM Oil Life System calculates when to change
your engine oil and ®lter based on vehicle use. Anytime
your oil is changed, reset the system so it can
calculate when the next oil change is required. If a
situation occurs where you change your oil prior to a
CHANGE ENGINE OIL message being turned on, reset
the system.
To reset the CHANGE ENGINE OIL message, see ªGM
Oil Life Systemº under
DIC Operation and Displays
on page 3-55for vehicles equipped with the DIC, or do
the following:
1. Turn the ignition key to RUN with the engine off.
2. Fully press and release the accelerator pedal three
times within ®ve seconds.
If the OIL LIFE RESET message ¯ashes for 10
seconds, the system is resetting.
3. Turn the key to LOCK.
If the CHANGE ENGINE OIL message comes back on
when you start your vehicle, the engine oil life system
has not reset. Repeat the procedure. If it still does
not reset, see your dealer for service.
What to Do with Used Oil
Used engine oil contains certain elements that may be
unhealthy for your skin and could even cause cancer.
Do not let used oil stay on your skin for very long. Clean
your skin and nails with soap and water, or a good
hand cleaner. Wash or properly dispose of clothing or
rags containing used engine oil. See the manufacturer's
warnings about the use and disposal of oil products.
Used oil can be a threat to the environment. If you
change your own oil, be sure to drain all the oil from the
®lter before disposal. Never dispose of oil by putting it in
the trash, pouring it on the ground, into sewers, or into
streams or bodies of water. Instead, recycle it by taking it
to a place that collects used oil. If you have a problem
properly disposing of your used oil, ask your dealer, a
service station or a local recycling center for help.
5-22
Page 423 of 588
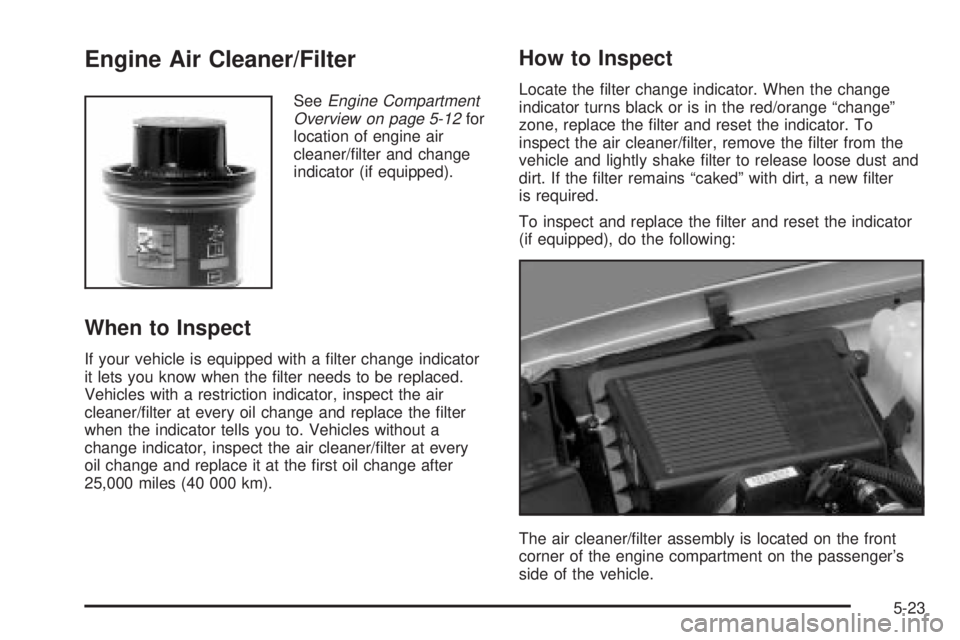
Engine Air Cleaner/Filter
SeeEngine Compartment
Overview on page 5-12for
location of engine air
cleaner/®lter and change
indicator (if equipped).
When to Inspect
If your vehicle is equipped with a ®lter change indicator
it lets you know when the ®lter needs to be replaced.
Vehicles with a restriction indicator, inspect the air
cleaner/®lter at every oil change and replace the ®lter
when the indicator tells you to. Vehicles without a
change indicator, inspect the air cleaner/®lter at every
oil change and replace it at the ®rst oil change after
25,000 miles (40 000 km).
How to Inspect
Locate the ®lter change indicator. When the change
indicator turns black or is in the red/orange ªchangeº
zone, replace the ®lter and reset the indicator. To
inspect the air cleaner/®lter, remove the ®lter from the
vehicle and lightly shake ®lter to release loose dust and
dirt. If the ®lter remains ªcakedº with dirt, a new ®lter
is required.
To inspect and replace the ®lter and reset the indicator
(if equipped), do the following:
The air cleaner/®lter assembly is located on the front
corner of the engine compartment on the passenger's
side of the vehicle.
5-23