2004 GMC SIERRA radio controls
[x] Cancel search: radio controlsPage 255 of 588
Setting the Tone (Bass/Treble)
AUDIO:Push and release the AUDIO knob until BASS
or TREB appears on the display. Turn the knob to
increase or to decrease. The display will show the bass
or treble level. If a station is weak or noisy, you may
want to decrease the treble.
To adjust the bass and treble to the middle position,
push and hold the AUDIO knob. The radio will produce
one beep and adjust the display level to the middle
position.
To adjust all tone and speaker controls to the middle
position, push and hold the AUDIO knob when no tone
or speaker control is displayed. ALL will appear on
the display, you will hear a beep and the display level
will be adjusted to the middle position.
AUTO EQ (Automatic Equalization):Press this button
to select customized equalization settings designed
for country/western, jazz, talk, pop, rock, and classical.
Selecting CUSTOM or changing bass or treble,
returns the EQ to the manual bass and treble settings.
The radio will save separate AUTO EQ settings for
each preset and source.
If you radio is equipped with the Bose audio system,
your equalization settings are either CUSTOM or TALK.
Adjusting the Speakers (Balance/Fade)
AUDIO:To adjust the balance between the right
and the left speakers, push and release the AUDIO
knob until BAL appears on the display. Turn the knob to
move the sound toward the right or the left speakers.
To adjust the fade between the front and the rear
speakers, push and release the AUDIO knob until FADE
appears on the display. Turn the knob to move the
sound toward the front or the rear speakers.
To adjust the balance and fade to the middle position,
push the AUDIO knob then push it again and hold it until
the radio produces one beep. The balance and fade
will be adjusted to the middle position and the display
will show the speaker balance.
To adjust all tone and speaker controls to the middle
position, push and hold the AUDIO knob when no tone
or speaker control is displayed. ALL will appear on
the display, you will hear a beep and the display level
will be adjusted to the middle position.
3-91
Page 260 of 588
XMŸ Radio Messages (cont'd)
Radio Display
MessageCondition Action Required
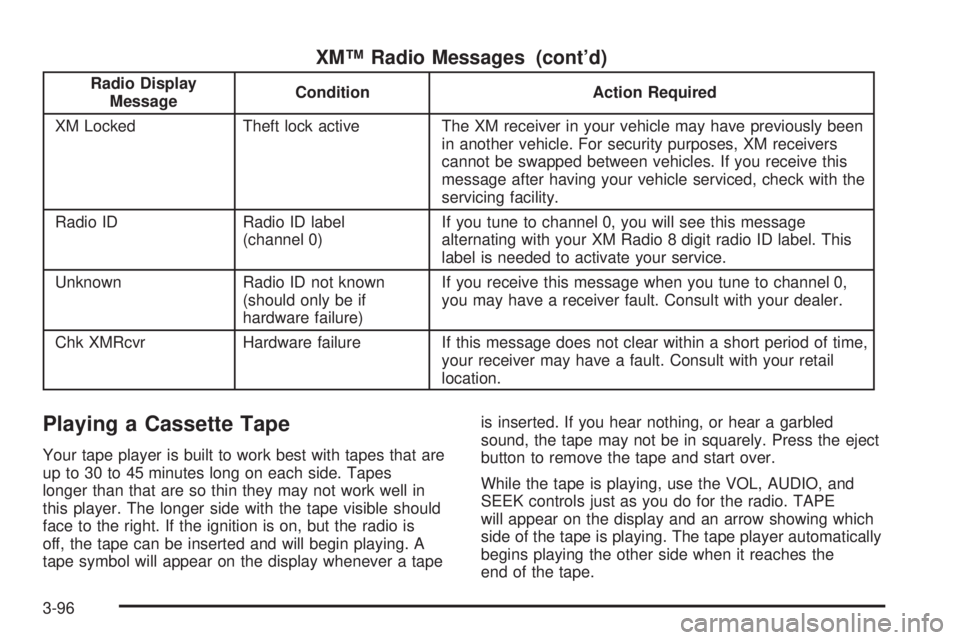
XM Locked Theft lock active The XM receiver in your vehicle may have previously been
in another vehicle. For security purposes, XM receivers
cannot be swapped between vehicles. If you receive this
message after having your vehicle serviced, check with the
servicing facility.
Radio ID Radio ID label
(channel 0)If you tune to channel 0, you will see this message
alternating with your XM Radio 8 digit radio ID label. This
label is needed to activate your service.
Unknown Radio ID not known
(should only be if
hardware failure)If you receive this message when you tune to channel 0,
you may have a receiver fault. Consult with your dealer.
Chk XMRcvr Hardware failure If this message does not clear within a short period of time,
your receiver may have a fault. Consult with your retail
location.
Playing a Cassette Tape
Your tape player is built to work best with tapes that are
up to 30 to 45 minutes long on each side. Tapes
longer than that are so thin they may not work well in
this player. The longer side with the tape visible should
face to the right. If the ignition is on, but the radio is
off, the tape can be inserted and will begin playing. A
tape symbol will appear on the display whenever a tapeis inserted. If you hear nothing, or hear a garbled
sound, the tape may not be in squarely. Press the eject
button to remove the tape and start over.
While the tape is playing, use the VOL, AUDIO, and
SEEK controls just as you do for the radio. TAPE
will appear on the display and an arrow showing which
side of the tape is playing. The tape player automatically
begins playing the other side when it reaches the
end of the tape.
3-96
Page 268 of 588
sSCANt:Press and hold either SCAN arrow for
two seconds until SC appears on the display and
you hear a beep. The radio will go to a station, play for
a few seconds, then go on to the next station. Press
either SCAN arrow again to stop scanning.
To scan preset stations, press and hold either SCAN
arrow for more than four seconds. PRESET SCAN will
appear on the display and you will hear a double
beep. The radio will go to a preset station stored on
your pushbuttons, play for a few seconds, then go on to
the next preset station. Press either SCAN arrow
again to stop scanning presets.
The radio will scan only to stations that are in the
selected band and only to those with a strong signal.
Setting Preset Stations
The six numbered pushbuttons let you return to your
favorite stations. You can set up to 30 stations
(six FM1, six FM2, and six AM, six XM1 and six XM2
(48 contiguous US states, if equipped), by performing
the following steps:
1. Turn the radio on.
2. Press BAND to select FM1, FM2, AM, or XM1
or XM2.
3. Tune in the desired station.
4. Press AUTO EQ to select the equalization.5. Press and hold one of the six numbered
pushbuttons until you hear a beep. Whenever you
press that numbered pushbutton, the station
you set will return and the equalization that you
selected will be automatically stored for that
pushbutton.
6. Repeat the steps for each pushbutton.
Setting the Tone (Bass/Treble)
AUDIO:Push the AUDIO knob until BASS or TREB
appears on the display. Turn the knob to increase or to
decrease. If a station is weak or noisy, you may
want to decrease the treble.
To adjust bass or treble to the middle position, select
BASS or TREB and push and hold the AUDIO knob. The
radio will produce one beep and adjust the display
level to zero.
To adjust all tone and speaker controls to the middle
position, push and hold the AUDIO knob when no tone
or speaker control is displayed. CENTERED will
appear on the display and you will hear a beep.
AUTO EQ (Automatic Equalization):Press this button
to select customized equalization settings designed
for country/western, jazz, talk, pop, rock, and classical.
Selecting CUSTOM or changing bass or treble,
returns the EQ to the manual bass and treble settings.
3-104
Page 269 of 588
The radio will save separate AUTO EQ settings for each
preset and source.
If you radio is equipped with the Bose audio system,
your equalization settings are either CUSTOM or TALK.
Adjusting the Speakers (Balance/Fade)
AUDIO:To adjust the balance between the right
and the left speakers, push the AUDIO knob until BAL
appears on the display. Turn the knob to move the
sound toward the right or the left speakers.
To adjust the fade between the front and rear speakers,
push and hold the AUDIO knob until FAD appears on
the display. Turn the knob to move the sound toward the
front or the rear speakers.
To adjust the balance and the fade to the middle
position, select balance or fade and push and hold the
AUDIO knob. The radio will produce one beep and
adjust the display level to the middle position.
To adjust all tone and speaker controls to the middle
position, push and hold the AUDIO knob when no tone
or speaker controls are displayed. CENTERED will
appear on the display and you will hear a beep.
Finding a Program Type (PTY) Station
(RDS and XMŸ)
To select and ®nd a desired PTY perform the following:
1. Press the P-TYPE button to activate program
type select mode. P-TYPE and the last selected
PTY will appear on the display.
2. Turn the P-TYPE knob to select a PTY.
3. Once the desired PTY is displayed, press either
SEEK arrow to select the PTY and take you to
the PTY's ®rst station.
4. If you want to go to another station within that PTY
and the PTY is displayed, press either SEEK arrow
once. If the PTY is not displayed, press either
SEEK arrow twice to display the PTY and then to
go to another station.
5. Press the P-TYPE button to exit program type
select mode.
If PTY times out and is no longer on the display, go
back to Step 1.
If both P-TYPE and TRAF are on, the radio will search
for stations with the selected PTY and traffic
announcements.
3-105
Page 290 of 588
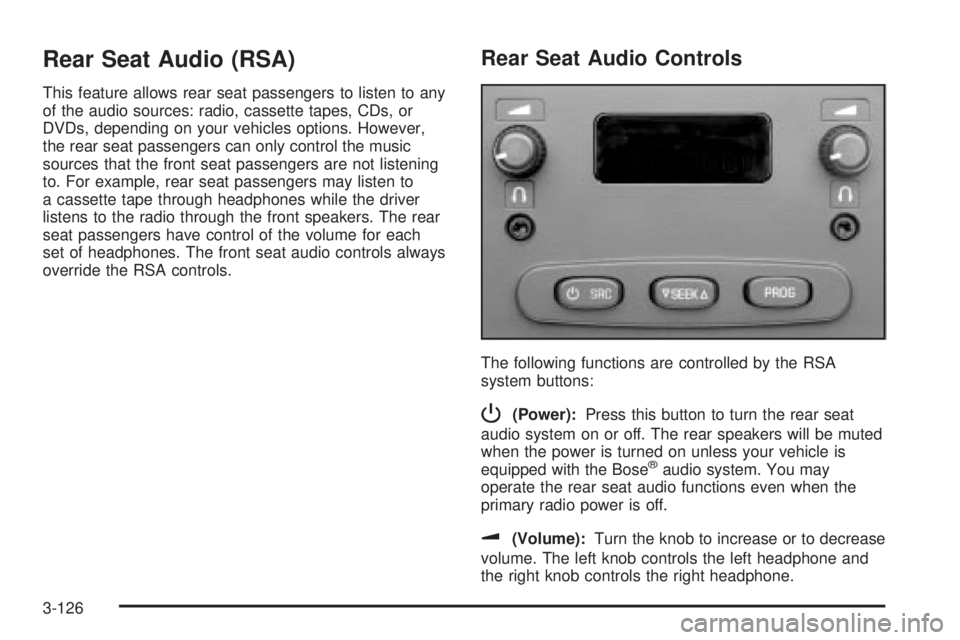
Rear Seat Audio (RSA)
This feature allows rear seat passengers to listen to any
of the audio sources: radio, cassette tapes, CDs, or
DVDs, depending on your vehicles options. However,
the rear seat passengers can only control the music
sources that the front seat passengers are not listening
to. For example, rear seat passengers may listen to
a cassette tape through headphones while the driver
listens to the radio through the front speakers. The rear
seat passengers have control of the volume for each
set of headphones. The front seat audio controls always
override the RSA controls.
Rear Seat Audio Controls
The following functions are controlled by the RSA
system buttons:
P(Power):Press this button to turn the rear seat
audio system on or off. The rear speakers will be muted
when the power is turned on unless your vehicle is
equipped with the Bose
žaudio system. You may
operate the rear seat audio functions even when the
primary radio power is off.
u(Volume):Turn the knob to increase or to decrease
volume. The left knob controls the left headphone and
the right knob controls the right headphone.
3-126
Page 292 of 588
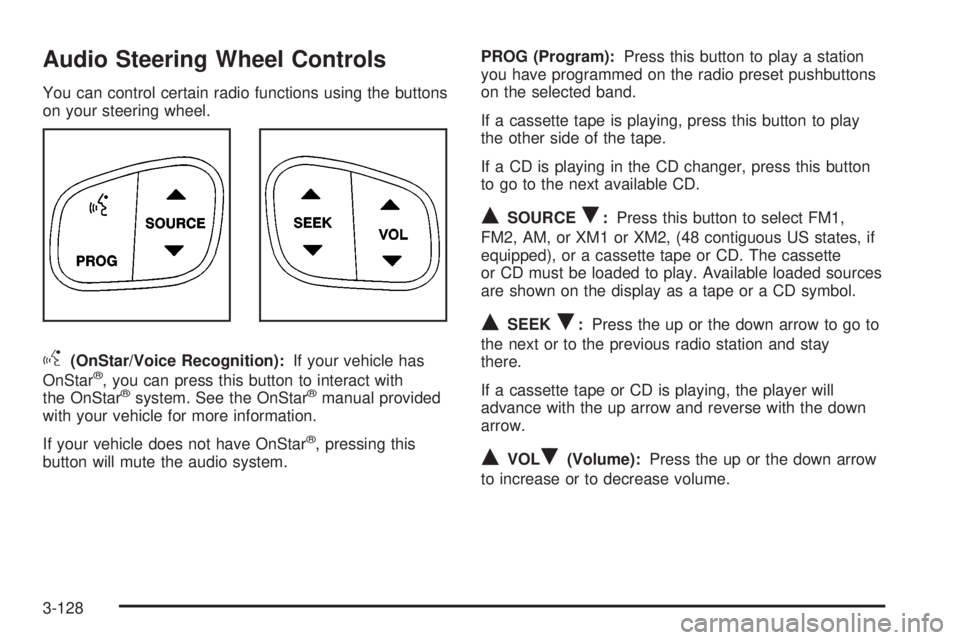
Audio Steering Wheel Controls
You can control certain radio functions using the buttons
on your steering wheel.
g(OnStar/Voice Recognition):If your vehicle has
OnStarž, you can press this button to interact with
the OnStaržsystem. See the OnStaržmanual provided
with your vehicle for more information.
If your vehicle does not have OnStar
ž, pressing this
button will mute the audio system.PROG (Program):Press this button to play a station
you have programmed on the radio preset pushbuttons
on the selected band.
If a cassette tape is playing, press this button to play
the other side of the tape.
If a CD is playing in the CD changer, press this button
to go to the next available CD.
QSOURCER:Press this button to select FM1,
FM2, AM, or XM1 or XM2, (48 contiguous US states, if
equipped), or a cassette tape or CD. The cassette
or CD must be loaded to play. Available loaded sources
are shown on the display as a tape or a CD symbol.
QSEEKR:Press the up or the down arrow to go to
the next or to the previous radio station and stay
there.
If a cassette tape or CD is playing, the player will
advance with the up arrow and reverse with the down
arrow.
QVOLR(Volume):Press the up or the down arrow
to increase or to decrease volume.
3-128
Page 571 of 588
A
Accessory Power Outlets.................................3-20
Adding a Snow Plow or Similar Equipment.........4-64
Adding Washer Fluid.......................................5-46
Additional Program Information........................... 7-9
Additives, Fuel................................................. 5-6
Add-On Electrical Equipment...........................5-125
Add-On Equipment..........................................4-63
Adjusting the Speakers
(Balance/Fade)..................3-76, 3-80, 3-91, 3-105
After Off-Road Driving.....................................4-37
Air Bag
Off Light.....................................................3-37
Passenger Status Indicator...........................3-40
Readiness Light..........................................3-36
Air Bag Systems.............................................1-70
Adding Equipment to Your Air Bag-Equipped
Vehicle...................................................1-86
Air Bag Off Switch.......................................1-76
How Does an Air Bag Restrain?....................1-75
Passenger Sensing System...........................1-81
Servicing Your Air Bag-Equipped Vehicle.........1-86
What Makes an Air Bag In¯ate?....................1-74
What Will You See After an Air Bag In¯ates?......1-75
When Should an Air Bag In¯ate?...................1-73
Where Are the Air Bags?..............................1-72
Air Cleaner/Filter, Engine.................................5-23
Air Conditioning..............................................3-30
Airbag Sensing and Diagnostic Module (SDM)....7-10All Overseas Locations...................................... 7-5
AM .............................................................3-129
AM-FM Radio.................................................3-74
Antenna, Fixed Mast......................................3-131
Antenna, XMŸ Satellite Radio Antenna
System.....................................................3-131
Anti-lock Brake System..................................... 4-7
Anti-Lock Brake, System Warning Light..............3-45
Appearance Care..........................................5-116
Care of Safety Belts...................................5-119
Chemical Paint Spotting..............................5-123
Cleaning the Inside of Your Vehicle..............5-117
Cleaning the Outside of Your Vehicle............5-120
Finish Damage..........................................5-122
Sheet Metal Damage..................................5-122
Underbody Maintenance.............................5-123
Vehicle Care/Appearance Materials...............5-123
Weatherstrips............................................5-119
Approaching a Hill..........................................4-27
Ashtrays........................................................3-21
Audio Output................................................3-123
Audio System(s).............................................3-73
AM-FM Radio.............................................3-74
Audio Steering Wheel Controls....................3-128
Care of Your Cassette Tape Player...............3-129
Care of Your CD and DVD Player................3-131
Care of Your CDs and DVDs.......................3-130
Chime Level Adjustment.............................3-131
Fixed Mast Antenna...................................3-131
Radio with Cassette and CD.........................3-88
1
Page 582 of 588
PASSENGER DOOR AJAR..............................3-69
Passenger Sensing System..............................1-81
Passing.................................................4-17, 4-92
Passlock
ž......................................................2-21
Payload.........................................................4-63
Personalization Button.....................................3-59
Pickup Conversion to Chassis Cab....................4-70
Plan Ahead When Possible................................ 7-8
Playing a Cassette Tape..................................3-96
Playing a CD...............................3-85, 3-99, 3-110
Playing a Speci®c Loaded CD.........................3-111
Playing the Radio.................3-74, 3-78, 3-89, 3-103
Power
Accessory Outlets........................................3-20
Door Locks.................................................. 2-9
Electrical System.......................................5-126
Lumbar Controls........................................... 1-5
Seat............................................................ 1-4
Steering Fluid.............................................5-45
Windows....................................................2-17
Power Steering...............................................4-12
Power Winches.............................................4-101
Programmable Automatic Door Locks.................2-10
Q
QUADRASTEERŸ..........................................4-14
Questions and Answers About Safety Belts.........1-15
R
Radio Data System (RDS)..............3-77, 3-88, 3-102
Radio Messages.............................3-76, 3-83, 3-94
Radios..........................................................3-73
AM-FM Radio.............................................3-74
Care of Your Cassette Tape Player...............3-129
Care of Your CD and DVD Player................3-131
Care of Your CDs and DVDs.......................3-130
Radio with Cassette and CD.........................3-88
Radio with CD............................................3-77
Radio with Six-Disc CD..............................3-102
Rear Seat Audio........................................3-126
Setting the Time for Radios with Radio Data
Systems (RDS)........................................3-74
Setting the Time for Radios without Radio
Data Systems (RDS)................................3-74
Theft-Deterrent..........................................3-127
Understanding Reception............................3-129
RANGE SHIFT INHIBITED (Allison
Transmission
žOnly).....................................3-69
RDS Messages.............................3-82, 3-93, 3-107
Rear Axle......................................................5-59
Locking......................................................4-12
Rear Door Security Locks................................2-12
Rear Doors....................................................2-13
Rear Safety Belt Comfort Guides......................1-30
Rear Seat Audio Controls...............................3-126
Rear Seat Audio (RSA)..................................3-126
12