2004 GMC SIERRA radio controls
[x] Cancel search: radio controlsPage 163 of 588
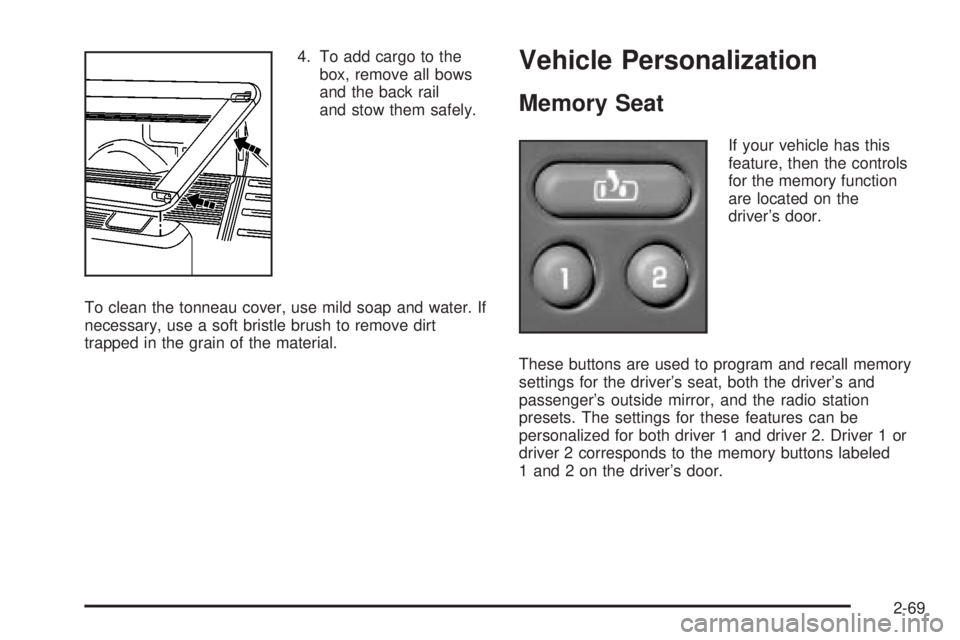
4. To add cargo to the
box, remove all bows
and the back rail
and stow them safely.
To clean the tonneau cover, use mild soap and water. If
necessary, use a soft bristle brush to remove dirt
trapped in the grain of the material.Vehicle Personalization
Memory Seat
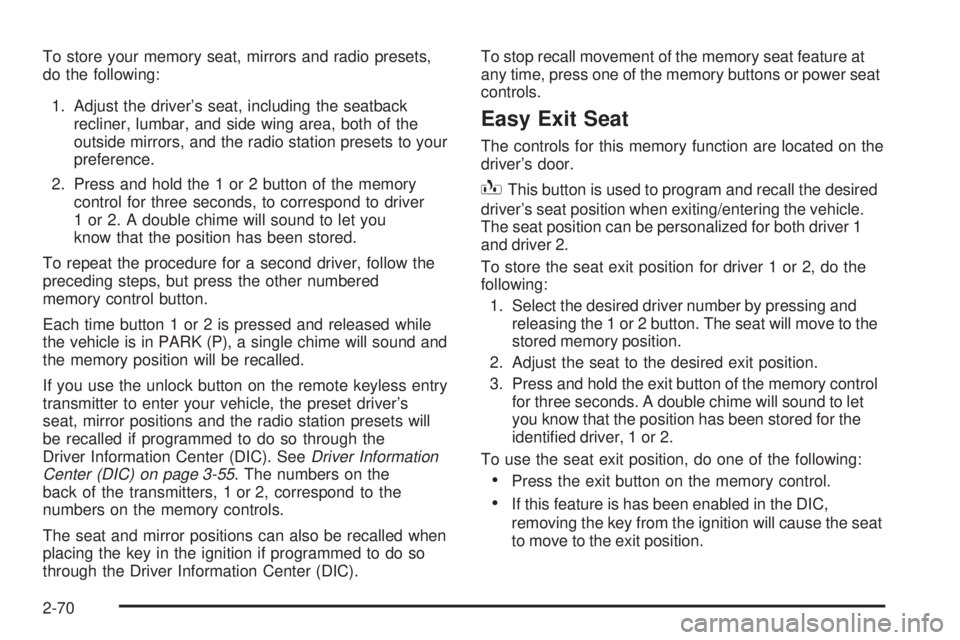
If your vehicle has this
feature, then the controls
for the memory function
are located on the
driver's door.
These buttons are used to program and recall memory
settings for the driver's seat, both the driver's and
passenger's outside mirror, and the radio station
presets. The settings for these features can be
personalized for both driver 1 and driver 2. Driver 1 or
driver 2 corresponds to the memory buttons labeled
1 and 2 on the driver's door.
2-69
Page 164 of 588
To store your memory seat, mirrors and radio presets,
do the following:
1. Adjust the driver's seat, including the seatback
recliner, lumbar, and side wing area, both of the
outside mirrors, and the radio station presets to your
preference.
2. Press and hold the 1 or 2 button of the memory
control for three seconds, to correspond to driver
1 or 2. A double chime will sound to let you
know that the position has been stored.
To repeat the procedure for a second driver, follow the
preceding steps, but press the other numbered
memory control button.
Each time button 1 or 2 is pressed and released while
the vehicle is in PARK (P), a single chime will sound and
the memory position will be recalled.
If you use the unlock button on the remote keyless entry
transmitter to enter your vehicle, the preset driver's
seat, mirror positions and the radio station presets will
be recalled if programmed to do so through the
Driver Information Center (DIC). See
Driver Information
Center (DIC) on page 3-55. The numbers on the
back of the transmitters, 1 or 2, correspond to the
numbers on the memory controls.
The seat and mirror positions can also be recalled when
placing the key in the ignition if programmed to do so
through the Driver Information Center (DIC).To stop recall movement of the memory seat feature at
any time, press one of the memory buttons or power seat
controls.
Easy Exit Seat
The controls for this memory function are located on the
driver's door.
BThis button is used to program and recall the desired
driver's seat position when exiting/entering the vehicle.
The seat position can be personalized for both driver 1
and driver 2.
To store the seat exit position for driver 1 or 2, do the
following:
1. Select the desired driver number by pressing and
releasing the 1 or 2 button. The seat will move to the
stored memory position.
2. Adjust the seat to the desired exit position.
3. Press and hold the exit button of the memory control
for three seconds. A double chime will sound to let
you know that the position has been stored for the
identi®ed driver, 1 or 2.
To use the seat exit position, do one of the following:
·Press the exit button on the memory control.
·If this feature is has been enabled in the DIC,
removing the key from the ignition will cause the seat
to move to the exit position.
2-70
Page 166 of 588
Audio System(s).............................................3-73
Setting the Time for Radios without Radio
Data Systems (RDS)..................................3-74
Setting the Time for Radios with Radio Data
Systems (RDS).........................................3-74
AM-FM Radio...............................................3-74
Radio with CD..............................................3-77
Radio with Cassette and CD..........................3-88
Radio with Six-Disc CD................................3-102
Rear Seat Entertainment System...................3-115
Rear Seat Audio (RSA)................................3-126
Theft-Deterrent Feature................................3-127Audio Steering Wheel Controls......................3-128
DVD Distortion............................................3-129
Radio Reception.........................................3-129
Care of Your Cassette Tape Player...............3-129
Care of Your CDs and DVDs........................3-130
Care of Your CD and DVD Player.................3-131
Cleaning the Video Screen...........................3-131
Fixed Mast Antenna....................................3-131
XMŸ Satellite Radio Antenna System
(48 Contiguous US States)........................3-131
Chime Level Adjustment...............................3-131
Section 3 Instrument Panel
3-2
Page 183 of 588

Interior Lamps
Instrument Panel Brightness Control
D
:This feature controls the brightness of the
instrument panel lights.
The thumbwheel for this feature is located next to the
headlamp control.
Turn the thumbwheel up, or down, to adjust the
instrument panel lights. Turn the thumbwheel up to
return the radio display to full brightness when the
headlamps or parking lamps are on. To turn on the
dome lamps, turn the thumbwheel all the way up.
Exit Lighting
With exit lighting, the interior lamps will come on when
you remove the key from the ignition. The lights will
not come on if the dome override button is pressed in.
Entry Lighting
Your vehicle is equipped with an illuminated entry
feature.
When a door is opened, the dome lamps will come on if
the dome override button is in the out position. If the
dome override button is pressed in, the lamps will
not come on.
Front Reading Lamps
If equipped, the reading
lamps are located on the
overhead console.
To turn the reading lamps on or off, press the button
located next to each lamp.
The lamps can be adjusted to point in the direction you
want them to go.
3-19
Page 237 of 588

TRANS HOT IDLE ENGINE
(Allison TransmissionžOnly)
If the transmission ¯uid in the vehicle gets hot, this
message will appear on the DIC, and you will hear a
chime. The chime will stop when the transmission ¯uid
temperature is less that 265ÉF (129ÉC). Driving with
the transmission ¯uid temperature high can cause
damage to the vehicle. Stop the vehicle and let it idle to
allow the transmission to cool. This message will
clear when the ¯uid temperature reaches a safe level.
Notice:If you drive your vehicle while the
transmission ¯uid is overheating and the
transmission temperature warning is displayed on
the instrument panel cluster and/or DIC, you
can damage the transmission. This could lead to
costly repairs that would not be covered by
your warranty. Do not drive your vehicle with
overheated transmission ¯uid or while transmission
temperature warning is displayed.
TURN SIGNAL ON
If a turn signal is left on for 3/4 of a mile (1.2 km), this
message will appear on the display and you will
hear a chime. Move the turn signal/multifunction lever to
the off position. Press the select button to acknowledge
the message and clear it from the DIC display.
Audio System(s)
Notice:Before you add any sound equipment to
your vehicle ± like a tape player, CB radio, mobile
telephone or two-way radio ± be sure you can
add what you want. If you can, it's very important to
do it properly. Added sound equipment may
interfere with the operation of your vehicle's engine,
radio or other systems, and even damage them.
Your vehicle's systems may interfere with the
operation of sound equipment that has been added
improperly.
So, before adding sound equipment, check with
your dealer and be sure to check federal rules
covering mobile radio and telephone units.
Your audio system has been designed to operate easily
and to give years of listening pleasure. You will get
the most enjoyment out of it if you acquaint yourself with
it ®rst. Figure out which radio you have in your vehicle,
®nd out what your audio system can do and how to
operate all of its controls to be sure you're getting the
most out of the advanced engineering that went into it.
Your vehicle may have a feature called Retained
Accessory Power (RAP). With RAP, you can play your
audio system even after the ignition is turned off.
See ªRetained Accessory Power (RAP)º under
Ignition
Positions on page 2-22.
3-73
Page 240 of 588
To adjust both tone controls and both speaker controls
to the middle position, end out of audio by waiting
for the display to change to the time display. Then press
and hold AUDIO for more than two seconds until you
hear a beep. CEN will appear on the display.
Adjusting the Speakers (Balance/Fade)
AUDIO:To adjust the balance between the right
and the left speakers, press and release AUDIO until
BAL appears on the display. Then press and hold the up
or the down arrow to move the sound toward the right
or the left speakers.
To adjust the fade between the front and the rear
speakers, press and release AUDIO until FAD appears
on the display. Then press and hold the up or the
down arrow to move the sound toward the front or the
rear speakers.
To adjust balance or fade to the middle position, select
BAL or FAD. Then press and hold AUDIO for more
than two seconds until you hear a beep. L and a zero
or F and a zero will appear on the display.To adjust both tone controls and both speaker controls
to the middle position, end out of audio by waiting
for the display to change to the time display. Then press
and hold AUDIO for more than two seconds until you
hear a beep. CEN will appear on the display.
Fade may not be available if you have a regular cab
model.Radio Messages
CAL (Calibrated):Your audio system has been
calibrated for your vehicle from the factory. If CAL
appears on the display it means that your radio has not
been con®gured properly for your vehicle and must
be returned to the dealer for service.
LOC (Locked):This message is displayed when the
Theftlock
žsystem has locked up. Your vehicle must be
returned to the dealer for service.
3-76
Page 243 of 588
qSCANr:Press and hold either arrow for more
than two seconds. SCAN will appear on the display and
you will hear a beep. The radio will go to a station,
play for a few seconds, then go on to the next station.
Press either arrow again to stop scanning.
To scan preset stations, press and hold either arrow for
more than four seconds. PSCN will appear on the
display and you will hear two beeps. The radio will go to
the ®rst preset station, play for a few seconds, then
go on to the next preset station. Press either arrow again
or one of the pushbuttons to stop scanning.
The radio will scan only to stations that are in the
selected band and only to those with a strong signal.
Setting Preset Stations
The six numbered pushbuttons let you return to your
favorite stations. You can set up to 30 stations
(six FM1, six FM2, and six AM, six XM1 and six XM2
(48 contiguous US states, if equipped), by performing
the following steps:
1. Turn the radio on.
2. Press BAND to select FM1, FM2, AM, or XM1
or XM2.
3. Tune in the desired station.
4. Press AUTO EQ to select the equalization.5. Press and hold one of the six numbered
pushbuttons. The radio will produce one beep.
Whenever you press that numbered pushbutton, the
station you set will return and the equalization
that you selected will be automatically stored for
that pushbutton.
6. Repeat the steps for each pushbutton.
Setting the Tone (Bass/Treble)
AUDIO:Push and release the AUDIO knob until BASS
or TREB appears on the display. Turn the knob to
increase or to decrease. The display will show the bass
or treble level. If a station is weak or noisy, you may
want to decrease the treble.
To adjust the bass and treble to the middle position,
push and hold the AUDIO knob. The radio will produce
one beep and adjust the display level to the middle
position.
To adjust all tone and speaker controls to the middle
position, push and hold the AUDIO knob when no tone
or speaker control is displayed. ALL will appear on
the display, you will hear a beep and the display level
will be adjusted to the middle position.
3-79
Page 244 of 588
AUTO EQ (Automatic Equalization):Press this button
to select customized equalization settings designed
for country/western, jazz, talk, pop, rock, and classical.
Selecting CUSTOM or changing bass or treble,
returns the EQ to the manual bass and treble settings.
The radio will save separate AUTO EQ settings for
each preset and source.
If you radio is equipped with the Bose audio system,
your equalization settings are either CUSTOM or TALK.
Adjusting the Speakers (Balance/Fade)
AUDIO:To adjust the balance to the right and the
left speakers, push and release the AUDIO knob until
BAL appears on the display. Turn the knob to move the
sound toward the right or the left speakers.
To adjust the fade to the front and the rear speakers,
push and release the AUDIO knob until FADE appears
on the display. Turn the knob to move the sound
toward the front or the rear speakers.
To adjust the balance and fade to the middle position,
push the AUDIO knob then push it again and hold it until
the radio produces one beep. The balance and fade
will be adjusted to the middle position and the display
will show the speaker balance.To adjust all tone and speaker controls to the middle
position, push and hold the AUDIO knob when no tone
or speaker control is displayed. ALL will appear on
the display, you will hear a beep and the display level
will be adjusted to the middle position.
Finding a Program Type (PTY) Station
(RDS and XMŸ)
To select and ®nd a desired PTY perform the following:
1. Turn the P-TYPE knob to activate program type
select mode. TYPE and a PTY will appear on the
display.
2. Turn the P-TYPE knob to select a PTY.
3. Once the desired PTY is displayed, press the
SEEK TYPE button or one of the SEEK arrows
to take you to the PTY's ®rst station.
4. If you want to go to another station within that PTY
and the PTY is displayed, press the SEEK TYPE
button once. If the PTY is not displayed, press
the SEEK TYPE button twice to display the PTY and
then to go to another station.
5. Press the P-TYPE knob to exit program type
select mode.
If PTY times out and is no longer on the display, go
back to Step 1.
3-80