2004 GMC CANYON clock
[x] Cancel search: clockPage 11 of 420

Manual Lumbar
If your vehicle has this
feature, there will be a
knob located on the
outboard side of the
driver’s seat.
Turn the knob counterclockwise to increase lumbar
support and clockwise to decrease lumbar support.
Heated Seats
If your vehicle has this
feature, the controls are
located on the outboard
side of the front seats.
This feature will quickly heat the lower cushion and
lower back of the driver’s and front passenger’s seats
for added comfort.
Press the lower part of the switch to turn the heater on
at low heat. Press the upper part of the switch to
turn the heater on at high heat. Put the switch in the
center position to turn the heater off.
The ignition must be on for the heated seat feature to
work. The passenger’s safety belt must be engaged for
the heated seat feature to work on the passenger’s seat.
1-5
Page 89 of 420
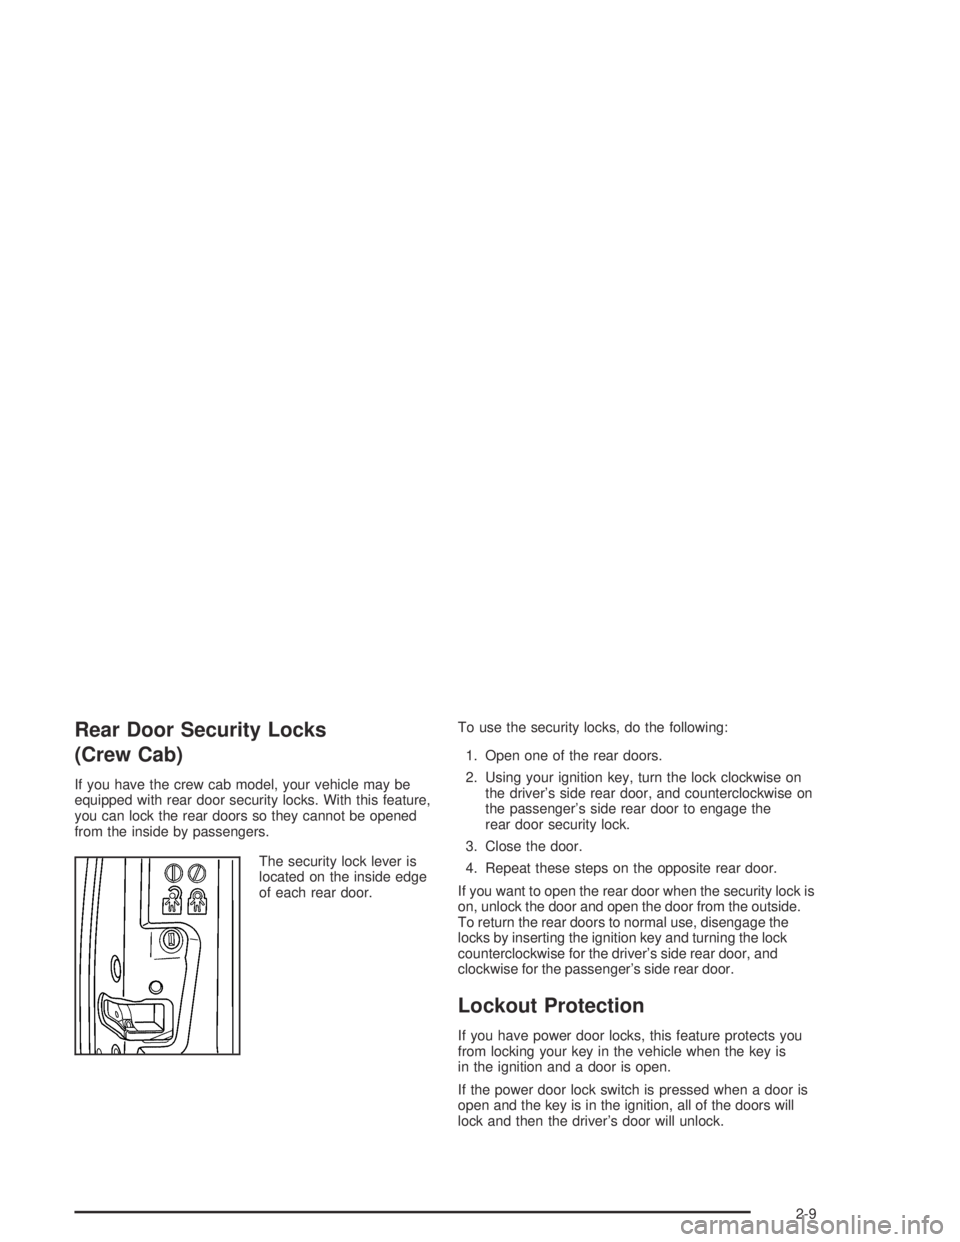
Rear Door Security Locks
(Crew Cab)
If you have the crew cab model, your vehicle may be
equipped with rear door security locks. With this feature,
you can lock the rear doors so they cannot be opened
from the inside by passengers.
The security lock lever is
located on the inside edge
of each rear door.To use the security locks, do the following:
1. Open one of the rear doors.
2. Using your ignition key, turn the lock clockwise on
the driver’s side rear door, and counterclockwise on
the passenger’s side rear door to engage the
rear door security lock.
3. Close the door.
4. Repeat these steps on the opposite rear door.
If you want to open the rear door when the security lock is
on, unlock the door and open the door from the outside.
To return the rear doors to normal use, disengage the
locks by inserting the ignition key and turning the lock
counterclockwise for the driver’s side rear door, and
clockwise for the passenger’s side rear door.
Lockout Protection
If you have power door locks, this feature protects you
from locking your key in the vehicle when the key is
in the ignition and a door is open.
If the power door lock switch is pressed when a door is
open and the key is in the ignition, all of the doors will
lock and then the driver’s door will unlock.
2-9
Page 90 of 420
Leaving Your Vehicle
If you are leaving the vehicle, take your keys, open your
door and set the locks from inside. Then get out and
close the door.
Rear Doors (Extended Cab)
If you have an extended cab, your vehicle has rear
doors for convenience in loading and unloading cargo.
To open a rear door, open the front door. Then, use
the handle located on the front edge of the rear
door panel to open it. You must close the rear door
before closing the front door.
Tailgate
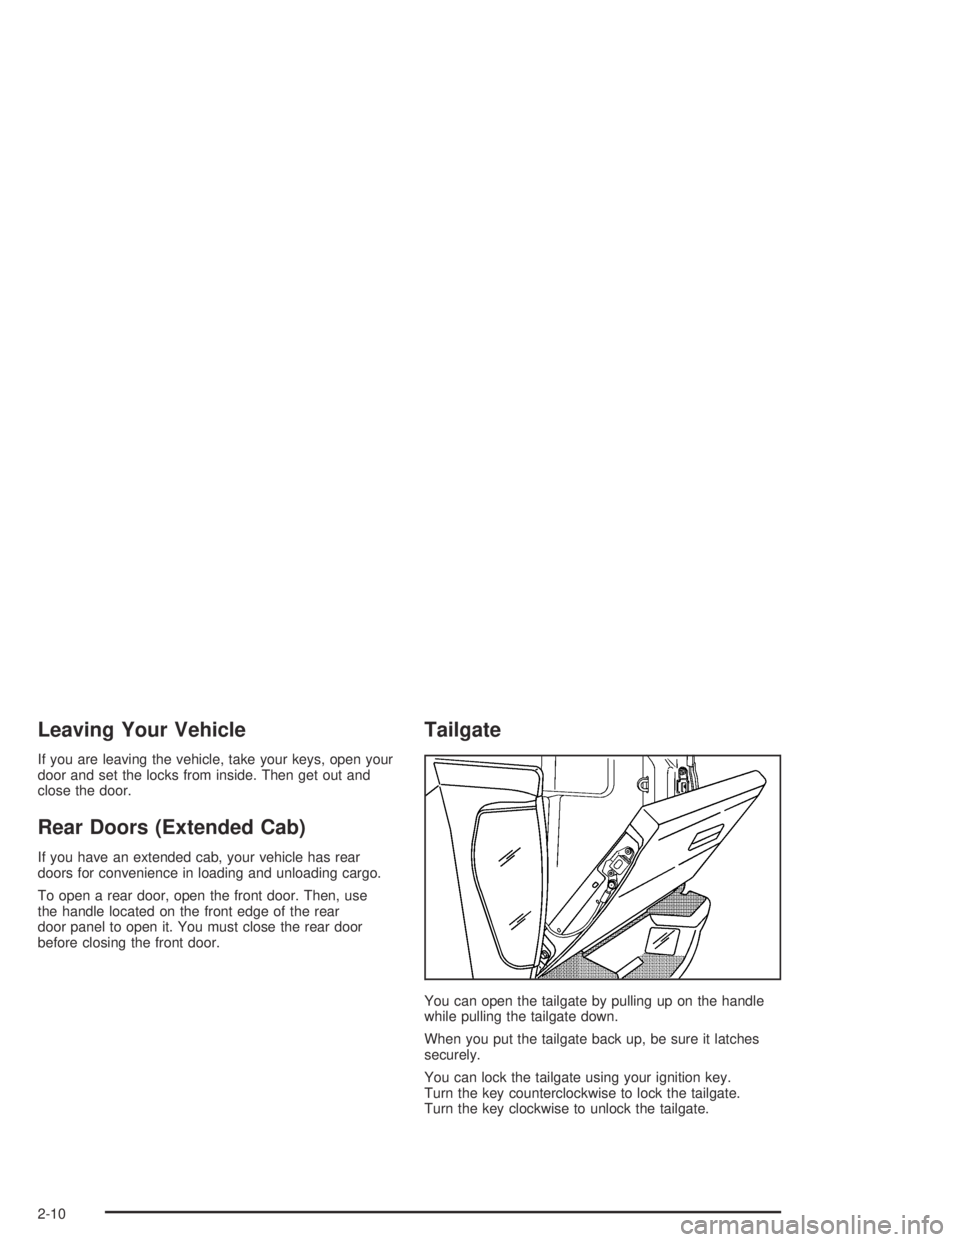
You can open the tailgate by pulling up on the handle
while pulling the tailgate down.
When you put the tailgate back up, be sure it latches
securely.
You can lock the tailgate using your ignition key.
Turn the key counterclockwise to lock the tailgate.
Turn the key clockwise to unlock the tailgate.
2-10
Page 142 of 420
Climate Controls
Climate Control System
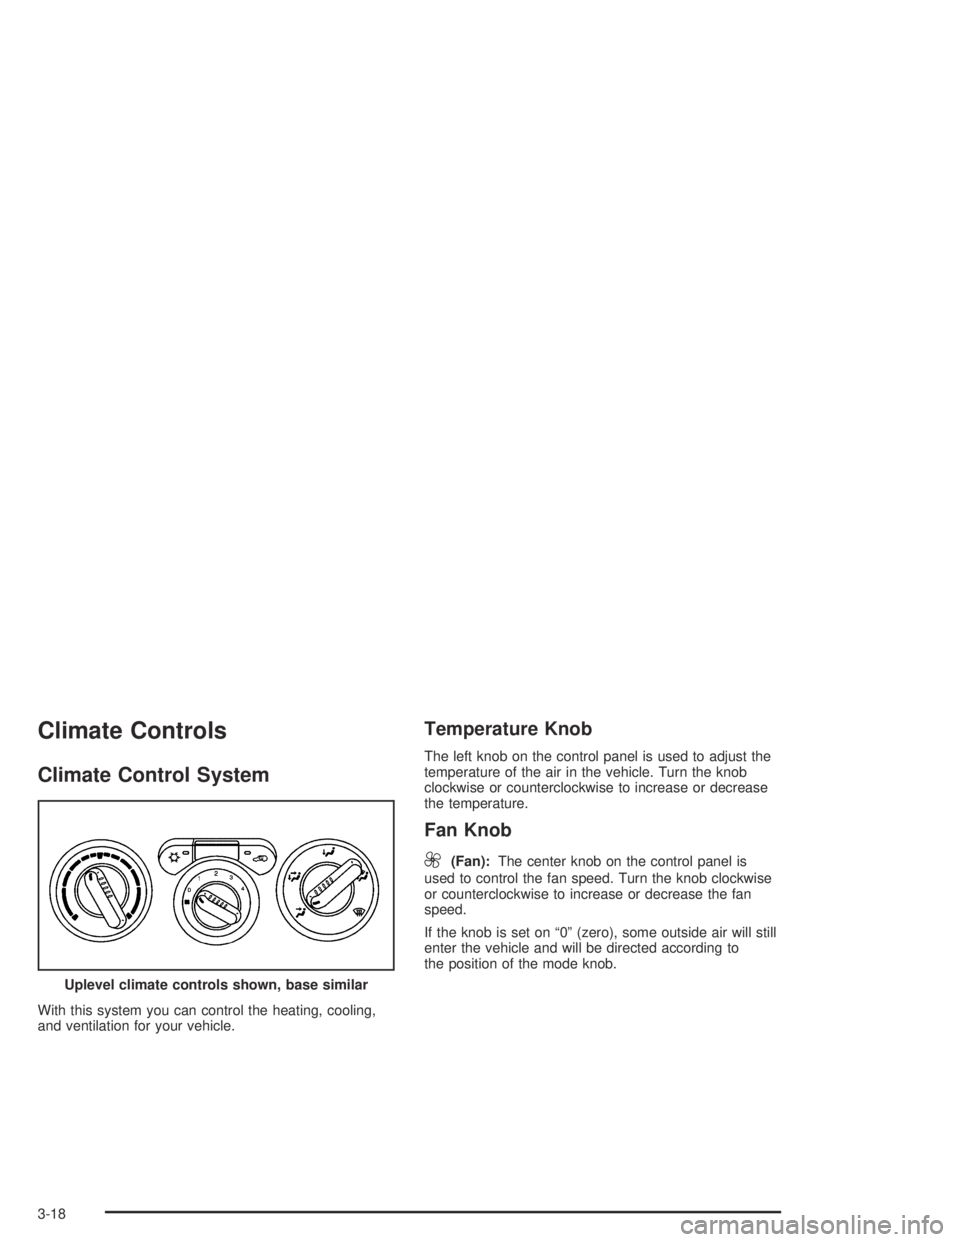
With this system you can control the heating, cooling,
and ventilation for your vehicle.
Temperature Knob
The left knob on the control panel is used to adjust the
temperature of the air in the vehicle. Turn the knob
clockwise or counterclockwise to increase or decrease
the temperature.
Fan Knob
9
(Fan):The center knob on the control panel is
used to control the fan speed. Turn the knob clockwise
or counterclockwise to increase or decrease the fan
speed.
If the knob is set on “0” (zero), some outside air will still
enter the vehicle and will be directed according to
the position of the mode knob.
Uplevel climate controls shown, base similar
3-18
Page 144 of 420
#(Air Conditioning):Your vehicle may have air
conditioning. Press this button to turn the air-conditioning
system on or off. An indicator light on the button will
come on to let you know the air conditioning is activated.
When the system is on, this setting cools and
dehumidi�es the air entering your vehicle.
The air conditioning will not function if the fan is
turned off.
You may notice a slight change in engine performance
when the air conditioning compressor shuts off and
turns on again. This is normal. The system is designed
to make adjustments to help with fuel economy while
still maintaining the selected temperature.
The air conditioning system removes moisture from the
air, so you may sometimes notice a small amount of
water dripping underneath your vehicle while idling
or after turning off the engine. This is normal.Defogging and Defrosting
Fog on the inside of windows is a result of high humidity
(moisture) condensing on the cool window glass.
This can be minimized if the climate control system is
used properly. There are two modes to clear fog or frost
from your windshield and side windows. Use the defog
mode to clear the windows of fog or moisture and warm
the passengers. Use the defrost mode to remove fog or
frost from the windshield more quickly. For best results,
clear all snow and ice from the windshield before
defrosting.
Turn the mode knob on the climate control panel
clockwise to select the defog or defrost modes.
/(Floor/Defog):This mode directs the air to the
windshield, the side window outlets, and to the
�oor outlets. When you select this mode, the system
runs the air conditioning compressor unless the outside
temperature is near freezing or below. Recirculation
is not available in this mode.
0(Defrost):This mode directs most of the air to the
windshield, and the side window outlets. When you
select this mode, the system runs the air conditioning
compressor unless the outside temperature is near, or
below freezing. Recirculation is not available in this
mode.
Do not drive the vehicle until all the windows are clear.
3-20
Page 167 of 420

Setting the Time for Radios without
Radio Data Systems (RDS)
Press and hold HR until the correct hour appears on the
display. Press and hold MIN until the correct minute
appears on the display. To display the time with
the ignition off, press RCL, HR, or MIN and the time will
appear on the display for a few seconds. There is an
initial two-second delay before the clock goes into
time-set mode.
Setting the Time for Radios with
Radio Data Systems (RDS)
Your radio may have a button marked with an H or
HR to represent hours and an M or MN to represent
minutes.
Press and hold the hour button until the correct hour
appears on the display. Press and hold the minute
button until the correct minute appears on the display.
The time may be set with the ignition on or off.
To synchronize the time with an FM station broadcasting
Radio Data System (RDS) information, press and hold
the hour and minute buttons at the same time until
RDS TIME appears on the display. To accept this time,
press and hold the hour and minute buttons, at the
same time, for another 2 seconds. If the time is
not available from the station, NO UPDAT will appear
on the display.
RDS time is broadcast once a minute. Once you have
tuned to an RDS broadcast station, it may take a
few minutes for your time to update.
3-43
Page 204 of 420
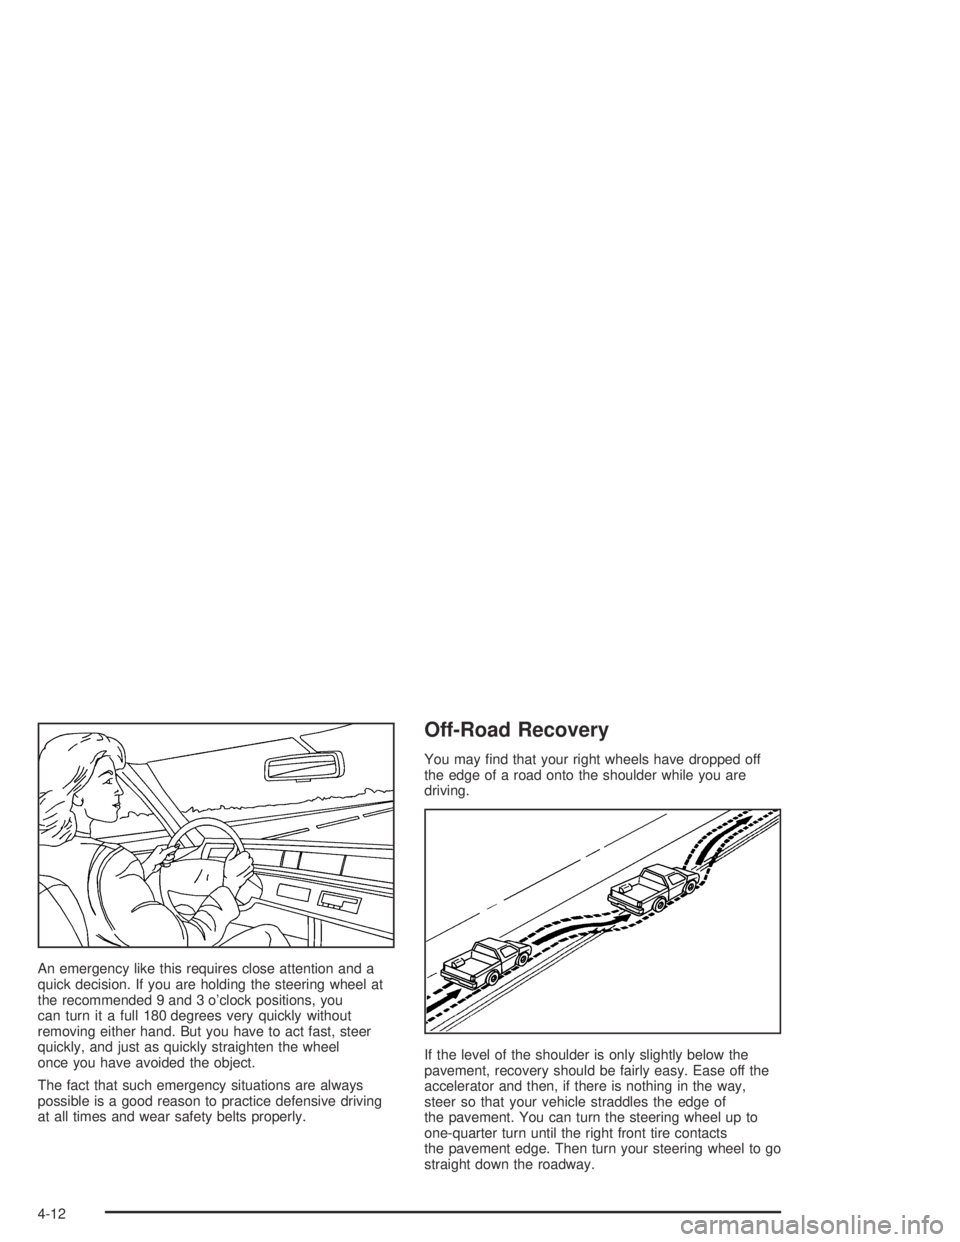
An emergency like this requires close attention and a
quick decision. If you are holding the steering wheel at
the recommended 9 and 3 o’clock positions, you
can turn it a full 180 degrees very quickly without
removing either hand. But you have to act fast, steer
quickly, and just as quickly straighten the wheel
once you have avoided the object.
The fact that such emergency situations are always
possible is a good reason to practice defensive driving
at all times and wear safety belts properly.
Off-Road Recovery
You may �nd that your right wheels have dropped off
the edge of a road onto the shoulder while you are
driving.
If the level of the shoulder is only slightly below the
pavement, recovery should be fairly easy. Ease off the
accelerator and then, if there is nothing in the way,
steer so that your vehicle straddles the edge of
the pavement. You can turn the steering wheel up to
one-quarter turn until the right front tire contacts
the pavement edge. Then turn your steering wheel to go
straight down the roadway.
4-12
Page 214 of 420

Q:What should I do if my vehicle stalls, or is about
to stall, and I can not make it up the hill?
A:If this happens, there are some things you should
do, and there are some things you must not do.
First, here is what youshoulddo:
Push the brake pedal to stop the vehicle and keep it
from rolling backwards. Also, apply the parking brake.
If your engine is still running, shift the transmission to
REVERSE (R), release the parking brake, and slowly
back down the hill in REVERSE (R).
If your engine has stopped running, you will need to
restart it. With the brake pedal pressed and the
parking brake still applied, shift the transmission to
PARK (P) (or shift to neutral if your vehicle has a
manual transmission) and restart the engine. Then,
shift to REVERSE (R), release the parking brake,
and slowly back down the hill as straight as possible
in REVERSE (R).
As you are backing down the hill, put your left hand
on the steering wheel at the 12 o’clock position.
This way, you will be able to tell if your wheels are
straight and maneuver as you back down. It is best
that you back down the hill with your wheels straight
rather than in the left or right direction. Turning the
wheel too far to the left or right will increase the
possibility of a rollover.Here are some things youmust notdo if you stall, or
are about to stall, when going up a hill.
Never attempt to prevent a stall by shifting into
NEUTRAL (N) (or pressing the clutch, if you have a
manual transmission) to “rev-up” the engine and
regain forward momentum. This will not work.
Your vehicle will roll backwards very quickly and
you could go out of control.
Instead, apply the regular brake to stop the vehicle.
Then apply the parking brake. Shift to REVERSE (R),
release the parking brake, and slowly back straight
down.
Never attempt to turn around if you are about to stall
when going up a hill. If the hill is steep enough to stall
your vehicle, it is steep enough to cause you to roll
over if you turn around. If you can not make it up the
hill, you must back straight down the hill.
Q:Suppose, after stalling, I try to back down the
hill and decide I just can not do it. What should
I do?
A:Set the parking brake, put your transmission
in PARK (P) (or the manual transmission in
FIRST (1)) and turn off the engine. Leave the
vehicle and go get some help. Exit on the uphill
side and stay clear of the path the vehicle would
take if it rolled downhill.
4-22