Page 43 of 280
Flash to pass
Pull toward you slightly to activate
and release to deactivate.
PANEL DIMMER CONTROL
Use to adjust the brightness of the
instrument panel and all applicable
switches in the vehicle during
headlamp and parklamp operation.
Move the control to the full upright
position, past detent, to turn on the
interior lamps.
Move the control to the full down
position, past detent, to prevent the
interior lights from illuminating
when the doors are opened.
VERTICAL AIM ADJUSTMENT
1. Park the vehicle on a level surface approximately 7.6 meters (25 feet)
from a vertical wall or screen directly in front of it.
²(1) Eight feet
²(2) Center height of lamp to ground
²(3) Twenty-five feet
Lights
43
Page 108 of 280

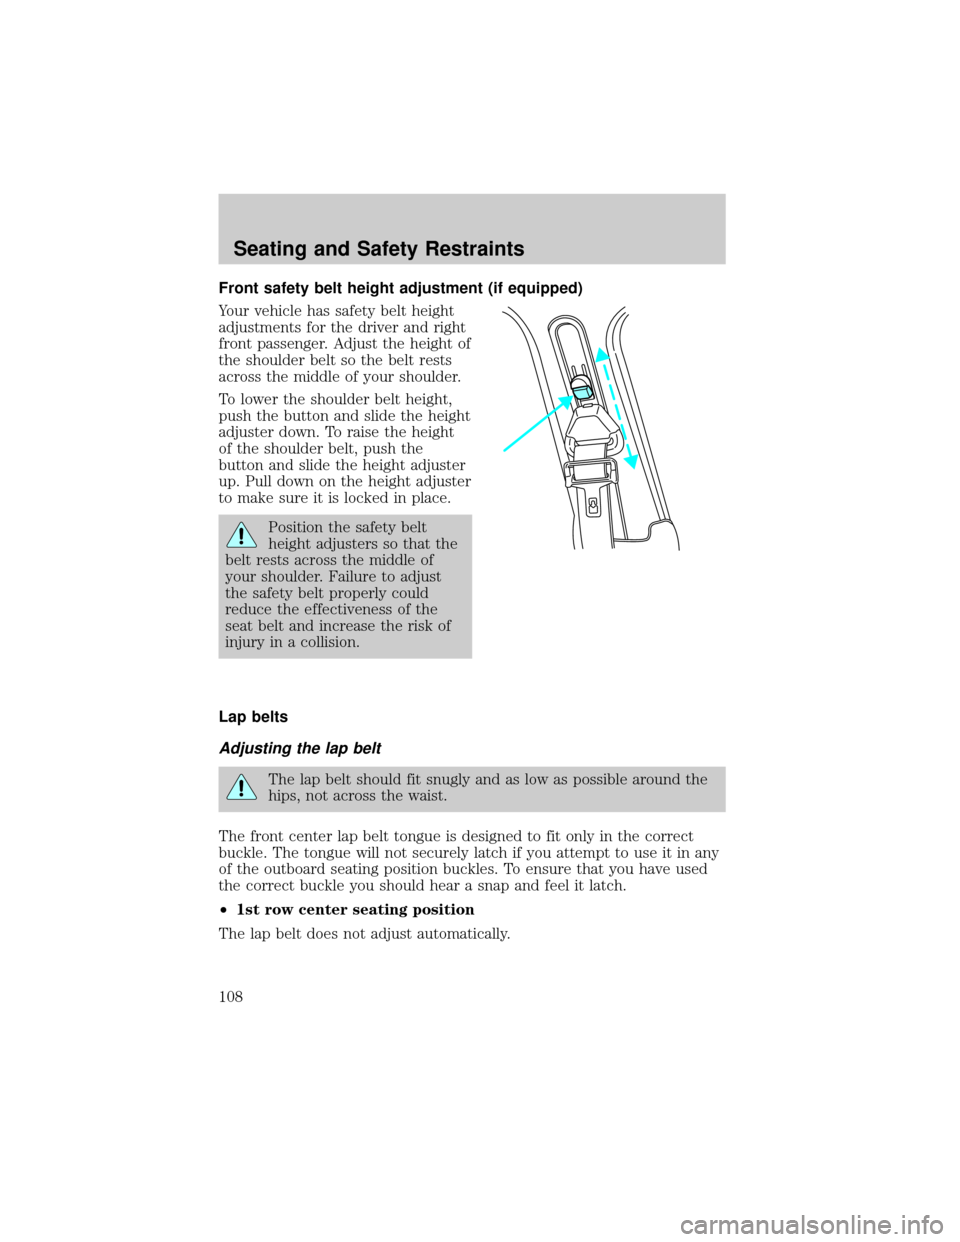
Front safety belt height adjustment (if equipped)
Your vehicle has safety belt height
adjustments for the driver and right
front passenger. Adjust the height of
the shoulder belt so the belt rests
across the middle of your shoulder.
To lower the shoulder belt height,
push the button and slide the height
adjuster down. To raise the height
of the shoulder belt, push the
button and slide the height adjuster
up. Pull down on the height adjuster
to make sure it is locked in place.
Position the safety belt
height adjusters so that the
belt rests across the middle of
your shoulder. Failure to adjust
the safety belt properly could
reduce the effectiveness of the
seat belt and increase the risk of
injury in a collision.
Lap belts
Adjusting the lap belt
The lap belt should fit snugly and as low as possible around the
hips, not across the waist.
The front center lap belt tongue is designed to fit only in the correct
buckle. The tongue will not securely latch if you attempt to use it in any
of the outboard seating position buckles. To ensure that you have used
the correct buckle you should hear a snap and feel it latch.
²1st row center seating position
The lap belt does not adjust automatically.
Seating and Safety Restraints
108
Page 180 of 280

2. Measure the height of a reference point on the front and rear bumpers
at the center of the vehicle.
3. Attach the trailer to the vehicle and adjust the hitch equalizers so that
the front bumper height is within 0±13 mm (0.5 in) of the reference
point. After proper adjustment, the rear bumper should be no higher
than in Step 2.
Note:Adjusting an equalizing hitch so the rear bumper of the vehicle is
higher than it was unloaded will defeat the function of the load
equalizing hitch and may cause unpredictable handling.
Safety chains
Always connect the trailer's safety chains to the frame or hook retainers
of the vehicle hitch. To connect the trailer's safety chains, cross the
chains under the trailer tongue and allow slack for turning corners.
If you use a rental trailer, follow the instructions that the rental agency
gives to you.
Do not attach safety chains to the bumper.
Trailer brakes
Electric brakes and manual, automatic or surge-type trailer brakes are safe
if installed properly and adjusted to the manufacturer's specifications. The
trailer brakes must meet local and Federal regulations.
Do not connect a trailer's hydraulic brake system directly to your
vehicle's brake system. Your vehicle may not have enough
braking power and your chances of having a collision greatly increase.
The braking system of the tow vehicle is rated for operation at the
GVWR not GCWR.
Trailer lamps
Trailer lamps are required on most towed vehicles. Make sure all running
lights, brake lights, turn signals and hazard lights are working. See your
dealer or trailer rental agency for proper instructions and equipment for
hooking up trailer lamps.
Using a step bumper (if equipped)
The rear bumper is equipped with an integral hitch and only requires a
ball with a 25.4 mm (one inch) shank diameter. The bumper has a 2,270
kg (5,000 lb.) trailer weight and 227 kg (500 lb.) tongue weight capacity.
Driving
180