2004 FORD F150 service
[x] Cancel search: servicePage 94 of 280

Your vehicle comes with two coded keys; additional coded keys may be
purchased from your dealer. The dealer can program your spare keys to
your vehicle or you can program the keys yourself. Refer to
Programming spare keysfor instructions on how to program the coded
key.
Note:The SecuriLockypassive anti-theft system is not compatible with
non-Ford aftermarket remote start systems. Use of these systems may
result in vehicle starting problems and a loss of security protection.
Note:Large metallic objects, electronic devices that are used to
purchase gasoline or similar items, or a second coded key on the same
key chain may cause vehicle starting issues. You need to prevent these
objects from touching the coded key while starting the engine. These
objects will not cause damage to the coded key, but may cause a
momentary issue if they are too close to the key when starting the
engine. If a problem occurs, turn the ignition off, remove all objects on
the key chain away from the coded key and restart the engine.
Theft indicator
The theft indicator is located on top of the instrument panel.
²When the ignition is in the OFF position, the indicator will flash once
every 2 seconds to indicate the SecuriLockysystem is functioning as
a theft deterrent.
²When the ignition is in the ON position, the indicator will glow for 3
seconds to indicate normal system functionality.
If a problem occurs with the SecuriLockysystem, the indicator will flash
rapidly or glow steadily when the ignition is in the ON position. If this
occurs, the vehicle should be taken to an authorized dealer for service.
Automatic arming
The vehicle is armed immediately
after switching the ignition to the 1
(OFF) position.
Automatic disarming
Switching the ignition to the 3 (ON) position with acoded keydisarms
the vehicle.
4
3
2
1
Locks and Security
94
Page 119 of 280
The National Highway Traffic Safety Administration (NHTSA)
recommends a minimum distance of at least 25 cm (10 inches)
between an occupant's chest and the driver air bag cover.
Never place your arms or feet over the air bag module as a
deploying air bag can result in serious fractures or other injuries.
To properly position yourself away from the air bag:
²Move your seat to the rear as far as you can while still reaching the
pedals comfortably.
²Recline the seat slightly one or two degrees from the upright position.
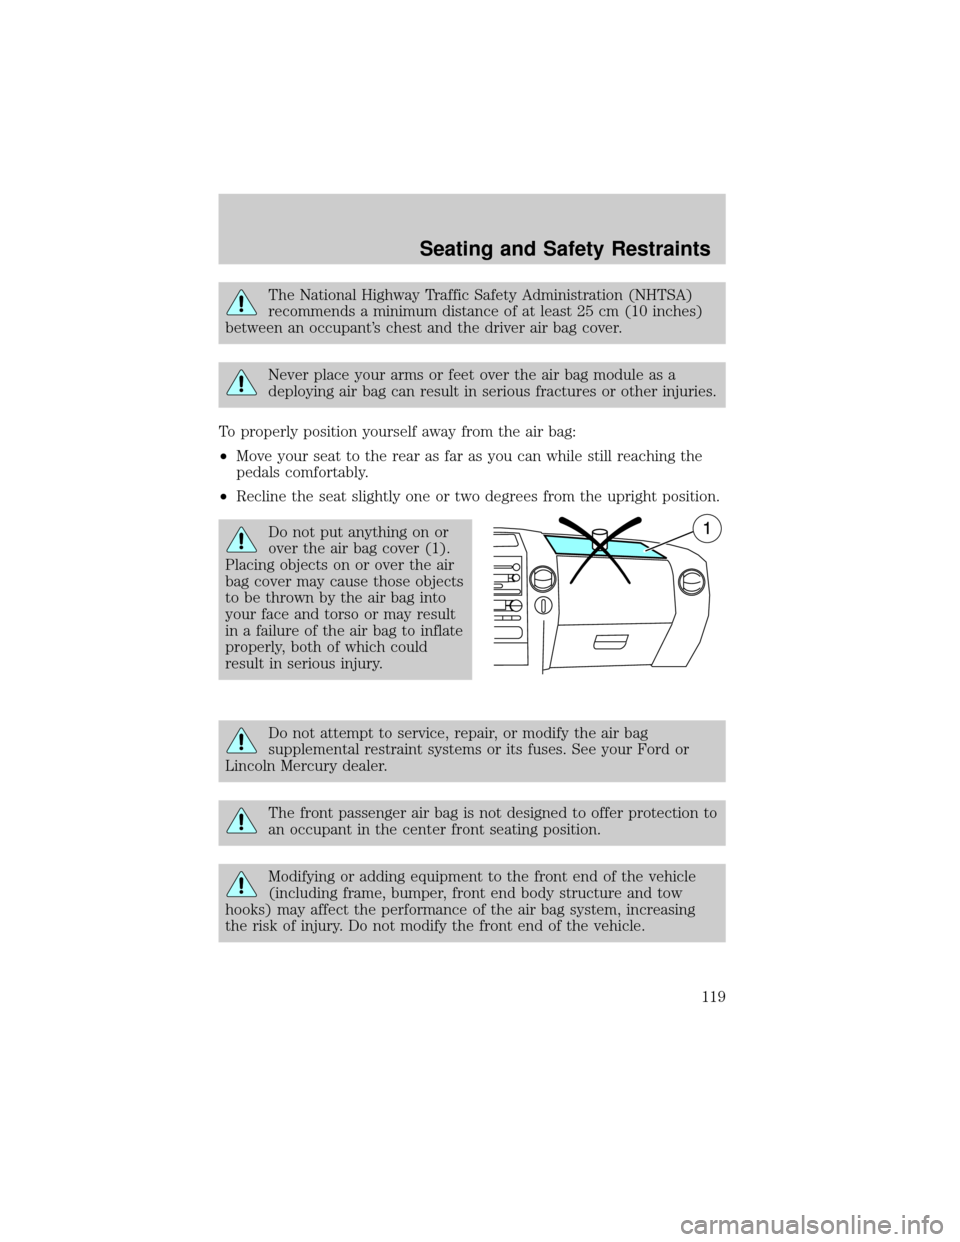
Do not put anything on or
over the air bag cover (1).
Placing objects on or over the air
bag cover may cause those objects
to be thrown by the air bag into
your face and torso or may result
in a failure of the air bag to inflate
properly, both of which could
result in serious injury.
Do not attempt to service, repair, or modify the air bag
supplemental restraint systems or its fuses. See your Ford or
Lincoln Mercury dealer.
The front passenger air bag is not designed to offer protection to
an occupant in the center front seating position.
Modifying or adding equipment to the front end of the vehicle
(including frame, bumper, front end body structure and tow
hooks) may affect the performance of the air bag system, increasing
the risk of injury. Do not modify the front end of the vehicle.
Seating and Safety Restraints
119
Page 122 of 280

If the air bag has deployed,the air bag will not function
again and must be replaced immediately.If the air bag is not
replaced, the unrepaired area will increase the risk of injury in a
collision.
The SRS consists of:
²driver and passenger air bag modules (which include the inflators,
covers and air bags),
²Occupation Classification Sensor (OCS)
²one or more impact and safing sensors, passenger air bag On/Off
switch (if equipped) and diagnostic monitor (RCM)
²a readiness light and tone,
²and the electrical wiring which connects the components.
The RCM (restraints control module) monitors its own internal circuits
and the supplemental air bag electrical system wiring (including the
passenger air bag On/Off switch, the impact sensors, the system wiring,
the air bag system readiness light, the air bag back up power and the air
bag ignitors).
Determining if the system is operational
The SRS uses readiness lights in the instrument cluster and the
passenger air bag on/off switch or a tone to indicate the condition of the
system. Refer to theAir bag readinesssection in theInstrument
clusterchapter orPassenger air bag on/off switchsection in this
chapter. Routine maintenance of the air bag is not required.
A difficulty with the system is indicated by one or more of the following:
²The readiness lights will either
flash or stay lit.
²The readiness lights will not
illuminate immediately after
ignition is turned on.
²A series of five beeps will be heard. The tone pattern will repeat
periodically until the problem and/or light are repaired.
If any of these things happen, even intermittently, have the SRS serviced
at your dealership or by a qualified technician immediately. Unless
serviced, the system may not function properly in the event of a
collision.
Seating and Safety Restraints
122
Page 124 of 280
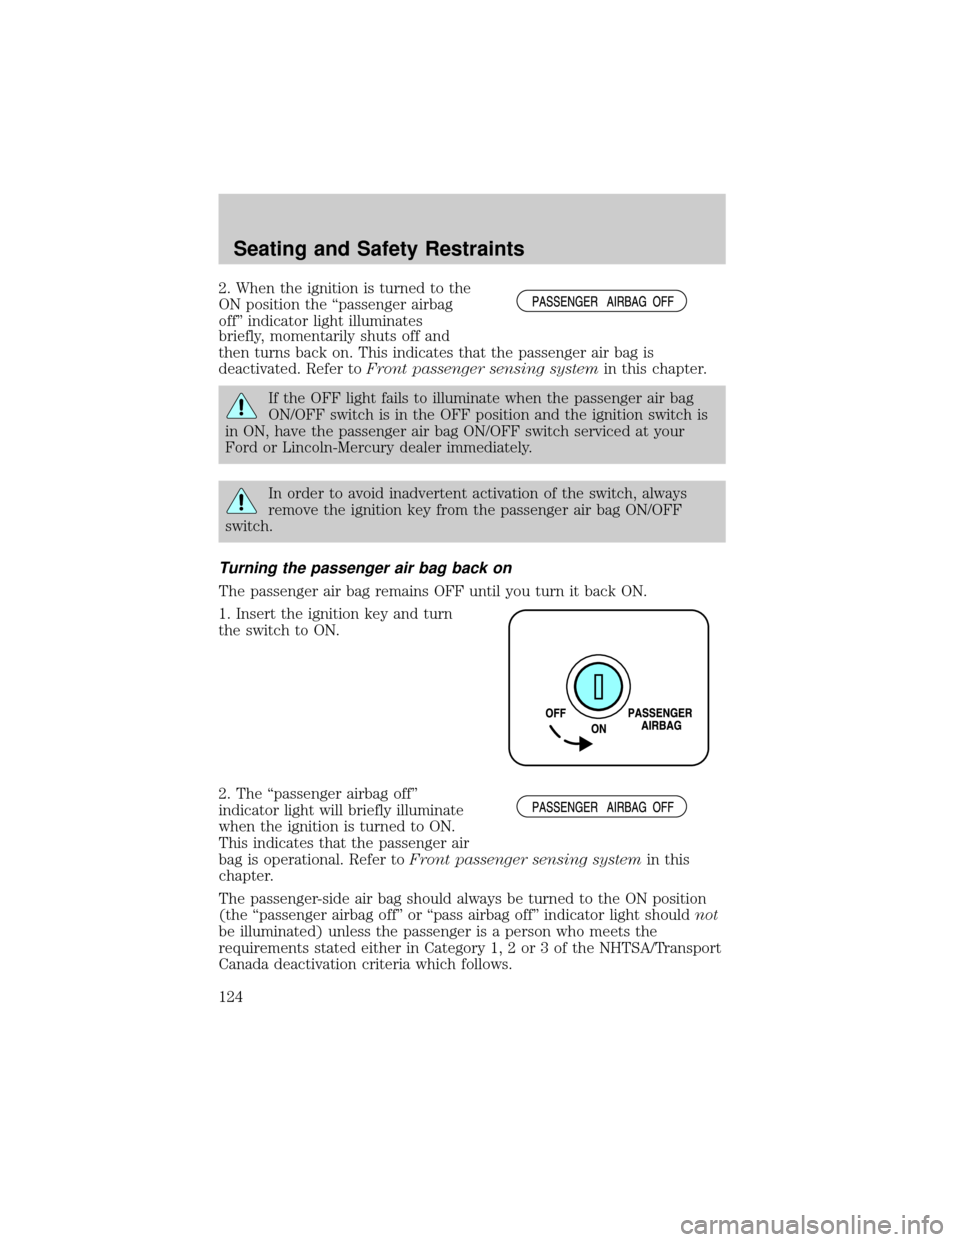
2. When the ignition is turned to the
ON position the ªpassenger airbag
offº indicator light illuminates
briefly, momentarily shuts off and
then turns back on. This indicates that the passenger air bag is
deactivated. Refer toFront passenger sensing systemin this chapter.
If the OFF light fails to illuminate when the passenger air bag
ON/OFF switch is in the OFF position and the ignition switch is
in ON, have the passenger air bag ON/OFF switch serviced at your
Ford or Lincoln-Mercury dealer immediately.
In order to avoid inadvertent activation of the switch, always
remove the ignition key from the passenger air bag ON/OFF
switch.
Turning the passenger air bag back on
The passenger air bag remains OFF until you turn it back ON.
1. Insert the ignition key and turn
the switch to ON.
2. The ªpassenger airbag offº
indicator light will briefly illuminate
when the ignition is turned to ON.
This indicates that the passenger air
bag is operational. Refer toFront passenger sensing systemin this
chapter.
The passenger-side air bag should always be turned to the ON position
(the ªpassenger airbag offº or ªpass airbag offº indicator light shouldnot
be illuminated) unless the passenger is a person who meets the
requirements stated either in Category 1, 2 or 3 of the NHTSA/Transport
Canada deactivation criteria which follows.
Seating and Safety Restraints
124
Page 129 of 280
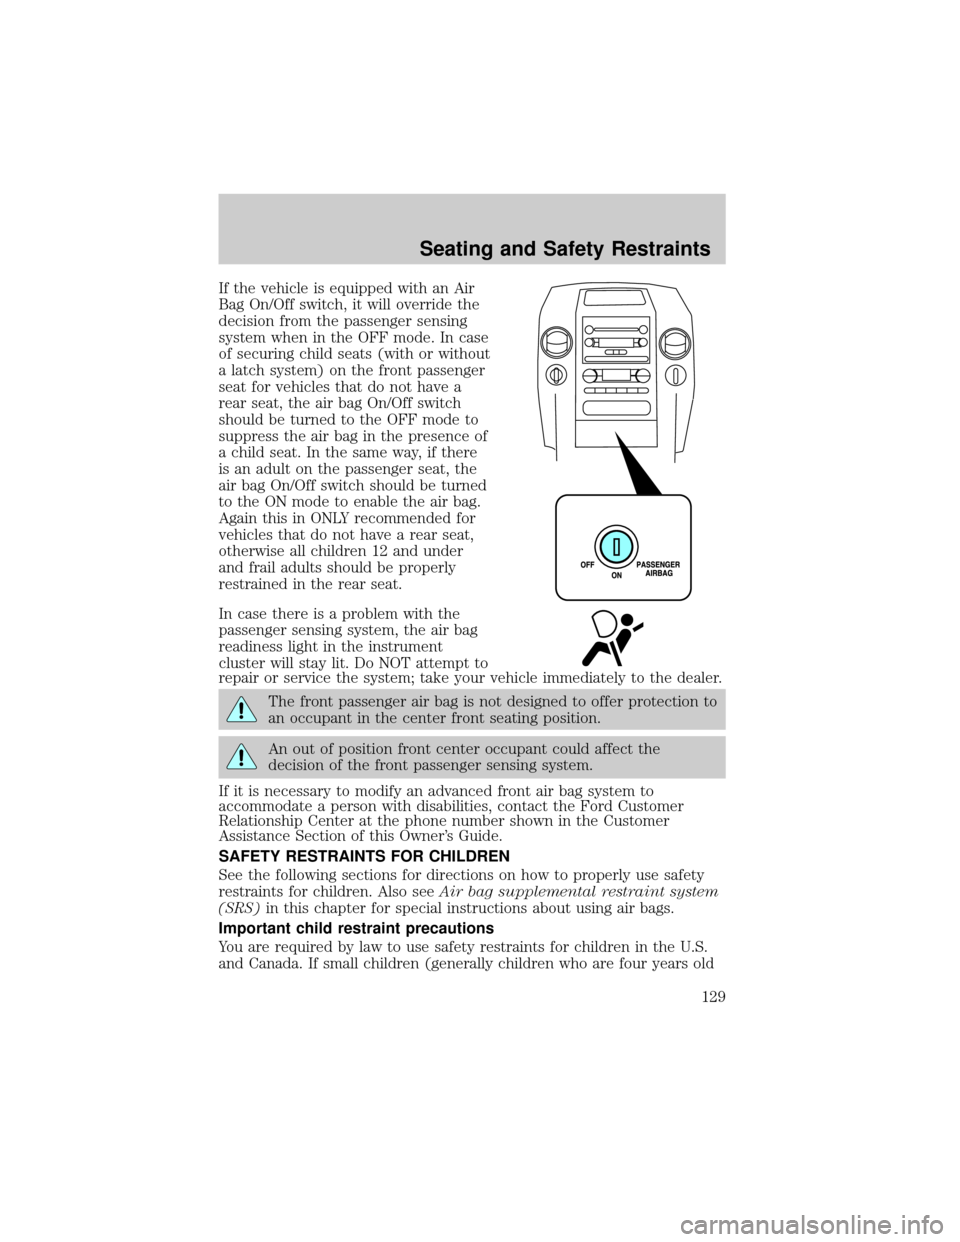
If the vehicle is equipped with an Air
Bag On/Off switch, it will override the
decision from the passenger sensing
system when in the OFF mode. In case
of securing child seats (with or without
a latch system) on the front passenger
seat for vehicles that do not have a
rear seat, the air bag On/Off switch
should be turned to the OFF mode to
suppress the air bag in the presence of
a child seat. In the same way, if there
is an adult on the passenger seat, the
air bag On/Off switch should be turned
to the ON mode to enable the air bag.
Again this in ONLY recommended for
vehicles that do not have a rear seat,
otherwise all children 12 and under
and frail adults should be properly
restrained in the rear seat.
In case there is a problem with the
passenger sensing system, the air bag
readiness light in the instrument
cluster will stay lit. Do NOT attempt to
repair or service the system; take your vehicle immediately to the dealer.
The front passenger air bag is not designed to offer protection to
an occupant in the center front seating position.
An out of position front center occupant could affect the
decision of the front passenger sensing system.
If it is necessary to modify an advanced front air bag system to
accommodate a person with disabilities, contact the Ford Customer
Relationship Center at the phone number shown in the Customer
Assistance Section of this Owner's Guide.
SAFETY RESTRAINTS FOR CHILDREN
See the following sections for directions on how to properly use safety
restraints for children. Also seeAir bag supplemental restraint system
(SRS)in this chapter for special instructions about using air bags.
Important child restraint precautions
You are required by law to use safety restraints for children in the U.S.
and Canada. If small children (generally children who are four years old
Seating and Safety Restraints
129
Page 147 of 280
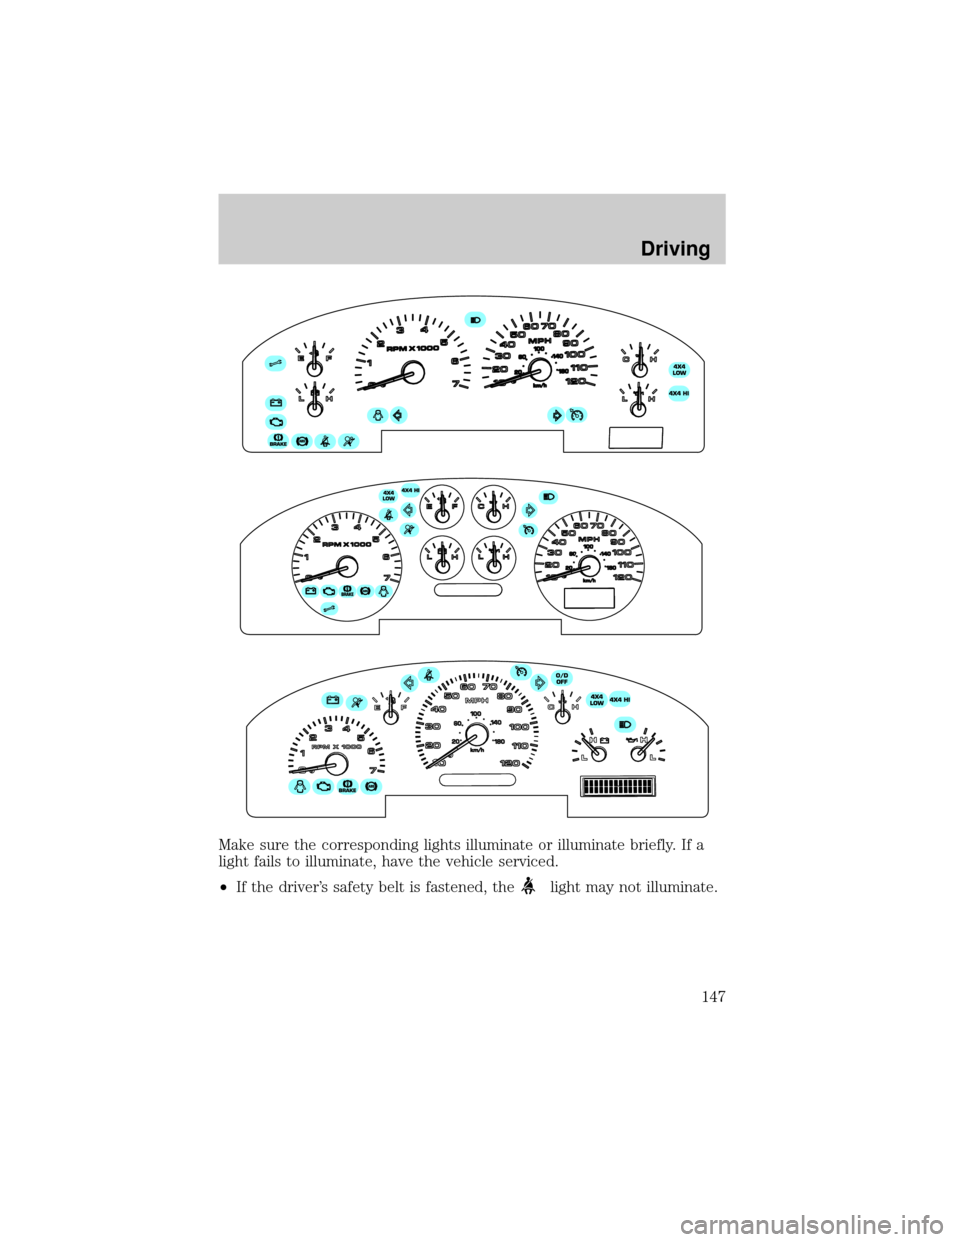
Make sure the corresponding lights illuminate or illuminate briefly. If a
light fails to illuminate, have the vehicle serviced.
²If the driver's safety belt is fastened, the
light may not illuminate.
Driving
147
Page 149 of 280

BRAKES
Occasional brake noise is normal. If a metal-to-metal, continuous grinding
or continuous squeal sound is present, the brake linings may be worn-out
and should be inspected by a qualified service technician. If the vehicle
has continuous vibration or shudder in the steering wheel while braking,
the vehicle should be inspected by a qualified service technician.
Four-wheel anti-lock brake system (ABS)
Your vehicle is equipped with an Anti-lock Braking System (ABS). This
system helps you maintain steering control during emergency stops by
keeping the brakes from locking. Noise from the ABS pump motor and
brake pedal pulsation may be observed during ABS braking; this is
normal and should be no reason for concern.
Using ABS
When hard braking is required, apply continuous force on the brake
pedal; do not pump the brake pedal since this will reduce the
effectiveness of the ABS and will increase your vehicle's stopping
distance. The ABS will be activated immediately, allowing you to retain
full steering control during hard braking and on slippery surfaces.
However, the ABS does not decrease stopping distance.
ABS warning lampABS
TheABSlamp in the instrument cluster momentarily illuminates when
the ignition is turned to ON. If the light does not illuminate during start
up, remains on or flashes, the ABS may be disabled and may need to be
serviced.
Even when the ABS is disabled,
normal braking is still effective. (If
your BRAKE warning lamp
illuminates with the parking brake
released, have your brake system
serviced immediately.)
!
BRAKE
Driving
149
Page 152 of 280
has blown or the vehicle's brakelamps are not operating properly. Refer
toFuses and relaysin theRoadside emergencieschapter.
If the fuse is not blown, perform the following procedure:
1. Apply the parking brake, turn the ignition to OFF/LOCK, then remove
the key.
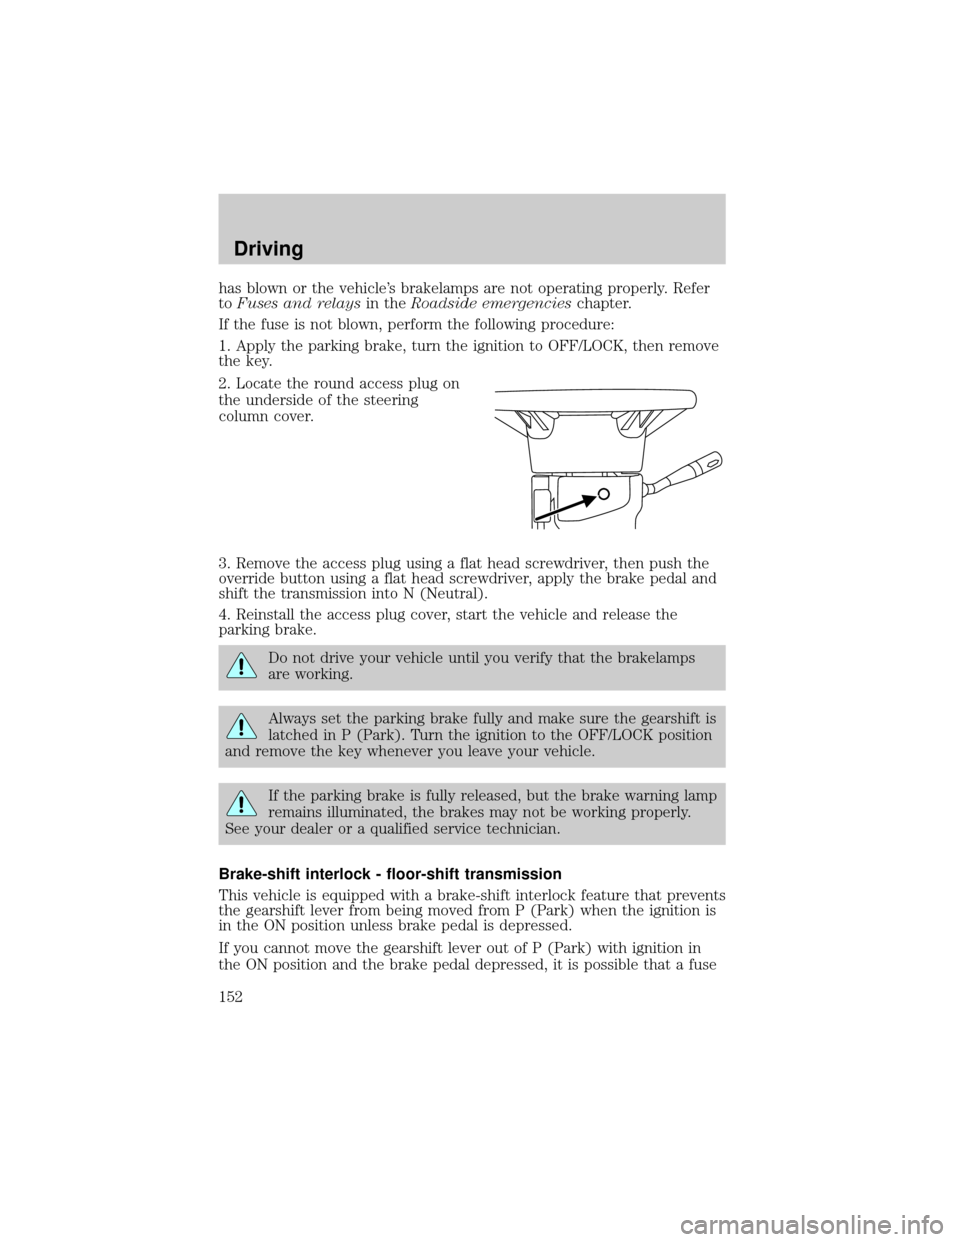
2. Locate the round access plug on
the underside of the steering
column cover.
3. Remove the access plug using a flat head screwdriver, then push the
override button using a flat head screwdriver, apply the brake pedal and
shift the transmission into N (Neutral).
4. Reinstall the access plug cover, start the vehicle and release the
parking brake.
Do not drive your vehicle until you verify that the brakelamps
are working.
Always set the parking brake fully and make sure the gearshift is
latched in P (Park). Turn the ignition to the OFF/LOCK position
and remove the key whenever you leave your vehicle.
If the parking brake is fully released, but the brake warning lamp
remains illuminated, the brakes may not be working properly.
See your dealer or a qualified service technician.
Brake-shift interlock - floor-shift transmission
This vehicle is equipped with a brake-shift interlock feature that prevents
the gearshift lever from being moved from P (Park) when the ignition is
in the ON position unless brake pedal is depressed.
If you cannot move the gearshift lever out of P (Park) with ignition in
the ON position and the brake pedal depressed, it is possible that a fuse
Driving
152