Page 43 of 280
Flash to pass
Pull toward you slightly to activate
and release to deactivate.
PANEL DIMMER CONTROL
Use to adjust the brightness of the
instrument panel and all applicable
switches in the vehicle during
headlamp and parklamp operation.
Move the control to the full upright
position, past detent, to turn on the
interior lamps.
Move the control to the full down
position, past detent, to prevent the
interior lights from illuminating
when the doors are opened.
VERTICAL AIM ADJUSTMENT
1. Park the vehicle on a level surface approximately 7.6 meters (25 feet)
from a vertical wall or screen directly in front of it.
²(1) Eight feet
²(2) Center height of lamp to ground
²(3) Twenty-five feet
Lights
43
Page 45 of 280
TURN SIGNAL CONTROL
²Push down to activate the left
turn signal.
²Push up to activate the right turn
signal.
INTERIOR LAMPS
Map lamps
To turn on the map lamps, press the
control next to each lamp.
Rear dome lamp (if equipped)
The dome lamp lights when the
control is in the DOOR (left)
position, any door is open, the
instrument panel switch is pushed
past the detent and when any of the
remote entry controls are pressed
while the ignition is off.
The rear dome lamp can be turned
ON (center) or OFF (right) by sliding the control.
Lights
45
Page 46 of 280
Rear map lamp (if equipped)
The rear map lamp lights are
located on the end of the overhead
rail system. The lamps can be
turned on or off by pushing on the
lens.
Dome/courtesy lamps (if equipped)
The dome lamp lights when:
²any door is opened.
²the instrument panel dimmer
switch is rotated up until the
courtesy lamps come on.
²any of the remote entry controls
are pressed and the ignition is
OFF.
The reading portion, the two outer lights, can only be toggled on and off
at the lamp.
Courtesy/reading/cargo lamps (if equipped)
The dome portion of the lamp, the
center light, can be turned on when
the headlamp control is rotated fully
up or when an door is opened.
With the ignition key in the ACC or ON position, the rear dome lamp can
be turned ON or OFF by sliding the control.
Lights
46
Page 47 of 280
BULBS
Replacing exterior bulbs
Check the operation of all the bulbs frequently.
Using the right bulbs
Replacement bulbs are specified in the chart below. Headlamp bulbs
must be marked with an authorized ªD.O.T.º for North America and an
ªEº for Europe to assure lamp performance, light brightness and pattern
and safe visibility. The correct bulbs will not damage the lamp assembly
or void the lamp assembly warranty and will provide quality bulb burn
time.
Function Number of
bulbsTrade number
Headlamps 2 9008
Front park/turn lamps 2 3157AK (amber)
Front sidemarker 2 194
Foglamps 2 9145
Backup lamp 2 3156K
Rear stop/turn/sidemarker/tail
lamp2 3057K
High-mount brakelamp 1 921
Cargo lamp 2 921
License plate lamp 2 194
Exterior mounted mirror turn
signal indicator (if equipped)1 See your dealer
All replacement bulbs are clear in color except where noted.
To replace all instrument panel lights - see your dealer
Lights
47
Page 56 of 280
With pressure applied with palms and side latches squeezed down, pull
downward on the entire storage bin and remove.
AUXILIARY POWER POINT
Power outlets are designed for
accessory plugs only. Do not
hang any type of accessory or
accessory bracket from the plug.
Improper use of the power
outlet can cause damage not
covered by your warranty.
The auxiliary power point is located
on the instrument panel.
Do not plug optional electrical
accessories into the cigarette lighter. Use the power point.
An additional auxiliary power point
is located on the lower rear side of
the center console. The power point
is accessible from the rear seats.
Driver Controls
56
Page 94 of 280

Your vehicle comes with two coded keys; additional coded keys may be
purchased from your dealer. The dealer can program your spare keys to
your vehicle or you can program the keys yourself. Refer to
Programming spare keysfor instructions on how to program the coded
key.
Note:The SecuriLockypassive anti-theft system is not compatible with
non-Ford aftermarket remote start systems. Use of these systems may
result in vehicle starting problems and a loss of security protection.
Note:Large metallic objects, electronic devices that are used to
purchase gasoline or similar items, or a second coded key on the same
key chain may cause vehicle starting issues. You need to prevent these
objects from touching the coded key while starting the engine. These
objects will not cause damage to the coded key, but may cause a
momentary issue if they are too close to the key when starting the
engine. If a problem occurs, turn the ignition off, remove all objects on
the key chain away from the coded key and restart the engine.
Theft indicator
The theft indicator is located on top of the instrument panel.
²When the ignition is in the OFF position, the indicator will flash once
every 2 seconds to indicate the SecuriLockysystem is functioning as
a theft deterrent.
²When the ignition is in the ON position, the indicator will glow for 3
seconds to indicate normal system functionality.
If a problem occurs with the SecuriLockysystem, the indicator will flash
rapidly or glow steadily when the ignition is in the ON position. If this
occurs, the vehicle should be taken to an authorized dealer for service.
Automatic arming
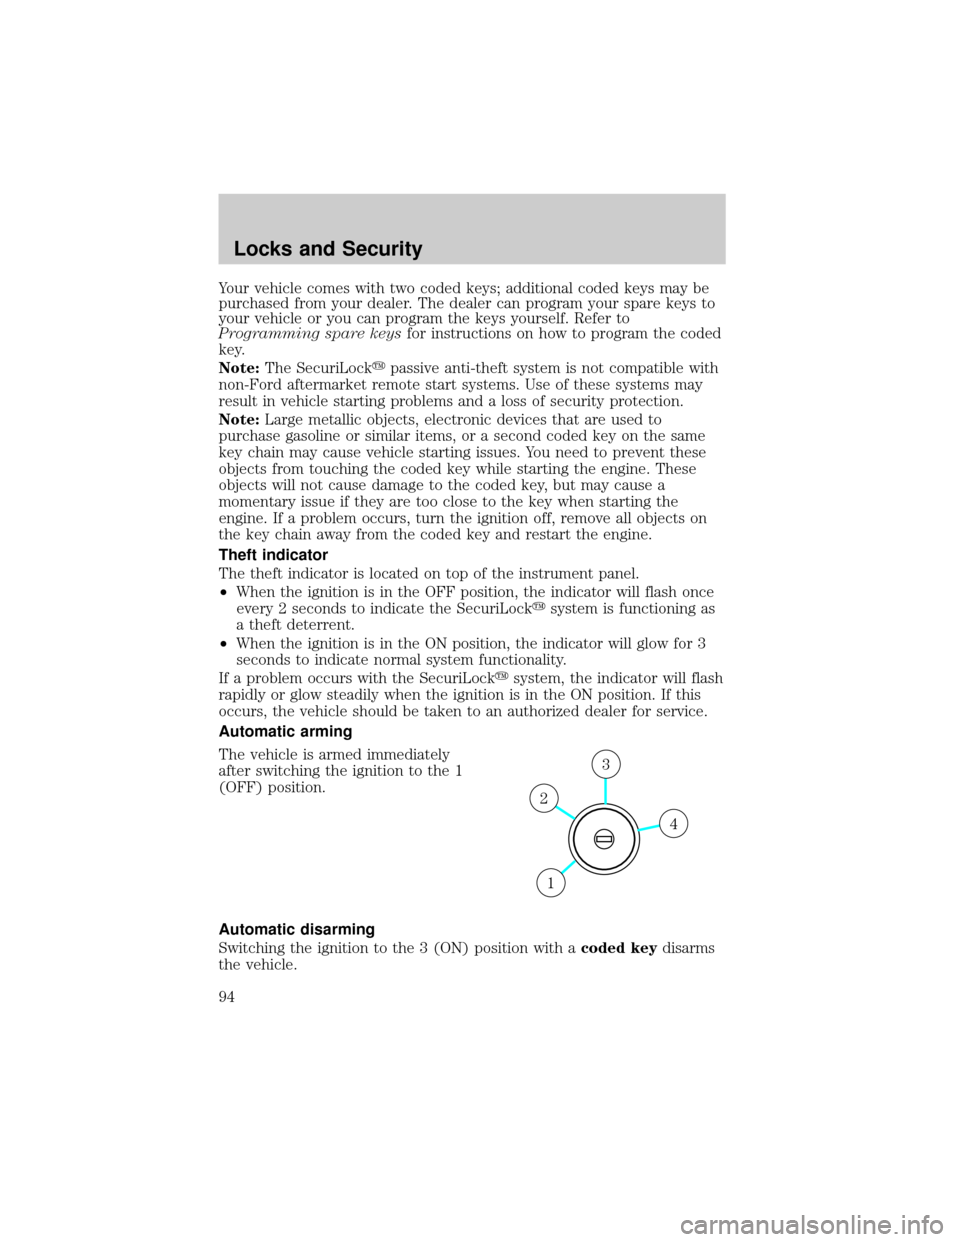
The vehicle is armed immediately
after switching the ignition to the 1
(OFF) position.
Automatic disarming
Switching the ignition to the 3 (ON) position with acoded keydisarms
the vehicle.
4
3
2
1
Locks and Security
94
Page 100 of 280

Press the control to move the seat
forward, backward, up or down.
Memory seats/adjustable pedals (if equipped)
This system allows automatic
positioning of the driver seat and
adjustable pedals to two
programmable positions.
The memory seat control is located
on the driver's seat.
²To program position one, move
the driver seat, and adjustable
pedals to the desired position.
Press the SET control. The SET
control indicator light will briefly illuminate. While the light is
illuminated, press control 1.
²To program position two, repeat the previous procedure using control
2.
A position can only be recalled when the transmission gearshift is in
Park. A memory position may be programmed at any time.
Heated seats (if equipped)
To operate the heated seats, do the following:
²Push control located on the
instrument panel to set at high
heat.
²Push control again to set at low heat.
²Push again to deactivate.
The indicator light on the control will illuminate when activated.
The system automatically shuts off after 10 minutes.
Seating and Safety Restraints
100
Page 128 of 280

that the front passenger frontal air bag is off. When the front passenger
seat is not occupied (empty seat) or in the event that the front passenger
frontal air bag is enabled (may inflate), the indicator light will be unlit.
The indicator light is located in the center stack of the instrument panel
just above the radio.
The front passenger sensing system is designed to turn off the front
passenger's frontal air bag when a rear facing infant seat, a
forward-facing child restraint, or a booster seat is detected. If the child
restraint has been installed and the indicator is not lit, then turn the
vehicle off, remove the child restraint from the vehicle and reinstall the
restraint following the child restraint manufacturer's directions.
The front passenger sensing system is designed to enable (may inflate)
the right front passenger's frontal air bag anytime the system senses that
a person of adult size is sitting properly in the front passenger seat,
unless the air bag on/off switch (if equipped) is turned to the Off
position. When the passenger sensing system has allowed the air bag to
be enabled, the indicator will be unlit and stay unlit to remind you that
the air bag is enabled (may inflate).
If a person of adult-size is sitting in the front passenger's seat, but the
ªpassenger air bag offº or ªpass air bag offº indicator is lit, it could be
that the person isn't sitting properly in the seat , or that the air bag
on/off switch (if equipped) is in the Off position. If this happens, turn
the vehicle off and ask the person to place the seatback in the full
upright position, then sit upright in the seat, centered on the seat
cushion, with the person's legs comfortably extended. Restart the vehicle
and have the person remain in this position for about two minutes. This
will allow the system to detect that person and then enable the
passenger's air bag. If the indicator lamp remains lit even after this, then
the occupant should be advised to ride in the back seat.
After all occupants have adjusted their seats and put on seat belts, it's
very important that they continue to sit upright, with their back against
the seatback, with their feet comfortably extended on the floor while the
vehicle is still in motion. Sitting improperly can increase the chance of
injury in a crash event. For example, if an occupant slouches, lies down,
turns sideways, sits forward, leans forward or sideways, or puts one or
both feet up, the chance of injury during a crash is greatly increased.
Sitting improperly out of position or with the seatback reclined too
far can take off weight from the seat cushion and affect the decision
of the passenger sensing system, resulting in serious injury or death in a
crash. Always sit upright against your seatback, with your feet on the floor.
Seating and Safety Restraints
128