2004 FORD F150 heating
[x] Cancel search: heatingPage 1 of 280

Introduction 4
Instrument Cluster 10
Warning and control lights 10
Gauges 15
Entertainment Systems 18
AM/FM stereo 18
AM/FM stereo with CD 20
AM/FM stereo cassette with CD 23
AM/FM stereo with in-dash six CD 26
Climate Controls 32
Heater only 32
Manual heating and air conditioning 33
Electronic automatic temperature control 35
Rear window defroster 40
Lights 41
Headlamps 41
Turn signal control 45
Bulb replacement 47
Driver Controls 52
Windshield wiper/washer control 52
Steering wheel adjustment 53
Power windows 58
Mirrors 59
Speed control 61
Message center 70
Tailgate 79
Table of Contents
Table of Contents
1
Page 15 of 280

GAUGES
Speedometer:Indicates the
current vehicle speed.
Engine coolant temperature
gauge:Indicates engine coolant
temperature. At normal operating
temperature, the needle will be in
the normal range (between ªHº and
ªCº). If it enters the red section, the
engine is overheating. Stop the
vehicle as soon as safely possible, switch off the engine and let the
engine cool.
Never remove the coolant reservoir cap while the engine is
running or hot.
4X4
LOW
4X4 HI
BRAKEABS
Instrument Cluster
15
Page 33 of 280

To increase airflow to the outer instrument panel vents, close the vents
located in the middle of the instrument panel.
Do not place objects on top of the instrument panel as these
objects may become projectiles in a collision or sudden stop.
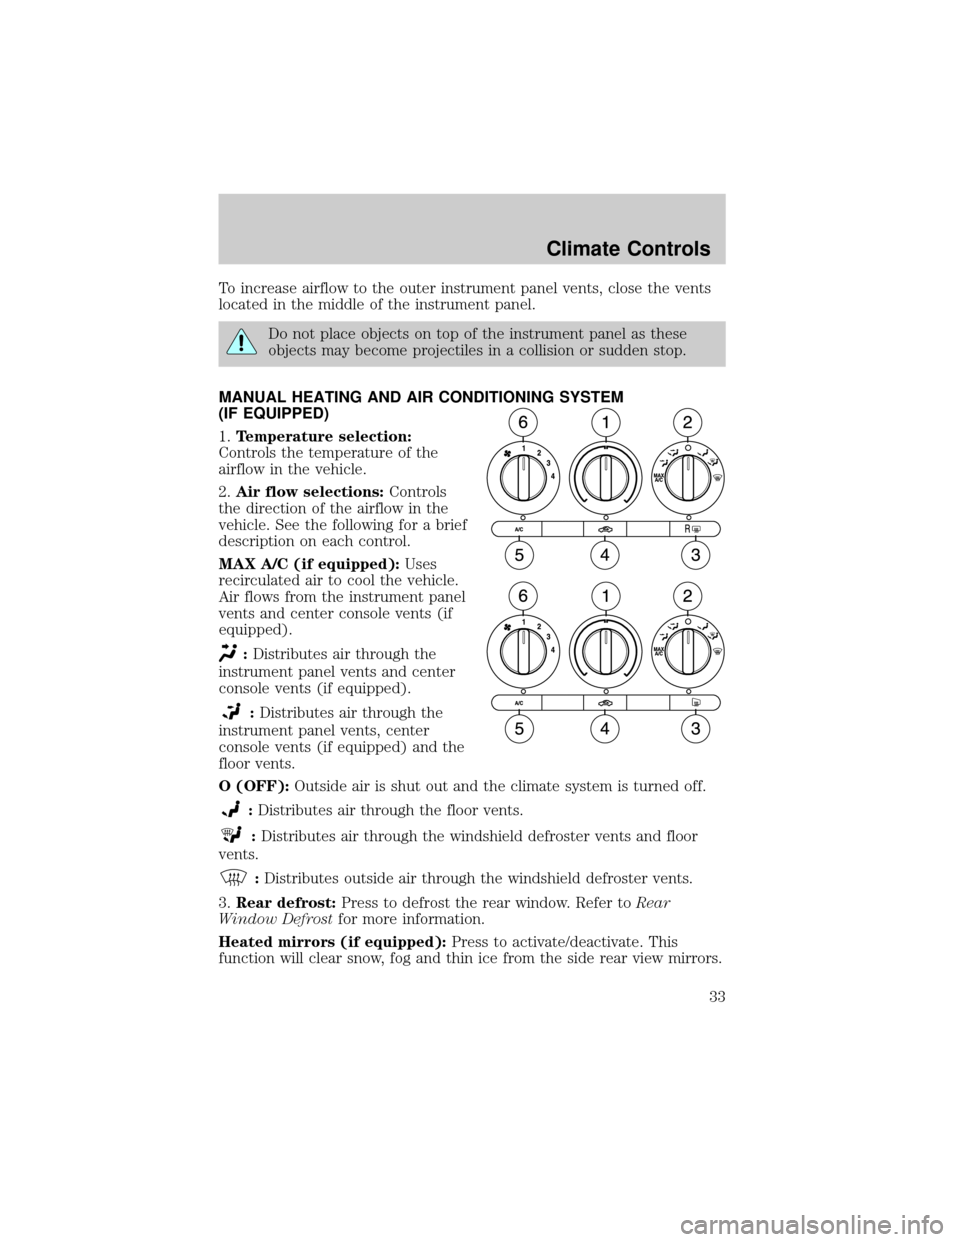
MANUAL HEATING AND AIR CONDITIONING SYSTEM
(IF EQUIPPED)
1.Temperature selection:
Controls the temperature of the
airflow in the vehicle.
2.Air flow selections:Controls
the direction of the airflow in the
vehicle. See the following for a brief
description on each control.
MAX A/C (if equipped):Uses
recirculated air to cool the vehicle.
Air flows from the instrument panel
vents and center console vents (if
equipped).
:Distributes air through the
instrument panel vents and center
console vents (if equipped).
:Distributes air through the
instrument panel vents, center
console vents (if equipped) and the
floor vents.
O (OFF):Outside air is shut out and the climate system is turned off.
:Distributes air through the floor vents.
:Distributes air through the windshield defroster vents and floor
vents.
:Distributes outside air through the windshield defroster vents.
3.Rear defrost:Press to defrost the rear window. Refer toRear
Window Defrostfor more information.
Heated mirrors (if equipped):Press to activate/deactivate. This
function will clear snow, fog and thin ice from the side rear view mirrors.
Climate Controls
33
Page 68 of 280

7. Press and release the ªlearnº or ªsmartº button. (The name and color
of the button may vary by manufacturer.)
Note:There are 30 seconds in which to initiate step eight.
8. Return to the vehicle and firmly press, hold for two seconds and
release the HomeLinktbutton. Repeat the press/hold/release sequence
again, and, depending on the brand of the garage door opener (or other
rolling code equipped device), repeat this sequence a third time to
complete the programming.
HomeLinktshould now activate your rolling code equipped device. To
program additional HomeLinktbuttons begin with step 2 in the
ªProgrammingº section. For questions or comments, please contact
HomeLink atwww.homelink.comor1±800±355±3515.
Gate Operator & Canadian Programming
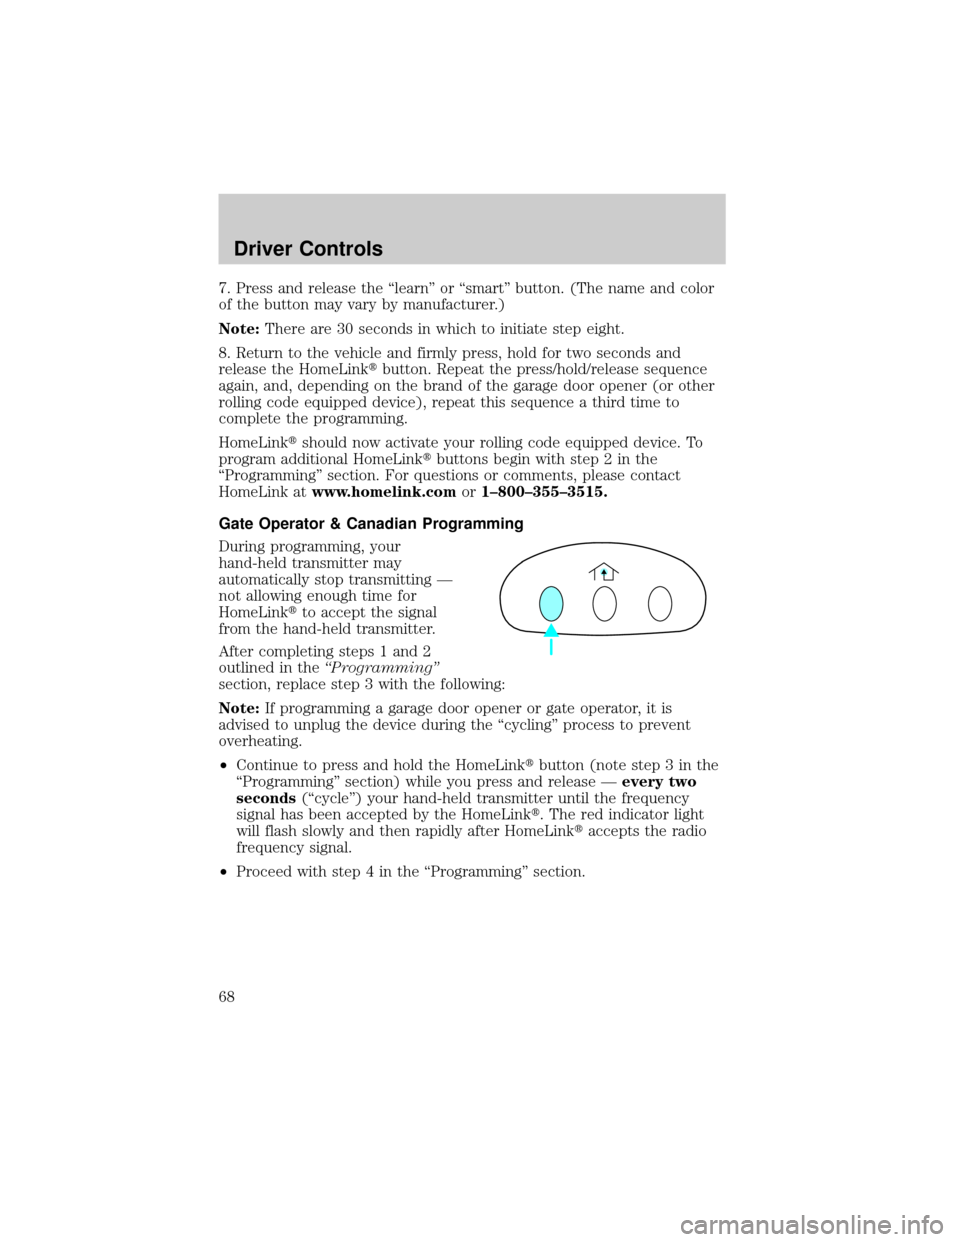
During programming, your
hand-held transmitter may
automatically stop transmitting Ð
not allowing enough time for
HomeLinktto accept the signal
from the hand-held transmitter.
After completing steps 1 and 2
outlined in theªProgrammingº
section, replace step 3 with the following:
Note:If programming a garage door opener or gate operator, it is
advised to unplug the device during the ªcyclingº process to prevent
overheating.
²Continue to press and hold the HomeLinktbutton (note step 3 in the
ªProgrammingº section) while you press and release Ðevery two
seconds(ªcycleº) your hand-held transmitter until the frequency
signal has been accepted by the HomeLinkt. The red indicator light
will flash slowly and then rapidly after HomeLinktaccepts the radio
frequency signal.
²Proceed with step 4 in the ªProgrammingº section.
Driver Controls
68
Page 76 of 280

In the event of a multiple warning situation, the message center will
cycle the display to show all warnings by displaying each one for 4
seconds.
The message center will display the last selected feature if there are no
more warning messages. This allows you to use the full functionality of
the message center after you acknowledge the warning by pressing the
RESET control and clearing the warning message.
Warning messages that have been reset are divided into two categories:
²They will reappear on the display ten minutes from the reset.
²They will not reappear until an ignition OFF-ON cycle has been
completed.
This acts as a reminder that these warning conditions still exist within
the vehicle.
Warning display Status
Door ajar Warning can be reset
Low fuel level Warning returns after 10 minutes
Check charging system
Low brake fluid level
Low oil pressure
Check engine temperature
Reduced engine power
Stop engine safely
Check fuel cap Warning returns after the ignition key
is turned from OFF to ON.
Engine failsafe mode
DOOR AJAR.Displayed when a door is not completely closed.
CHECK ENGINE TEMPERATURE.Displayed when the engine
coolant is overheating. Stop the vehicle as soon as safely possible, turn
off the engine and let it cool. Check the coolant and coolant level. Refer
toEngine coolantin theMaintenance and specificationschapter. If
the warning stays on or continues to come on, contact your dealer as
soon as possible.
REDUCED ENGINE POWER.Displayed when the engine is
overheating. Stop the vehicle as soon as safely possible, turn off the
engine. If the warning stays on or continues to come on, contact your
dealer as soon as possible.
Driver Controls
76
Page 77 of 280

STOP ENGINE SAFELY.Displayed when the engine is overheating.
Stop the vehicle as soon as safely possible, turn off the engine. If the
warning stays on or continues to come on, contact your dealer as soon as
possible.
LOW FUEL LEVEL.Displayed as an early reminder of a low fuel
condition.
CHECK CHARGING SYSTEM.Displayed when the electrical system is
not maintaining proper voltage. If you are operating electrical accessories
when the engine is idling at a low speed, turn off as many of the
electrical loads as soon as possible. If the warning stays on or comes on
when the engine is operating at normal speeds, have the electrical
system checked as soon as possible.
LOW BRAKE FLUID LEVEL.Indicates the brake fluid level is low and
the brake system should be inspected immediately. Refer toChecking and
adding brake fluidin theMaintenance and specificationschapter.
LOW OIL PRESSURE.Displayed when the engine oil pressure is low. If
this warning message is displayed, check the level of the engine oil.
Refer toEngine oilin theMaintenance and specificationschapter for
information about adding engine oil. If the oil level is OK and this
warning persists, shut down the engine immediately and contact your
dealership for service.
CHECK FUEL CAP.Displayed when the fuel filler cap is not properly
installed. Check the fuel filler cap for proper installation. Refer toFuel
filler capunder theFuel Information sectionin theMaintenance and
specificationschapter.
ENGINE FAILSAFE MODE.Displayed when the engine has defaulted
to a 'limp-home' operation. If the warning stays on or continues to come
on, contact your dealer as soon as possible.
DATA ERR.These messages indicate improper operation of the vehicle
network communication between electronic modules.
²Fuel computer
²Charging system
²Autolamp delay
²Auto locks²Brake fluid
²Compass
²Outside temperature
²Engine sensor
Contact your dealer as soon as possible if these messages occur on a
regular basis.
Driver Controls
77
Page 148 of 280

Starting the engine
1. Turn the key to 3 (ON) without
turning the key to 4 (START). If
there is difficulty in turning the key,
rotate the steering wheel until the
key turns freely.
2. Turn the key to 4 (START), then
release the key as soon as the
engine starts. Excessive cranking
could damage the starter.
Note:If the engine does not start within five seconds on the first try,
turn the key to OFF, wait 10 seconds and try again. If the engine still
fails to start, press the accelerator to the floor and try again; this will
allow the engine to crank with the fuel shut off in case the engine is
flooded with fuel.
Using the engine block heater (if equipped)
An engine block heater warms the engine coolant which aids in starting
and heater/defroster performance. Use of an engine block heater is
strongly recommended if you live in a region where temperatures reach
-23É C (-10É F) or below. For best results, plug the heater in at least
three hours before starting the vehicle. The heater can be plugged in the
night before starting the vehicle.
To reduce the risk of electrical shock, do not use your heater
with ungrounded electrical systems or two-pronged (cheater)
adapters.
Guarding against exhaust fumes
Carbon monoxide is present in exhaust fumes. Take precautions to avoid
its dangerous effects.
If you smell exhaust fumes inside your vehicle, have your dealer
inspect your vehicle immediately. Do not drive if you smell
exhaust fumes.
Important ventilating information
If the engine is idling while the vehicle is stopped for a long period of
time, open the windows at least 2.5 cm (one inch) or adjust the heating
or air conditioning to bring in fresh air.
4
3
2
1
Driving
148
Page 168 of 280

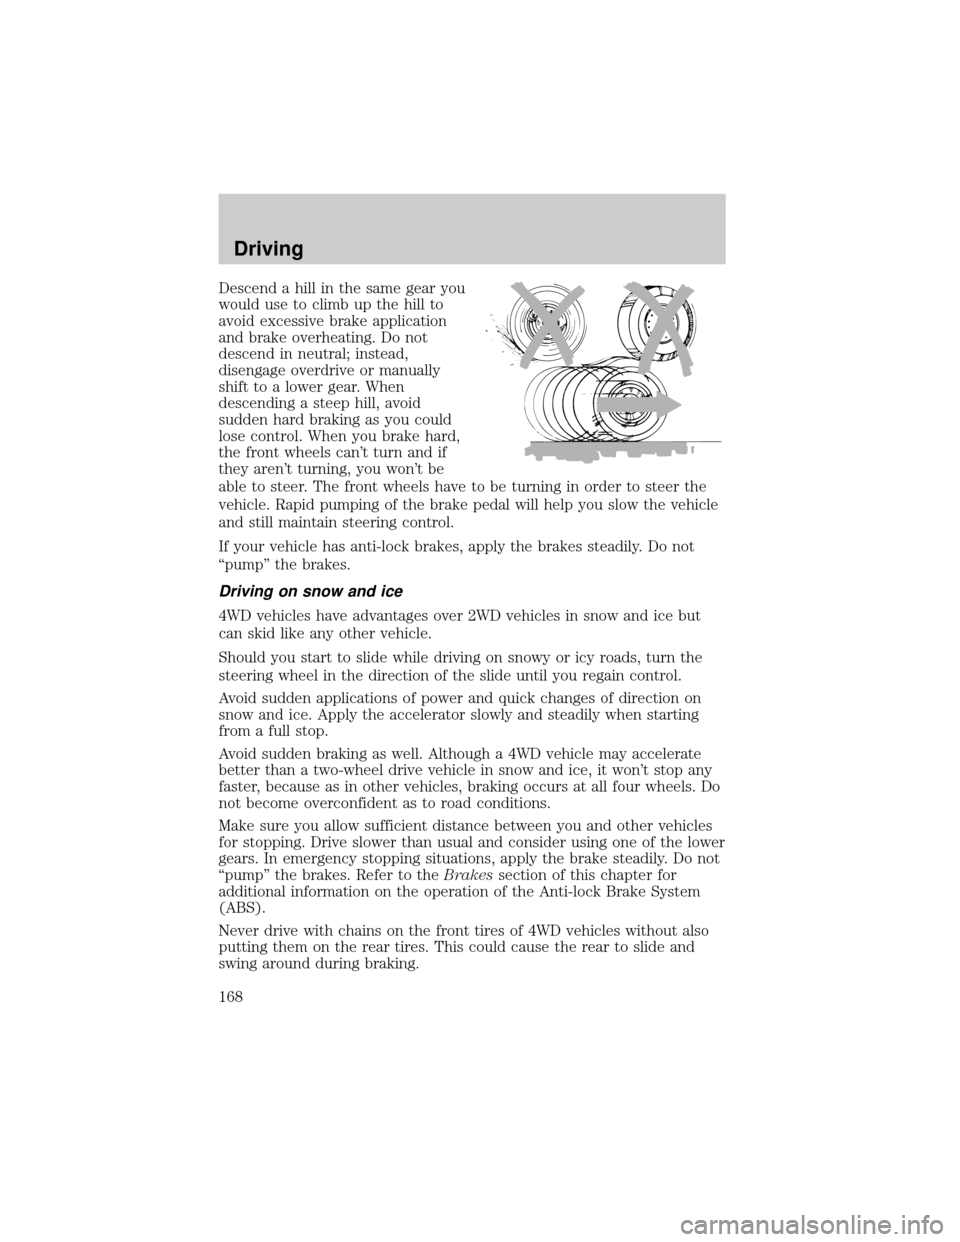
Descend a hill in the same gear you
would use to climb up the hill to
avoid excessive brake application
and brake overheating. Do not
descend in neutral; instead,
disengage overdrive or manually
shift to a lower gear. When
descending a steep hill, avoid
sudden hard braking as you could
lose control. When you brake hard,
the front wheels can't turn and if
they aren't turning, you won't be
able to steer. The front wheels have to be turning in order to steer the
vehicle. Rapid pumping of the brake pedal will help you slow the vehicle
and still maintain steering control.
If your vehicle has anti-lock brakes, apply the brakes steadily. Do not
ªpumpº the brakes.
Driving on snow and ice
4WD vehicles have advantages over 2WD vehicles in snow and ice but
can skid like any other vehicle.
Should you start to slide while driving on snowy or icy roads, turn the
steering wheel in the direction of the slide until you regain control.
Avoid sudden applications of power and quick changes of direction on
snow and ice. Apply the accelerator slowly and steadily when starting
from a full stop.
Avoid sudden braking as well. Although a 4WD vehicle may accelerate
better than a two-wheel drive vehicle in snow and ice, it won't stop any
faster, because as in other vehicles, braking occurs at all four wheels. Do
not become overconfident as to road conditions.
Make sure you allow sufficient distance between you and other vehicles
for stopping. Drive slower than usual and consider using one of the lower
gears. In emergency stopping situations, apply the brake steadily. Do not
ªpumpº the brakes. Refer to theBrakessection of this chapter for
additional information on the operation of the Anti-lock Brake System
(ABS).
Never drive with chains on the front tires of 4WD vehicles without also
putting them on the rear tires. This could cause the rear to slide and
swing around during braking.
Driving
168