Page 66 of 344
Limited GPS reception
System performance may be adversely affected if GPS reception is
interrupted or interference occurs over a distance of several miles. The
following are possible causes for GPS reception being interrupted. If the
vehicle is:
•in multi-story parking garages
•in tunnels and under bridges
•in between high buildings
•by forests or tree-lined avenues
•in heavy rain showers and thunderstorms
•in valleys and in mountainous regions
The GPS signal strength may vary. The directional heading indicator at
the bottom of the screen might change color to indicate this signal
strength. The colors are as follows:
•Green—A clear GPS signal is being received.
•Yellow—The GPS signal is partially blocked.
•Red—The GPS signal is unavailable and may be temporarily blocked.
To enter navigation mode
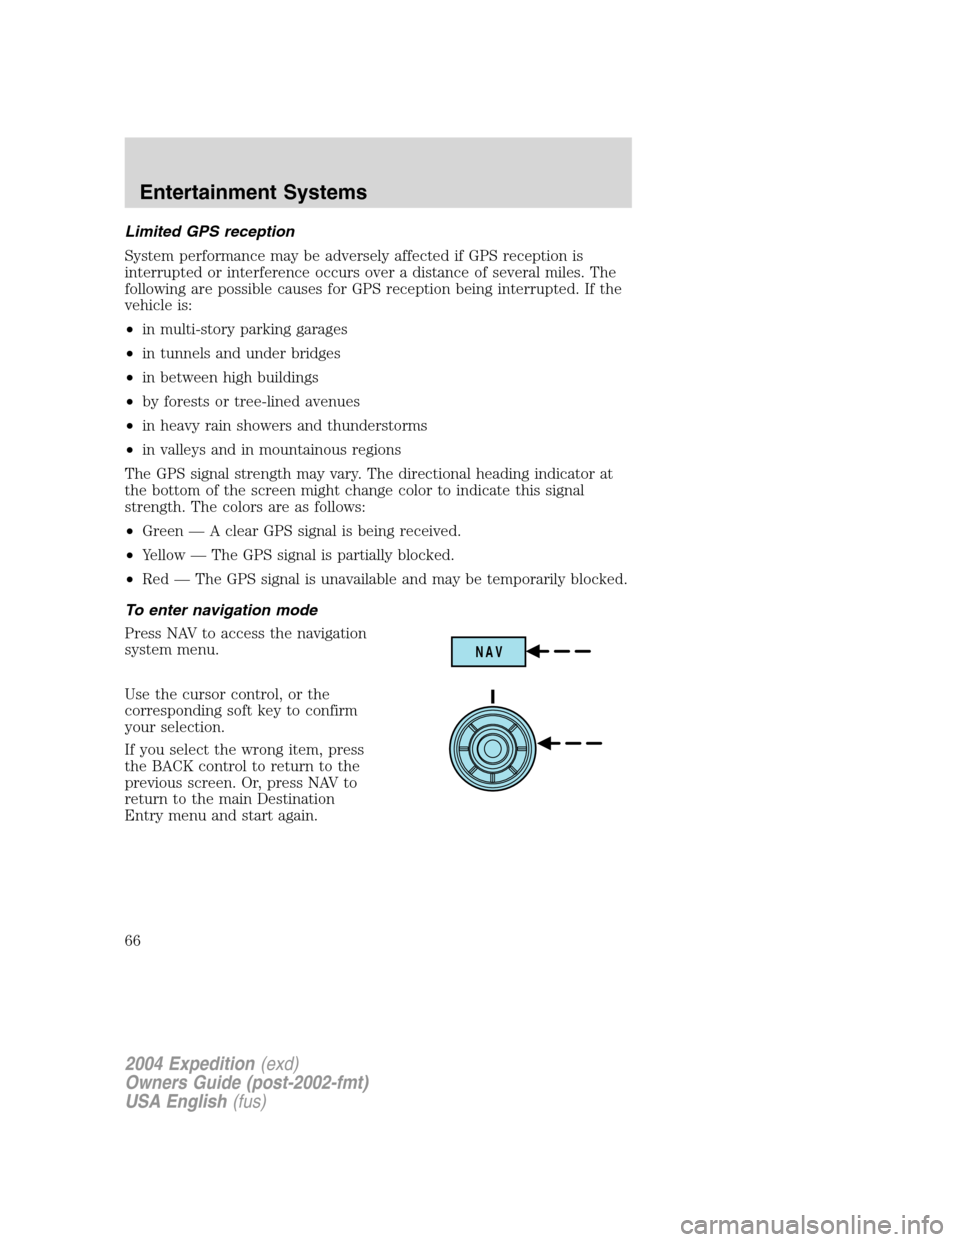
Press NAV to access the navigation
system menu.
Use the cursor control, or the
corresponding soft key to confirm
your selection.
If you select the wrong item, press
the BACK control to return to the
previous screen. Or, press NAV to
return to the main Destination
Entry menu and start again.
NAV
2004 Expedition(exd)
Owners Guide (post-2002-fmt)
USA English(fus)
Entertainment Systems
66
Page 77 of 344
Display options
Use this feature to change the
display setting. This feature can be
accessed by selecting“Display
Options”within the Main Menu.
Use the cursor control to select one
of the following options:
•’Mode’—auto (automatic), day
or night display settings.
•’Brightness’—provides manual adjustment for screen brightness.
•’Turn display off’—Select turn the display off. Press any button to
turn the display back on again.
System options
•Language Selection: Use the
cursor control to select and enter
the desired voice and text
language.
•Clock Setting: Your vehicle is equipped with your clock in the VNR
system. To set the clock:
1. Access the CLOCK screen.
2. Press the ADJUST control to
select the hours or minutes to set.
3. Use the cursor control to increase
or decrease the hours or minutes.
4. Press DONE to set the time.
2004 Expedition(exd)
Owners Guide (post-2002-fmt)
USA English(fus)
Entertainment Systems
77
Page 78 of 344
5. Select the SET soft key to synchronize/set the minutes and seconds to
GPS time. The hours will remain at the user set value.
You may choose to set the clock to a 12 or 24 hour display.
General information
Federal Communication Commission (FCC) Compliance
Changes or modifications not approved by Ford or Lincoln Mercury could
void user’s authority to operate the equipment. This equipment has been
tested and found to comply with the limits for a Class B digital device,
pursuant to Part 15 of the FCC Rules. These limits are designed to
provide reasonable protection against harmful interference in a
residential installation. This equipment generates, uses and can radiate
radio frequency energy and, if not installed and used in accordance with
the instructions, may cause harmful interference to radio
communications.
However, there is no guarantee that interference will not occur in a
particular installation. If this equipment does cause harmful interference
to radio or television reception, which can be determined by turning the
equipment off and on, the user is encouraged to consult the dealer or an
experienced radio/TV technician for help.
Cleaning the display
Do not spray cleaning fluid directly onto the unit. Instead, spray onto a
soft cloth and gently wipe the unit. Only recommended products should
be used.
Do not clean any part of the system with benzene, paint thinner or any
other solvent.
Do not spill liquids of any kind onto the unit.
The navigation system utilizes a database stored in a special format on a
CD. It is recommended always to use the latest update of this map CD.
•The navigation system will only work with CDs specifically intended
for your navigation system.
•Always store the map CDs in their protective cases when not in use.
2004 Expedition(exd)
Owners Guide (post-2002-fmt)
USA English(fus)
Entertainment Systems
78
Page 87 of 344
HEADLAMP CONTROL
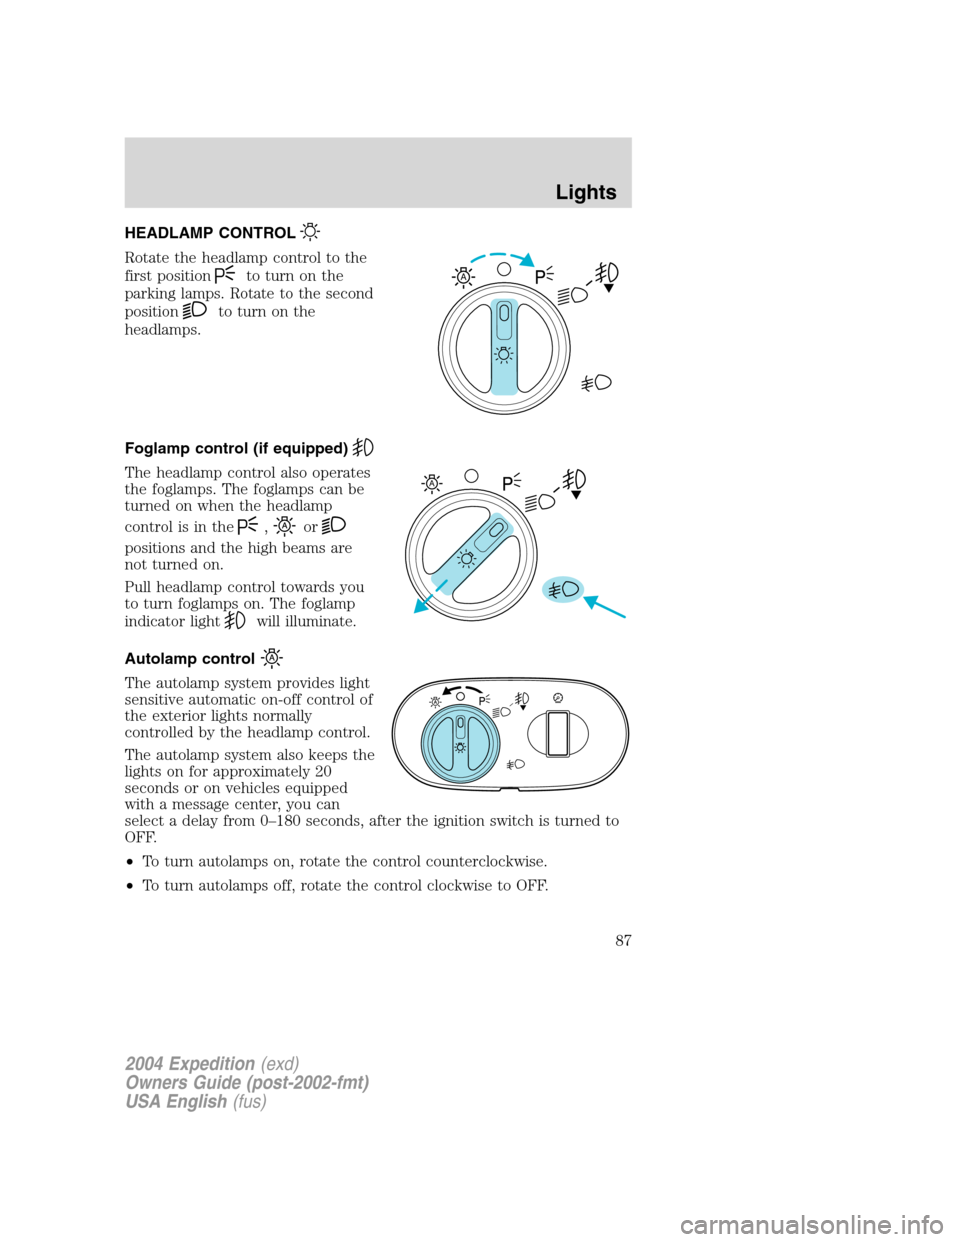
Rotate the headlamp control to the
first position
to turn on the
parking lamps. Rotate to the second
position
to turn on the
headlamps.
Foglamp control (if equipped)
The headlamp control also operates
the foglamps. The foglamps can be
turned on when the headlamp
control is in the
,or
positions and the high beams are
not turned on.
Pull headlamp control towards you
to turn foglamps on. The foglamp
indicator light
will illuminate.
Autolamp control
The autolamp system provides light
sensitive automatic on-off control of
the exterior lights normally
controlled by the headlamp control.
The autolamp system also keeps the
lights on for approximately 20
seconds or on vehicles equipped
with a message center, you can
select a delay from 0–180 seconds, after the ignition switch is turned to
OFF.
•To turn autolamps on, rotate the control counterclockwise.
•To turn autolamps off, rotate the control clockwise to OFF.
A
A
2004 Expedition(exd)
Owners Guide (post-2002-fmt)
USA English(fus)
Lights
Lights
87
Page 90 of 344
5. Locate the vertical adjuster on
each headlamp, then use a 10 mm
socket/wrench to turn the adjuster
either counterclockwise (to adjust
down) or clockwise (to adjust up)
aligning the upper edge of the light
pattern up to the horizontal line.
6. HORIZONTAL AIM IS NOT
REQUIRED FOR THIS VEHICLE
AND IS NON-ADJUSTABLE.
7. Repeat step 3–5 for the other headlamp.
8. Close the hood and turn off the lamps.
TURN SIGNAL CONTROL
•Push down to activate the left
turn signal.
•Push up to activate the right turn
signal.
INTERIOR LAMPS
Front row map lights (if equipped)
To turn on the map lights, press the
rear edge of the light.
INT2OFFOFFINT1
2004 Expedition(exd)
Owners Guide (post-2002-fmt)
USA English(fus)
Lights
90
Page 94 of 344
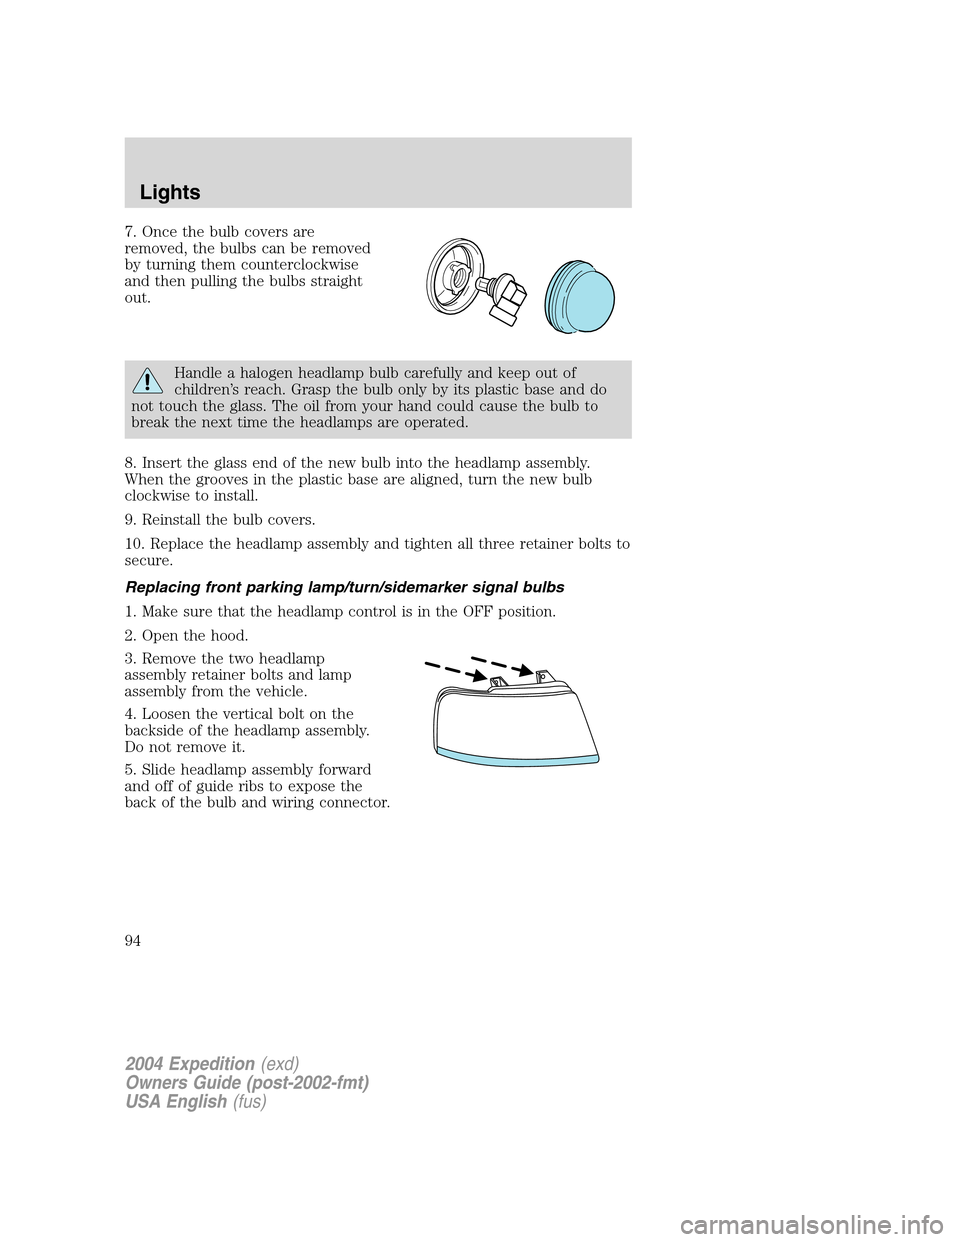
7. Once the bulb covers are
removed, the bulbs can be removed
by turning them counterclockwise
and then pulling the bulbs straight
out.
Handle a halogen headlamp bulb carefully and keep out of
children’s reach. Grasp the bulb only by its plastic base and do
not touch the glass. The oil from your hand could cause the bulb to
break the next time the headlamps are operated.
8. Insert the glass end of the new bulb into the headlamp assembly.
When the grooves in the plastic base are aligned, turn the new bulb
clockwise to install.
9. Reinstall the bulb covers.
10. Replace the headlamp assembly and tighten all three retainer bolts to
secure.
Replacing front parking lamp/turn/sidemarker signal bulbs
1. Make sure that the headlamp control is in the OFF position.
2. Open the hood.
3. Remove the two headlamp
assembly retainer bolts and lamp
assembly from the vehicle.
4. Loosen the vertical bolt on the
backside of the headlamp assembly.
Do not remove it.
5. Slide headlamp assembly forward
and off of guide ribs to expose the
back of the bulb and wiring connector.
2004 Expedition(exd)
Owners Guide (post-2002-fmt)
USA English(fus)
Lights
94
Page 95 of 344
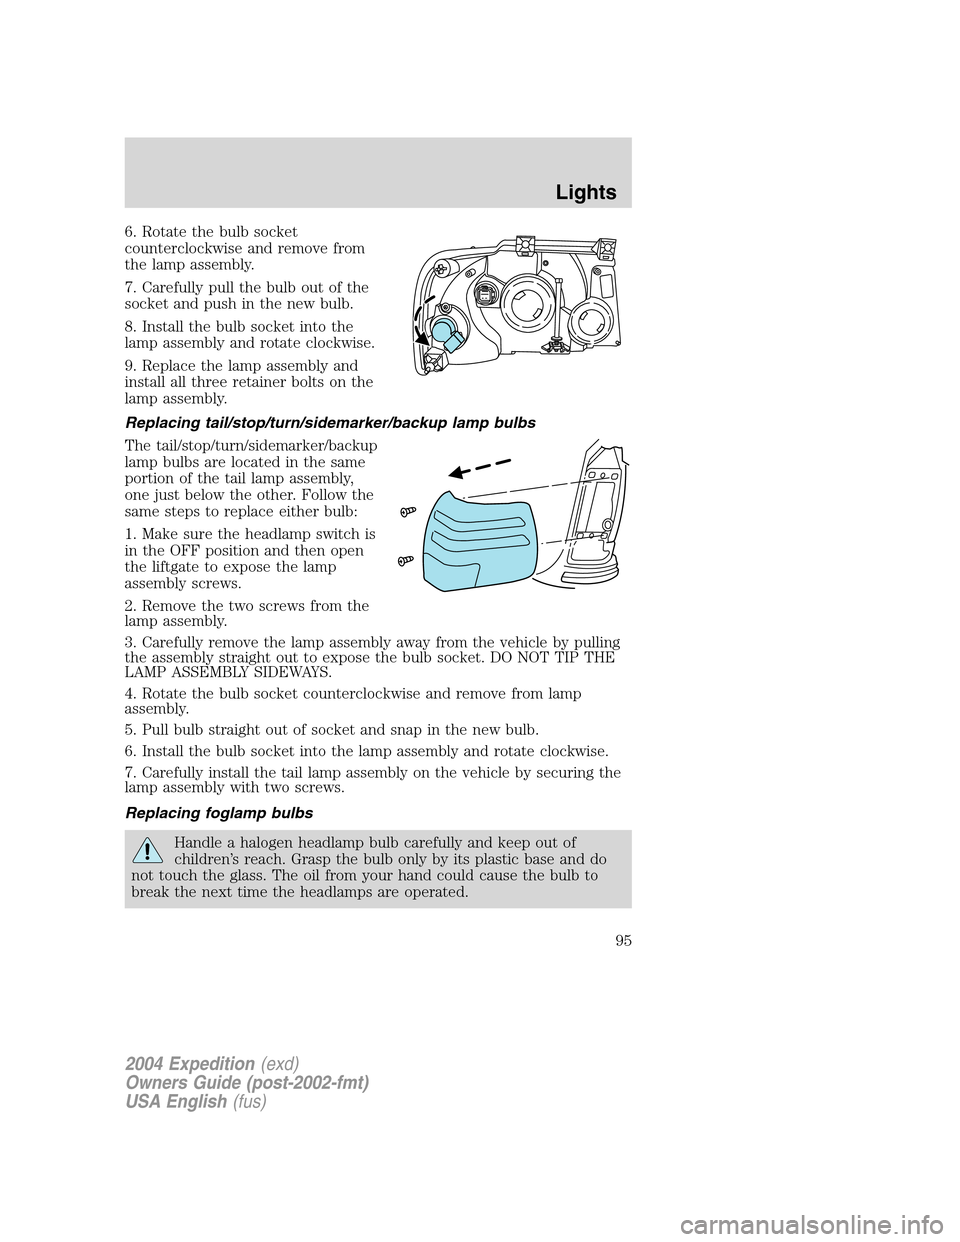
6. Rotate the bulb socket
counterclockwise and remove from
the lamp assembly.
7. Carefully pull the bulb out of the
socket and push in the new bulb.
8. Install the bulb socket into the
lamp assembly and rotate clockwise.
9. Replace the lamp assembly and
install all three retainer bolts on the
lamp assembly.
Replacing tail/stop/turn/sidemarker/backup lamp bulbs
The tail/stop/turn/sidemarker/backup
lamp bulbs are located in the same
portion of the tail lamp assembly,
one just below the other. Follow the
same steps to replace either bulb:
1. Make sure the headlamp switch is
in the OFF position and then open
the liftgate to expose the lamp
assembly screws.
2. Remove the two screws from the
lamp assembly.
3. Carefully remove the lamp assembly away from the vehicle by pulling
the assembly straight out to expose the bulb socket. DO NOT TIP THE
LAMP ASSEMBLY SIDEWAYS.
4. Rotate the bulb socket counterclockwise and remove from lamp
assembly.
5. Pull bulb straight out of socket and snap in the new bulb.
6. Install the bulb socket into the lamp assembly and rotate clockwise.
7. Carefully install the tail lamp assembly on the vehicle by securing the
lamp assembly with two screws.
Replacing foglamp bulbs
Handle a halogen headlamp bulb carefully and keep out of
children’s reach. Grasp the bulb only by its plastic base and do
not touch the glass. The oil from your hand could cause the bulb to
break the next time the headlamps are operated.
2004 Expedition(exd)
Owners Guide (post-2002-fmt)
USA English(fus)
Lights
95
Page 96 of 344
1. Remove the bulb socket from the
foglamp by turning
counterclockwise.
2. Disconnect the electrical
connector from the foglamp bulb.
3. Connect the new foglamp bulb to the electrical connector.
4. Install the bulb socket in the foglamp turning clockwise.
High-mount brakelamp
To change the high-mount
brakelamp bulbs:
1. Remove the two screws holding
the lamp assembly in place.
2. Pull the lamp assembly straight
out.
3. Remove the wire harness.
4. Depress the four tabs that hold
the light assembly on, one at a time,
and pull the black bulb carrier away
from the lamp.
5. Pull the old bulb out and replace
with the new bulb.
6. Snap the black bulb carrier into
the lamp assembly.
7. Replace the wire harness.
8. Replace the lamp assembly.
2004 Expedition(exd)
Owners Guide (post-2002-fmt)
USA English(fus)
Lights
96