Page 97 of 344
Replacing license plate lamp bulb
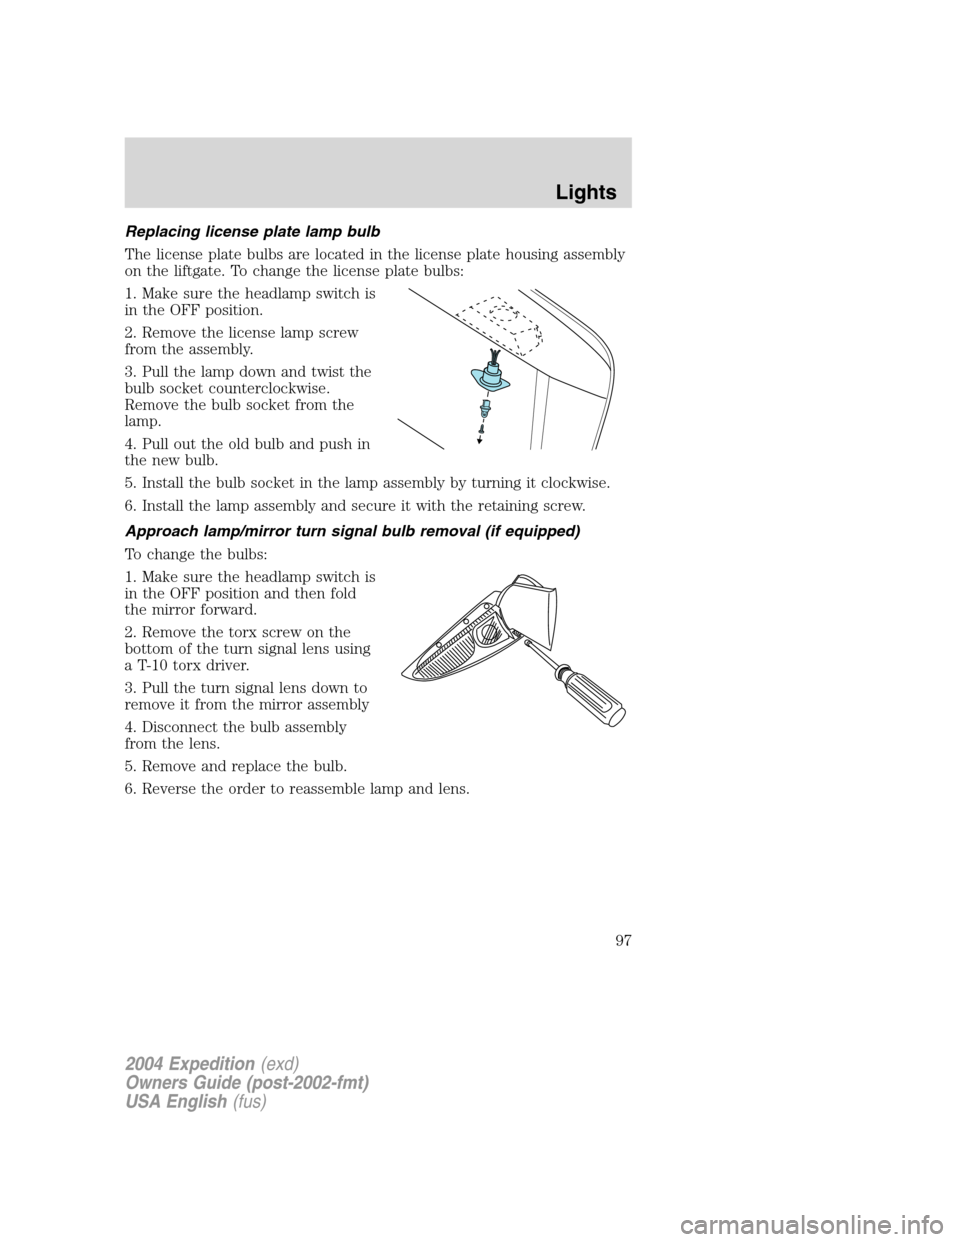
The license plate bulbs are located in the license plate housing assembly
on the liftgate. To change the license plate bulbs:
1. Make sure the headlamp switch is
in the OFF position.
2. Remove the license lamp screw
from the assembly.
3. Pull the lamp down and twist the
bulb socket counterclockwise.
Remove the bulb socket from the
lamp.
4. Pull out the old bulb and push in
the new bulb.
5. Install the bulb socket in the lamp assembly by turning it clockwise.
6. Install the lamp assembly and secure it with the retaining screw.
Approach lamp/mirror turn signal bulb removal (if equipped)
To change the bulbs:
1. Make sure the headlamp switch is
in the OFF position and then fold
the mirror forward.
2. Remove the torx screw on the
bottom of the turn signal lens using
a T-10 torx driver.
3. Pull the turn signal lens down to
remove it from the mirror assembly
4. Disconnect the bulb assembly
from the lens.
5. Remove and replace the bulb.
6. Reverse the order to reassemble lamp and lens.
2004 Expedition(exd)
Owners Guide (post-2002-fmt)
USA English(fus)
Lights
97
Page 100 of 344
Changing the wiper blades
It is recommended that wiper blades are renewed before winter.
To replace the wiper blades:
1. Fold back the wiper arm and
position the wiper blade at right
angles to the wiper arm.
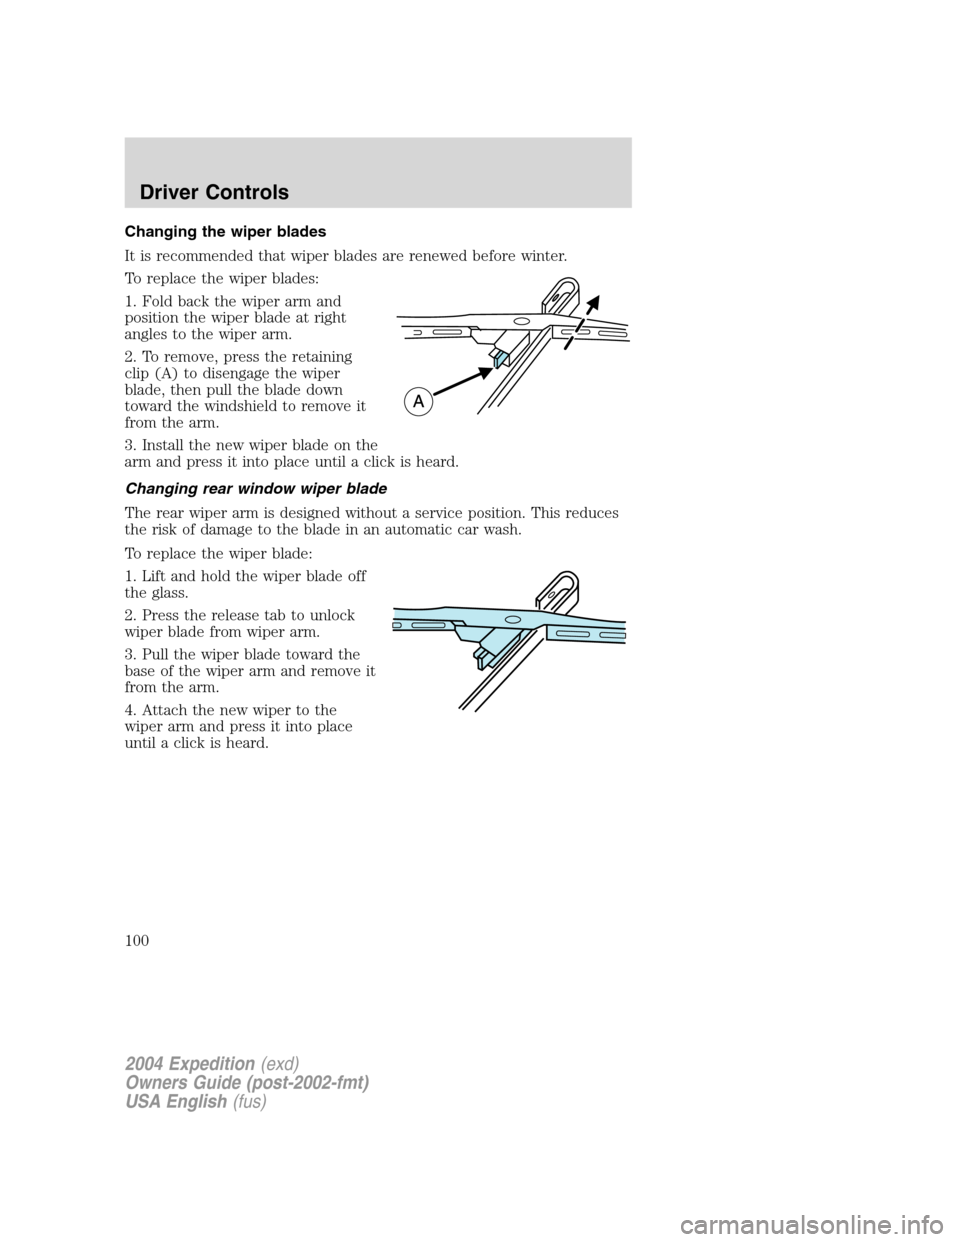
2. To remove, press the retaining
clip (A) to disengage the wiper
blade, then pull the blade down
toward the windshield to remove it
from the arm.
3. Install the new wiper blade on the
arm and press it into place until a click is heard.
Changing rear window wiper blade
The rear wiper arm is designed without a service position. This reduces
the risk of damage to the blade in an automatic car wash.
To replace the wiper blade:
1. Lift and hold the wiper blade off
the glass.
2. Press the release tab to unlock
wiper blade from wiper arm.
3. Pull the wiper blade toward the
base of the wiper arm and remove it
from the arm.
4. Attach the new wiper to the
wiper arm and press it into place
until a click is heard.
2004 Expedition(exd)
Owners Guide (post-2002-fmt)
USA English(fus)
Driver Controls
100
Page 101 of 344
TILT STEERING
Push the lever down to unlock the
steering column. While the lever is
in the down position, tilt the
steering column to the desired
position.
While holding the steering wheel,
pull the lever up to its original
position to lock the steering column.
Never adjust the steering
column when the vehicle is
moving.
ILLUMINATED VISOR MIRROR
(IF EQUIPPED)
Lift the mirror cover to turn on the
visor mirror lamps.
OVERHEAD CONSOLE
The appearance of your vehicle’s overhead console will vary according to
your option package.
2004 Expedition(exd)
Owners Guide (post-2002-fmt)
USA English(fus)
Driver Controls
101
Page 105 of 344
Not equipped with rear climate
control
POWER WINDOWS (IF EQUIPPED)
When closing the power
windows, you should verify
they are free of obstructions and
ensure that children and/or pets
are not in the proximity of the
window openings.
Press and hold the bottom part of the rocker switch to open the window.
Press and hold the top part of the rocker switch to close the window.
One touch down
Allows the driver’s window to open
fully without holding the control
down. Press completely down on
the bottom part of the rocker switch
and release quickly. Press the top
part of the rocker switch to stop.
Window lock
The window lock feature allows only
the driver to operate the power
windows.
To lock out all the window controls
except for the driver’s press the left
side of the control. Press the right side to restore the window controls.
2004 Expedition(exd)
Owners Guide (post-2002-fmt)
USA English(fus)
Driver Controls
105
Page 106 of 344
Accessory delay
With accessory delay, the window switches, audio system and moon roof
may be used for up to ten minutes after the ignition switch is turned to
the OFF position or until any door is opened.
MIRRORS
Automatic dimming rear view mirrors (if equipped)
Your vehicle may be equipped with an inside rear view mirror with an
auto-dimming function. The electronic day/night mirror will change from
the normal state to the non-glare state when bright lights (glare) reach
the inside rear view mirror. When the inside rear view mirror detects
bright light from in front of or behind the vehicle, the inside rear view
mirror will automatically adjust (darken) to minimize glare.
Do not block the sensor on the backside of the inside rear view mirror
since this may impair proper system performance.
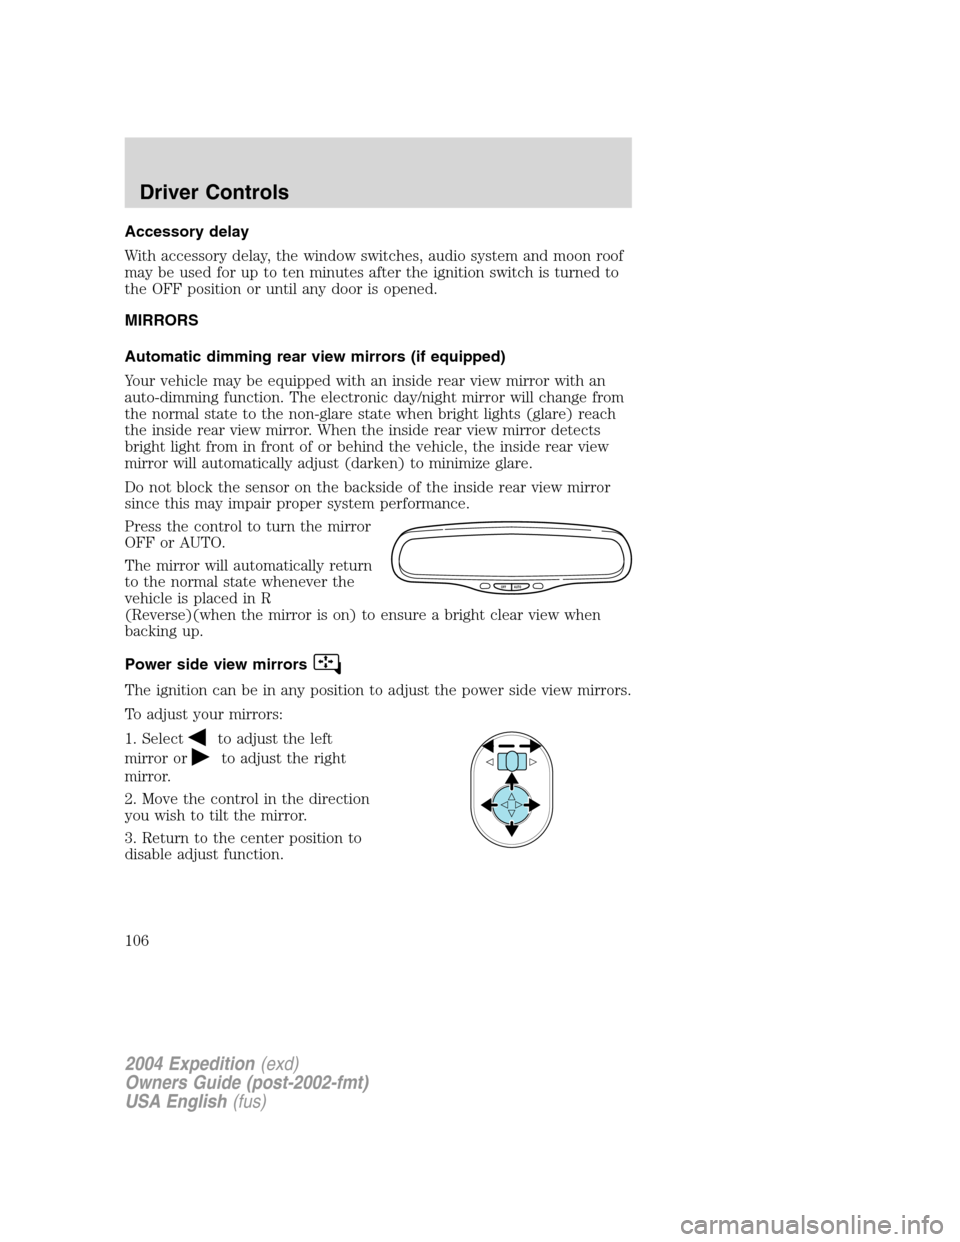
Press the control to turn the mirror
OFF or AUTO.
The mirror will automatically return
to the normal state whenever the
vehicle is placed in R
(Reverse)(when the mirror is on) to ensure a bright clear view when
backing up.
Power side view mirrors
The ignition can be in any position to adjust the power side view mirrors.
To adjust your mirrors:
1. Select
to adjust the left
mirror or
to adjust the right
mirror.
2. Move the control in the direction
you wish to tilt the mirror.
3. Return to the center position to
disable adjust function.
OFF AUTO
2004 Expedition(exd)
Owners Guide (post-2002-fmt)
USA English(fus)
Driver Controls
106
Page 113 of 344
Climate control features
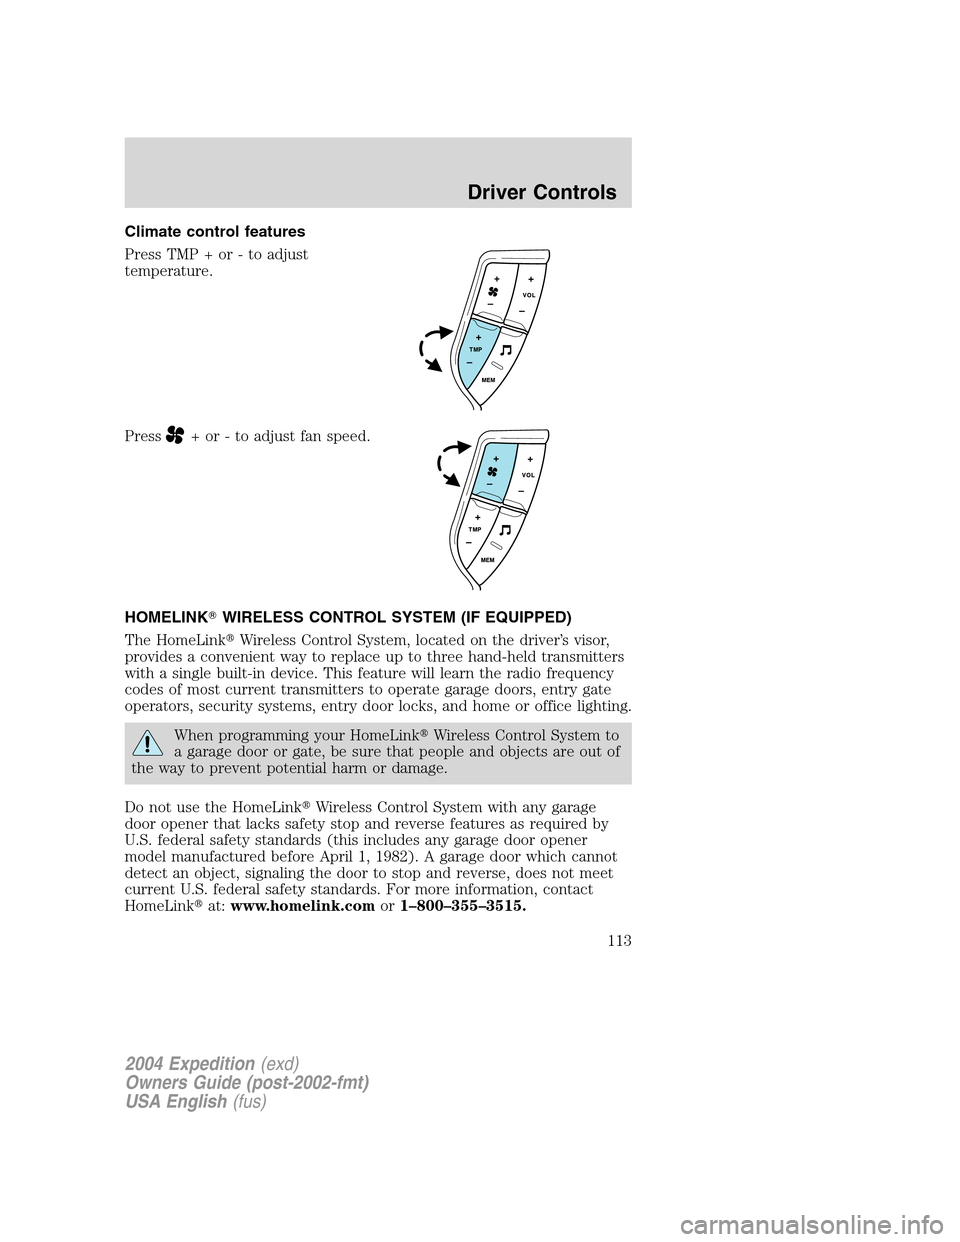
Press TMP + or - to adjust
temperature.
Press
+ or - to adjust fan speed.
HOMELINK�WIRELESS CONTROL SYSTEM (IF EQUIPPED)
The HomeLink�Wireless Control System, located on the driver’s visor,
provides a convenient way to replace up to three hand-held transmitters
with a single built-in device. This feature will learn the radio frequency
codes of most current transmitters to operate garage doors, entry gate
operators, security systems, entry door locks, and home or office lighting.
When programming your HomeLink�Wireless Control System to
a garage door or gate, be sure that people and objects are out of
the way to prevent potential harm or damage.
Do not use the HomeLink�Wireless Control System with any garage
door opener that lacks safety stop and reverse features as required by
U.S. federal safety standards (this includes any garage door opener
model manufactured before April 1, 1982). A garage door which cannot
detect an object, signaling the door to stop and reverse, does not meet
current U.S. federal safety standards. For more information, contact
HomeLink�at:www.homelink.comor1–800–355–3515.
2004 Expedition(exd)
Owners Guide (post-2002-fmt)
USA English(fus)
Driver Controls
113
Page 116 of 344
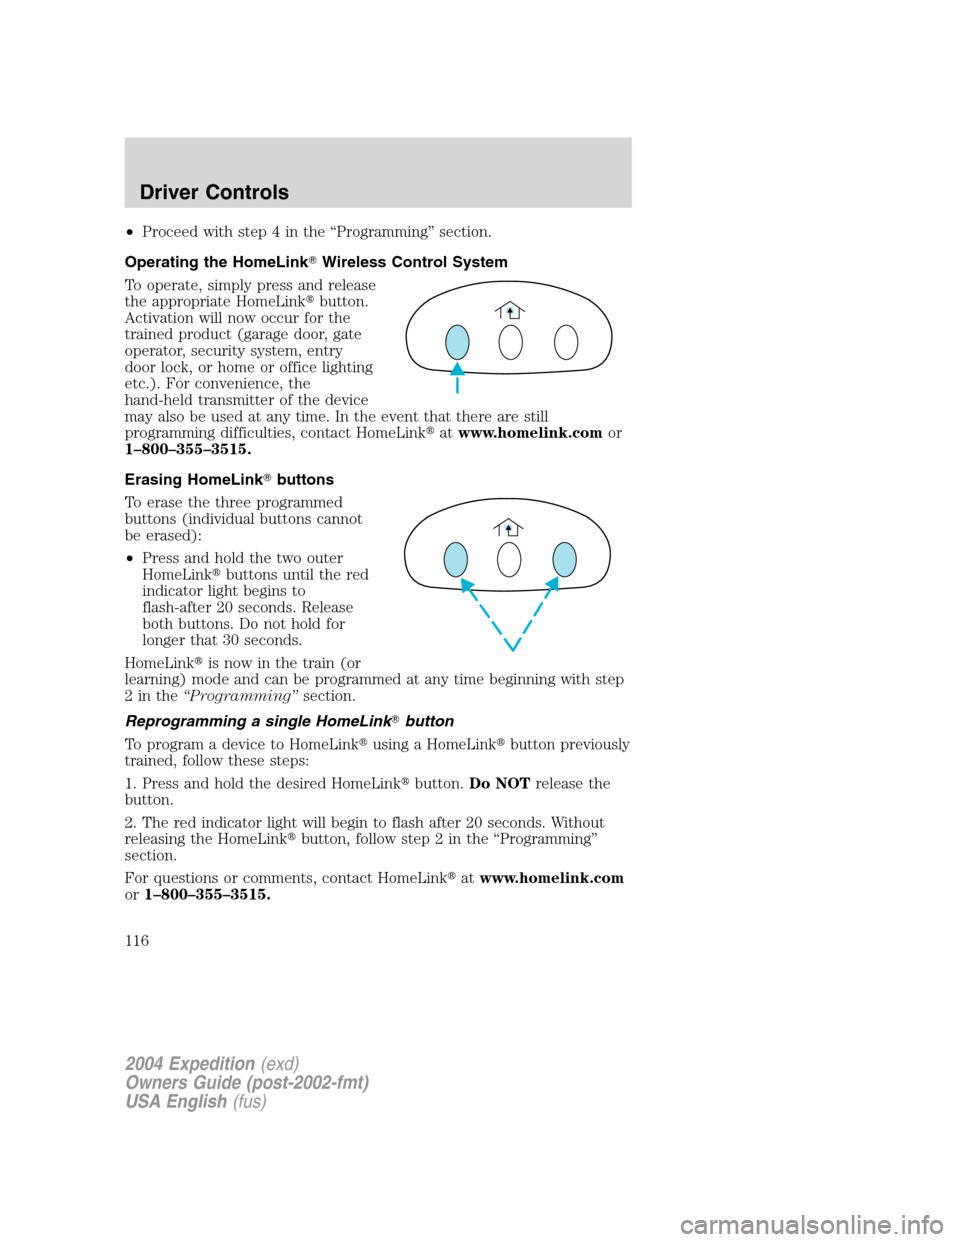
•Proceed with step 4 in the“Programming”section.
Operating the HomeLink�Wireless Control System
To operate, simply press and release
the appropriate HomeLink�button.
Activation will now occur for the
trained product (garage door, gate
operator, security system, entry
door lock, or home or office lighting
etc.). For convenience, the
hand-held transmitter of the device
may also be used at any time. In the event that there are still
programming difficulties, contact HomeLink�atwww.homelink.comor
1–800–355–3515.
Erasing HomeLink�buttons
To erase the three programmed
buttons (individual buttons cannot
be erased):
•Press and hold the two outer
HomeLink�buttons until the red
indicator light begins to
flash-after 20 seconds. Release
both buttons. Do not hold for
longer that 30 seconds.
HomeLink�is now in the train (or
learning) mode and can be programmed at any time beginning with step
2inthe“Programming”section.
Reprogramming a single HomeLink�button
To program a device to HomeLink�using a HomeLink�button previously
trained, follow these steps:
1. Press and hold the desired HomeLink�button.Do NOTrelease the
button.
2. The red indicator light will begin to flash after 20 seconds. Without
releasing the HomeLink�button, follow step 2 in the“Programming”
section.
For questions or comments, contact HomeLink�atwww.homelink.com
or1–800–355–3515.
2004 Expedition(exd)
Owners Guide (post-2002-fmt)
USA English(fus)
Driver Controls
116
Page 118 of 344

Compass zone adjustment
1. Determine which magnetic zone
you are in for your geographic
location by referring to the zone
map.
2. Turn ignition to the ON position.
3. Start the engine.
4. Press the TRIP/RESET button
(near your odometer display), hold
for six seconds and release. You will
see that ZONE appears in the
instrument cluster display.
5. Press and release the button until
the desired zone number appears.
Note:The range of zone values are from 01 to 15 and“wraps”back to
01.
6. When you get to the desired ZONE number, hold the TRIP/RESET
button down to“lock in”the new value.
The cluster display will return to the“normal”mode when the
TRIP/RESET button has not been pressed for 6 seconds.
Compass calibration adjustment
Perform this adjustment in an open area free from steel structures and
high voltage lines. For optimum calibration, turn off all electrical
accessories (heater/air conditioning, wipers, etc.) and make sure all
vehicle doors are shut.
1. Start the vehicle.
2. To enter the compass calibration
mode, press and hold the
TRIP/RESET button for greater than
eight seconds. The display will then
show CAL in the display window.
1 2 3
4
5
6 7 8 9 101112 13 14 15
2004 Expedition(exd)
Owners Guide (post-2002-fmt)
USA English(fus)
Driver Controls
118