2004 FIAT MULTIPLA lock
[x] Cancel search: lockPage 77 of 202

76
CONNECT NAV
NAVIGATOR
“FOLLOW ME” FUNCTION ............................................ 157
RECALLING THE PHONE CODE NUMBER .............. 162
RECALLING THE PHONE “STATE” FUNCTION .... 162
DISPLAYING AVAILABLE SIM PROFILES .................... 163
TELEPHONE.......................................................................... 164
GENERAL INFORMATION .............................................. 164
TURNING THE PHONE ON .......................................... 164
ENTERING THE PIN CODE ............................................ 164
CHANGING THE PIN CODE ........................................ 165
SIM CARD UNLOCKING ................................................ 166
VOLUME ADJUSTMENT .................................................. 166
SELECTING PHONE NUMBERS .................................... 167
SELECTING A NUMBER
IN THE PHONE BOOK .................................................... 169
INCOMING CALLS ............................................................ 170
TELEPHONE CALLS TO FOREIGN COUNTRIES .... 171
SELECTING THE NETWORK ........................................ 172
PHONEBOOK ...................................................................... 176
MESSAGES (SMS) ................................................................ 178BASIC SETTINGS .............................................................. 183
OPENING THE SETTINGS MENU ................................ 183
ADJUSTING THE DISPLAY .............................................. 183
ADJUSTING POWER-ON, TA ANNOUNCEMENT
MESSAGE ................................................................................ 185
SETTING THE CLOCK ...................................................... 187
SELECTING THE LANGUAGE ........................................ 189
GPS STATUS ........................................................................ 190
SECURITY .............................................................................. 191
RESETTING DEFAULT SETTINGS ................................ 192
ANTITHEFT PROTECTION SYSTEM.................. 195
GENERAL INFORMATION .............................................. 195
CODE CARD ........................................................................ 195
ENTERING THE SECURITY CODE .............................. 195
TECHNICAL DATA .......................................................... 197
RADIO .................................................................................... 197
COMPACT DISC PLAYER AND CD CHANGER .... 197
AUDIO .................................................................................... 198
SATELLITE NAVIGATION ................................................ 198
TARGA INFOMOBILITY SERVICES ................................ 198
TELEPHONE ........................................................................ 198
SYSTEM TECHNICAL DATA .......................................... 199
Page 86 of 202

85
CONNECT NAV
NAVIGATOR
ADJUSTING THE VOLUME
To turn the volume up: turn the
knob/button (16) clockwise.
To turn the volume down: turn
the knob/button (16) anticlockwise.
The volume is graphically shown on
the display during the adjustment (au-
dio source main menu only)fig. 5.
IMPORTANT The volume of a
navigation voice message can be
changed, regardless of the basic sound
source volume.DISPLAY fig. 6
The display will switch to night-time
operation (reversed colours) when
the side/taillights are switched on
fig. 7. This function can be switched
off if you need to travel in daytime
with the headlights on (see “Adjusting
the display” in section “Basic settings”.
fig. 5F0E3021gfig. 6F0E3095gfig. 7F0E3221g
If you drive with the volume
too high you put both your
own life and that of others in jeop-
ardy. You should adjust the volume
so that you can hear noises from
outside the car (e.g. horns, ambu-
lance/ police sirens, etc.).
WARNING
Page 101 of 202
100
CONNECT NAV
NAVIGATOR
PLAYING A CD
(internal player)
Playback will start automatically as
soon as a CD is inserted.
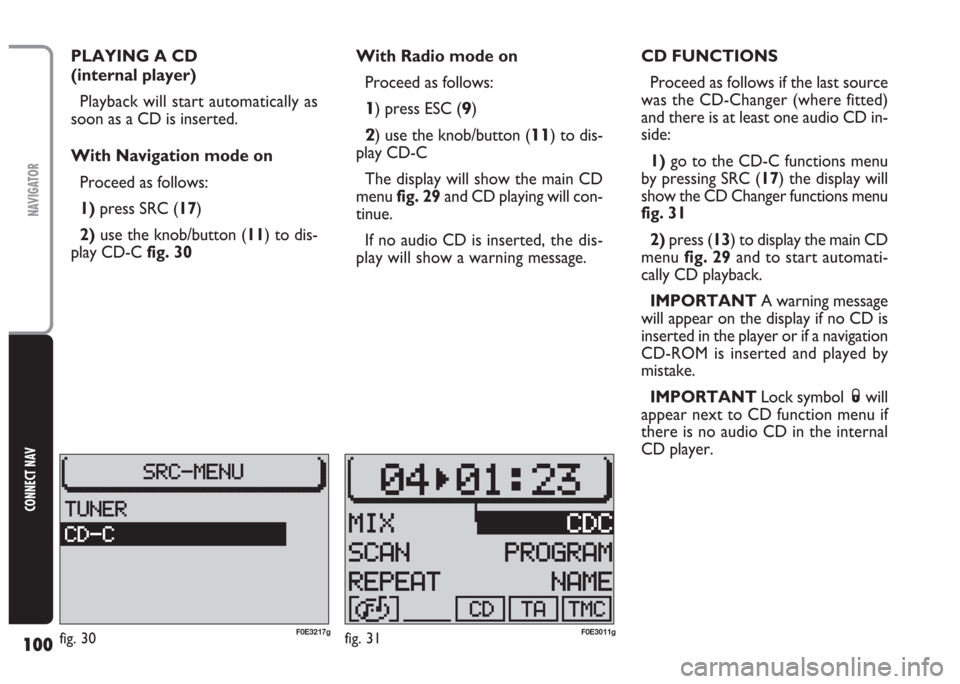
With Navigation mode on
Proceed as follows:
1) press SRC (17)
2)use the knob/button (11) to dis-
play CD-Cfig. 30With Radio mode on
Proceed as follows:
1) press ESC (9)
2) use the knob/button (11) to dis-
play CD-C
The display will show the main CD
menu fig. 29and CD playing will con-
tinue.
If no audio CD is inserted,the dis-
play will show a warning message.CD FUNCTIONS
Proceed as follows if the last source
was the CD-Changer (where fitted)
and there is at least one audio CD in-
side:
1)go to the CD-C functions menu
by pressing SRC (17) the display will
show the CD Changer functions menu
fig. 31
2)press (13) to display the main CD
menu fig. 29and to start automati-
cally CD playback.
IMPORTANT A warning message
will appear on the display if no CD is
inserted in the player or if a navigation
CD-ROM is inserted and played by
mistake.
IMPORTANT Lock symbol Swill
appear next to CD function menu if
there is no audio CD in the internal
CD player.
fig. 30F0E3217gfig. 31F0E3011g
Page 107 of 202

106
CONNECT NAV
NAVIGATOR
INSERTING AND EJECTING
A CD
Loading the CD loader
To insert CDs apply the following
procedure:
1) pull the proper lever A-fig. 41to
open one of the ten loader compart-
ments;
2) load the CD taking care to posi-
tion the CD with the label set on the
proper side otherwise the CD player
will not work;
3)close the loader compartment;
4) repeat the same procedure for
the other Compact Discs.
C C
D D
C C
H H
A A
N N
G G
E E
R R
- -
C C
D D
C C
( (
w w
h h
e e
r r
e e
f f
i i
t t
t t
e e
d d
) )
How to insert the CD-changer
in the CD-player
Move the sliding lid B-fig. 42right-
wards until it locks.
Fit down the loader C-fig. 43com-
pletely into the player observing the
direction of the arrow marked on the
loader side.
After fitting the CD loader, close the
sliding lid D-fig. 44to prevent foreign
matters or dust penetration into the
CD player.
fig. 41F0E0401mfig. 42F0E0402mfig. 44F0E0404m
fig. 43F0E0403m
Page 110 of 202
109
CONNECT NAV
NAVIGATOR
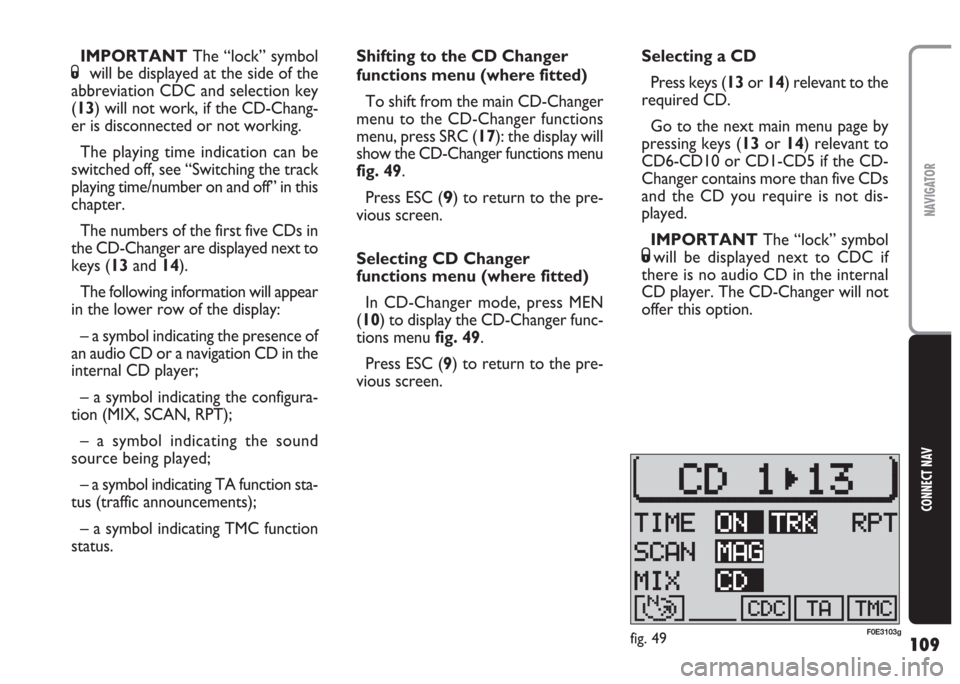
Shifting to the CD Changer
functions menu (where fitted)
To shift from the main CD-Changer
menu to the CD-Changer functions
menu, press SRC (17): the display will
show the CD-Changer functions menu
fig. 49.
Press ESC (
9) to return to the pre-
vious screen.
Selecting CD Changer
functions menu (where fitted)
In CD-Changer mode, press MEN
(10) to display the CD-Changer func-
tions menu fig. 49.
Press ESC (9) to return to the pre-
vious screen.Selecting a CD
Press keys (13or 14) relevant to the
required CD.
Go to the next main menu page by
pressing keys (13or 14) relevant to
CD6-CD10 or CD1-CD5 if the CD-
Changer contains more than five CDs
and the CD you require is not dis-
played.
IMPORTANT The “lock” symbol
Swill be displayed next to CDC if
there is no audio CD in the internal
CD player. The CD-Changer will not
offer this option. IMPORTANT The “lock” symbol
Swill be displayed at the side of the
abbreviation CDC and selection key
(13) will not work, if the CD-Chang-
er is disconnected or not working.
The playing time indication can be
switched off, see “Switching the track
playing time/number on and off” in this
chapter.
The numbers of the first five CDs in
the CD-Changer are displayed next to
keys (13and 14).
The following information will appear
in the lower row of the display:
– a symbol indicating the presence of
an audio CD or a navigation CD in the
internal CD player;
– a symbol indicating the configura-
tion (MIX, SCAN, RPT);
– a symbol indicating the sound
source being played;
– a symbol indicating TA function sta-
tus (traffic announcements);
– a symbol indicating TMC function
status.
fig. 49F0E3103g
Page 122 of 202
121
CONNECT NAV
NAVIGATOR
6)press the knob/button (11) to
confirm. The selected character is dis-
played in the editing field 3-fig. 64
7) repeat the procedure for the oth-
er letters in the name
8)when entering the name, the list
of destinations matching the entered
letters will appear in the editing list 2-
fig. 64.
9) position the cursor on the symbol
jand press the knob/button (11) or
hold the knob/button (11) pressed for
longer than two seconds. The alpha-
betical list of destinations will appear
10)turn the knob/button (11) to
seek the required town destination
name in the editing list
11) confirm the destination by press-
ing the knob/button (11).Press ESC (9) to not confirm the
destination and return to the editing
menu (Speller) fig. 64.
After selecting the destination, the
sound/navigation system offers the fol-
lowing options: STREET, CENTRE,
DEST. SURROUND)
IMPORTANT Only the options
for which data is available on the nav-
igation CD are offered. A lock symbol
Swill appear next to the unavailable
options.
“STREET” The destination street
can be entered. This option depends
on the size of the town and data
stored on the navigation CD.Confirm the street. The entering
procedure will continue with the fol-
lowing options:
– CONTINUE: select this item to
continue;
– INTERSECTION: select this item
to define an intersection with the pre-
viously selected street as a destination.
In this case, an alphabetical list where
to select the required intersection will
be displayed;
– HOUSE NUMBER: select this item
to define a house number on the pre-
viously selected street as a destination.
“CENTRE” The town centre or
district (for big cities) can be entered
as a destination.
Page 124 of 202
123
CONNECT NAV
NAVIGATOR
9)position the cursor on the symbol
jand press the knob/button (11) or
hold the knob/button (11) pressed for
longer than two seconds. The alpha-
betical list of destinations will appear
on the display
10)turn the knob/button (11) to
seek the required street name in the
editing list
11) confirm the destination by press-
ing the knob/button (11).IMPORTANT Only the options
for which data is available on the nav-
igation CD are offered. A lock symbol
Swill appear next to the unavailable
options.
Press ESC (9) to return to the pre-
vious menu.
Entering the destination
“HOUSE NUMBER”
Proceed as follows to reach a house
number:
1) enter the street as described pre-
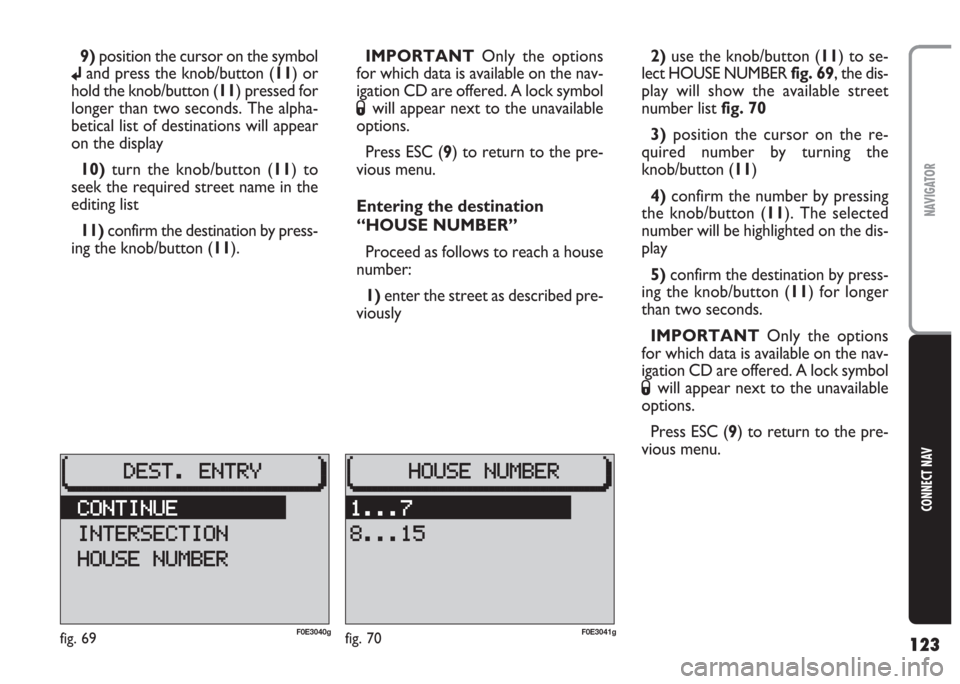
viously2)use the knob/button (11) to se-
lect HOUSE NUMBERfig. 69, the dis-
play will show the available street
number listfig. 70
3) position the cursor on the re-
quired number by turning the
knob/button (11)
4)confirm the number by pressing
the knob/button (11). The selected
number will be highlighted on the dis-
play
5)confirm the destination by press-
ing the knob/button (11) for longer
than two seconds.
IMPORTANT Only the options
for which data is available on the nav-
igation CD are offered. A lock symbol
Swill appear next to the unavailable
options.
Press ESC (9) to return to the pre-
vious menu.
fig. 69F0E3040gfig. 70F0E3041g
Page 125 of 202
124
CONNECT NAV
NAVIGATOR
Entering the destination
“INTERSECTION”
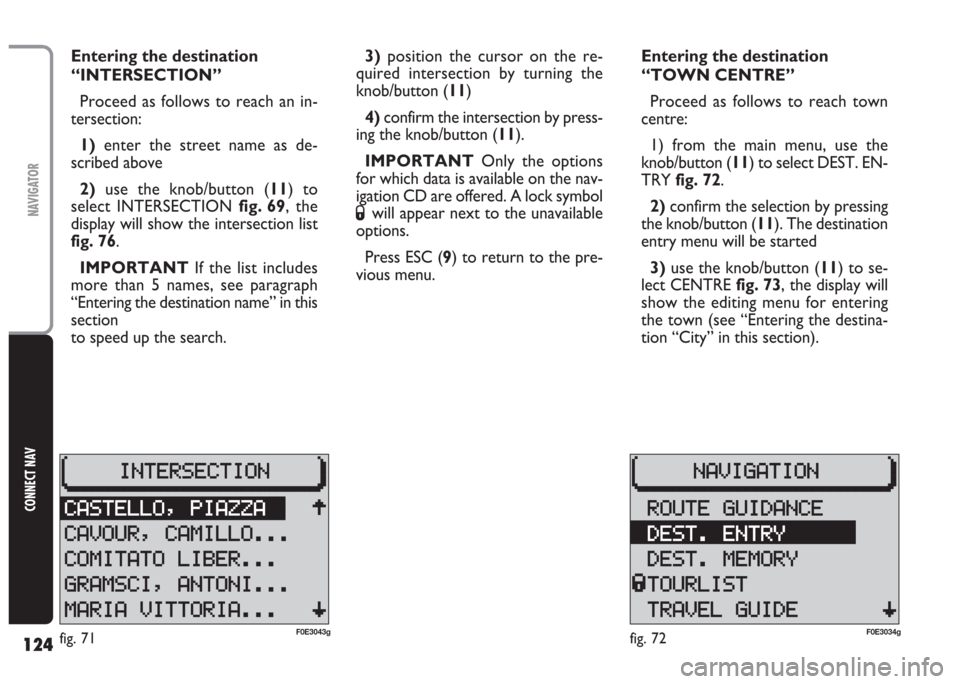
Proceed as follows to reach an in-
tersection:
1) enter the street name as de-
scribed above
2) use the knob/button (11) to
select INTERSECTION fig. 69, the
display will show the intersection list
fig. 76.
IMPORTANT If the list includes
more than 5 names, see paragraph
“Entering the destination name” in this
section
to speed up the search.3)position the cursor on the re-
quired intersection by turning the
knob/button (11)
4)confirm the intersection by press-
ing the knob/button (11).
IMPORTANT Only the options
for which data is available on the nav-
igation CD are offered. A lock symbol
Swill appear next to the unavailable
options.
Press ESC (9) to return to the pre-
vious menu.Entering the destination
“TOWN CENTRE”
Proceed as follows to reach town
centre:
1) from the main menu, use the
knob/button (11) to select DEST. EN-
TRY fig. 72.
2)confirm the selection by pressing
the knob/button (11). The destination
entry menu will be started
3) use the knob/button (11) to se-
lect CENTRE fig. 73, the display will
show the editing menu for entering
the town (see “Entering the destina-
tion “City” in this section).
fig. 72F0E3034gfig. 71F0E3043g