Page 119 of 202
118
CONNECT NAV
NAVIGATOR
ENTERING
THE DESTINATION
Possible destinations include:
– town;
– town centre or district in a city;
– street;
– house number (if contained in the
navigation CD data);
– intersection;
special destinations can also be en-
tered:
– motorway junctions;
– railway stations;
– airports;
– hospitals, etc.Proceed as follows to enter a desti-
nation:
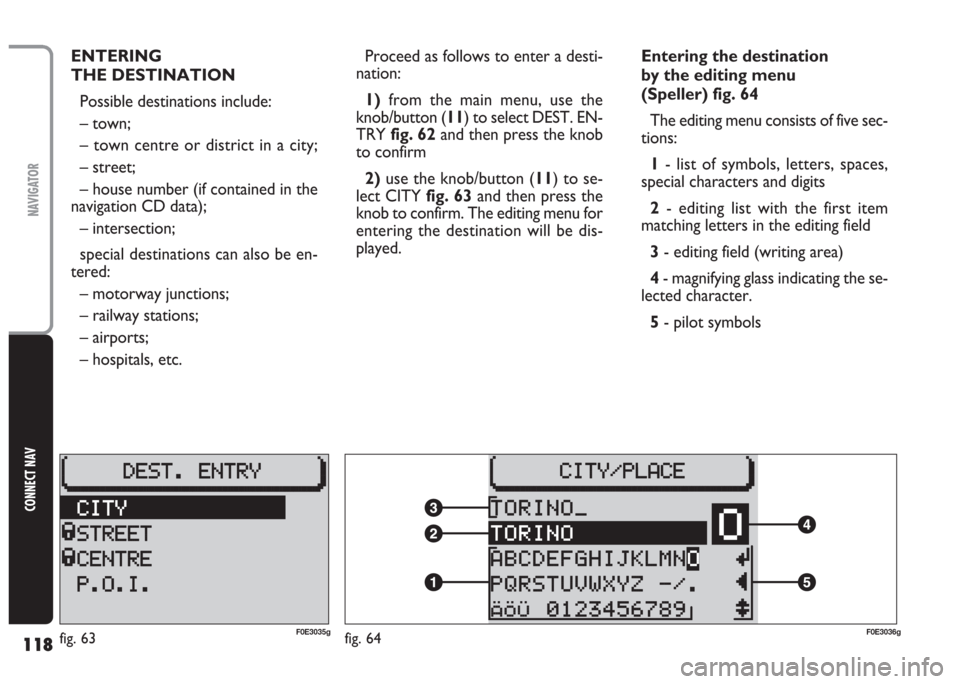
1)from the main menu, use the
knob/button (11) to select DEST. EN-
TRYfig. 62and then press the knob
to confirm
2) use the knob/button (11) to se-
lect CITY fig. 63and then press the
knob to confirm. The editing menu for
entering the destination will be dis-
played.Entering the destination
by the editing menu
(Speller) fig. 64
The editing menu consists of five sec-
tions:
1- list of symbols, letters, spaces,
special characters and digits
2- editing list with the first item
matching letters in the editing field
3- editing field (writing area)
4- magnifying glass indicating the se-
lected character.
5- pilot symbols
fig. 63F0E3035gfig. 64F0E3036g
Page 122 of 202
121
CONNECT NAV
NAVIGATOR
6)press the knob/button (11) to
confirm. The selected character is dis-
played in the editing field 3-fig. 64
7) repeat the procedure for the oth-
er letters in the name
8)when entering the name, the list
of destinations matching the entered
letters will appear in the editing list 2-
fig. 64.
9) position the cursor on the symbol
jand press the knob/button (11) or
hold the knob/button (11) pressed for
longer than two seconds. The alpha-
betical list of destinations will appear
10)turn the knob/button (11) to
seek the required town destination
name in the editing list
11) confirm the destination by press-
ing the knob/button (11).Press ESC (9) to not confirm the
destination and return to the editing
menu (Speller) fig. 64.
After selecting the destination, the
sound/navigation system offers the fol-
lowing options: STREET, CENTRE,
DEST. SURROUND)
IMPORTANT Only the options
for which data is available on the nav-
igation CD are offered. A lock symbol
Swill appear next to the unavailable
options.
“STREET” The destination street
can be entered. This option depends
on the size of the town and data
stored on the navigation CD.Confirm the street. The entering
procedure will continue with the fol-
lowing options:
– CONTINUE: select this item to
continue;
– INTERSECTION: select this item
to define an intersection with the pre-
viously selected street as a destination.
In this case, an alphabetical list where
to select the required intersection will
be displayed;
– HOUSE NUMBER: select this item
to define a house number on the pre-
viously selected street as a destination.
“CENTRE” The town centre or
district (for big cities) can be entered
as a destination.
Page 123 of 202
122
CONNECT NAV
NAVIGATOR
“P.O.I.” Special destinations in the
surroundings of the town - e.g.: mo-
torways, railway stations, shopping
centres, etc. - can be directly select-
ed
The system will automatically return
to the main navigation menu after the
entry.
Select ROUTE GUIDANCE and
confirm by pressing the knob/button
(11).
The system will calculate the route
in a few seconds and start providing
visual instructions (drawings) and
voice messages to guide you to your
destination.
Press ESC (9) to return to the pre-
vious menu.Entering the destination
“STREET”
You can specify a street as a desti-
nation in the previously selected town
as follows:
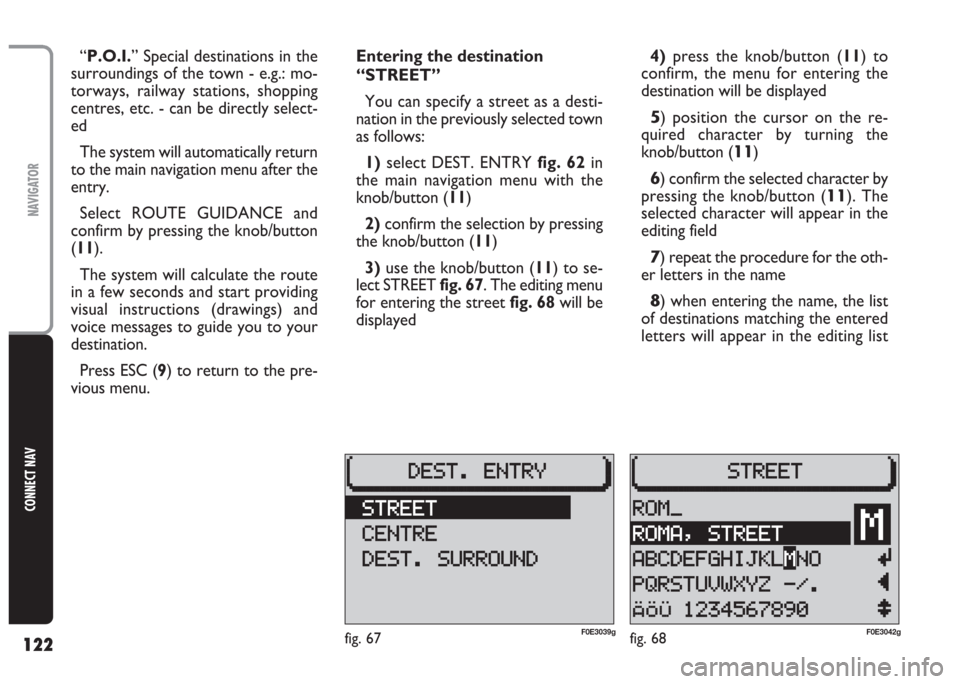
1)select DEST. ENTRY fig. 62in
the main navigation menu with the
knob/button (11)
2) confirm the selection by pressing
the knob/button (11)
3)use the knob/button (11) to se-
lect STREET fig. 67. The editing menu
for entering the street fig. 68will be
displayed4)press the knob/button (11) to
confirm, the menu for entering the
destination will be displayed
5) position the cursor on the re-
quired character by turning the
knob/button (
11)
6) confirm the selected character by
pressing the knob/button (
11). The
selected character will appear in the
editing field
7) repeat the procedure for the oth-
er letters in the name
8) when entering the name, the list
of destinations matching the entered
letters will appear in the editing list
fig. 68F0E3042gfig. 67F0E3039g
Page 125 of 202
124
CONNECT NAV
NAVIGATOR
Entering the destination
“INTERSECTION”
Proceed as follows to reach an in-
tersection:
1) enter the street name as de-
scribed above
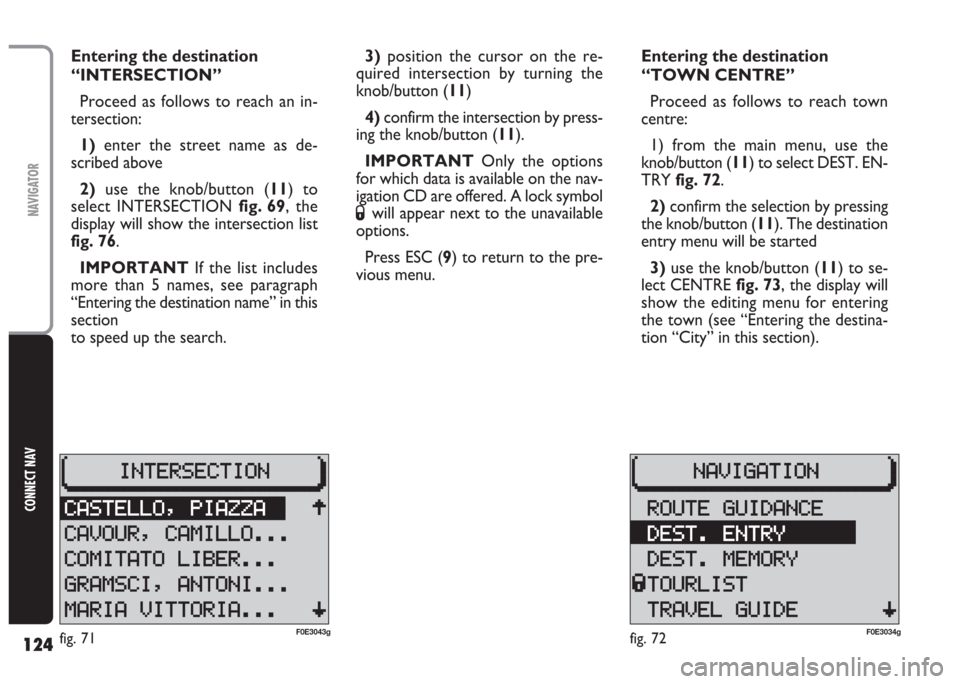
2) use the knob/button (11) to
select INTERSECTION fig. 69, the
display will show the intersection list
fig. 76.
IMPORTANT If the list includes
more than 5 names, see paragraph
“Entering the destination name” in this
section
to speed up the search.3)position the cursor on the re-
quired intersection by turning the
knob/button (11)
4)confirm the intersection by press-
ing the knob/button (11).
IMPORTANT Only the options
for which data is available on the nav-
igation CD are offered. A lock symbol
Swill appear next to the unavailable
options.
Press ESC (9) to return to the pre-
vious menu.Entering the destination
“TOWN CENTRE”
Proceed as follows to reach town
centre:
1) from the main menu, use the
knob/button (11) to select DEST. EN-
TRY fig. 72.
2)confirm the selection by pressing
the knob/button (11). The destination
entry menu will be started
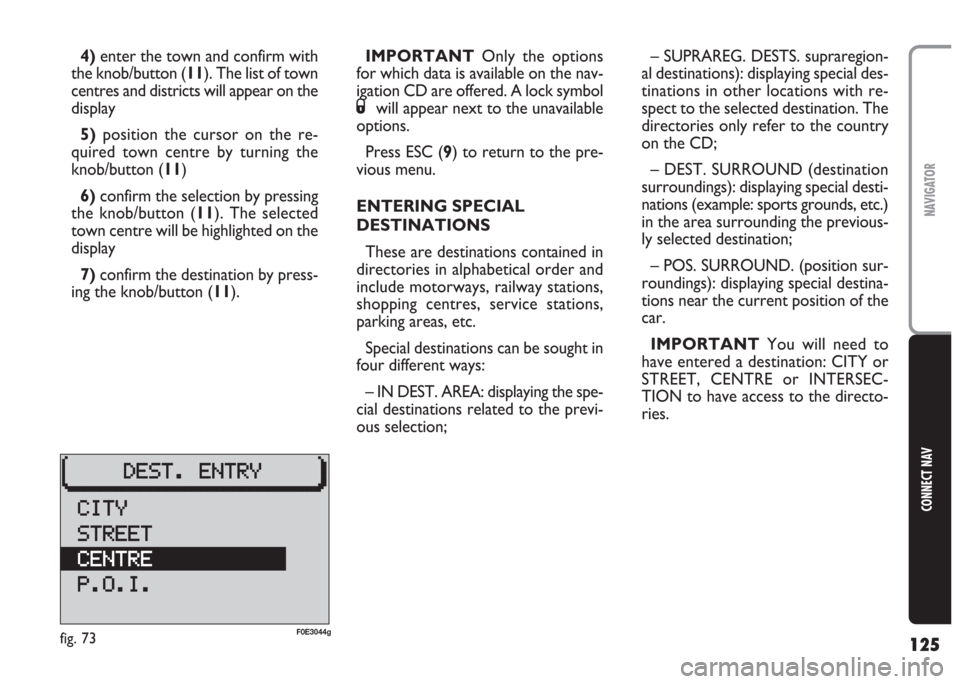
3) use the knob/button (11) to se-
lect CENTRE fig. 73, the display will
show the editing menu for entering
the town (see “Entering the destina-
tion “City” in this section).
fig. 72F0E3034gfig. 71F0E3043g
Page 126 of 202
125
CONNECT NAV
NAVIGATOR
4)enter the town and confirm with
the knob/button (11). The list of town
centres and districts will appear on the
display
5)position the cursor on the re-
quired town centre by turning the
knob/button (11)
6)confirm the selection by pressing
the knob/button (11). The selected
town centre will be highlighted on the
display
7) confirm the destination by press-
ing the knob/button (11).IMPORTANT Only the options
for which data is available on the nav-
igation CD are offered. A lock symbol
Swill appear next to the unavailable
options.
Press ESC (9) to return to the pre-
vious menu.
ENTERING SPECIAL
DESTINATIONS
These are destinations contained in
directories in alphabetical order and
include motorways, railway stations,
shopping centres, service stations,
parking areas, etc.
Special destinations can be sought in
four different ways:
– IN DEST. AREA: displaying the spe-
cial destinations related to the previ-
ous selection;– SUPRAREG. DESTS. supraregion-
al destinations): displaying special des-
tinations in other locations with re-
spect to the selected destination. The
directories only refer to the country
on the CD;
– DEST. SURROUND (destination
surroundings): displaying special desti-
nations (example: sports grounds, etc.)
in the area surrounding the previous-
ly selected destination;
– POS. SURROUND. (position sur-
roundings): displaying special destina-
tions near the current position of the
car.
IMPORTANT You will need to
have entered a destination: CITY or
STREET, CENTRE or INTERSEC-
TION to have access to the directo-
ries.
fig. 73F0E3044g
Page 135 of 202
134
CONNECT NAV
NAVIGATOR
TOURIST GUIDE
INFORMATION
(where fitted)
Tourist information on the destina-
tions can be recalled when using a nav-
igation CD.
Information is contained in directo-
ries on the following topics: accom-
modation, restaurants, tourist infor-
mation, amusements, etc…
The guide name will appear in the
main navigation menu if there is only
one guide (e.g.: MERIAN scout).Proceed as follows:
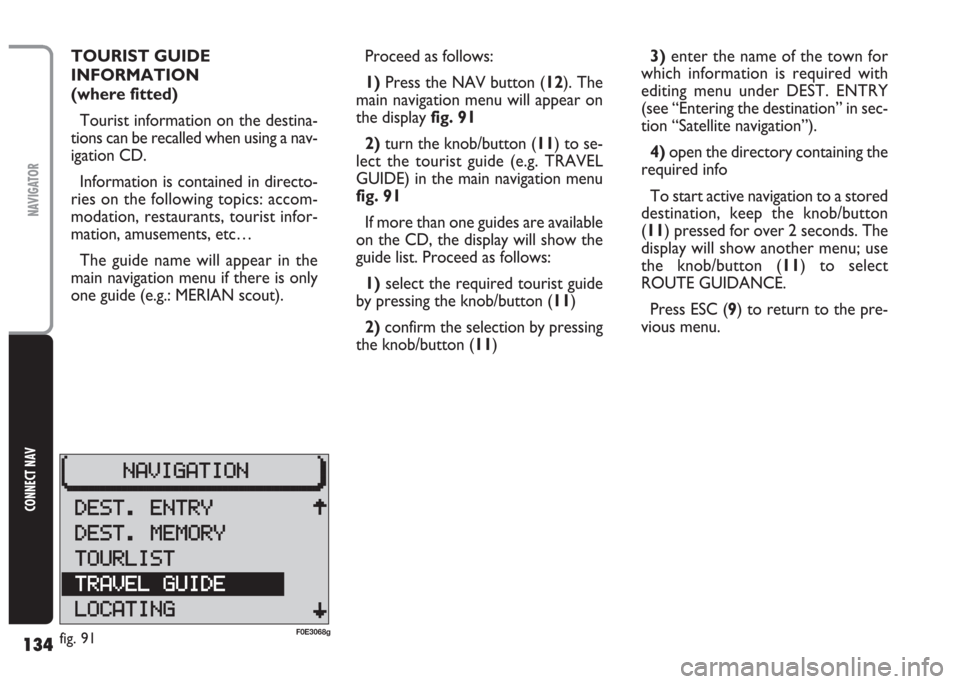
1) Press the NAV button (12). The
main navigation menu will appear on
the display fig. 91
2)turn the knob/button (11) to se-
lect the tourist guide (e.g. TRAVEL
GUIDE) in the main navigation menu
fig. 91
If more than one guides are available
on the CD, the display will show the
guide list. Proceed as follows:
1)select the required tourist guide
by pressing the knob/button (11)
2)confirm the selection by pressing
the knob/button (11)3)enter the name of the town for
which information is required with
editing menu under DEST. ENTRY
(see “Entering the destination” in sec-
tion “Satellite navigation”).
4)open the directory containing the
required info
To start active navigation to a stored
destination, keep the knob/button
(11) pressed for over 2 seconds. The
display will show another menu; use
the knob/button (11) to select
ROUTE GUIDANCE.
Press ESC (9) to return to the pre-
vious menu.
fig. 91F0E3068g