Page 187 of 397
Removing Discs from the CD Changer
If there is a single CD in the changer, press the EJT button
and the CD will eject. If the CD is not removed within 15
seconds, it will automatically reload into the CD changer.
To eject additional CDs from the changer, first select the
numbered button where the CD is located and then press
the EJT button.
CD Changer Operation with the Changer Off
The CD changer is able to load and eject discs with the
ignition power off. However, while the ignition is off, one
of the six numbered buttons must be pressed first. 6 DISC CD/DIGITAL VIDEO DISC (DVD) CHANGER
Ð IF EQUIPPED
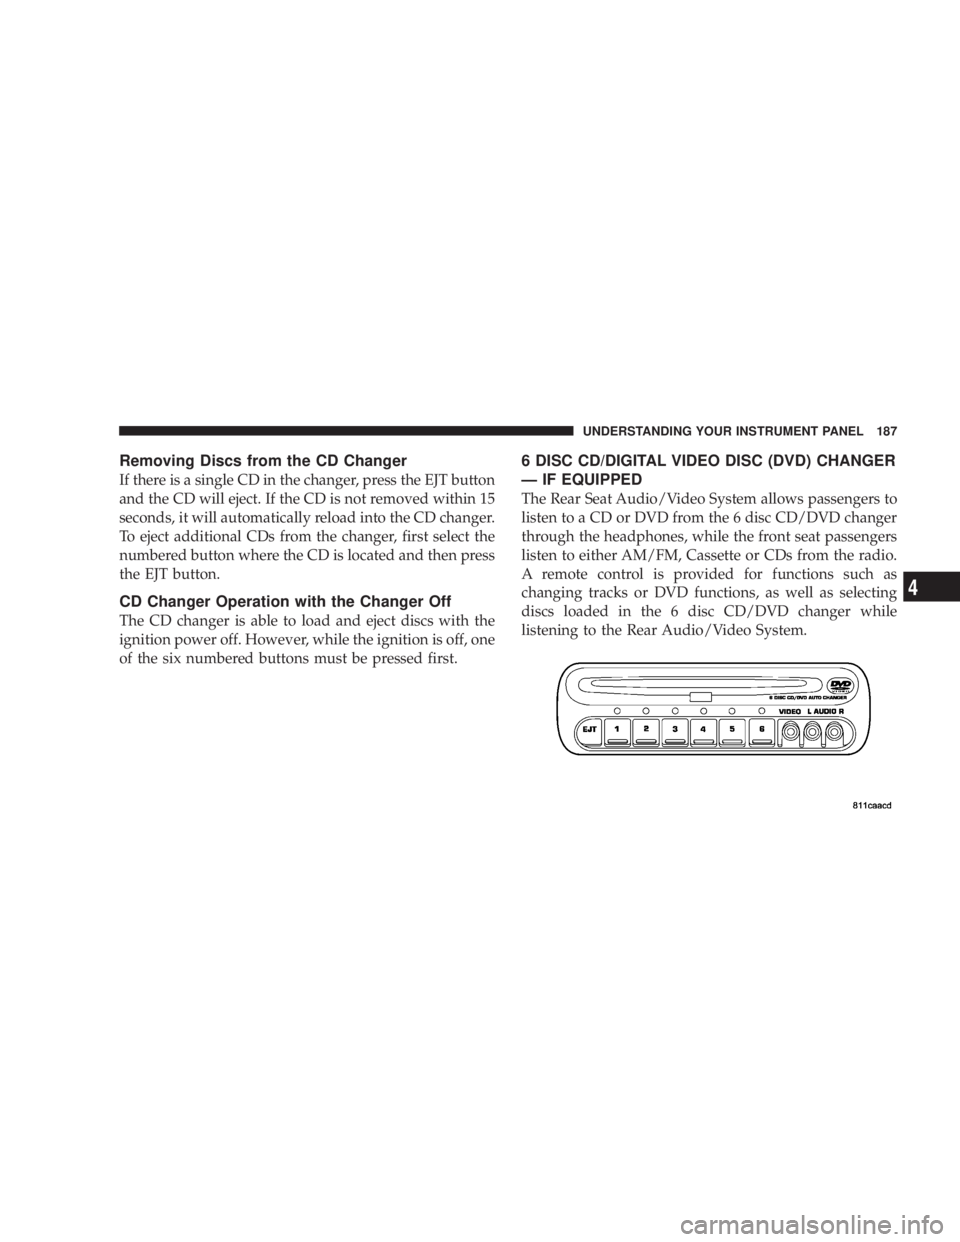
The Rear Seat Audio/Video System allows passengers to
listen to a CD or DVD from the 6 disc CD/DVD changer
through the headphones, while the front seat passengers
listen to either AM/FM, Cassette or CDs from the radio.
A remote control is provided for functions such as
changing tracks or DVD functions, as well as selecting
discs loaded in the 6 disc CD/DVD changer while
listening to the Rear Audio/Video System. UNDERSTANDING YOUR INSTRUMENT PANEL 187
4
Page 188 of 397
Operating Instructions Ð CD/DVD Changer
Loading The CD/DVD Changer
The CD/DVD changer is a multi-disc changer,
and will accept up to six discs. Gently insert
one disc into the CD/DVD changer with the
label facing up. The disc will automatically be
pulled into the CD/DVD changer.
To insert additional discs into the changer, follow the
instructions shown:
1. Select and press any numbered button without an
illuminated light above it.
2. Insert the disc while the light above the chosen button
is flashing and the light below the loading slot is illumi-
nated.
3. Upon insertion, the disc will begin to play, and both
the button light and the light below the loading slot will
illuminate. 4. Repeat the process for loading any additional CD/
DVDs. The CD/DVD changer will stop while additional
CD/DVDs are loaded.
If the volume control is ON, the unit will switch from
radio to CD/DVD mode and begin to play. The radio
display will show the chapter number and index time in
hours and minutes of the DVD, and the track number,
minutes and second of the CD. Play will begin automati-
cally in approximately 20 seconds. If the DVD does not
play automatically, press the ªENTERº button on the
remote control or on the side of the video screen to select
play from the menu options.
NOTE:
² You may eject a disc with the radio OFF. The ignition
switch must be in the ON or ACC position to insert a
disc with the radio OFF.188 UNDERSTANDING YOUR INSTRUMENT PANEL
Page 189 of 397
² If you insert a disc with the ignition ON and the radio
OFF, the DVD will automatically be pulled into the
DVD changer and the display will show the time of
day.
EJECT (EJT) Button
If there is a single disc in the changer, press the EJT
button and the disc will eject. The unit will switch to the
radio mode. If you do not remove the disc within 10
seconds, it will be reloaded and the display will show
PAUSE. The radio mode will continue to operate.
To eject additional discs from the changer, first select the
numbered button where the disc is located and then press
the EJT button.
The disc can be ejected with the radio OFF. Operating Instructions Ð Remote Control
Power Button (PWR)
Pressing the ªPOWERº button will turn the rear audio/
video system ON/OFF. The headphone symbol will flash
for approximately 5 seconds in the radio display and
sound can be heard from the headphones.
NOTE:
² The power button on the headphones must be turned
ON before sound can be heard from the headphones.
² When the rear audio/video system is ON, sound can
only be heard from the front speakers. The rear
speakers will turn back on when the rear audio/video
system is turned OFF. UNDERSTANDING YOUR INSTRUMENT PANEL 189
4
Page 193 of 397
Power Button
Pressing the power button will turn the headphones
ON/OFF.
NOTE:
² The headphones will turn off automatically and the
red LED will illuminate for approximately 2 minutes
when the radio or rear audio/video system is turned
off.
² The rear audio/video system must be turned ON
before sound can be heard from the headphones.
Volume Control
Rotate the volume control upward to increase the vol-
ume. Scan Button
Pressing the scan button will automatically find the
audio signal that is transmitted from the CD/DVD
changer when the rear audio/video system and the
headphones are on. This button is used only if the
headphones are locked on to a source other than the
vehicle's radio.
NOTE: When the ªGREEN LEDº is showing the head-
phones are receiving the audio signal. When the ªRED
LEDº is showing the headphones are searching for the
audio signal UNDERSTANDING YOUR INSTRUMENT PANEL 193
4
Page 194 of 397
Headphone Battery Service
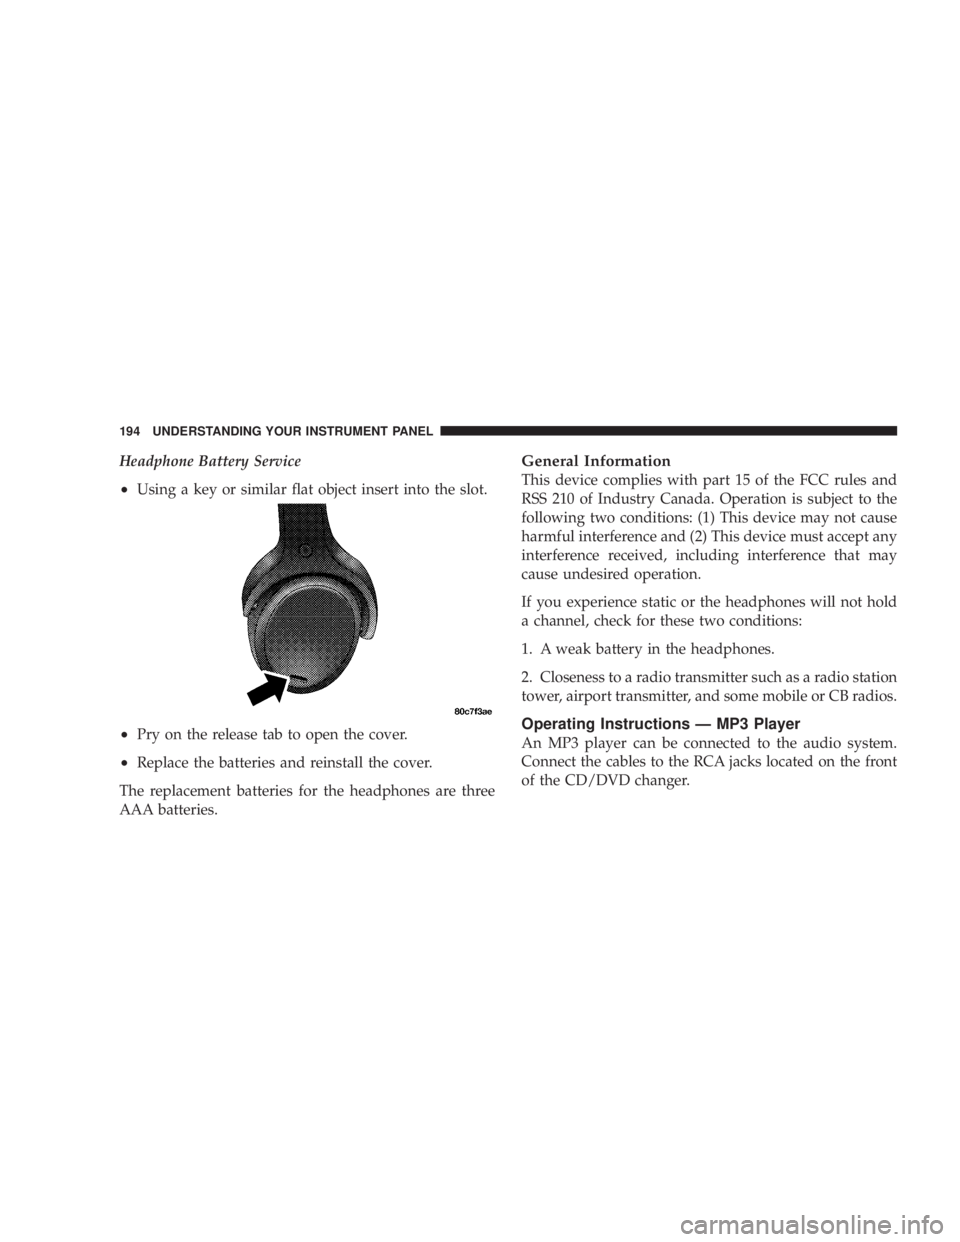
² Using a key or similar flat object insert into the slot.
² Pry on the release tab to open the cover.
² Replace the batteries and reinstall the cover.
The replacement batteries for the headphones are three
AAA batteries. General Information
This device complies with part 15 of the FCC rules and
RSS 210 of Industry Canada. Operation is subject to the
following two conditions: (1) This device may not cause
harmful interference and (2) This device must accept any
interference received, including interference that may
cause undesired operation.
If you experience static or the headphones will not hold
a channel, check for these two conditions:
1. A weak battery in the headphones.
2. Closeness to a radio transmitter such as a radio station
tower, airport transmitter, and some mobile or CB radios.
Operating Instructions Ð MP3 Player
An MP3 player can be connected to the audio system.
Connect the cables to the RCA jacks located on the front
of the CD/DVD changer.194 UNDERSTANDING YOUR INSTRUMENT PANEL
Page 196 of 397
system. Pressing the top of the rocker switch will increase
the volume and pressing the bottom of the rocker switch
will decrease the volume. Pressing the center button
changes the operation of the radio from AM to FM to
Tape or CD mode depending on which radio is in the
vehicle.
The left hand rocker switch has a push button in the
center. The function of the left hand switch is different
depending on which mode you are in.
The following describes the left hand rocker switch
operation in each mode:
Radio Operation
Pressing the top of the switch will SEEK up for the next
listenable station and pressing the bottom of the switch
will SEEK down for the next listenable station. The button located in the center of the left hand switch
will tune to the next pre-set station that you have
programmed in the radio pre-set push-button.
Tape Player
Pressing the top of the switch once will go to the next
selection on the cassette. Pressing the bottom of the
switch once will go to the beginning of the current
selection or to the beginning of the previous selection if it
is within the first 5 seconds of the current selection.
If you press the switch up or down twice it plays the
second selection, three times, it will play the third, etc.
The button in the center of the left hand switch has no
function in this mode.196 UNDERSTANDING YOUR INSTRUMENT PANEL
Page 197 of 397
CD Player
Pressing the top of the switch once will go to the next
track on the CD. Pressing the bottom of the switch once
will go to the beginning of the current track or to the
beginning of the previous track if it is within one second
after the current track begins to play.
If you press the switch up or down twice it plays the
second track, three times, it will play the third, etc.
The button in the center of the left hand switch has no
function in this mode.
CASSETTE TAPE AND PLAYER MAINTENANCE
To keep the cassette tapes and player in good condition,
take the following precautions:
1. Do not use cassette tapes longer than C-90; otherwise,
sound quality and tape durability will be greatly dimin-
ished. 2. Keep the cassette tape in its case to protect from
slackness and dust when it is not in use.
3. Keep the cassette tape away from direct sunlight, heat
and magnetic fields such as the radio speakers.
4. Before inserting a tape, make sure that the label is
adhering flatly to the cassette.
5. A loose tape should be corrected before use. To rewind
a loose tape, insert the eraser end of a pencil into the tape
drive gear and twist the pencil in the required directions.
Maintain your cassette tape player. The head and capstan
shaft in the cassette player can pick up dirt or tape
deposits each time a cassette is played. The result of
deposits on the capstan shaft may cause the tape to wrap
around and become lodged in the tape transport. The
other adverse condition is low or ªmuddyº sound from
one or both channels, as if the treble tone control were UNDERSTANDING YOUR INSTRUMENT PANEL 197
4
Page 198 of 397
turned all the way down. To prevent this, you should
periodically clean the head with a commercially available
WET cleaning cassette.
As preventive maintenance, clean the head about every
30 hours of use. If you wait until the head becomes very
dirty (noticeably poor sound), it may not be possible to
remove all deposits with a simple WET cleaning cassette.
CD/DVD DISC MAINTENANCE
To keep the CD/DVD discs in good condition, take the
following precautions:
1. Handle the disc by its edge; avoid touching the
surface.
2. If the disc is stained, clean the surface with a soft cloth,
wiping from center to edge.
3. Do not apply paper, paper CD labels, or tape to the
disc; avoid scratching the disc. 4. Do not use solvents such as benzine, thinner, cleaners,
or antistatic sprays.
5. Store the disc in its case after playing.
6. Do not expose the disc to direct sunlight.
7. Do not store the disc where temperatures may become
too high.
RADIO OPERATION AND CELLULAR PHONES
Under certain conditions, the cellular phone being On in
your vehicle can cause erratic or noisy performance from
your radio. This condition may be lessened or eliminated
by relocating the cellular phone antenna. This condition
is not harmful to the radio. If your radio performance
does not satisfactorily ªclearº by the repositioning of the
antenna, it is recommended that the radio volume be
turned down or off during cellular phone operation.198 UNDERSTANDING YOUR INSTRUMENT PANEL