Page 274 of 397

Figure out the weight on the front and rear of the vehicle
separately. It is important that you distribute the load
evenly over the front and rear axles.
Overloading can cause potential safety hazards and
shorten useful service life. Heavier axles or suspension
components do not necessarily increase the vehicle's
GVWR.
Loading
To load your vehicle properly, first figure out its empty
weight, axle by axle and side by side. Store heavier items
down low and be sure you distribute their weight as
evenly as possible. Stow all loose items securely before
driving. If weighing the loaded vehicle shows that you
have exceeded either GAWR, but the total load is within
the specified GVWR, you must redistribute the weight.
Improper weight distribution can have an adverse effect
on the way your vehicle steers and handles and the way
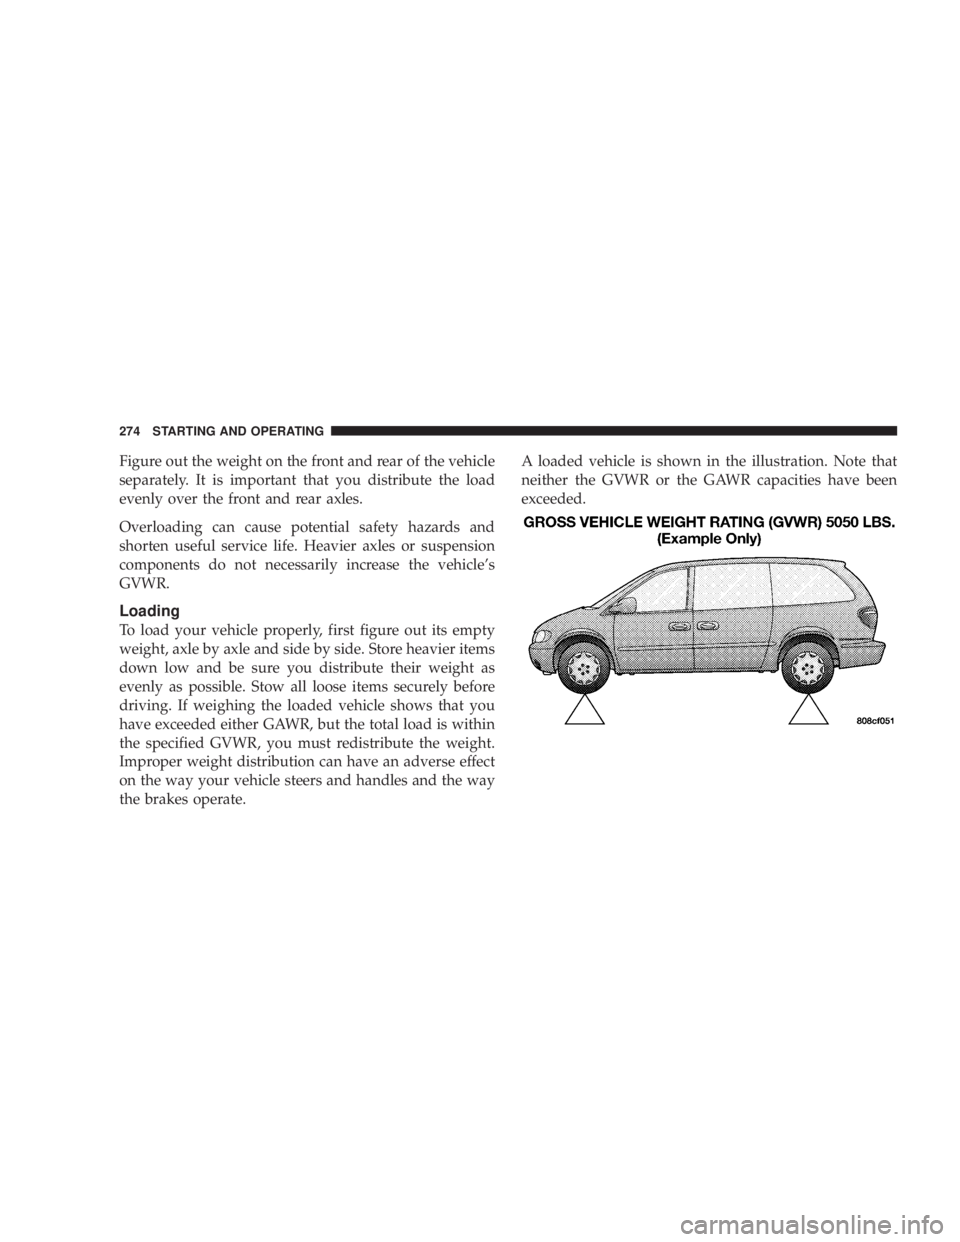
the brakes operate. A loaded vehicle is shown in the illustration. Note that
neither the GVWR or the GAWR capacities have been
exceeded.274 STARTING AND OPERATING
Page 276 of 397

² The trailer tongue load must be considered as part of
the combined weight of occupants and cargo, and
should never exceed the weight referenced on the Tire
and Loading Information placard. Refer to the Tire±
Safety Information Section in this manual.
² The ªDº range can be selected when towing. However,
if frequent shifting occurs while in this range, the ª3º
range must be selected.
NOTE: Using the ª3º range while operating the vehicle
under heavy operating conditions will improve perfor-
mance and extend transaxle life by reducing excessive
shifting and heat build up.
WARNING!Connecting trailer brakes to your vehicle's hydraulic
brake lines can overload your brake system and
cause it to fail. You might not have brakes when you
need them and could have an accident. ² Do not attempt to tow a trailer while using a compact
spare tire.
² Whenever you pull a trailer, regardless of the trailer
size, stop lights and turn signals on the trailer are
recommended for motoring safety.
² The automatic transaxle fluid and filter should be
changed if you REGULARLY tow a trailer for more
than 45 minutes of continuous operation. See Schedule
ªBº in section 8 of this manual for transaxle fluid
change intervals.
NOTE: Check the automatic transaxle fluid level before
towing. Fluid discoloration, or a burnt odor, shows the
need for a transmission fluid and filter change.276 STARTING AND OPERATING
Page 278 of 397
A load equalizing hitch is recommended for loaded
trailer weights above 1,000 lbs (454 kg) and required for
weights above 2,000 lbs (907 kg).
CAUTION!If the trailer weighs more than 1,000 lbs (454 kg)
loaded, it should have its own brakes and they
should be of adequate capacity. Failure to do this
could lead to accelerated brake lining wear, higher
brake pedal effort, and longer stopping distances. WARNING!Connecting trailer brakes to your vehicle's hydraulic
brake lines can overload your brake system and
cause it to fail. You might not have brakes when you
need them and could have an accident.278 STARTING AND OPERATING
Page 284 of 397
Spare Tire Removal
Fit the jack-handle over the drive nut. Rotate the nut to
the left until the spare is on the ground with enough slack
cable to allow you to pull the tire out from under the
vehicle.
CAUTION!The winch mechanism is designed for use with the
jack handle only. Use of an air wrench or other
power tools is not recommended and can damage the
winch.
When the spare is clear, tilt the retainer at the end of the
cable and pull it through the center of the wheel. Preparations For Jacking
Park the vehicle on a firm level surface, avoid ice or
slippery areas, set the parking brake and place the gear
selector in PARK. Turn OFF the ignition.
WARNING!Do not attempt to change a tire on the side of the
vehicle close to moving traffic. Pull far enough off
the road to avoid the danger of being hit when
operating the jack or changing the wheel.
² Turn on the Hazard Warning Flasher.284 WHAT TO DO IN EMERGENCIES
Page 289 of 397

1. Wear eye protection and remove any metal jewelry
such as watch bands or bracelets that might make an
inadvertent electrical contact.
2. When boost is provided by a battery in another
vehicle, park that vehicle within booster cable reach and
without letting the vehicles touch. Set the parking brake,
place the automatic transmission in PARK and turn the
ignition switch to the OFF position for both vehicles.
3. Turn off the heater, radio and all unnecessary electrical
loads.
4. Connect one end of a jumper cable to the positive
terminal of the discharged battery. Connect the other end
of the same cable to the positive terminal of the booster
battery. 5. Connect the other cable, first to the negative terminal
of the booster battery and then to the engine of the
vehicle with the discharged battery. Make sure you have
a good contact on the engine.
6. Start the engine in the vehicle which has the booster
battery, let the engine idle a few minutes, then start the
engine in the vehicle with the discharged battery.
7. When removing the jumper cables, reverse the above
sequence exactly. Be careful of the moving belts and fan. WHAT TO DO IN EMERGENCIES 289
6
Page 296 of 397

N Front Suspension Ball Joints ..............314
N Steering Shaft Seal ....................314
N Steering Linkage ......................315
N Drive Shaft Universal Joints ..............315
N Body Lubrication .....................315
N Windshield Wiper Blades ................316
N Windshield And Rear Window Washers .....316
N Exhaust System ......................317
N Cooling System .......................318
N Hoses And Vacuum/Vapor Harnesses .......322
N Brakes .............................323
N Master Cylinder Ð ABS Brakes Brake Fluid
Level Check .........................324 N Fuel System Hoses ....................326
N Automatic Transmission ................326
N All Wheel Drive (AWD) .................329
N Front And Rear Wheel Bearings ...........330
N Appearance Care And Protection From
Corrosion ...........................330
N Cleaning The Instrument Panel And
Underseat Cup Holders .................334
m Integrated Power Module (IPM) ............336
m Vehicle Storage ........................337
m Replacement Light Bulbs .................338
m Bulb Replacement ......................339
N Headlights ..........................339296 MAINTAINING YOUR VEHICLE
Page 323 of 397

Insure nylon tubing in these areas has not melted or
collapsed.
Inspect all hose connections such as clamps and cou-
plings to make sure they are secure and no leaks are
present.
Components should be replaced immediately if there is
any evidence of wear or damage that could cause failure.
Brakes
In order to assure brake system performance, all brake
system components should be inspected periodically.
Suggested service intervals can be found in the Mainte-
nance Schedules. WARNING!Riding the brakes can lead to brake failure and
possibly an accident. Driving with your foot resting
or riding on the brake pedal can result in abnormally
high brake temperatures, excessive lining wear, and
possible brake damage. You wouldn't have your full
braking capacity in an emergency.
Brake And Power Steering Hoses
When the vehicle is serviced for scheduled maintenance,
inspect surface of hoses and nylon tubing for evidence of
heat and mechanical damage. Hard and brittle rubber,
cracking, tears, cuts, abrasion, and excessive swelling
indicate deterioration of the rubber. Particular attention
should be made to examining those hose surfaces nearest
to high heat sources, such as the exhaust manifold. MAINTAINING YOUR VEHICLE 323
7
Page 324 of 397

Insure nylon tubing in these areas has not melted or
collapsed.
Inspect all hose connections such as clamps and cou-
plings to make sure they are secure and no leaks are
present.
NOTE: Often, fluid such as oil, power steering fluid,
and brake fluid are used during assembly plant opera-
tions to facilitate the assembly of hoses to couplings.
Therefore, oil wetness at the hose-coupling area is not
necessarily an indication of leakage. Actual dripping of
hot fluid when systems are under pressure (during
vehicle operation), should be noted before hose is re-
placed based on leakage.
NOTE: Inspection of brake hoses should be performed
whenever the brake system is serviced and every engine
oil change. Inspect hydraulic brake hoses for surface
cracking, scuffing, or worn spots. If there is any evidence
of cracking, scuffing, or worn spots, the hose should be replaced immediately! Eventual deterioration of the hose
can take place resulting in a possibility of a burst failure.
WARNING!Worn brake hoses can burst and cause brake failure.
You could have an accident. If you see any signs of
cracking, scuffing, or worn spots, have the brake
hoses replaced immediately.
Master Cylinder Ð ABS Brakes Brake Fluid Level
Check
The fluid level in the master cylinder should be checked
when performing underhood services, or immediately if
the brake system warning light indicates system failure.
Clean the top of the master cylinder area before removing
the cap. Add fluid to bring the level up to the top of the
ªFULLº mark on the side of the master cylinder reservoir.324 MAINTAINING YOUR VEHICLE