Page 55 of 300
UNDERSTANDING THE FEATURES OF YOUR VEHICLE
CONTENTS
mMirrors..............................58
NInside Day/Night Mirror.................58
NAutomatic Dimming MirrorÐ If Equipped....59
NOutside Mirrors.......................59
NExterior Mirrors Folding Feature...........59
NElectric Remote-Control Mirrors............60
NHeated Mirrors Ð If Equipped.............61
mSeats................................61
NSeat Adjustment.......................61
NReclining Seats........................62
N6 - Way Power Seat Adjuster Ð Driver's Side
Only...............................63NLumbar Support Adjustment Ð Power Seats
Only...............................63
NSeatback Releases Ð Bench Seat............63
NSeatback ReleasesÐBucket And Split Bench....64
NClub Cab Easy Entry System..............64
NClub Cab/Quad Cab Rear Seat.............65
mTo Open And Close The Hood.............66
mLights...............................67
NInterior Lights........................67
NBattery Saver.........................68
NHeadlamp Delay.......................68
NHeadlights, Parking Lights, Panel Lights......68
3
Page 60 of 300
Electric Remote-Control Mirrors
The controls for the power mirrors are located on the
driver's door trim panel.Set the top switch to the left or right for the left or right
mirror, and set it to the center off position to prevent
accidentally moving a mirror when you are finished
adjusting the mirror. To adjust a mirror, select left or right
with the top switch, and press one of the four arrows for
the direction you want the mirror to move.
60 UNDERSTANDING THE FEATURES OF YOUR VEHICLE
Page 76 of 300
WARNING!
Speed Control can be dangerous where the system
can't maintain a constant speed. Your vehicle could
go too fast for the conditions, and you could lose
control. An accident could be the result. Don't use
Speed Control in heavy traffic or on roads that are
winding, icy, snow-covered, or slippery.
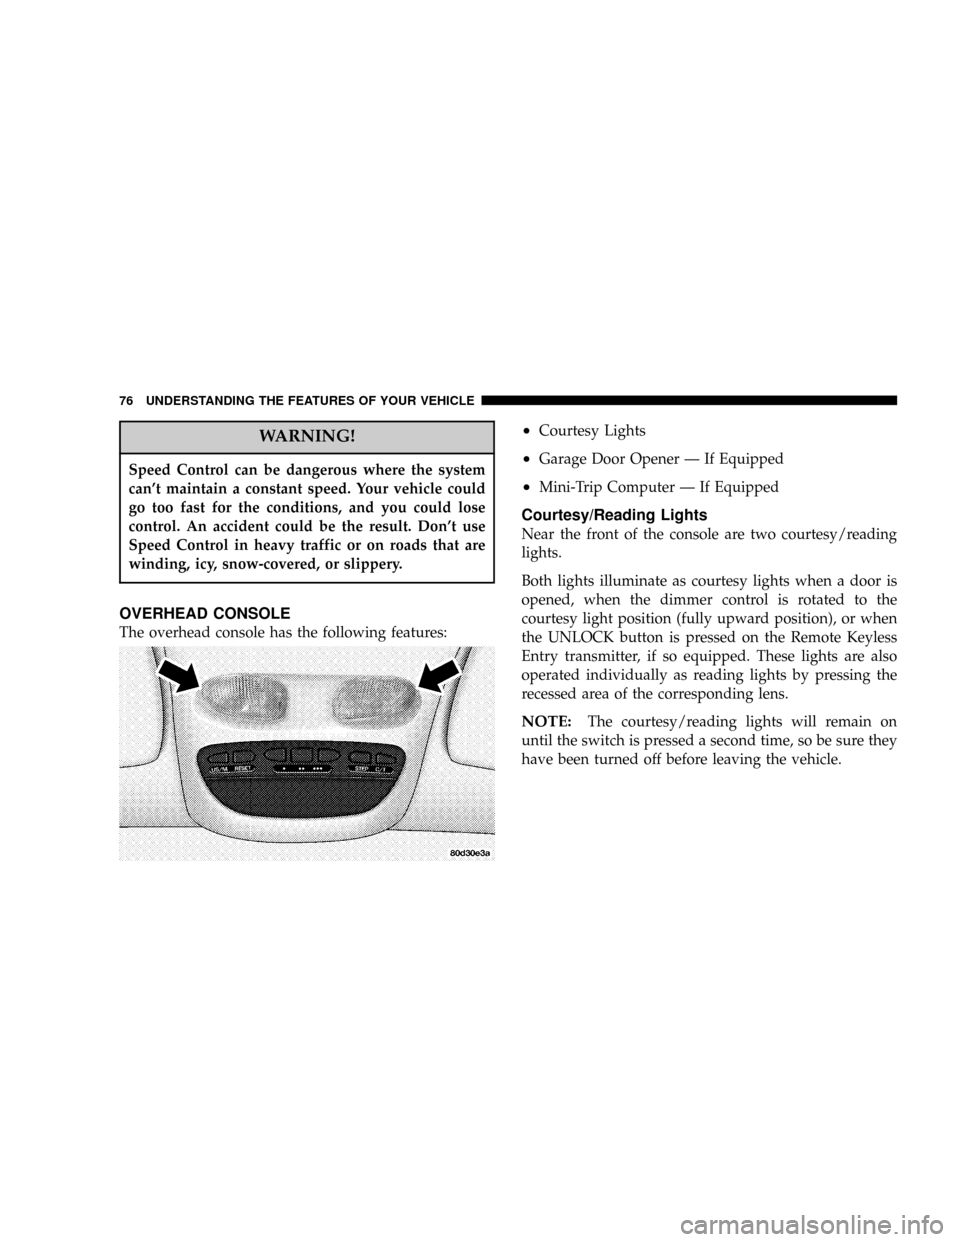
OVERHEAD CONSOLE
The overhead console has the following features:
²Courtesy Lights
²Garage Door Opener Ð If Equipped
²Mini-Trip Computer Ð If Equipped
Courtesy/Reading Lights
Near the front of the console are two courtesy/reading
lights.
Both lights illuminate as courtesy lights when a door is
opened, when the dimmer control is rotated to the
courtesy light position (fully upward position), or when
the UNLOCK button is pressed on the Remote Keyless
Entry transmitter, if so equipped. These lights are also
operated individually as reading lights by pressing the
recessed area of the corresponding lens.
NOTE:The courtesy/reading lights will remain on
until the switch is pressed a second time, so be sure they
have been turned off before leaving the vehicle.
76 UNDERSTANDING THE FEATURES OF YOUR VEHICLE
Page 81 of 300
Outside Temperature
Because engine temperature can increase the displayed
temperature, temperature readings are slowly updated
when vehicle speed is below 20 mph (30 km/h).
GARAGE DOOR OPENER
The HomeLinktUniversal Transceiver replaces up to
three remote controls (hand held transmitters) that oper-
ate devices such as garage door openers, motorized
gates, or home lighting. It triggers these devices at the
push of a button. The Universal Transceiver operates off
your vehicle's battery and charging system; no batteries
are needed.
For additional information on HomeLinkt, call 1±800±
355±3515, or on the internet at www.homelink.com.
UNDERSTANDING THE FEATURES OF YOUR VEHICLE 81
3
Page 95 of 300
NSeek..............................120
NTune ..............................120
NTo Set The Push-Button Memory..........120
NBalance............................121
NFade..............................121
NBass And Treble Tone Control............121
NAM/FM Selection.....................121
NMode Button........................121
NCassette Player Features................121
NCD Changer Control Capability Ð If
Equipped...........................122
NRadio Display Messages................124
mSales Code RBQÐAM/FM Stereo Radio
With 6 - Disc CD Changer
...............124
NRadio Operation......................124
NCD Player Operation...................126
mRemote Sound System Controls Ð If
Equipped
............................130
NRadio Operation......................130
NTape Player.........................131
NCD Player..........................131
mCassette Tape And Player Maintenance......131
mCompact Disc Maintenance...............132
mRadio Operation And Cellular Phones.......132
mClimate Controls......................133
NHeater Only.........................133
NAir Conditioning.....................134
NOperating Tips.......................137
NOperation Tips Chart...................139
mRear Window Defroster ± Quad-Cab Only....140
INSTRUMENT PANEL AND CONTROLS 95
4
Page 113 of 300
CD Changer Control Capability Ð If Equipped
This radio is compatible with a remote mounted CD
changer available through Mopar Accessories. The fol-
lowing instructions are for the radio controls that operate
this CD changer.
Mode Button
To activate the CD changer, press the MODE button until
CD information appears on the display.
Push-Button
While the CD changer is playing, press the NUMBER 1
push-button or the NUMBER 5 push-button to select a
disc numbered higher or lower than the one currently
being played.
Seek Button
Press the SEEK up or down to select another track on the
same disc. A SEEK symbol will appear on the display.
Fast Forward And Rewind Buttons
Press and hold the FF button for fast forward. Press and
hold the RW button for fast reverse.
The audio output can be heard when fast forward and
fast reverse are activated.
Random Play (RND)
Press the Random button to play the tracks on the
selected disc in random order for an interesting change of
pace.
Random can be cancelled by pressing the button a second
time or by ejecting the CD from the changer.
CD Diagnostic Indicators
When driving over a very rough road, the CD player may
skip momentarily. Skipping will not damage the disc or
the player, and play will resume automatically.
As a safeguard and to protect your CD player, one of the
following warning symbols may appear on your display.
A CD HOT symbol indicates the player is too hot.
CD HOT will pause the operation. Play can be resumed
when the operating temperature is corrected or another
MODE is selected.
An ERR symbol will appear on the display if the laser is
unable to read the Disc data for the following reasons:
²Excessive vibration
INSTRUMENT PANEL AND CONTROLS 113
4
Page 117 of 300
beginning of the current selection, or return to the
beginning of the previous selection if the CD is within the
first second of the current selection.
EJT Ð Eject
Press the EJT button and the disc will unload and move
to the entrance for easy removal. The unit will switch to
the radio mode.
If you do not remove the disc within 15 seconds, it will be
reloaded. The unit will continue in radio mode.
The disc can be ejected with the radio and ignition OFF.
FF/TUNE/RW
Press FF (Fast Forward) and the CD player will begin to
fast forward until FF is released. The RW ( Reverse)
button works in a similar manner.
Random Play Ð RND/Program Button 4
Press the RND (button 4) button while the CD is playing
to activate Random Play. This feature plays the tracks on
the selected disc in random order to provide an interest-
ing change of pace.Press the SEEK button to move to the next randomly
selected track.
Press the RND (button 4) button a second time to stop
Random Play.
Mode
Press the MODE button repeatedly to select between the
CD player, the optional remote CD changer and the
Satellite Radio (if equipped). When Satellite Radio (if
equipped) is selected ªSAº will appear in your radio
display.
A CD or tape may remain in the player while in the
Satellite mode.
Time
Press the TIME button to change the display from
elapsed CD playing time to time of day.
CD Changer Control Capability Ð If Equipped
This radio is compatible with a remote mounted CD
changer available through Mopar Accessories. The fol-
lowing instructions are for the radio controls that operate
this CD changer.
INSTRUMENT PANEL AND CONTROLS 117
4
Page 122 of 300

Music Search
Pressing the SEEK button while playing a tape will start
the Music Search mode. Press the SEEK button up for the
next selection on the tape and down to return to the
beginning of the current selection, or return to the
beginning of the previous selection if the tape is within
the first 5 seconds of the current selection.
The SEEK symbol appears on the display when Music
Search is in operation. Music Search shuts off automati-
cally when a selection has been located.
Selective Music Search
Press the SEEK button up or down to move the track
number to skip forward or backward 1 to 7 selections.
Press the SEEK button once to move 1 selection, twice to
move 2 selections, etc.
Fast Forward And Rewind Buttons
Pressing the TUNE button up or down momentarily
activates Fast Forward or Rewind and makes the direc-
tional arrows appear on the display.
To stop Fast Forward or Rewind, press the TUNE button
again.
Time Button
Press the time button to toggle between station frequency
and time of day.
Pressing this button while playing a cassette tape will
change the side of the tape being played.
NR (Noise Reduction)
Pushing the Number 2 Pre-set button when a tape is
playing deactivates the Dolby Noise Reduction System*.
When Dolby is ON, the NR symbol appears on the
display. Each time a tape is inserted the Dolby will turn
ON.
* ªDolbyº noise reduction manufactured under license
from Dolby Laboratories Licensing Corporation. Dolby
and the double-D symbol are trademarks of Dolby Labo-
ratories Licensing Corporation.
CD Changer Control Capability Ð If Equipped
This radio is compatible with a remote mounted CD
changer available through Mopar Accessories. The fol-
lowing instructions are for the radio controls that operate
this CD changer.
122 INSTRUMENT PANEL AND CONTROLS