Page 2543 of 2643
NUBIRA/LACETTIFRONT 4–9
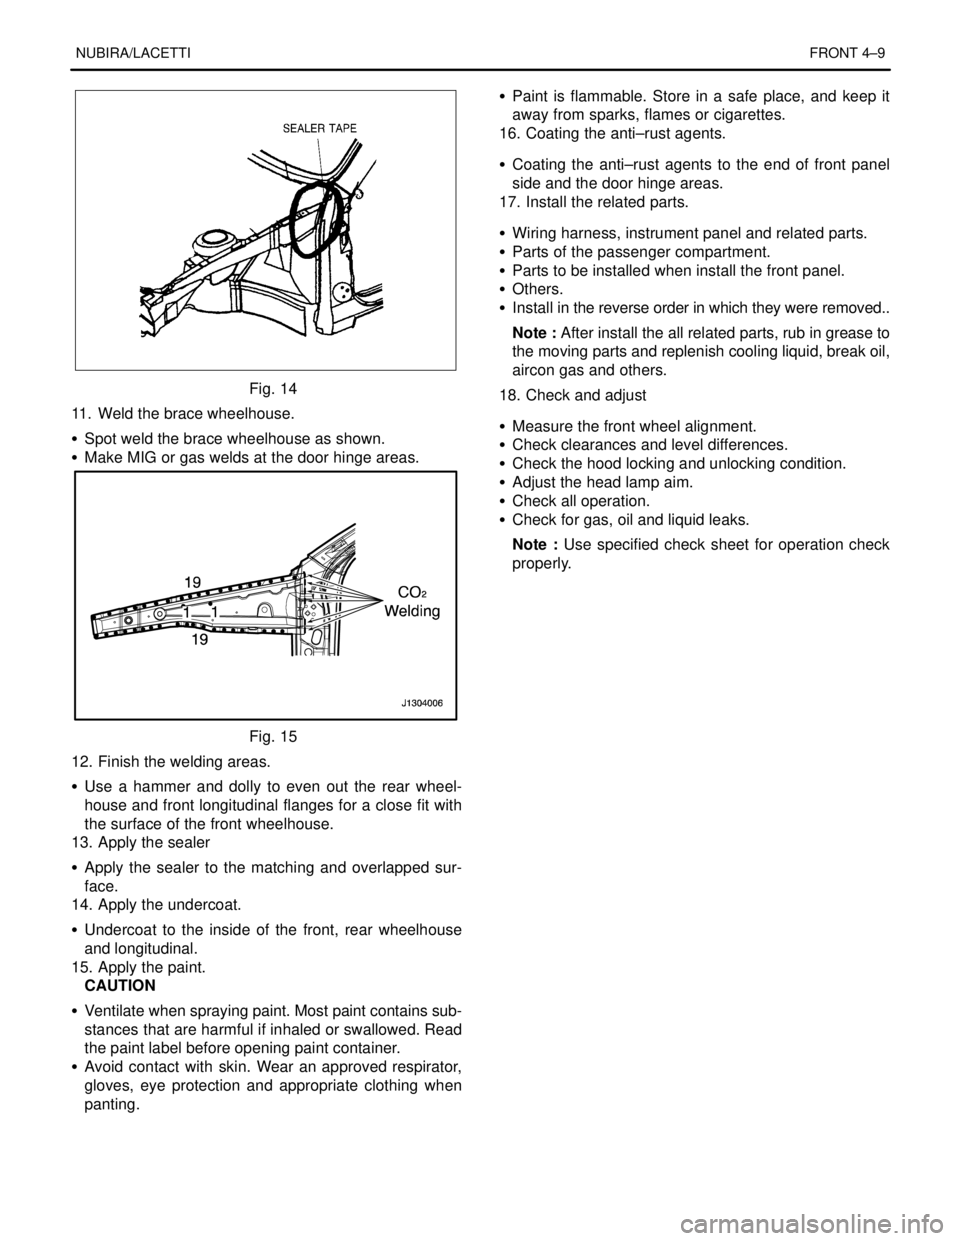
Fig. 14
11. Weld the brace wheelhouse.
S Spot weld the brace wheelhouse as shown.
S Make MIG or gas welds at the door hinge areas.
Fig. 15
12. Finish the welding areas.
S Use a hammer and dolly to even out the rear wheel-
house and front longitudinal flanges for a close fit with
the surface of the front wheelhouse.
13. Apply the sealer
S Apply the sealer to the matching and overlapped sur-
face.
14. Apply the undercoat.
S Undercoat to the inside of the front, rear wheelhouse
and longitudinal.
15. Apply the paint.
CAUTION
S Ventilate when spraying paint. Most paint contains sub-
stances that are harmful if inhaled or swallowed. Read
the paint label before opening paint container.
S Avoid contact with skin. Wear an approved respirator,
gloves, eye protection and appropriate clothing when
panting.S Paint is flammable. Store in a safe place, and keep it
away from sparks, flames or cigarettes.
16. Coating the anti–rust agents.
S Coating the anti–rust agents to the end of front panel
side and the door hinge areas.
17. Install the related parts.
S Wiring harness, instrument panel and related parts.
S Parts of the passenger compartment.
S Parts to be installed when install the front panel.
S Others.
S Install in the reverse order in which they were removed..
Note : After install the all related parts, rub in grease to
the moving parts and replenish cooling liquid, break oil,
aircon gas and others.
18. Check and adjust
S Measure the front wheel alignment.
S Check clearances and level differences.
S Check the hood locking and unlocking condition.
S Adjust the head lamp aim.
S Check all operation.
S Check for gas, oil and liquid leaks.
Note : Use specified check sheet for operation check
properly.
Page 2551 of 2643
NUBIRA/LACETTIFRONT 4–17
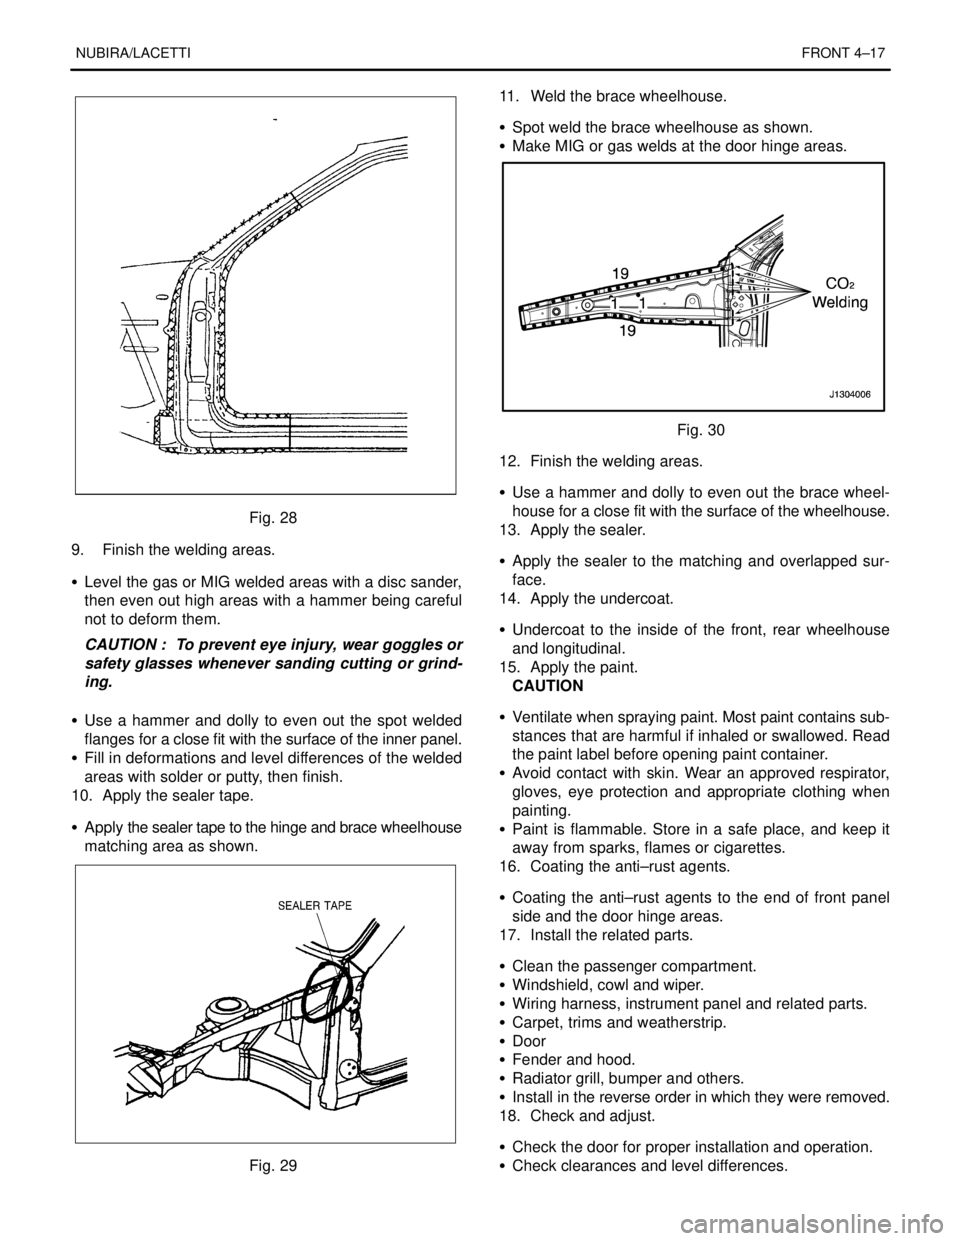
Fig. 28
9. Finish the welding areas.
S Level the gas or MIG welded areas with a disc sander,
then even out high areas with a hammer being careful
not to deform them.
CAUTION : To prevent eye injury, wear goggles or
safety glasses whenever sanding cutting or grind-
ing.
S Use a hammer and dolly to even out the spot welded
flanges for a close fit with the surface of the inner panel.
S Fill in deformations and level differences of the welded
areas with solder or putty, then finish.
10. Apply the sealer tape.
S Apply the sealer tape to the hinge and brace wheelhouse
matching area as shown.
Fig. 2911. Weld the brace wheelhouse.
S Spot weld the brace wheelhouse as shown.
S Make MIG or gas welds at the door hinge areas.
Fig. 30
12. Finish the welding areas.
S Use a hammer and dolly to even out the brace wheel-
house for a close fit with the surface of the wheelhouse.
13. Apply the sealer.
S Apply the sealer to the matching and overlapped sur-
face.
14. Apply the undercoat.
S Undercoat to the inside of the front, rear wheelhouse
and longitudinal.
15. Apply the paint.
CAUTION
S Ventilate when spraying paint. Most paint contains sub-
stances that are harmful if inhaled or swallowed. Read
the paint label before opening paint container.
S Avoid contact with skin. Wear an approved respirator,
gloves, eye protection and appropriate clothing when
painting.
S Paint is flammable. Store in a safe place, and keep it
away from sparks, flames or cigarettes.
16. Coating the anti–rust agents.
S Coating the anti–rust agents to the end of front panel
side and the door hinge areas.
17. Install the related parts.
S Clean the passenger compartment.
S Windshield, cowl and wiper.
S Wiring harness, instrument panel and related parts.
S Carpet, trims and weatherstrip.
S Door
S Fender and hood.
S Radiator grill, bumper and others.
S Install in the reverse order in which they were removed.
18. Check and adjust.
S Check the door for proper installation and operation.
S Check clearances and level differences.
Page 2579 of 2643
7–2 FENDER, HOOD, TAILGATE AND TRUNK LID NUBIRA/LACETTI
1. FENDER
1–1. REPAIR PROCEDURE
1. Remove the related parts.
S Front bumper and mud guard.
.
2. Remove the fender
.
3. Preparation of the new fender.
S Preparation of the new fender and check damaged
areas.
.
4. Apply the paint.
.
CAUTION
S Ventilate when spraying paint. Most paint contains sub-
stances that are harmful if inhaled or swallowed, Read
the paint label before opening paint container.
S Avoid contact with skin, Wear an approved respirator,
gloves, eye protection and appropriate clothing when
painting.
S Paint is flammable. Store in a safe place, and keep it
away from sparks, flames or cigarettes.
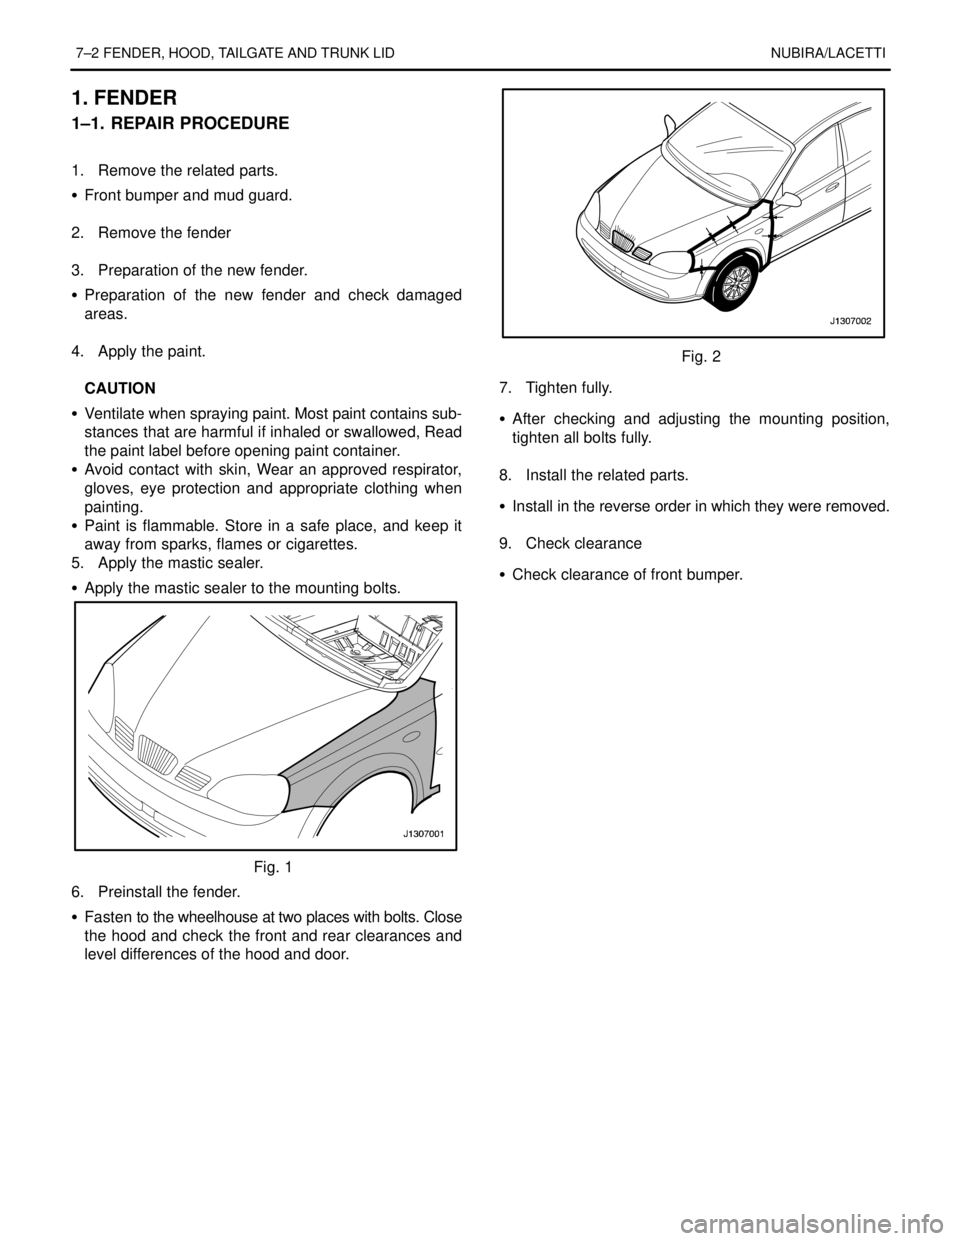
5. Apply the mastic sealer.
S Apply the mastic sealer to the mounting bolts.
Fig. 1
6. Preinstall the fender.
S Fasten to the wheelhouse at two places with bolts. Close
the hood and check the front and rear clearances and
level differences of the hood and door.
Fig. 2
7. Tighten fully.
S After checking and adjusting the mounting position,
tighten all bolts fully.
.
8. Install the related parts.
S Install in the reverse order in which they were removed.
.
9. Check clearance
S Check clearance of front bumper.
Page 2580 of 2643
NUBIRA/LACETTI FENDER, HOOD, TAILGATE AND TRUNK LID 7–3
2. HOOD
2–1. REPAIR PROCEDURE
1. Remove the related parts.
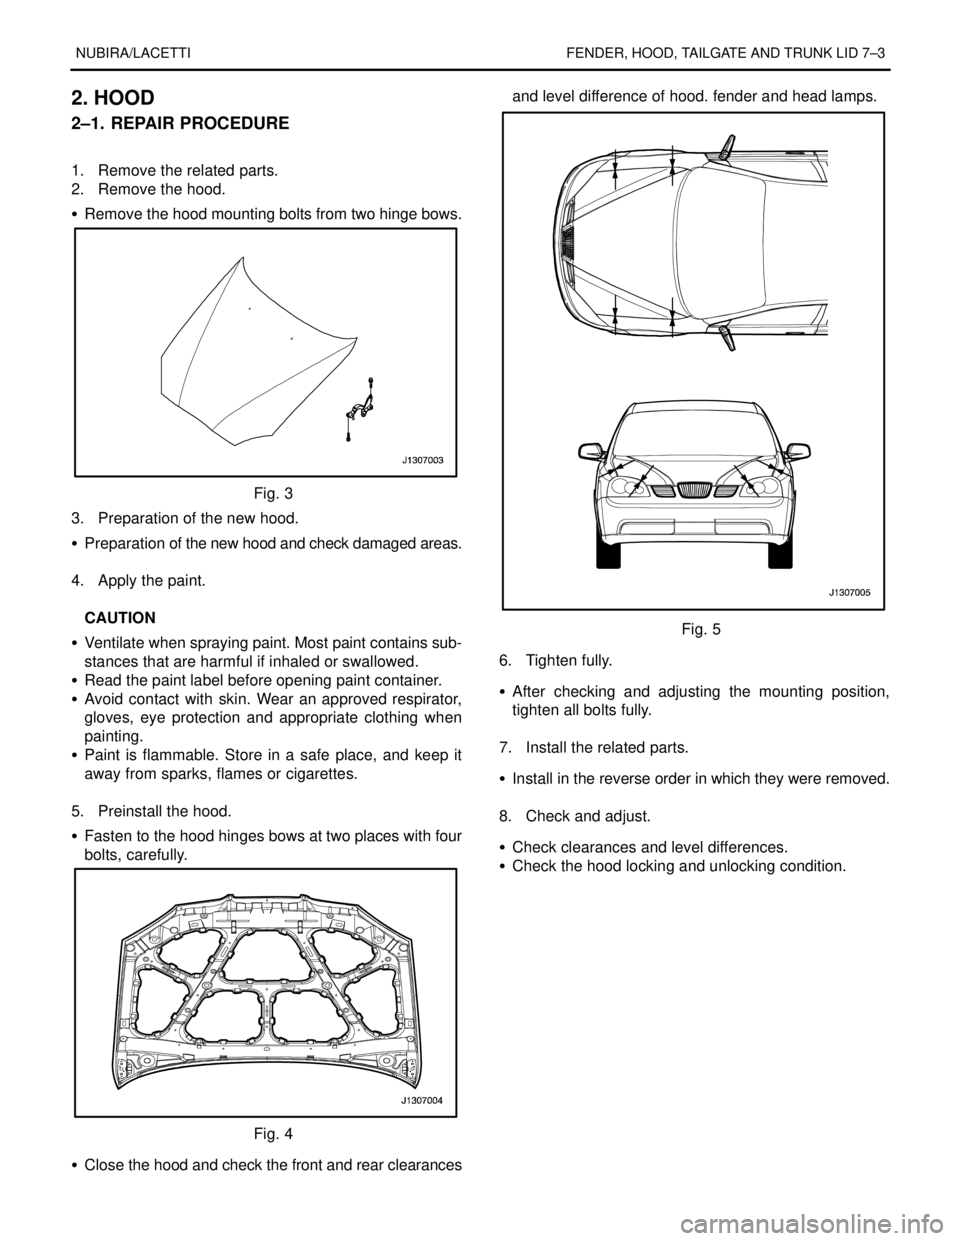
2. Remove the hood.
S Remove the hood mounting bolts from two hinge bows.
Fig. 3
3. Preparation of the new hood.
S Preparation of the new hood and check damaged areas.
.
4. Apply the paint.
.
CAUTION
S Ventilate when spraying paint. Most paint contains sub-
stances that are harmful if inhaled or swallowed.
S Read the paint label before opening paint container.
S Avoid contact with skin. Wear an approved respirator,
gloves, eye protection and appropriate clothing when
painting.
S Paint is flammable. Store in a safe place, and keep it
away from sparks, flames or cigarettes.
.
5. Preinstall the hood.
S Fasten to the hood hinges bows at two places with four
bolts, carefully.
Fig. 4
S Close the hood and check the front and rear clearancesand level difference of hood. fender and head lamps.
Fig. 5
6. Tighten fully.
S After checking and adjusting the mounting position,
tighten all bolts fully.
.
7. Install the related parts.
S Install in the reverse order in which they were removed.
.
8. Check and adjust.
S Check clearances and level differences.
S Check the hood locking and unlocking condition.
Page 2582 of 2643
NUBIRA/LACETTI FENDER, HOOD, TAILGATE AND TRUNK LID 7–5
4. TRUNK LID (NOTCHBACK)
4–1. REPAIR PROCEDURE
1. Remove the related parts.
S Wiring harness and solenoid valve.
S Lock set, latch set and others.
.
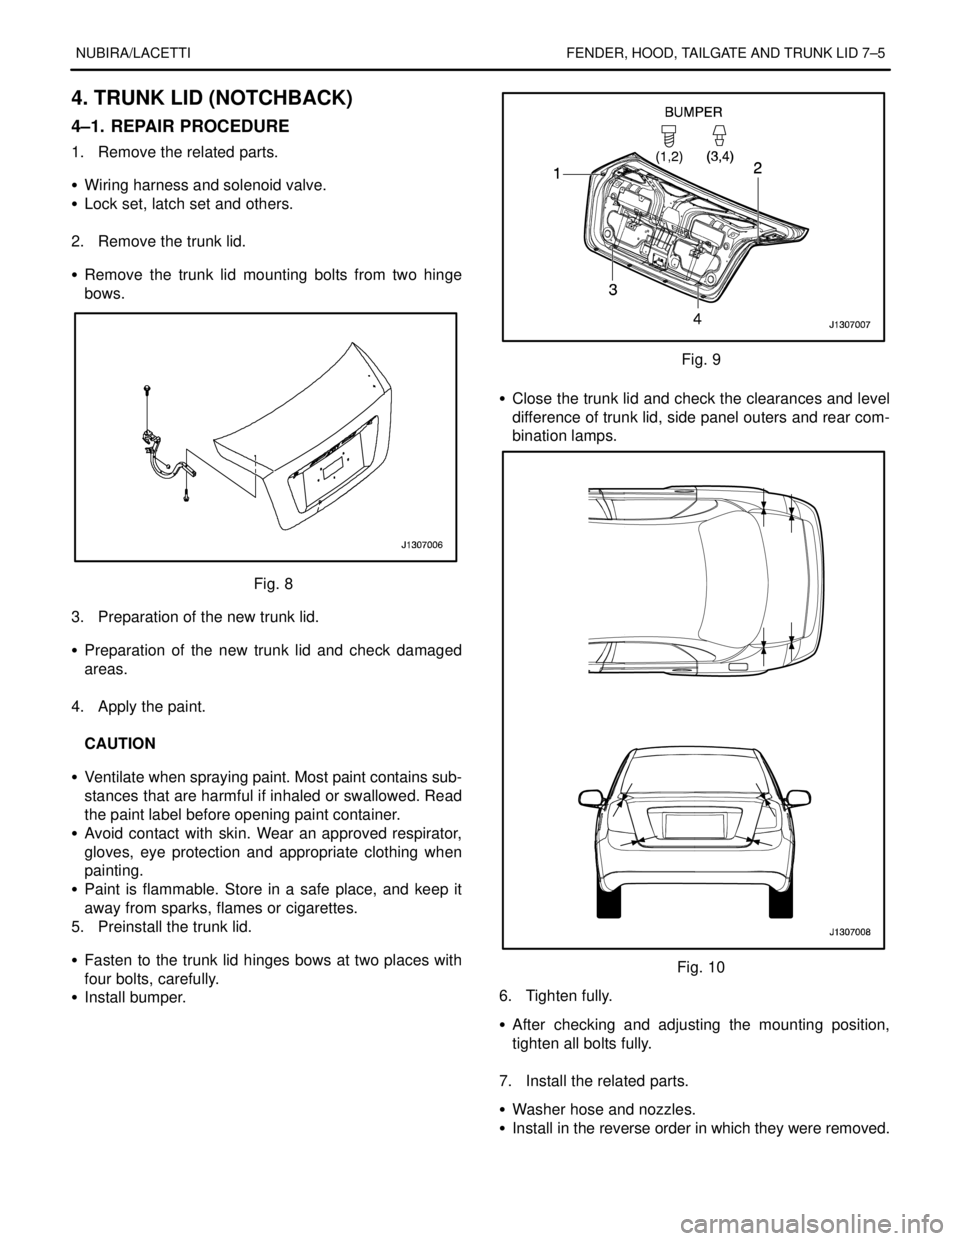
2. Remove the trunk lid.
S Remove the trunk lid mounting bolts from two hinge
bows.
Fig. 8
3. Preparation of the new trunk lid.
S Preparation of the new trunk lid and check damaged
areas.
.
4. Apply the paint.
.
CAUTION
S Ventilate when spraying paint. Most paint contains sub-
stances that are harmful if inhaled or swallowed. Read
the paint label before opening paint container.
S Avoid contact with skin. Wear an approved respirator,
gloves, eye protection and appropriate clothing when
painting.
S Paint is flammable. Store in a safe place, and keep it
away from sparks, flames or cigarettes.
5. Preinstall the trunk lid.
S Fasten to the trunk lid hinges bows at two places with
four bolts, carefully.
S Install bumper.
Fig. 9
S Close the trunk lid and check the clearances and level
difference of trunk lid, side panel outers and rear com-
bination lamps.
Fig. 10
6. Tighten fully.
S After checking and adjusting the mounting position,
tighten all bolts fully.
.
7. Install the related parts.
S Washer hose and nozzles.
S Install in the reverse order in which they were removed.
.
Page:
< prev 1-8 9-16 17-24