Page 1725 of 2643
AISIN AUTOMATIC TRANSAXLE 5A2 – 135
DAEWOO V–121 BL4
88. Using a suitable puller, remove the counter driven
gear outer tapered roller bearing race from the
transaxle housing.
89. Using a driver, remove the oil seal from the trans-
axle housing.
Notice : Be careful not to damage the transaxle housing
when removing the oil seal using a driver.
90. Using a suitable puller, remove the side bearing
outer race from the transaxle housing.
WARNING : USE CAUTION WHEN REMOVING SNAP
RINGS OR PERSONAL INJURY MAY RESULT.
Notice : Stop the press when the O/D brake piston is low-
ered 1–2 mm (0.039–0.078 in.) from the snap ring groove,
preventing the O/D brake piston from being deformed.
91. Using brake/clutch spring compressor DW240–020,
overdrive brake adapter DW240–050 and a driver,
remove the snap ring.
92. Remove the O/D brake return spring.
Page 1727 of 2643

AISIN AUTOMATIC TRANSAXLE 5A2 – 137
DAEWOO V–121 BL4
MAJOR COMPONENT ASSEMBLY
Tools Required
DW240–020 Brake/Clutch Spring Compressor
DW240–050 Overdrive Brake Adapter
DW240–060–01 Brake Spring Compressor Bolt/Nut
DW240–060–02 Brake Spring Compressor Plate
DW240–070 1st / Reverse Brake Adapter
DW240–100 Counter Drive Gear Installation Adapter
DW240–130 Differential Preload Adapter
DW260–031–01 Transaxle Housing Oil Seal Installer
DW260–031–02 Transaxle Case Oil Seal Installer
DW260–041 Planetary Ring Gear Nut Removal/Installa-
tion Socket
DW240–160 Transaxle Case Outer Tapered Roller Bear-
ing Race Adapter
DW240–140 Transaxle Housing Side Bearing Outer Race
Adapter
DW240–170 Adapter Handle
Assembly Procedure
1. Install 4 new O–rings to the 4 screw plugs.
2. Install the 4 screw plugs with the O–rings to the
transaxle rear cover.
Tighten
Tighten the screw plugs to 7.4 NSm (65 lb–in).
3. Install the 2 seal rings to the transaxle rear cover.
4. Using the vernier calipers, measure the free length
of the O/D brake piston return spring together with
the spring seat.
S Standard free length : 18.99 mm (0.7476 in.)
Page 1728 of 2643
5A2 – 138IAISIN AUTOMATIC TRANSAXLE
DAEWOO V–121 BL4
5. Coat 2 new O–rings with ATF, install them to the
O/D brake piston.
6. Coat the O/D brake piston with ATF, install it to the
transaxle rear cover.
Notice : Be careful not to damage the O–rings of the O/D
brake piston.
7. Using brake/clutch spring compressor DW240–020,
overdrive brake adapter DW240–050 and a driver,
install the O/D brake return spring and snap ring to
the transaxle rear cover.
Notice : Stop the press when the O/D brake piston is low-
ered 1–2 mm (0.039 �0.078 in.) from the snap ring groove,
preventing the O/D brake piston from being deformed.
8. Using transaxle housing side bearing outer race
adapter DW240–140 and adapter handle
DW240–170, install a new side bearing outer race
into the transaxle housing.
Page 1739 of 2643
AISIN AUTOMATIC TRANSAXLE 5A2 – 149
DAEWOO V–121 BL4
54. Using a small torque wrench, while turning to count-
er drive gear 100 turn per minute and measure the
preload.
Notice : When the preload is smaller than the specifica-
tion, tighten the nut more and adjust the preload. Preload:
0.05–0.35 NSm (0.43–3.12 lb–in)
Tighten
Tighten the nut to 29 NSm (22 lb–ft) or less.
55. Stake the nut.
56. Install the planetary gear to the transaxle case.
57. Coat the planetary carrier thrust washer with petro-
leum jelly and install it onto the planetary gear.
58. Install the No.2 one–way clutch to the transaxle
case.
Page 1740 of 2643
5A2 – 150IAISIN AUTOMATIC TRANSAXLE
DAEWOO V–121 BL4
59. Check that the planetary gear turns freely counter-
clockwise and locks clockwise.
60. Install the anti–rattle clip in the place shown in the
illustration (the space between the No.2 one–way
clutch outer race and transaxle case), push the
anti–rattle clip in until you hear the ”click”.
61. Using vernier calipers, measure the free length of
the 2nd brake piston return spring together with
spring seat.
S Standard free length: 15.85 mm (0.6240 in.).
62. Check to see if the sliding surface of the disc, plate
and flange of 2nd brake are worn or burnt. If neces-
sary, replace them.
Notice : If the lining of the disc is peeling off or discolored,
or even if a part of the groove is defaced, replace all discs.
Notice : Before assembling new discs, soak them in ATF
for at least 15 minutes.
Page 1741 of 2643
AISIN AUTOMATIC TRANSAXLE 5A2 – 151
DAEWOO V–121 BL4
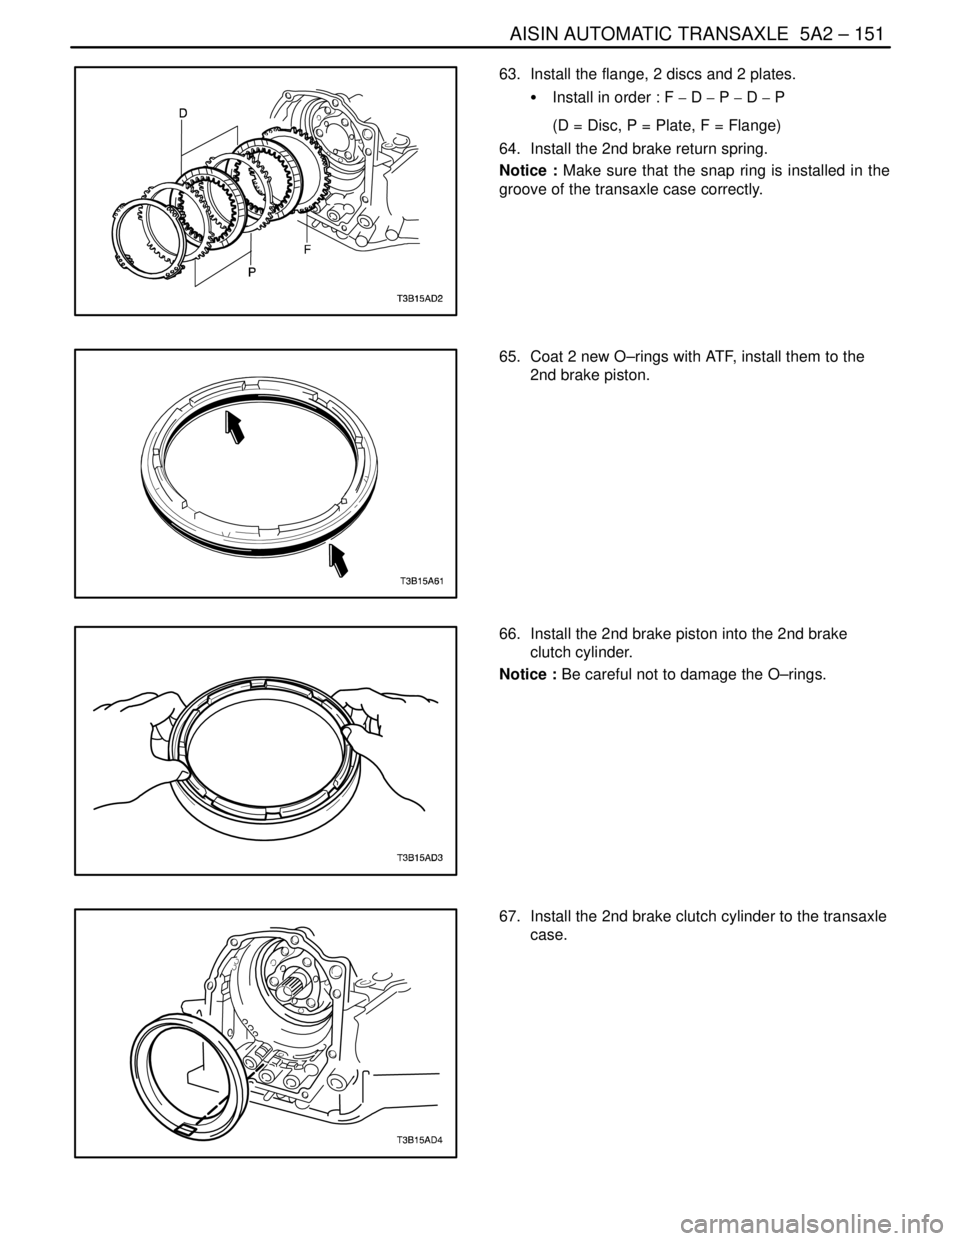
63. Install the flange, 2 discs and 2 plates.
S Install in order : F � D � P � D � P
(D = Disc, P = Plate, F = Flange)
64. Install the 2nd brake return spring.
Notice : Make sure that the snap ring is installed in the
groove of the transaxle case correctly.
65. Coat 2 new O–rings with ATF, install them to the
2nd brake piston.
66. Install the 2nd brake piston into the 2nd brake
clutch cylinder.
Notice : Be careful not to damage the O–rings.
67. Install the 2nd brake clutch cylinder to the transaxle
case.
Page 1742 of 2643
5A2 – 152IAISIN AUTOMATIC TRANSAXLE
DAEWOO V–121 BL4
68. Using brake spring compressor bolt / nut
DW240–060–01 and 2nd brake adapter
DW240–080, compress the 2nd brake piston return
spring.
69. Using a screwdriver, install the snap ring.
Notice : Make sure that the snap ring is installed in the
groove of the transaxle case correctly.
70. Coat the thrust bearing race with petroleum jelly
and install it onto the front planetary sun gear.
S Race:
Inner diameter: 19.3 mm (0.760 in.)
Outer diameter : 29.0 mm (1.142 in.)
71. Install the front planetary sun gear to the transaxle
case.
72. Install the thrust washer and one–way clutch as-
sembly to the rear planetary sun gear.
Page 1743 of 2643
AISIN AUTOMATIC TRANSAXLE 5A2 – 153
DAEWOO V–121 BL4
73. Coat the thrust bearing race with petroleum jelly
and install it onto the rear planetary sun gear and
one–way clutch assembly.
S Bearig:
Inner diameter: 42.5 mm (1.673 in.)
Outer diameter: 57.5 mm (2.264 in.)
Notice : Check the direction of the bearing.
74. Install the rear planetary sun gear and one–way
clutch assembly to the transaxle case.
75. Coat the thrust bearing race with petroleum jelly
and install it onto the transaxle case.
S Race:
Inner diameter: 34.95 mm (1.3760 in.)
Outer diameter: 45.50 mm (1.7913 in.)
Notice : Check the direction of race.
76. Coat the thrust needle roller bearing with petroleum
jelly and install it onto the forward clutch hub.
S Bearig:
Inner diameter: 33.3 mm (1.311 in.)
Outer diameter: 46.5 mm (1.831 in.)
Notice : Check the direction of bearing.