2004 CHEVROLET KODIAK service
[x] Cancel search: servicePage 150 of 366

Transmission Temperature Gage
If you have an automatic
transmission, this gage is
located above the
switchbank in the center of
the instrument panel.
When your ignition is on, the gage shows the
temperature of the transmission oil. A reading in the
warning zone, the red area beginning at 300°F (150°C),
means you must stop driving and check into the
cause. One possible cause is a low oil level in the
transmission.
Notice:If you drive your vehicle with the
transmission temperature gage above normal
operating range, you can damage the transmission.
This could lead to costly repairs that would not
be covered by your warranty. Do not drive your
vehicle while the transmission temperature gage
reading is above normal. See your dealer for service.
Exhaust Brake Indicator Light
If your vehicle is equipped
with an exhaust brake, you
will have this light,
located above the comfort
controls in the center of
the instrument panel.
The exhaust brake indicator light will come on and stay
on whenever the diesel engine exhaust brake or
exhaust restrictor is active. For more information, see
Diesel Engine Exhaust Brake on page 2-25.
Differential Lock Indicator Light
If your vehicle has this
feature, this light is located
in the center of the
instrument panel. The light
is on when the inter-axle
differential lock system
is in use.
The light will come on momentarily during starting. If the
light fails to come on, have it repaired as soon as
possible so you will be aware when the lock system is
in use.
3-40
Page 151 of 366

Reduced Engine Power Light
If the check engine and
reduced engine power
lights are on, the throttle
may be disabled, and
a noticeable reduction in
the vehicle’s performance
may occur.
If the reduced engine power light is on, but there is no
reduction in performance, proceed to your destination.
The performance may be reduced the next time
the vehicle is driven. The vehicle may be driven at a
reduced speed while the reduced engine power light is
on, but acceleration and speed may be reduced.
Anytime the check engine light stays on, the vehicle
should be taken to an authorized GM dealer as soon as
possible for service.
Daytime Running Lamps
Indicator Light
This light is located on the
instrument panel cluster. It
goes on whenever the
Daytime Running Lamps
are on.
SeeDaytime Running LampsunderExterior Lamps on
page 3-13for further information.
When it begins to get dark, the DRL indicator light is a
reminder to turn on your headlamps.
3-41
Page 158 of 366

To adjust both tone controls and both speaker controls
to the middle position, end out of audio by waiting
for the display to change to the time display. Then press
and hold AUDIO for more than two seconds until you
hear a beep. CEN will appear on the display.
Fade may not be available if you have a regular cab
model.
Radio Messages
CAL (Calibrated):Your audio system has been
calibrated for your vehicle from the factory. If CAL
appears on the display it means that your radio has not
been configured properly for your vehicle and must
be returned to the dealer for service.
LOC (Locked):This message is displayed when the
Theftlock
®system has locked up. Your vehicle must be
returned to the dealer for service.
Radio with Cassette
Playing the Radio
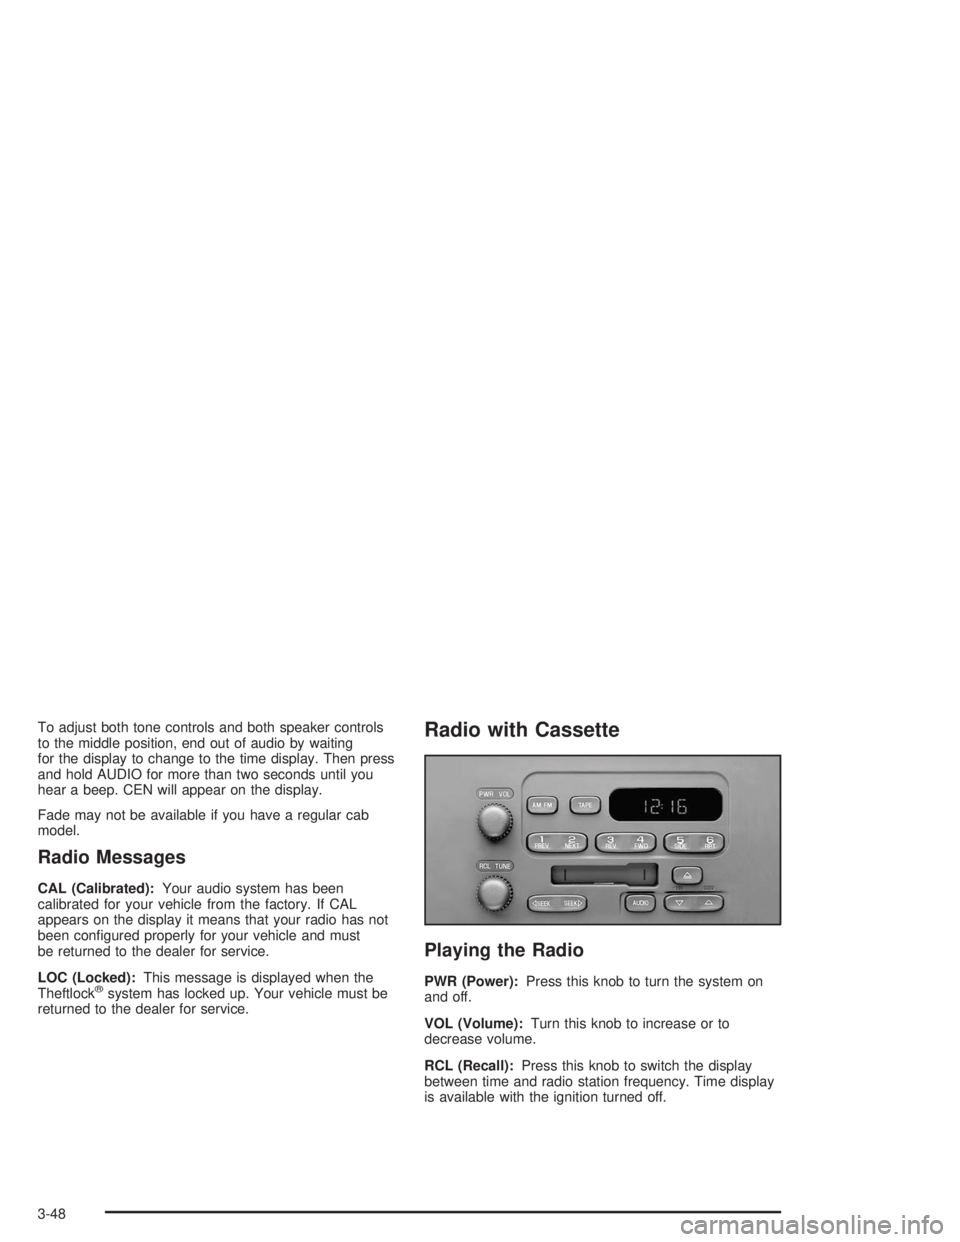
PWR (Power):Press this knob to turn the system on
and off.
VOL (Volume):Turn this knob to increase or to
decrease volume.
RCL (Recall):Press this knob to switch the display
between time and radio station frequency. Time display
is available with the ignition turned off.
3-48
Page 160 of 366

To adjust both tone controls and both speaker controls
to the middle position, end out of audio by waiting
for the display to change to the clock display. Then
press and hold AUDIO for more than two seconds until
you hear a beep. CEN will appear on the display.
Adjusting the Speakers (Balance/Fade)
AUDIO:To adjust the balance between the right
and the left speakers, press and release AUDIO until
BAL appears on the display. Then press and hold the up
or the down arrow to move the sound toward the right
or the left speakers.
To adjust the fade between the front and the rear
speakers, press and release AUDIO until FAD appears
on the display. Then press and hold the up or the
down arrow to move the sound toward the front or the
rear speakers.
To adjust balance or fade to the middle position, select
BAL or FAD. Then press and hold AUDIO for more
than two seconds until you hear a beep. L and a zero or
F and a zero will appear on the display.
To adjust both tone controls and both speaker controls
to the middle position, end out of audio by waiting
for the display to change to the time display. Then press
and hold AUDIO for more than two seconds until you
hear a beep. CEN will appear on the display.
Fade may not be available if you have a regular
cab model.
Radio Messages
CAL (Calibration):Your audio system has been
calibrated for your vehicle from the factory. If CAL
appears on the display it means that your radio has not
been configured properly for your vehicle and must
be returned to the dealership for service.
LOC (Locked):This message is displayed when the
Theftlock
®system has locked up. Your vehicle must be
returned to the dealership for service.
Playing a Cassette
Your tape player is built to work best with tapes that are
up to 30 to 45 minutes long on each side. Tapes
longer than that are so thin they may not work well in
this player. The longer side with the tape visible should
face to the right. If the ignition is on, but the radio is
off, the tape can be inserted and will begin playing. If
you hear nothing but a garbled sound, the tape may not
be in squarely. Press the eject button to remove the
tape and start over.
While the tape is playing, use the VOL, AUDIO and
SEEK controls just as you do for the radio. The radio will
display UP if the top side of the tape is playing.
DN (Down) will appear if the bottom side is playing.
If you want to insert a tape while the ignition is off, first
press the eject button or the RCL knob.
3-50
Page 165 of 366

Radio Messages
CAL (Calibrated):Your audio system has been
calibrated for your vehicle from the factory. If CAL
appears on the display it means that your radio has not
been configured properly for your vehicle and must
be returned to the dealership for service.
LOC (Locked):This message is displayed when the
Theftlock
®system has locked up. Your vehicle must be
returned to the dealership for service.
Playing a Compact Disc
Insert a disc partway into the slot, label side up. The
player will pull it in. The disc should begin playing. The
display will show CD. If you want to insert a compact
disc with the ignition off, first press RCL or the eject
button.
The integral CD player can play the smaller 8 cm single
discs with an adapter ring. Full-size compact discs
and the smaller discs are loaded in the same manner.
If playing a CD-R the sound quality may be reduced due
to CD-R quality, the method of recording, the quality
of the music that has been recorded and the way
the CD-R has been handled. You may experience an
increase in skipping, difficulty in finding tracks and/or
difficulty in loading and ejecting. If these problems occur
try a known good CD.Do not add paper labels to discs, they could get caught
in the CD player.
Do not play 3 inch discs without a standard
adapter disc.
If an error appears on the display, see “Compact Disc
Messages” later in this section.
1 PREV (Previous):Press this pushbutton to go to the
previous track if the current track has been playing
for less than eight seconds. If pressed when the current
track has been playing for more than eight seconds,
it will go to the beginning of the current track. The track
number will appear on the display. If you hold this
pushbutton or press it more than once, the player will
continue moving back through the disc.
2 NEXT:Press this pushbutton to go to the next track.
The track number will appear on the display. If you
hold this pushbutton or press it more than once,
the player will continue moving forward through the disc.
3 REV (Reverse):Press and hold this pushbutton to
reverse quickly within a track. Release it to play
the passage. The display will show elapsed time while
reversing.
4 FWD (Forward):Press and hold this pushbutton to
advance quickly within a track. Release it to play
the passage. The display will show elapsed time while
forwarding.
3-55
Page 168 of 366

The cut tape detection feature of your cassette tape
player may identify the cleaning cassette as a damaged
tape. To prevent the cleaning cassette from being
ejected, use the following steps:
1. Turn the ignition on.
2. Turn the radio off.
3. Press and hold the TAPE button for two seconds
until the radio produces one beep. CAS will flash
on the display for five seconds.
4. Insert the scrubbing action cleaning cassette.
5. Eject the cleaning cassette after the manufacturer’s
recommended cleaning time.
After the cleaning cassette is ejected, the cut tape
detection feature will be active again.You may also choose a non-scrubbing action, wet-type
cleaner which uses a cassette with a fabric belt to
clean the tape head. This type of cleaning cassette will
not eject on its own. A non-scrubbing action cleaner
may not clean as thoroughly as the scrubbing type
cleaner. The use of a non-scrubbing action, dry-type
cleaning cassette is not recommended.
After you clean the player, press and hold the eject
button for three seconds to reset the CLN indicator. The
radio will display --- to show the indicator was reset.
Cassettes are subject to wear and the sound quality may
degrade over time. Always make sure the cassette
tape is in good condition before you have your
tape player serviced.
3-58
Page 193 of 366

Highway Hypnosis
Is there actually such a condition as “highway
hypnosis”? Or is it just plain falling asleep at the wheel?
Call it highway hypnosis, lack of awareness, or
whatever.
When you drive the vehicle for a long distance, there is
something about an easy stretch of road with the
same scenery, along with the hum of the tires on the
road, the drone of the engine, and the rush of the wind
against the vehicle that can make you sleepy. Do
not let it happen to you! If it does, your vehicle can leave
the road inless than a second,and you could crash
and be injured.
What can you do about highway hypnosis? First, be
aware that it can happen.
Then here are some tips:
•Make sure your vehicle is well ventilated, with a
comfortably cool interior.
•Keep your eyes moving. Scan the road ahead and
to the sides. Check your mirrors and your
instruments frequently.
•If you get sleepy, pull off the road into a rest,
service or parking area and take a nap, get some
exercise, or both. For safety, treat drowsiness
on the highway as an emergency.
Hill and Mountain Roads
Driving on steep hills or mountains is different from
driving in flat or rolling terrain.
4-23
Page 201 of 366

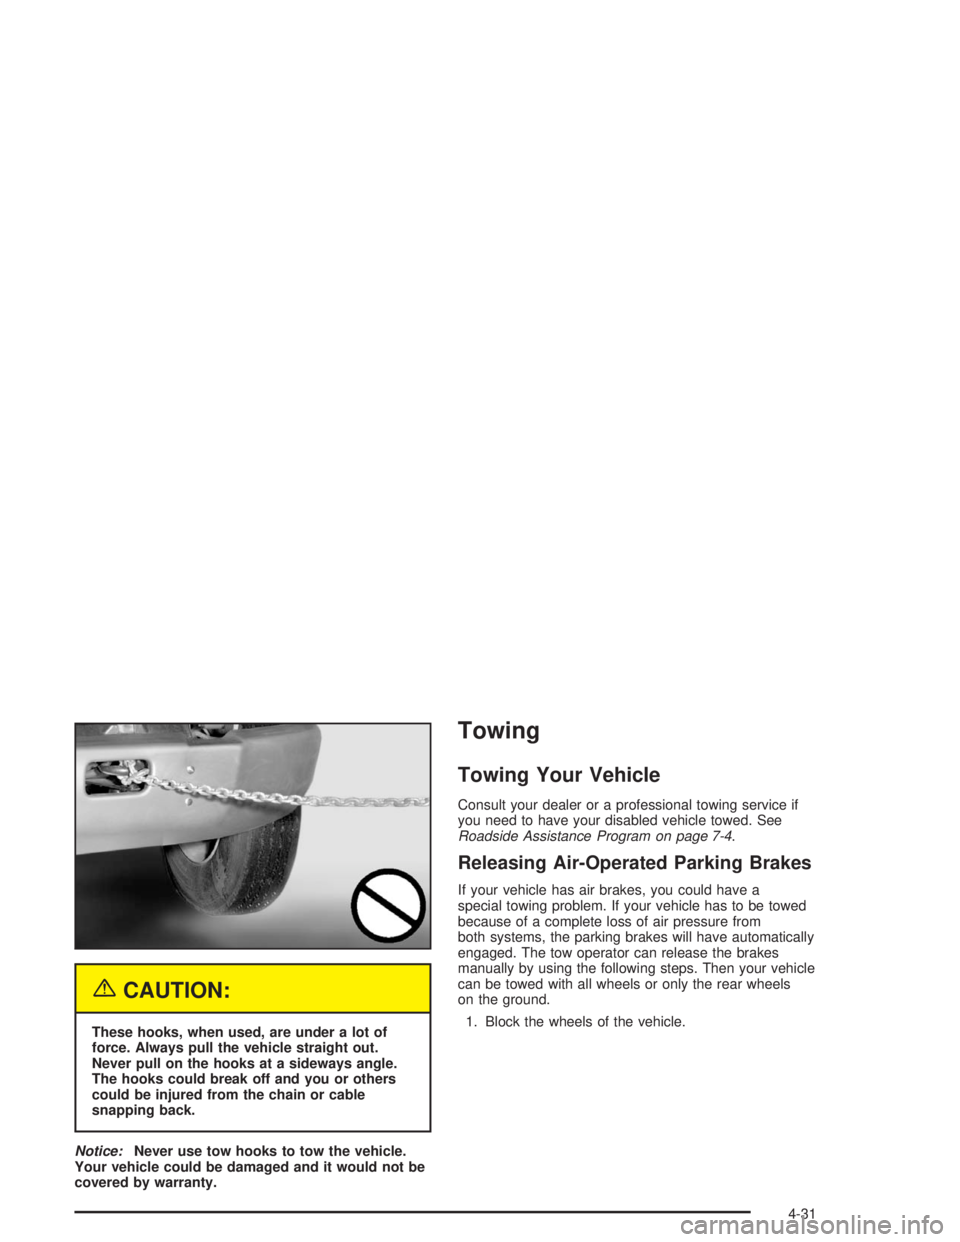
{CAUTION:
These hooks, when used, are under a lot of
force. Always pull the vehicle straight out.
Never pull on the hooks at a sideways angle.
The hooks could break off and you or others
could be injured from the chain or cable
snapping back.
Notice:Never use tow hooks to tow the vehicle.
Your vehicle could be damaged and it would not be
covered by warranty.
Towing
Towing Your Vehicle
Consult your dealer or a professional towing service if
you need to have your disabled vehicle towed. See
Roadside Assistance Program on page 7-4.
Releasing Air-Operated Parking Brakes
If your vehicle has air brakes, you could have a
special towing problem. If your vehicle has to be towed
because of a complete loss of air pressure from
both systems, the parking brakes will have automatically
engaged. The tow operator can release the brakes
manually by using the following steps. Then your vehicle
can be towed with all wheels or only the rear wheels
on the ground.
1. Block the wheels of the vehicle.
4-31