2004 CHEVROLET CORVETTE oil reset
[x] Cancel search: oil resetPage 160 of 384
Check Gages Warning Light
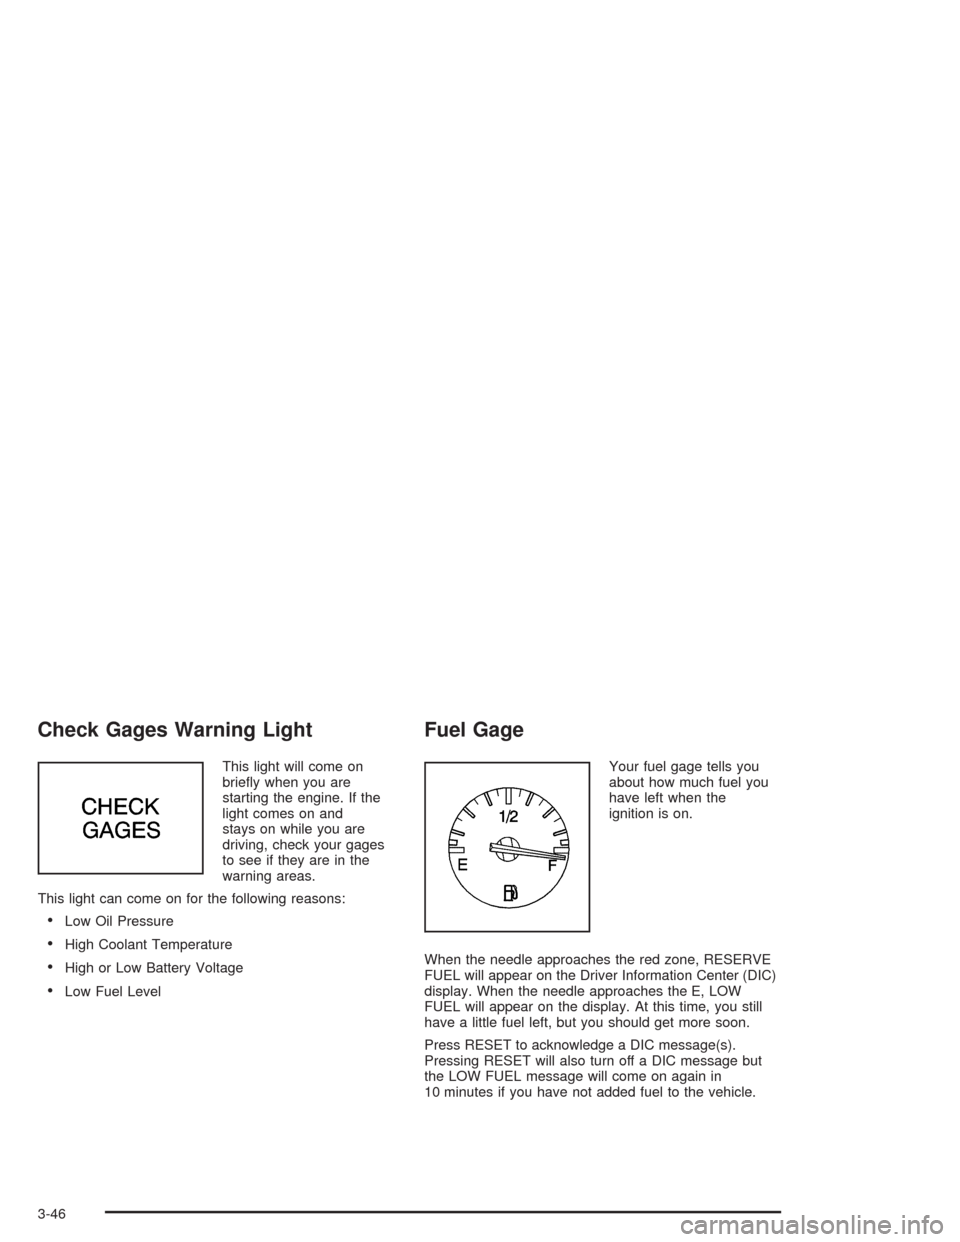
This light will come on
briefly when you are
starting the engine. If the
light comes on and
stays on while you are
driving, check your gages
to see if they are in the
warning areas.
This light can come on for the following reasons:
•Low Oil Pressure
•High Coolant Temperature
•High or Low Battery Voltage
•Low Fuel Level
Fuel Gage
Your fuel gage tells you
about how much fuel you
have left when the
ignition is on.
When the needle approaches the red zone, RESERVE
FUEL will appear on the Driver Information Center (DIC)
display. When the needle approaches the E, LOW
FUEL will appear on the display. At this time, you still
have a little fuel left, but you should get more soon.
Press RESET to acknowledge a DIC message(s).
Pressing RESET will also turn off a DIC message but
the LOW FUEL message will come on again in
10 minutes if you have not added fuel to the vehicle.
3-46
Page 162 of 384
Driver Information Center (DIC)
The Driver Information Center (DIC) will display
information about how your vehicle is functioning, as
well as warning messages if a system problem is
detected. The DIC display area is located in the
instrument panel cluster below the speedometer and
tachometer, directly above the steering column.
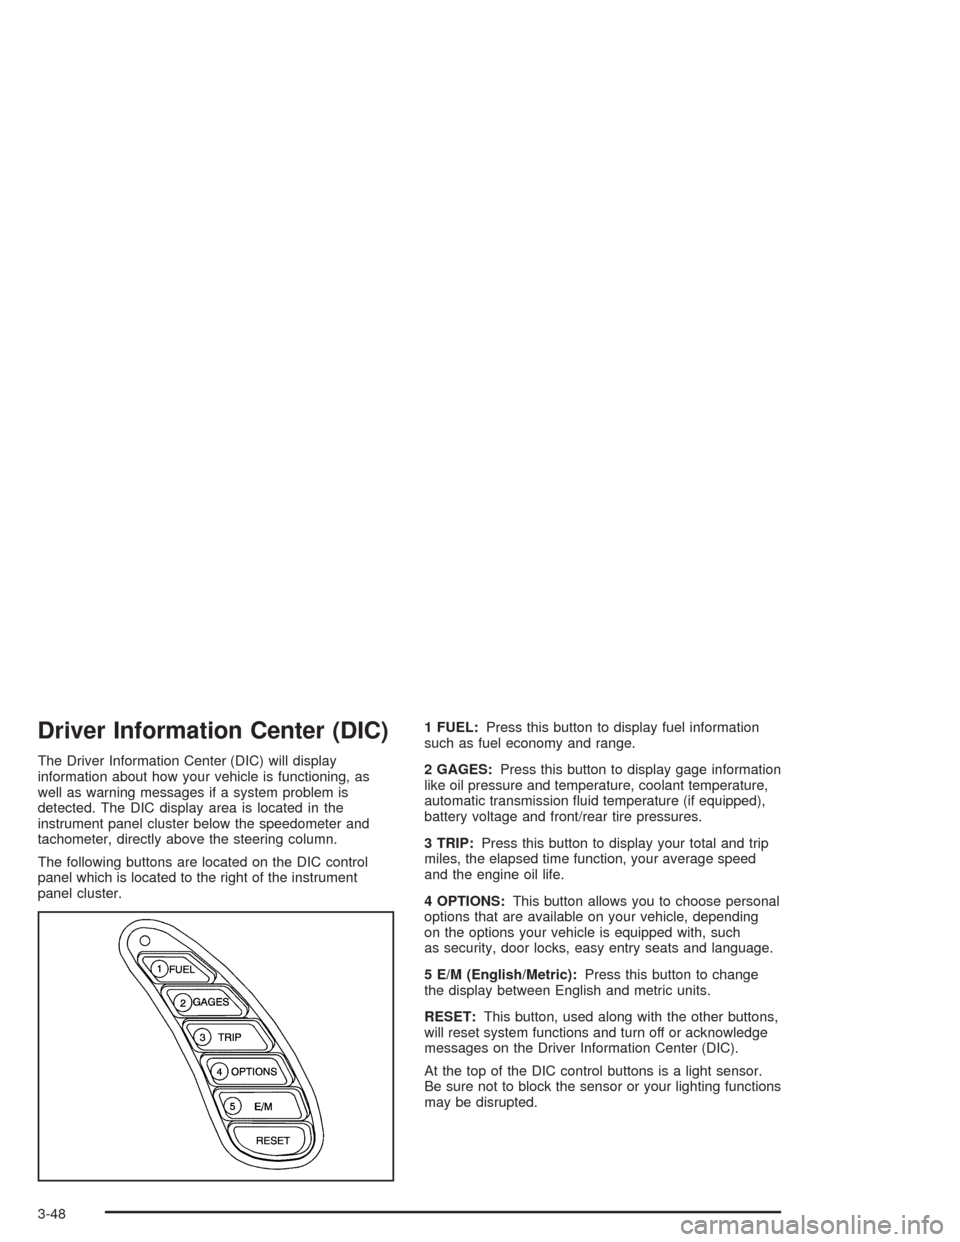
The following buttons are located on the DIC control
panel which is located to the right of the instrument
panel cluster.1 FUEL:Press this button to display fuel information
such as fuel economy and range.
2 GAGES:Press this button to display gage information
like oil pressure and temperature, coolant temperature,
automatic transmission fluid temperature (if equipped),
battery voltage and front/rear tire pressures.
3 TRIP:Press this button to display your total and trip
miles, the elapsed time function, your average speed
and the engine oil life.
4 OPTIONS:This button allows you to choose personal
options that are available on your vehicle, depending
on the options your vehicle is equipped with, such
as security, door locks, easy entry seats and language.
5 E/M (English/Metric):Press this button to change
the display between English and metric units.
RESET:This button, used along with the other buttons,
will reset system functions and turn off or acknowledge
messages on the Driver Information Center (DIC).
At the top of the DIC control buttons is a light sensor.
Be sure not to block the sensor or your lighting functions
may be disrupted.
3-48
Page 164 of 384
The average fuel economy is viewed as a long-term
approximation of your overall driving conditions. If you
press RESET in this mode while you’re driving, the
system will begin figuring fuel economy from that point
in time.
Press FUEL again to display instantaneous fuel
economy, such as:
•INST. 20.1 MPG or
•INST. 5.3 L/100 km
Press FUEL again to display the range, such as:
•RANGE 20 MI or
•RANGE 32 km
The range calculates the remaining distance you can
drive without refueling. It’s based on fuel economy and
the fuel remaining in the tank.
If the range is lower than 30 miles (48 km), the display
will read RANGE LOW.
The fuel economy data used to determine fuel range is
an average of recent driving conditions. As your
driving conditions change, this data is gradually updated.
Resetting the fuel range causes the fuel economy
data to be updated immediately. Press RESET to reset
the fuel range.
2 GAGES
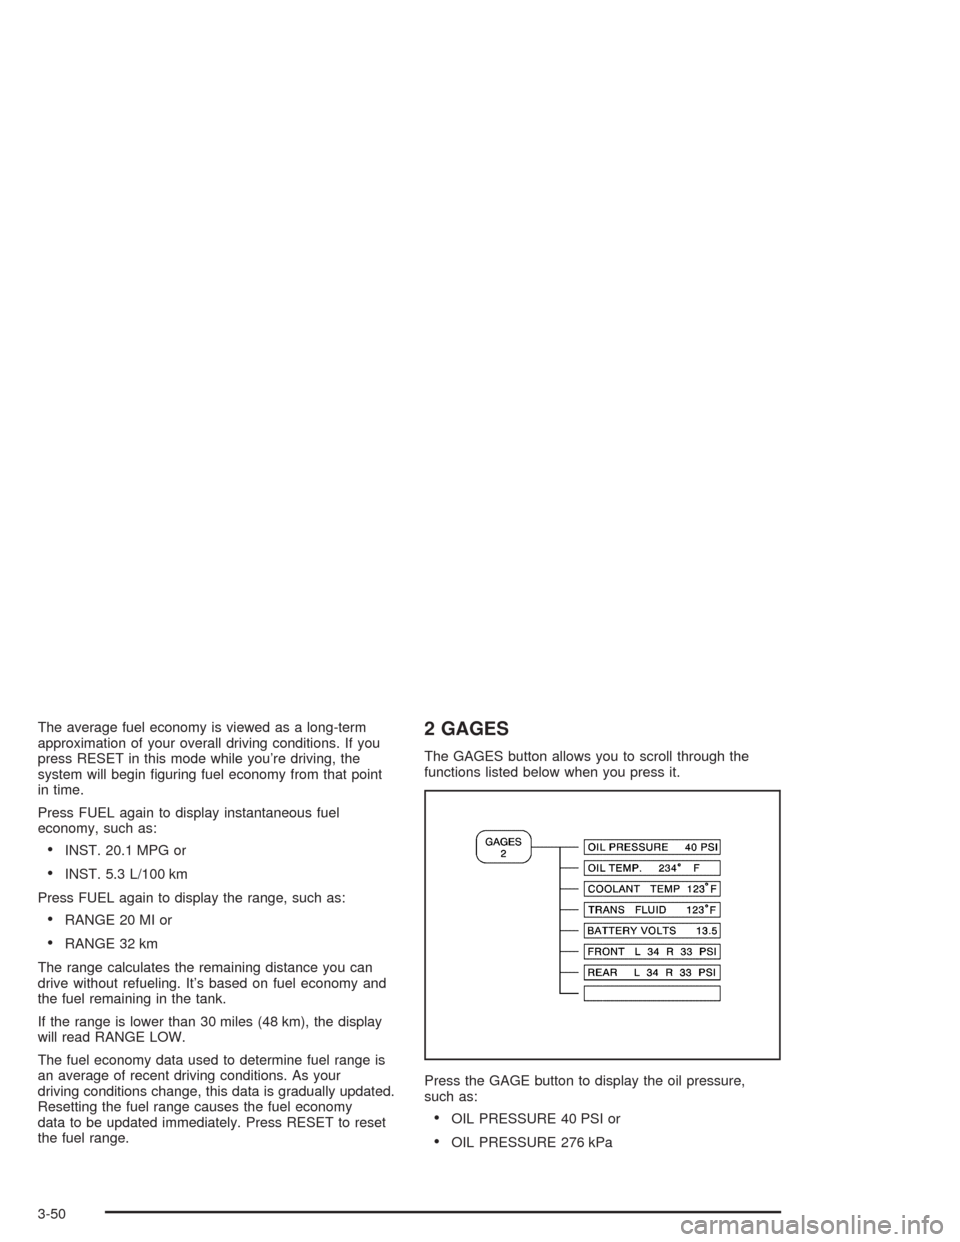
The GAGES button allows you to scroll through the
functions listed below when you press it.
Press the GAGE button to display the oil pressure,
such as:
•OIL PRESSURE 40 PSI or
•OIL PRESSURE 276 kPa
3-50
Page 167 of 384
Elapsed Time
Press the TRIP button until ELAP. TIME is displayed,
such as ELAP. TIME 00:00:00.00.
When the ignition is in ON, the Driver Information
Center (DIC) can be used as a stopwatch. The display
can show hours, minutes, seconds and hundredths
of a second. The elapsed time indicator will record up to
99 hours, 59 minutes and 59 seconds, then it will
reset to zero and continue counting. (Hundredths are
shown up to 59 minutes, 59 seconds and
99 hundredths). The display appears as ELAP. TIME
00:00:00.00 in the elapsed time function.
You can start or stop the elapsed time by pressing
RESET. To reset the elapsed time to zero, stop the timer
by pressing RESET. Then press and hold RESET
until ELAP. TIME 00:00:00.00 appears in the DIC.
Average Speed
Press the TRIP button until the average speed is
displayed, such as:
•AVERAGE SPEED 62 MPH or
•AVERAGE SPEED 100 km/h
Press reset in this mode to start calculating the average
speed. Press and hold RESET to clear.
Engine Oil Life
Press the TRIP button until the engine oil life is
displayed, such as OIL LIFE REMAIN 89%.
This is an estimate of the engine oil’s remaining useful
life. It will show 100% when the system is reset after
an oil change. It will alert you to change your oil
on a schedule consistent with your driving conditions.
When the remaining oil life is low, the system will
alert you with the message CHANGE OIL SOON.
When the oil life is down to zero, you will receive the
message CHANGE OIL NOW.
Remember, you must reset the OIL LIFE yourself after
each oil change. It will not reset itself. Also, be
careful not to reset the OIL LIFE accidentally at any
time other than when the oil has just been changed. It
can’t be reset accurately until the next oil change.
To reset the system, see “How to Reset the Change Oil
Soon Message” underEngine Oil on page 5-13.
Also, seeEngine Oil on page 5-13andScheduled
Maintenance on page 6-4.
3-53
Page 176 of 384

LOW OIL LEVEL:Press RESET to acknowledge that
you have read the message and to remove it from
the display. The message will reappear every
10 minutes until this condition changes. Once the
vehicle senses a temperature change in the engine oil,
the light will remain off.
You will hear two chimes when this message is
displayed. If this message appears after starting your
engine, your engine oil level may be too low. You
may need to add oil. SeeEngine Overheating on
page 5-26.
LOW OIL PRESSURE:You will hear four chimes and
the CHECK GAGES telltale will come on when this
message is displayed. To acknowledge the warning,
press the RESET button. After you press the RESET
button, a message will be displayed and you will hear a
chime every minute until the vehicle is serviced. If
you do not press RESET, the message will remain on
the digital display until the vehicle is serviced.
Low oil pressure may be the result of a combination of
low oil level and abrupt changes in the vehicle’s
direction. When this warning is displayed, you should
not operate the engine at high rpm or make fast abrupt
moves. As soon as possible, you should check the
oil level. SeeEngine Oil on page 5-13.LOW TIRE PRESSURE (Except Z06):You will hear
two chimes when this message is displayed. To
acknowledge the warning, press RESET. After you
press RESET, a message will appear every 10 minutes
until this condition changes. This message indicates
that the pressure in one of your tires is less than 25 psi
(172 kPa). Next to the LOW TIRE PRESSURE
message, you can see either LF (left front), LR (left
rear), RF (right front) or RR (right rear) to indicate to you
which tire is low on pressure. You can receive more
than one tire pressure message at a time. To read other
messages that may have been sent at the same time,
press RESET. If a tire pressure message appears on the
DIC, stop as soon as you can. Have the tire pressures
checked and set to those shown on your Tire Loading
Information Label. SeeExtended Mobility Tires
(Except Z06) on page 5-61andTire Pressure
Monitor Operation (Except Z06) on page 5-64.
3-62
Page 178 of 384

REDUCED ENGINE POWER:You will hear chimes
continuously when this message is displayed. To
acknowledge that you have read the message and to
remove it from the display, press RESET. The message
will reappear every 15 seconds until this condition
changes.
If the Driver Information Center (DIC) displays the
REDUCED ENGINE POWER message and the CHECK
ENGINE light comes on, a noticeable reduction in the
vehicle’s performance may occur. If the REDUCED
ENGINE POWER message is displayed but there is no
reduction in performance, proceed to your destination.
The performance may be reduced the next time
the vehicle is driven.
The vehicle may be driven at a reduced speed while the
REDUCED ENGINE POWER message is displayed,
but acceleration and speed may be reduced. Anytime
the CHECK ENGINE light stays on, the vehicle
should be taken to an authorized dealer as soon as
possible for diagnosis and repair.
Also, refer toMalfunction Indicator Lamp on page 3-41.
If the REDUCED ENGINE POWER message is
displayed in combination with the COOLANT OVER
TEMP message, seeEngine Overheating on page 5-26.REDUCE ENGINE RPM:You will hear four chimes
when this message is displayed. To acknowledge
the warning, press the RESET button. After you press
the RESET button, a message will be displayed and you
will hear a chime every minute until this condition
changes. If you do not press RESET, the message will
remain on the digital display until the condition
changes.
If the engine oil temperature exceeds 320°F (160°C),
this message is displayed. You should check the engine
coolant temperature and engine oil level. If your
engine is too hot, seeEngine Overheating on page 5-26.
Your vehicle may need service, so see your dealer.
You can monitor the oil temperature with the GAGES
button on the DIC.
SERVICE ABS (Anti-Lock Brake System):If the
SERVICE ABS message is displayed when you
are driving, stop as soon as possible and turn the
ignition off. Then start the engine again to reset the
system. If the message stays on, or comes back
on again while you are driving, your vehicle is in need
of service. If the regular brake system warning light
is not on, you still have brakes, but do not have anti-lock
brakes. If the regular brake system light is also on,
you do not have anti-lock brakes and there is a problem
with your brakes. SeeBrake System Warning Light
on page 3-38.
3-64
Page 182 of 384
Other Messages
Here are more messages that you can receive on your
Driver Information Center (DIC). To acknowledge a
message and read another message that may have
come on at the same time, press the RESET button.
•BRAKE BEFORE SHIFT
(See “Automatic Transmissions Only” under
Automatic Transmission Operation on page 2-25.)
•CHANGE OIL NOW
(See “GM Oil Life System™” underEngine Oil on
page 5-13.)
•CHANGE OIL SOON
(See “GM Oil Life System™” underEngine Oil on
page 5-13andScheduled Maintenance on
page 6-4.)
•CRUISE DISENGAGED
(See “Cruise Control” underTurn
Signal/Multifunction Lever on page 3-6.)
•CRUISE SET_MPH (_km/h)
(See “Cruise Control” underTurn
Signal/Multifunction Lever on page 3-6.)
•DOOR AJAR
•ENGINE PROTECTION REDUCE ENGINE RPM
•HATCH AJAR (Coupe)
•HIGH VOLTAGE
(SeeVoltmeter Gage on page 3-37.)
•LOW BRAKE FLUID
(See “Brake Fluid” underBrakes on page 5-37.)
•LOW FUEL
(SeeFuel Gage on page 3-46.)
•LOW VOLTAGE
(SeeVoltmeter Gage on page 3-37.)
•LOW WASHER FLUID
(SeeWindshield Washer Fluid on page 5-36.)
•RESERVE FUEL
(SeeFuel Gage on page 3-46.)
•TONNEAU AJAR (Convertible)
•TRUNK AJAR (Convertible/Z06)
•UPSHIFT NOW
(SeeManual Transmission Operation on
page 2-28.)
3-68
Page 203 of 384
A non-scrubbing action, wet-type cleaner which uses a
cassette with a fabric belt to clean the tape head
can be used. This type of cleaning cassette will not
eject on its own. A non-scrubbing action cleaner may not
clean as thoroughly as the scrubbing type cleaner.
The use of a non-scrubbing action, dry-type cleaning
cassette is not recommended.
After the player is cleaned, press and hold the EJECT
button for five seconds to reset the CLN indicator.
The radio will display --- or CLEANED to show the
indicator was reset.
Cassettes are subject to wear and the sound quality
may degrade over time. Always make sure the cassette
tape is in good condition before the tape player is
serviced.Care of Your CDs
Handle CDs carefully. Store them in their original cases
or other protective cases and away from direct
sunlight and dust. If the surface of a CD is soiled,
dampen a clean, soft cloth in a mild, neutral detergent
solution and clean it, wiping from the center to the edge.
Be sure never to touch the side without writing when
handling CDs. Pick up CDs by grasping the outer edges
or the edge of the hole and the outer edge.
Care of Your CD Player
The use of CD lens cleaners for CD players is not
advised, due to the risk of contaminating the lens of the
CD optics with lubricants internal to the CD mechanism.
Fixed Mast Antenna (Z06)
The fixed mast antenna can withstand most car washes
without being damaged. If the mast should ever
become slightly bent, straighten it out by hand. If the
mast is badly bent, replace it.
Check occasionally to make sure the mast is still
tightened to the rear quarter panel.
3-89