2004 BMW Z4 ROADSTER 3.0I ignition
[x] Cancel search: ignitionPage 33 of 120
Reference
At a glance
Controls
Driving tips
Mobility
31
Mirrors
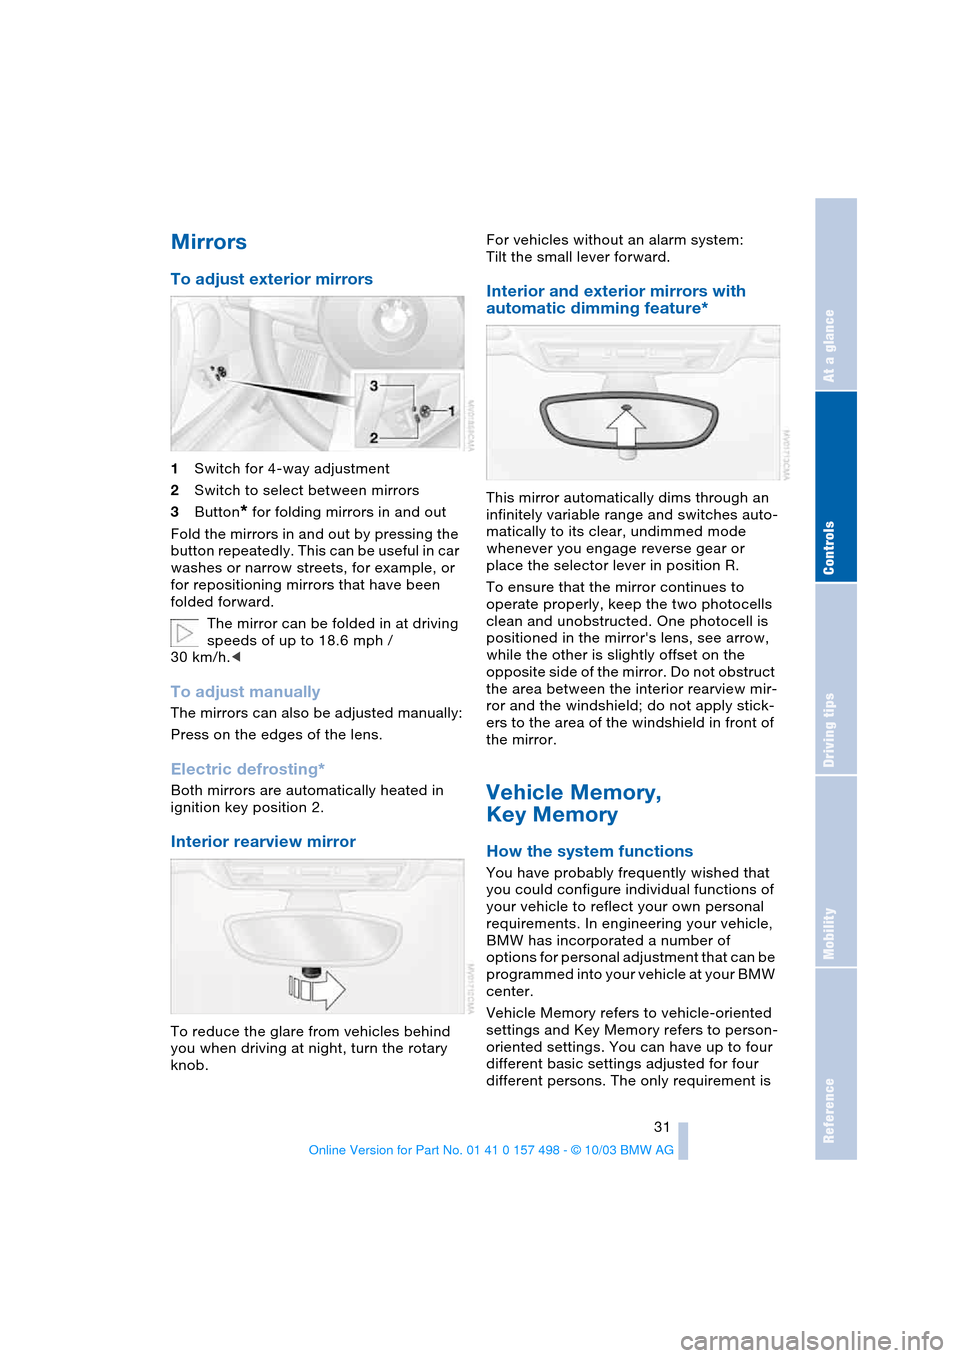
To adjust exterior mirrors
1Switch for 4-way adjustment
2Switch to select between mirrors
3Button
* for folding mirrors in and out
Fold the mirrors in and out by pressing the
button repeatedly. This can be useful in car
washes or narrow streets, for example, or
for repositioning mirrors that have been
folded forward.
The mirror can be folded in at driving
speeds of up to 18.6 mph /
30 km/h.<
To adjust manually
The mirrors can also be adjusted manually:
Press on the edges of the lens.
Electric defrosting*
Both mirrors are automatically heated in
ignition key position 2.
Interior rearview mirror
To reduce the glare from vehicles behind
you when driving at night, turn the rotary
knob.For vehicles without an alarm system:
Tilt the small lever forward.
Interior and exterior mirrors with
automatic dimming feature*
This mirror automatically dims through an
infinitely variable range and switches auto-
matically to its clear, undimmed mode
whenever you engage reverse gear or
place the selector lever in position R.
To ensure that the mirror continues to
operate properly, keep the two photocells
clean and unobstructed. One photocell is
positioned in the mirror's lens, see arrow,
while the other is slightly offset on the
opposite side of the mirror. Do not obstruct
the area between the interior rearview mir-
ror and the windshield; do not apply stick-
ers to the area of the windshield in front of
the mirror.
Vehicle Memory,
Key Memory
How the system functions
You have probably frequently wished that
you could configure individual functions of
your vehicle to reflect your own personal
requirements. In engineering your vehicle,
BMW has incorporated a number of
options for personal adjustment that can be
programmed into your vehicle at your BMW
center.
Vehicle Memory refers to vehicle-oriented
settings and Key Memory refers to person-
oriented settings. You can have up to four
different basic settings adjusted for four
different persons. The only requirement is
Page 35 of 120
Reference
At a glance
Controls
Driving tips
Mobility
33
Transporting children safely
Children on the passenger's
seat
Deactivating/reactivating passenger
airbags
The passenger airbags must be deac-
tivated before using a rear-facing
child-restraint system on the passenger
seat, refer also to page 34 for explanation.
BMW also recommends that the passenger
airbags be deactivated if a child is trans-
ported in a front-facing child-restraint sys-
tem, regardless of the age of the child. If
you transport a child in the passenger seat,
not an infant in a rear-facing seat, who is
properly seated and seat-belted at all
times, the potential benefits of airbags
deploying in an accident generally out-
weigh the risks of the child being injured by
the force of a deploying airbag.
Therefore, you should deactivate the pas-
senger airbags only if you find it difficult to
ensure that the child will remain properly
seated and seat-belted at all times.
Always position the passenger seat as far
back as possible and at the lowest level.
The above warning and recommendations
are compatible with regulations estab-
lished by the National Highway Traffic
Safety Administration, NHTSA, permitting
the deactivation of passenger airbags by
means of an on-off switch for members of
certain at-risk groups.
Specifically, the at-risk groups are:
>Infants in rear-facing infant seats
>Persons with certain medical conditions
>Children aged 12 and under in the pas-
senger seat.
NHTSA provides this information via their
website, www.nhtsa.dot.gov, or via their
Auto Safety Hotline toll-free at
1-800-424-9393 or 366-0123
in Washington, D.C. area.<
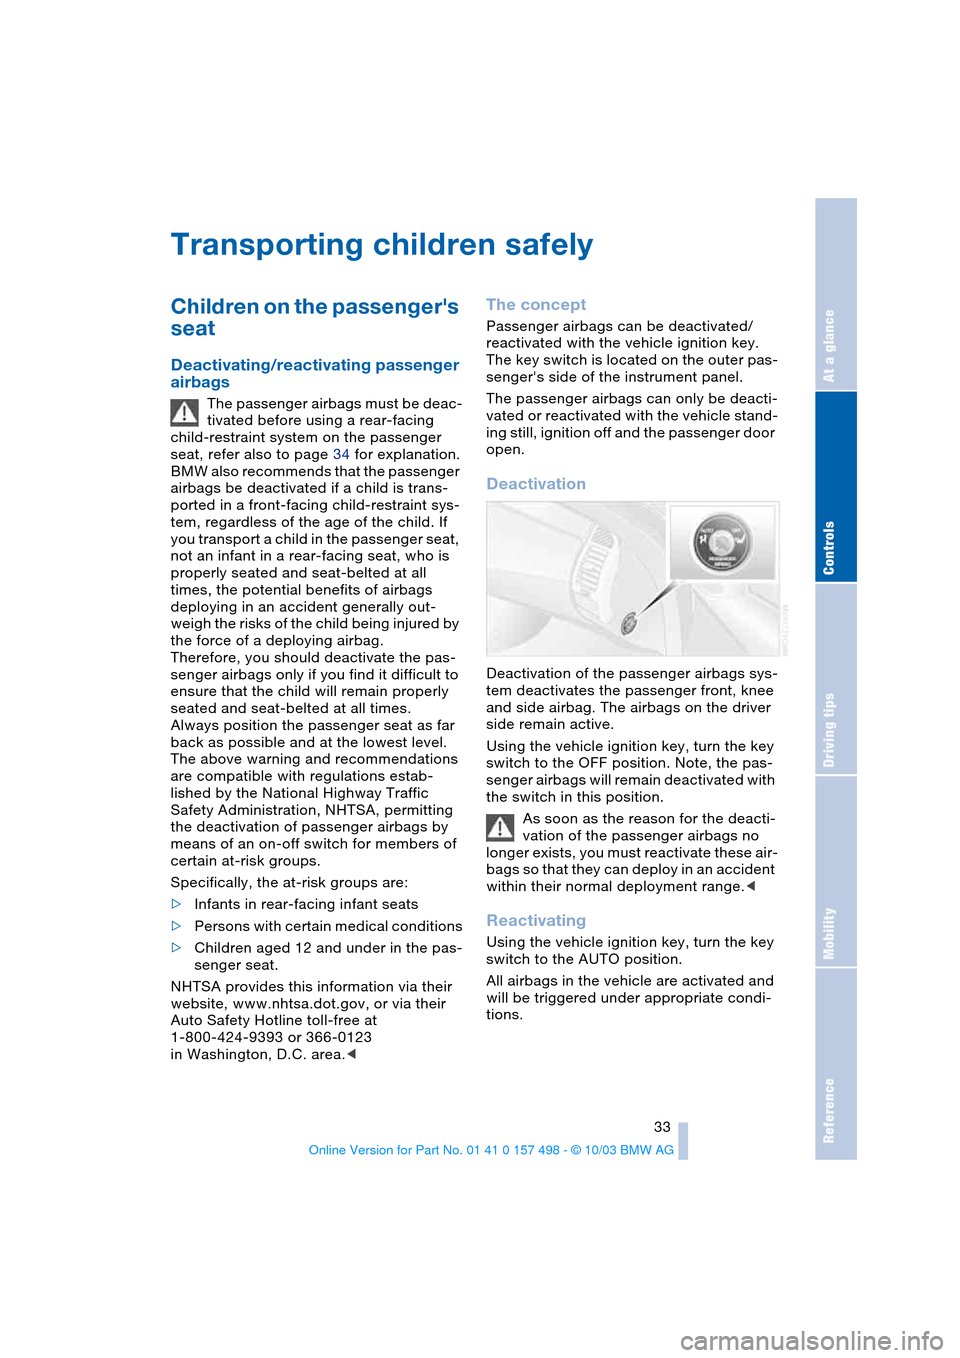
The concept
Passenger airbags can be deactivated/
reactivated with the vehicle ignition key.
The key switch is located on the outer pas-
senger's side of the instrument panel.
The passenger airbags can only be deacti-
vated or reactivated with the vehicle stand-
ing still, ignition off and the passenger door
open.
Deactivation
Deactivation of the passenger airbags sys-
tem deactivates the passenger front, knee
and side airbag. The airbags on the driver
side remain active.
Using the vehicle ignition key, turn the key
switch to the OFF position. Note, the pas-
senger airbags will remain deactivated with
the switch in this position.
As soon as the reason for the deacti-
vation of the passenger airbags no
longer exists, you must reactivate these air-
bags so that they can deploy in an accident
within their normal deployment range.<
Reactivating
Using the vehicle ignition key, turn the key
switch to the AUTO position.
All airbags in the vehicle are activated and
will be triggered under appropriate condi-
tions.
Page 36 of 120
Transporting children safely
34
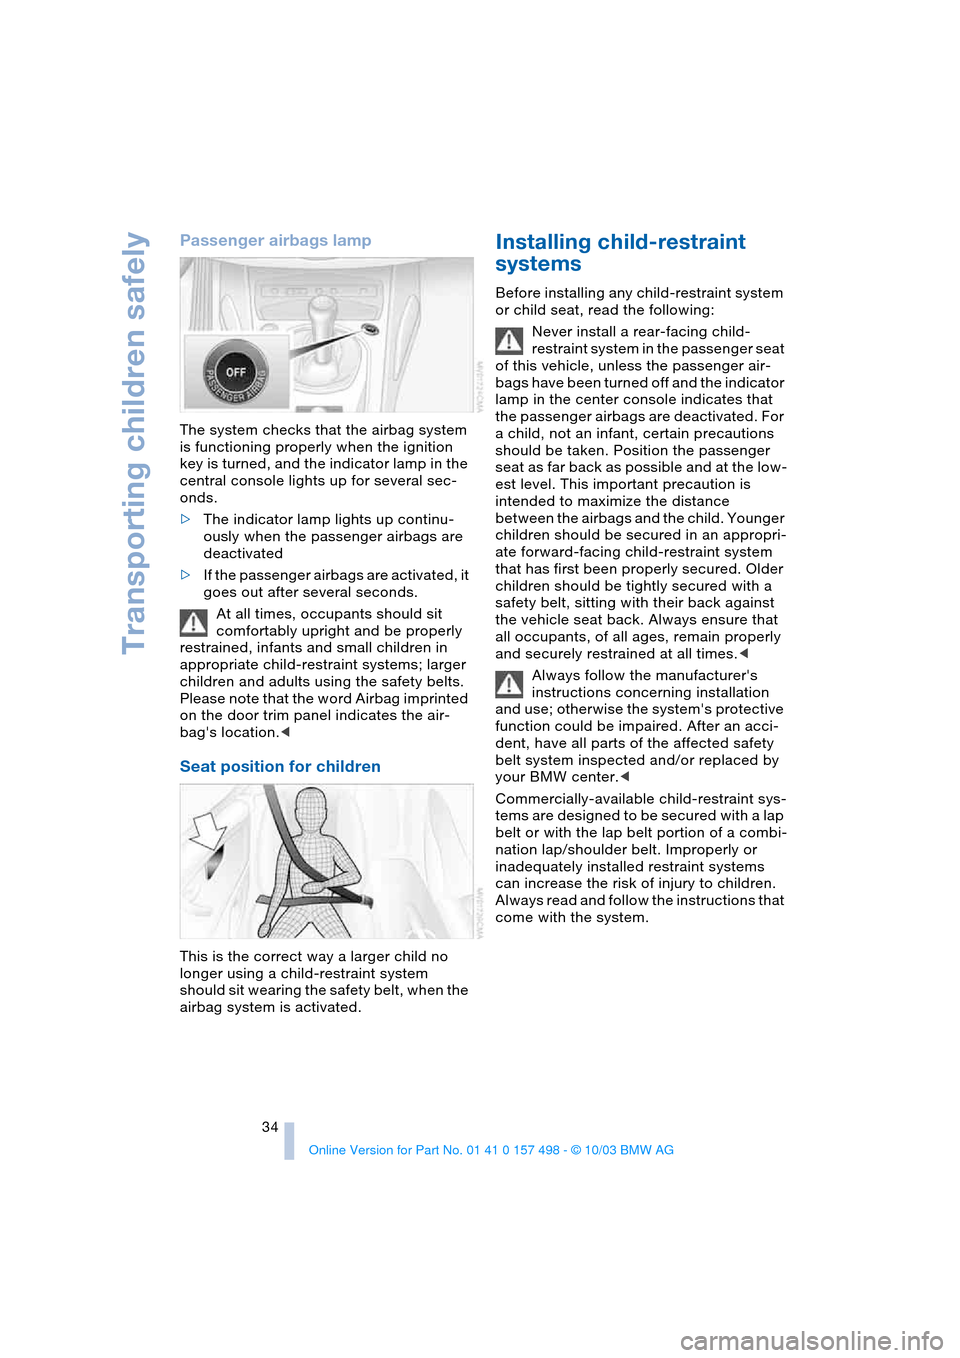
Passenger airbags lamp
The system checks that the airbag system
is functioning properly when the ignition
key is turned, and the indicator lamp in the
central console lights up for several sec-
onds.
>The indicator lamp lights up continu-
ously when the passenger airbags are
deactivated
>If the passenger airbags are activated, it
goes out after several seconds.
At all times, occupants should sit
comfortably upright and be properly
restrained, infants and small children in
appropriate child-restraint systems; larger
children and adults using the safety belts.
Please note that the word Airbag imprinted
on the door trim panel indicates the air-
bag's location.<
Seat position for children
This is the correct way a larger child no
longer using a child-restraint system
should sit wearing the safety belt, when the
airbag system is activated.
Installing child-restraint
systems
Before installing any child-restraint system
or child seat, read the following:
Never install a rear-facing child-
restraint system in the passenger seat
of this vehicle, unless the passenger air-
bags have been turned off and the indicator
lamp in the center console indicates that
the passenger airbags are deactivated. For
a child, not an infant, certain precautions
should be taken. Position the passenger
seat as far back as possible and at the low-
est level. This important precaution is
intended to maximize the distance
between the airbags and the child. Younger
children should be secured in an appropri-
ate forward-facing child-restraint system
that has first been properly secured. Older
children should be tightly secured with a
safety belt, sitting with their back against
the vehicle seat back. Always ensure that
all occupants, of all ages, remain properly
and securely restrained at all times.<
Always follow the manufacturer's
instructions concerning installation
and use; otherwise the system's protective
function could be impaired. After an acci-
dent, have all parts of the affected safety
belt system inspected and/or replaced by
your BMW center.<
Commercially-available child-restraint sys-
tems are designed to be secured with a lap
belt or with the lap belt portion of a combi-
nation lap/shoulder belt. Improperly or
inadequately installed restraint systems
can increase the risk of injury to children.
Always read and follow the instructions that
come with the system.
Page 38 of 120
Driving
36
Driving
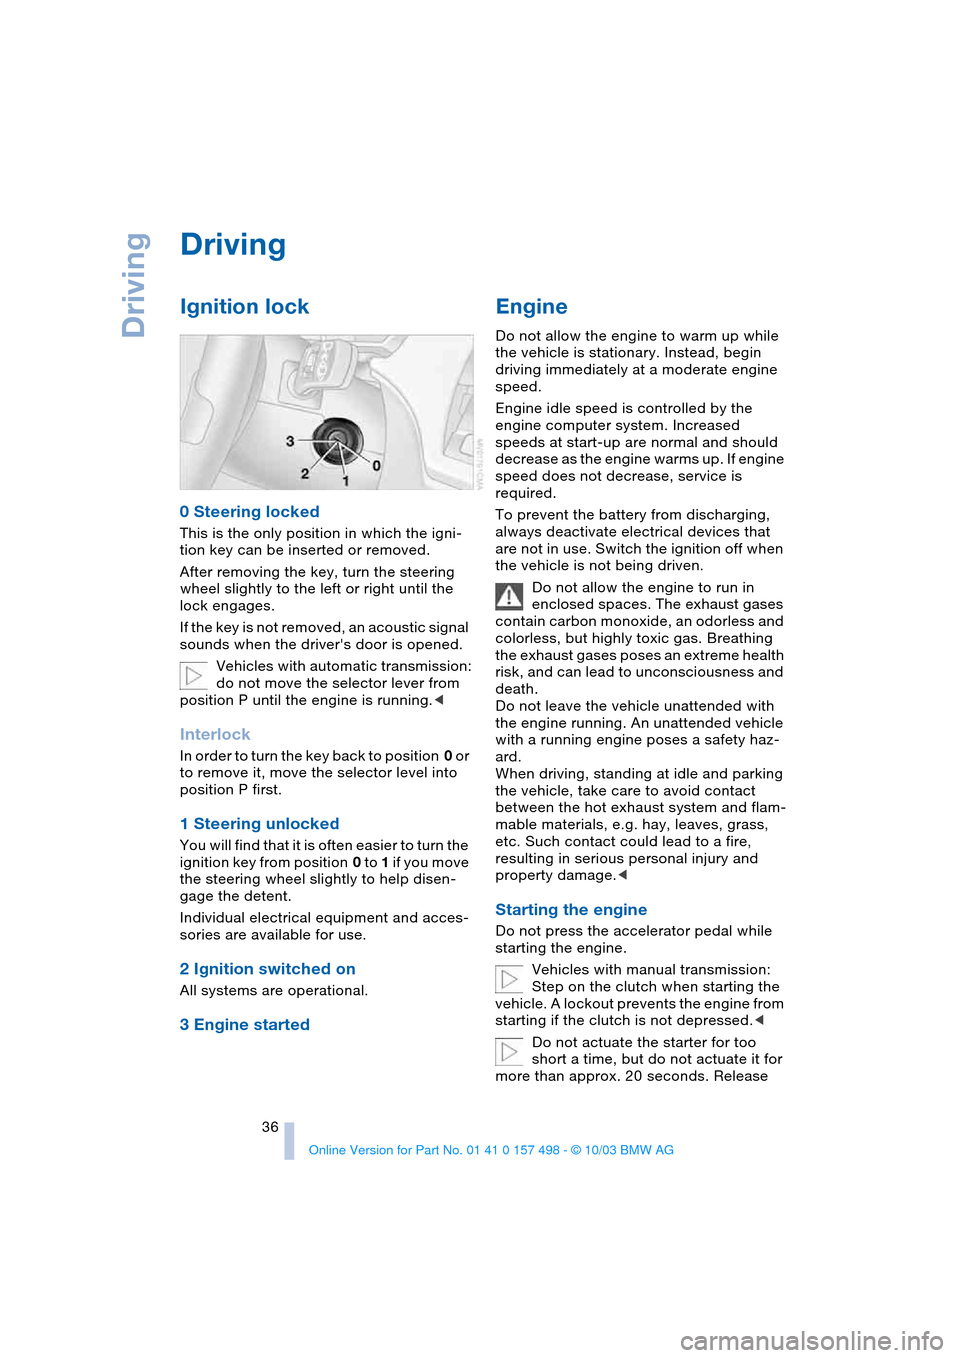
Ignition lock
0 Steering locked
This is the only position in which the igni-
tion key can be inserted or removed.
After removing the key, turn the steering
wheel slightly to the left or right until the
lock engages.
If the key is not removed, an acoustic signal
sounds when the driver's door is opened.
Vehicles with automatic transmission:
do not move the selector lever from
position P until the engine is running.<
Interlock
In order to turn the key back to position 0 or
to remove it, move the selector level into
position P first.
1 Steering unlocked
You will find that it is often easier to turn the
ignition key from position 0 to 1 if you move
the steering wheel slightly to help disen-
gage the detent.
Individual electrical equipment and acces-
sories are available for use.
2 Ignition switched on
All systems are operational.
3 Engine started
Engine
Do not allow the engine to warm up while
the vehicle is stationary. Instead, begin
driving immediately at a moderate engine
speed.
Engine idle speed is controlled by the
engine computer system. Increased
speeds at start-up are normal and should
decrease as the engine warms up. If engine
speed does not decrease, service is
required.
To prevent the battery from discharging,
always deactivate electrical devices that
are not in use. Switch the ignition off when
the vehicle is not being driven.
Do not allow the engine to run in
enclosed spaces. The exhaust gases
contain carbon monoxide, an odorless and
colorless, but highly toxic gas. Breathing
the exhaust gases poses an extreme health
risk, and can lead to unconsciousness and
death.
Do not leave the vehicle unattended with
the engine running. An unattended vehicle
with a running engine poses a safety haz-
ard.
When driving, standing at idle and parking
the vehicle, take care to avoid contact
between the hot exhaust system and flam-
mable materials, e.g. hay, leaves, grass,
etc. Such contact could lead to a fire,
resulting in serious personal injury and
property damage.<
Starting the engine
Do not press the accelerator pedal while
starting the engine.
Vehicles with manual transmission:
Step on the clutch when starting the
vehicle. A lockout prevents the engine from
starting if the clutch is not depressed.<
Do not actuate the starter for too
short a time, but do not actuate it for
more than approx. 20 seconds. Release
Page 39 of 120
Reference
At a glance
Controls
Driving tips
Mobility
37
the ignition key immediately when the
engine starts.<
Extended starting attempts, charac-
terized by excessively frequent or
long periods with the starter engaged, can
damage the catalytic converter.<
If the engine fails to start on the first
attempt, for instance if it is very hot or cold:
>Press the accelerator pedal halfway
down.
Cold starts at very low temperatures, start-
ing at approx. 57/–156:
>Press the accelerator pedal halfway
down.
>On the first start attempt, engage the
starter for a longer period, approx.
10 seconds.
Manual transmission
1.Engage the parking brake
2.Gearshift lever in idling position
3.Depress clutch pedal
4.Start the engine.
Automatic transmission
1.Depress footbrake
2.Place selector lever in position P or N
3.Start the engine.
Before leaving the vehicle with the
engine running, place the selector
lever in position P and pull the parking
brake.
Do not leave the vehicle unattended with
the engine running. An unattended vehicle
with a running engine poses a safety haz-
ard.<
Sequential manual gearbox SMG
1.Depress footbrake
2.Move selector lever to neutral
position N
3.Start the engine.
If the engine does not start, re-
engage the gear last selected, refer to
the display in the instrument cluster, and move the selector lever to neutral position
N again.<
Before leaving the vehicle with the
engine running, place the selector
lever in position N and pull the parking
brake.
Do not leave the vehicle unattended with
the engine running. An unattended vehicle
with a running engine poses a safety haz-
ard.<
Switching off the engine
Do not remove the ignition key while
the vehicle is still moving. If you did
so, the steering lock would engage when
the steering wheel is turned.
When you leave the vehicle, always remove
the ignition key and engage the steering
lock.
Always engage the parking brake when
parking on downhill roads.<
You can have an acoustic signal set
as a reminder that the ignition key is
still in the ignition switch after the driver's
door has been opened.<
Manual transmission
Turn the ignition key to position 1 or 0.
Automatic transmission
Place the selector lever in position P and
turn the ignition key to position 1 or 0.
Sequential manual gearbox SMG
If you turn the ignition key to position 1 or 0
with the selector lever in position R, or in
sequential mode, a gear automatically
remains engaged.
If you turn the ignition key to position 1 or 0
with the selector lever in neutral position N,
a warning tone and the flashing gear indi-
cator in the display remind you that the
vehicle is not secured against rolling.
The warning stops after approx. 9 seconds.
Always engage the parking brake
when parking on downhill roads.
Engaging a gear may not sufficiently secure
the vehicle against rolling.<
Page 40 of 120
Driving
38
Parking brake
The parking brake is designed primarily to
prevent the vehicle from rolling when
parked. It operates against the rear wheels.
Indicator lamp
The indicator lamp lights up when
the parking brake is engaged; if you
start driving, an acoustic signal is
heard as well.
The indicator lamp for Canadian
models lights up when the parking
brake is engaged; if you start driv-
ing, an acoustic signal is heard as well.
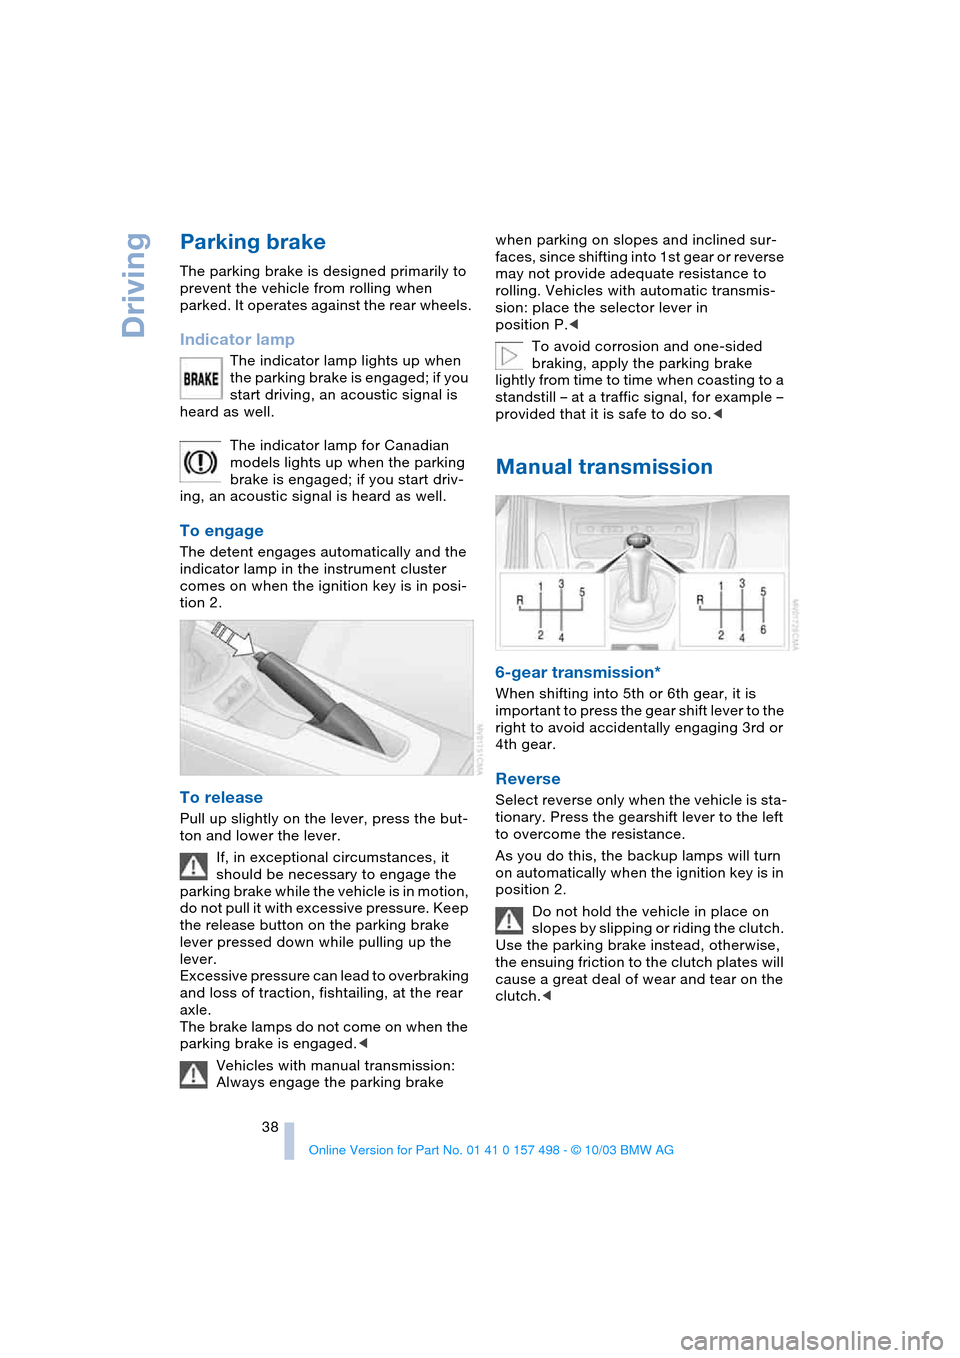
To engage
The detent engages automatically and the
indicator lamp in the instrument cluster
comes on when the ignition key is in posi-
tion 2.
To release
Pull up slightly on the lever, press the but-
ton and lower the lever.
If, in exceptional circumstances, it
should be necessary to engage the
parking brake while the vehicle is in motion,
do not pull it with excessive pressure. Keep
the release button on the parking brake
lever pressed down while pulling up the
lever.
Excessive pressure can lead to overbraking
and loss of traction, fishtailing, at the rear
axle.
The brake lamps do not come on when the
parking brake is engaged.<
Vehicles with manual transmission:
Always engage the parking brake when parking on slopes and inclined sur-
faces, since shifting into 1st gear or reverse
may not provide adequate resistance to
rolling. Vehicles with automatic transmis-
sion: place the selector lever in
position P.<
To avoid corrosion and one-sided
braking, apply the parking brake
lightly from time to time when coasting to a
standstill – at a traffic signal, for example –
provided that it is safe to do so.<
Manual transmission
6-gear transmission*
When shifting into 5th or 6th gear, it is
important to press the gear shift lever to the
right to avoid accidentally engaging 3rd or
4th gear.
Reverse
Select reverse only when the vehicle is sta-
tionary. Press the gearshift lever to the left
to overcome the resistance.
As you do this, the backup lamps will turn
on automatically when the ignition key is in
position 2.
Do not hold the vehicle in place on
slopes by slipping or riding the clutch.
Use the parking brake instead, otherwise,
the ensuing friction to the clutch plates will
cause a great deal of wear and tear on the
clutch.<
Page 43 of 120
Reference
At a glance
Controls
Driving tips
Mobility
41
Forward position with one-touch functions:
Sequential mode
+:manual upshifting
—:manual downshifting
D: drive mode.
The SMG is ready for operation in ignition
key positions 2 and 3.
The gearbox is automatically taken
out of gear if the driver's door is
opened while the engine is running and the
driver does not actuate the pedals, the shift
paddles or the selector lever.
This is accompanied by an acoustic signal
and the flashing gear indicator.
The gear indicator in the instrument cluster
displays N.
A driving position can only be engaged
when the driver's door is closed.
When the vehicle is unlocked, a buzzing
sound in the area of the transmission indi-
cates that the system is ready to operate.<
Shiftlock
For your safety, it is only possible to
engage a driving position from selector
lever position N when the footbrake is
depressed.
Please keep in mind while driving
When driving off on inclines, drive
smoothly without pausing. Do not
keep the vehicle in place by depressing the
accelerator pedal; instead, apply the park-
ing brake. Otherwise, the SMG gearbox
could overheat.<
RReverse
Select reverse only when the vehicle is sta-
tionary.
NNeutral
Always engage before starting the engine,
refer to Starting the engine.
Sequential mode
Each time the engine is started, the
sequential mode is activated as soon as you move the selector lever into the for-
ward driving position.
The gears are shifted via the shift paddles
or the selector lever.
It is also possible to drive off in second
gear, e.g. on snow-covered roads.
D Drive mode
In the drive mode all forward gears are
shifted automatically.
To switch from sequential to drive mode:
tap the selector lever to the right toward D.
For rapid acceleration, e.g. during passing,
depress the accelerator pedal completely:
kickdown.
Kickdown:
In the kickdown mode, you achieve maxi-
mum acceleration.
Depress the accelerator pedal past the
increased resistance point at the full-throt-
tle position.
To switch back to sequential mode: tap the
selector lever again to the right toward D,
or change the current gear via the shift
paddles or the selector lever.
Shifting gears
With selector lever
>To upshift, tap the selector lever
toward +
>To downshift, tap the lever toward —.
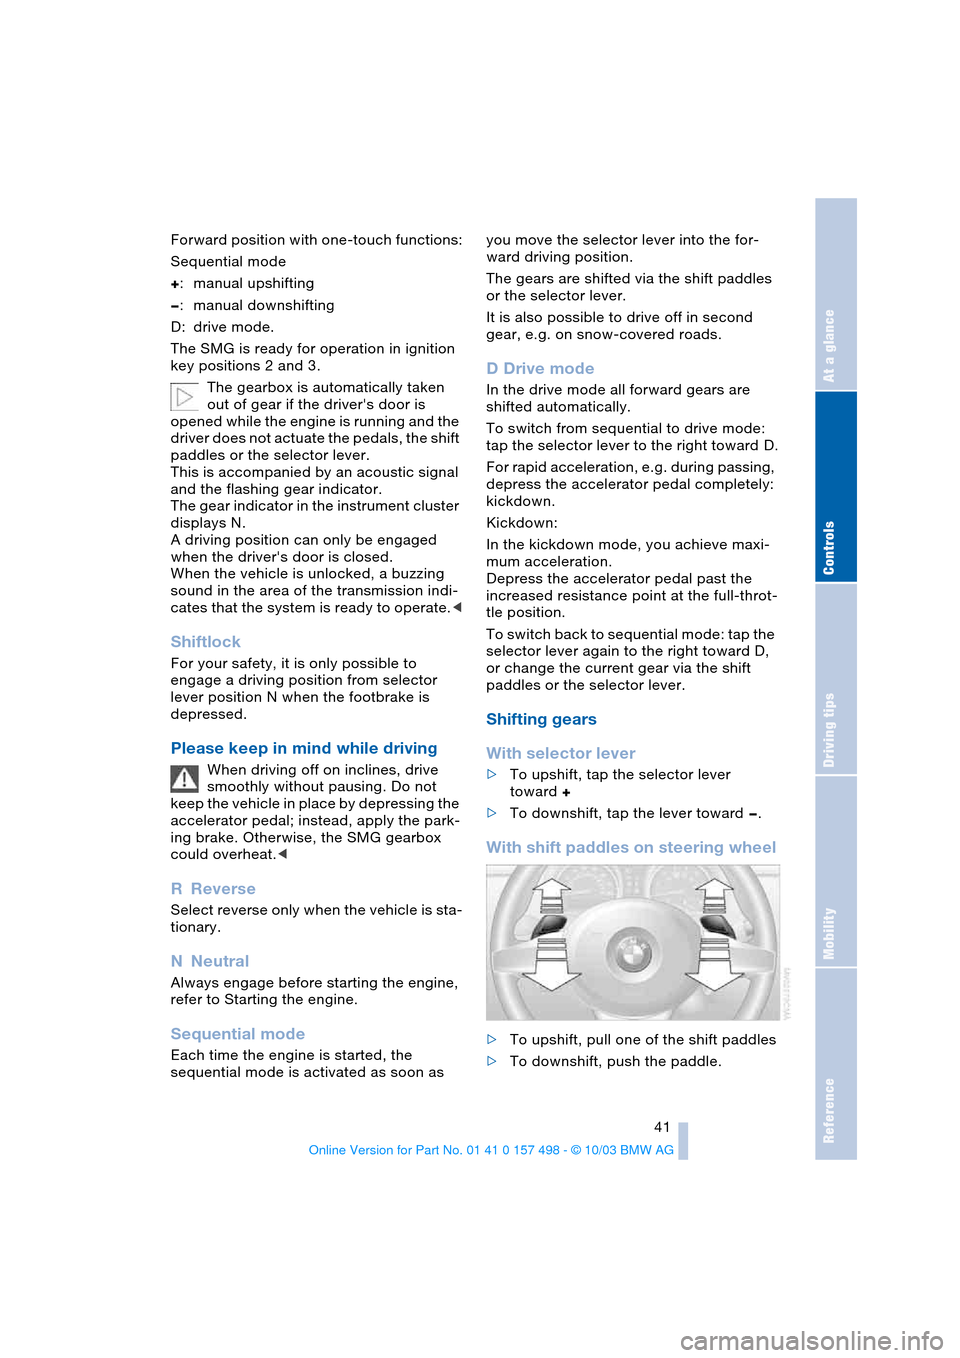
With shift paddles on steering wheel
>To upshift, pull one of the shift paddles
>To downshift, push the paddle.
Page 44 of 120
Driving
42 You accelerate from higher gears, e.g. dur-
ing passing, by downshifting manually.
In the following situations, the SMG in the
sequential mode assists you:
>The transmission will only execute
upshifts and downshifts that will result
in an appropriate combination of vehi-
cle speed and engine rpm. For
instance, downshifts that would result
in excessive engine speed cannot be
executed
>During a stop the gearbox is automati-
cally downshifted into first gear
>Shortly before a gear-dependent mini-
mum speed is reached, the gearbox
shifts down automatically without you
taking any action.
Display in the instrument cluster
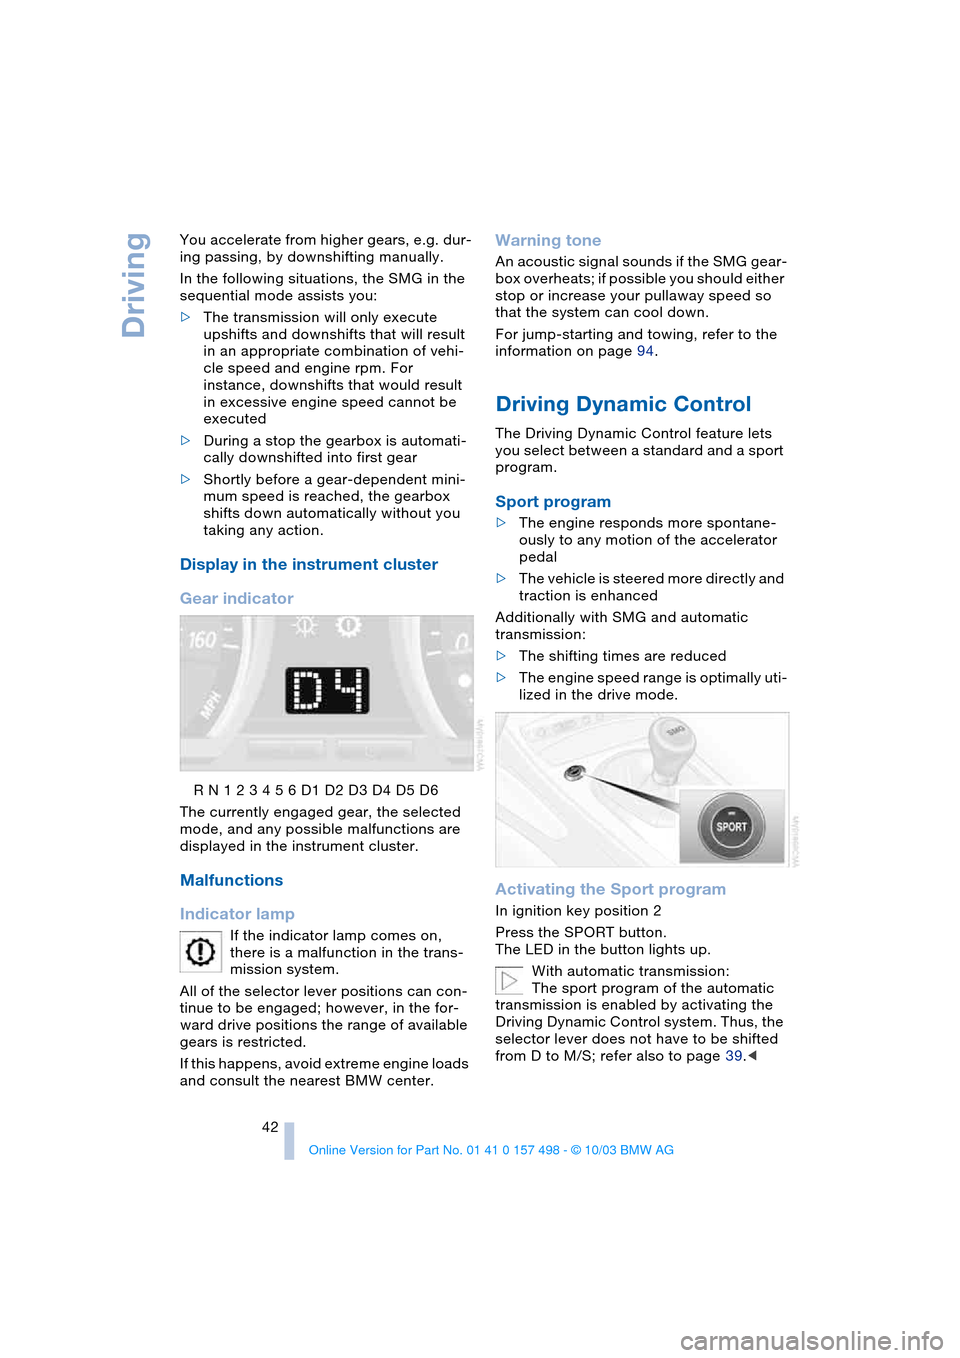
Gear indicator
R N 1 2 3 4 5 6 D1 D2 D3 D4 D5 D6
The currently engaged gear, the selected
mode, and any possible malfunctions are
displayed in the instrument cluster.
Malfunctions
Indicator lamp
If the indicator lamp comes on,
there is a malfunction in the trans-
mission system.
All of the selector lever positions can con-
tinue to be engaged; however, in the for-
ward drive positions the range of available
gears is restricted.
If this happens, avoid extreme engine loads
and consult the nearest BMW center.
Warning tone
An acoustic signal sounds if the SMG gear-
box overheats; if possible you should either
stop or increase your pullaway speed so
that the system can cool down.
For jump-starting and towing, refer to the
information on page 94.
Driving Dynamic Control
The Driving Dynamic Control feature lets
you select between a standard and a sport
program.
Sport program
>The engine responds more spontane-
ously to any motion of the accelerator
pedal
>The vehicle is steered more directly and
traction is enhanced
Additionally with SMG and automatic
transmission:
>The shifting times are reduced
>The engine speed range is optimally uti-
lized in the drive mode.
Activating the Sport program
In ignition key position 2
Press the SPORT button.
The LED in the button lights up.
With automatic transmission:
The sport program of the automatic
transmission is enabled by activating the
Driving Dynamic Control system. Thus, the
selector lever does not have to be shifted
from D to M/S; refer also to page 39.<