Page 42 of 162
Operation340
Switching off the turn
indicators• Press indicator button 3.
»Turn indicator off.
» Turn indicator telltale light is
off.
SeatRemoving the seat • Turn the key anticlockwise in
the seat lock. • When doing so, press the
seat downwards for support.
• Raise the seat at the rear.
• Let go of the key and pull the
seat from the retaining
brackets towards the rear.
Setting down the seat• Place the seat with the cov-
ered side downwards on a
smooth and clean surface.
For example, place the
seat with the covered
side downwards on the fuel
tank and the handlebars.c
Page 43 of 162
341Operation
Installing the seat
If too much pressure is
applied in a forward
direction, there is a danger
that the motorcycle will be
pushed off its stand.
Make sure that the motorcycle
is parked securely.c
• Push the seat forwards into
retaining brackets 1.• Press the seat firmly down-
wards over the detent.
» The seat can be heard to
lock into place.
Helmet holder
Helmet holders 1 and 2 are
located under the seat.
A motorcycle helmet with chin
strap can be attached to
helmet holders1.
• Remove the seat (
b 40).
• Hook the chin strap into the
holder.
• Refit the seat.
Page 63 of 162
461Riding
Placing the motorcycle
on its side stand
The motorcycle cannot
stand securely on uneven
ground.
Ensure that the stand is set
down on an even and firm
surface.c
When sitting on the
motorcycle:
• Switch off the engine.
• Apply the handbrake.
• Place the motorcycle verti-
cally and balance it out.
• Use your left foot to fold the
side stand towards the side
up to its limit position (arrow).
• Slowly lean the motorcycle
on the stand, relieving the
load, and dismount to the
left.• Turn the handlebars to the
full left or right lock position.
• Check that the motorcycle is
standing firmly.
If the motorcycle is on the
side stand, the surface of
the ground determines wheth-
er it is better to turn the han-
dlebars to the left or right.
However, the motorcycle is
more stable on a level surface
with the handlebars turned to
the left than with the handle-
bars turned to the right.
On level ground, always turn
the handlebars to the left to set
the steering lock.cThe side stand is only
configured for the weight
of the motorcycle.
Do not sit on the motorcycle
with the side stand
extended.c
On uphill gradients,
position the motorcycle
in the "uphill" direction and
engage 1st gear.c
Page 65 of 162
463Riding
Taking the motorcycle
off the side stand
With the ignition switched
off, there is no braking
power assistance; the motor-
cycle can begin to roll.
Especially on inclines, switch
on the ignition and wait for the
ABS self-diagnosis (
b 54).c
• Unlock the ignition lock,
switch on the ignition.
•Wait for the ABS self-
diagnosis.
• From the left, grip the
handlebars with both hands.
• Apply the handbrake.
• Swing your right leg over the
seat, straightening the
motorcycle as you do so.
• Place the motorcycle verti-
cally and balance it out.• Sit down and fold back the
side stand with your left foot.
An extended side stand
can catch on the ground
when the motorcycle is mov-
ing and lead to a fall.
Fold in the side stand before
moving the motorcycle.c
Page 69 of 162
467Riding
Pushing the motorcycle
off the centre stand
OA
With the ignition switched
off, there is no braking
power assistance; the motor-
cycle can begin to roll.
Especially on inclines, switch
on the ignition and wait for the
ABS self-diagnosis (
b 54).c
• Unlock the ignition lock,
switch on the ignition.
•Wait for the ABS self-
diagnosis.
• Place your left hand on the
left handlebar grip.
• With your right hand, take
hold of the pillion passenger
grab handle.
• Push the motorcycle for-
wards off the centre stand.• Check whether the centre
stand has folded in fully.
Fuel Refuelling
Fuel is a fire hazard and
explosive!
Do not smoke and make sure
that there are no naked flames
during all activities at the fuel
tank.c
Fuel expands under the
influence of high temper-
atures and exposure to sun-
light.
Fill up only to the lower edge of
the filler neck.c
Fuel can damage plastic
parts.
Avoid fuel coming into contact
with body panels.c• Place the motorcycle on the
centre stand
OA or side
stand, ensuring that the
ground is firm and level.
• Open the protective cap.
• Open the fuel tank cap with
the ignition key by turning it
anticlockwise.
Page 71 of 162
469Riding
Wet brakes
After washing the motor-
cycle, after riding through
water or when it is raining, the
braking effect can be delayed
due to damp brake discs and
brake pads.
Note that there will be an
extended braking distance
until the brakes have dried out
or the act of braking itself dries
them.c
Salt on brakes
The brakes may fail to
take effect immediately if
the motorcycle was ridden on
salt-covered roads and the
brakes were not applied for
some time.
Note that there will be an
extended braking distance until the salt layer on the brake
discs and brake pads is
removed by braking.c
Oil or grease on the brake
Oil and grease deposits
on brake discs and pads
considerably reduce the
braking effect.
Especially after repair and
maintenance work, make sure
that the brake discs and brake
pads are free of oil and
grease.c
Dirt or mud on brakes
When riding on loose sur-
faces or muddy roads,
the brakes may fail to take ef-
fect immediately because of
dirt or moisture on the discs or
brake pads.
Note that there will be an extended braking distance
until the brakes have been
cleaned by braking.c
BMW Integral ABSSensitive electronic control
It takes skill and sensitive con-
trol of the brakes to pull up
safely on a motorcycle. If the
front wheel brake locks and
the wheel skids, the necessary
longitudinal and lateral stabil-
ising forces are lost, and a fall
can result. For this reason, the
rider seldom makes full use of
available braking performance
in an emergency.
BMW Integral ABS provides
improved braking deceleration
by means of anti-lock braking
for both wheels and braking
force distribution by means of
the integral braking function
(b 50, 69). Making full use of
Page 73 of 162
471Riding
ABS anti-lock braking
system
ABS prevents the wheels from
locking on braking, making a
major contribution to road
safety.
Lifting up the rear wheel
With strong adhesion between
the tyres and the road, the
front wheel locks either very
late or not at all when the
brakes are applied hard.
Accordingly, the ABS control
only has to intervene very late
or not at all. In this case, the
rear wheel can lift up, which
can lead to the motorcycle
rolling over. Heavy braking can cause
the rear wheel to rise.
Bear in mind that the ABS
control is unable to prevent
the rear wheel from lifting up in
every instance.c
Residual braking function
With the ignition switched off,
during the self-diagnosis and
in the event of a fault in the
BMW Integral ABS, the brake
circuits concerned only have
the residual braking function.
The residual braking function
is the braking power without
the hydraulic servo assistance
of the BMW Integral ABS.
Under these circumstances,
therefore, you must apply con-
siderably higher pressure to
the brake levers in question in
order to apply the brakes, and
lever travel is longer. When the residual braking function is
active, the ABS function is
unavailable in the brake sys-
tem in question. When the
residual braking function is
active, the integral braking
function is partially or entirely
unavailable.
Without the ABS func-
tion, the wheels may lock
under braking; without braking
power assistance, considera-
bly greater force is required to
brake.
Brake carefully and safely.
Avoid braking sharply. Have
the fault remedied as soon as
possible by a specialist work-
shop, preferably an authorised
BMW motorcycle dealer.c
Page 79 of 162
577Accessories
Luggage systemCorrect loading
Overloading and uneven
loading can adversely
affect the riding stability of
your motorcycle.
Do not exceed the permissible
gross weight and permissible
wheel loads (
b 137). Observe
the following information on
loading.c
• Adapt the settings for spring
preload (
b 47), damping
(
b 44, 46) and tyre pressure
(b 126) to the gross weight.
• Ensure that the case vol-
umes on the left and right are
equal.
• Ensure that the weight is
equally distributed on the left
and right.• Pack heavy items of luggage
downwards and inwards.
• Load the left-hand and
right-hand cases
OA with a
maximum of 8 kg each.
• Load the tank rucksack with
a maximum of 5 kg.
Release leversThere is a release lever on the
left and right of each case
lock.
The grey lever with the inscrip-
tion OPEN is used to open and
close the cases.
The black lever with the
inscription RELEASE is used
to remove and attach the
cases.
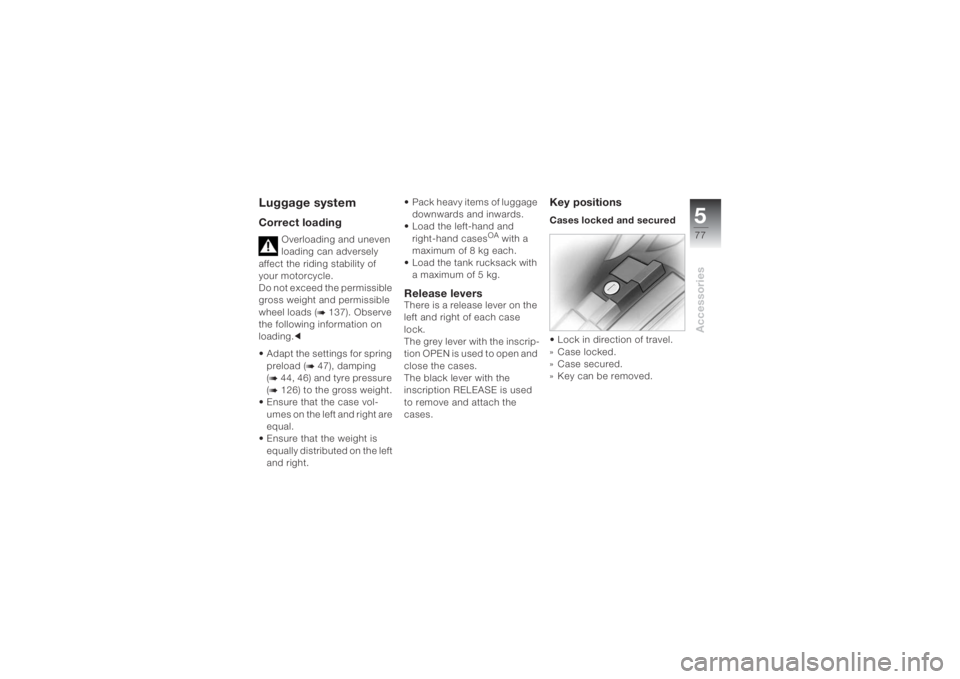
Key positionsCases locked and secured • Lock in direction of travel.
» Case locked.
»Case secured.
» Key can be removed.