Page 31 of 100
22
29
Safety check
2
For this reason, check the
details in the following sections
before you start the journey:
– Fuel level
– Positions of the handlebar levers
–Brakes
–Brake fluid level
– Clutch fluid level
– Coolant level
– Shock-absorber setting and spring preload
– Wheel rim and tyre condition, tread depth and tyre
pressures
– Load, gross weight
–Lights
– Warning lights and indicator lights with ignition switched
on – Check regularly (every time
you stop for fuel), on the basis
of the following section:
– Engine oil level (every sec- ond/third stop for fuel):
– Brake pads
If you encounter any problems
or difficulties, it is always best to
contact your authorised BMW
motorcycle dealer.
He will provide the necessary
advice and assistance.
Checklist
10k41bkg3.book Seite 29 Donnerstag, 27. Mai 2004 5:30 17
Page 47 of 100
22
45
Safety check
2
� Warning:
Before the journey starts, ad-
just spring preload to suit the
gross weight.
For safety reasons, never at-
tempt to alter spring preload
while the motorcycle is being
ridden.
Always bring the motorcycle to
a standstill before adjusting.
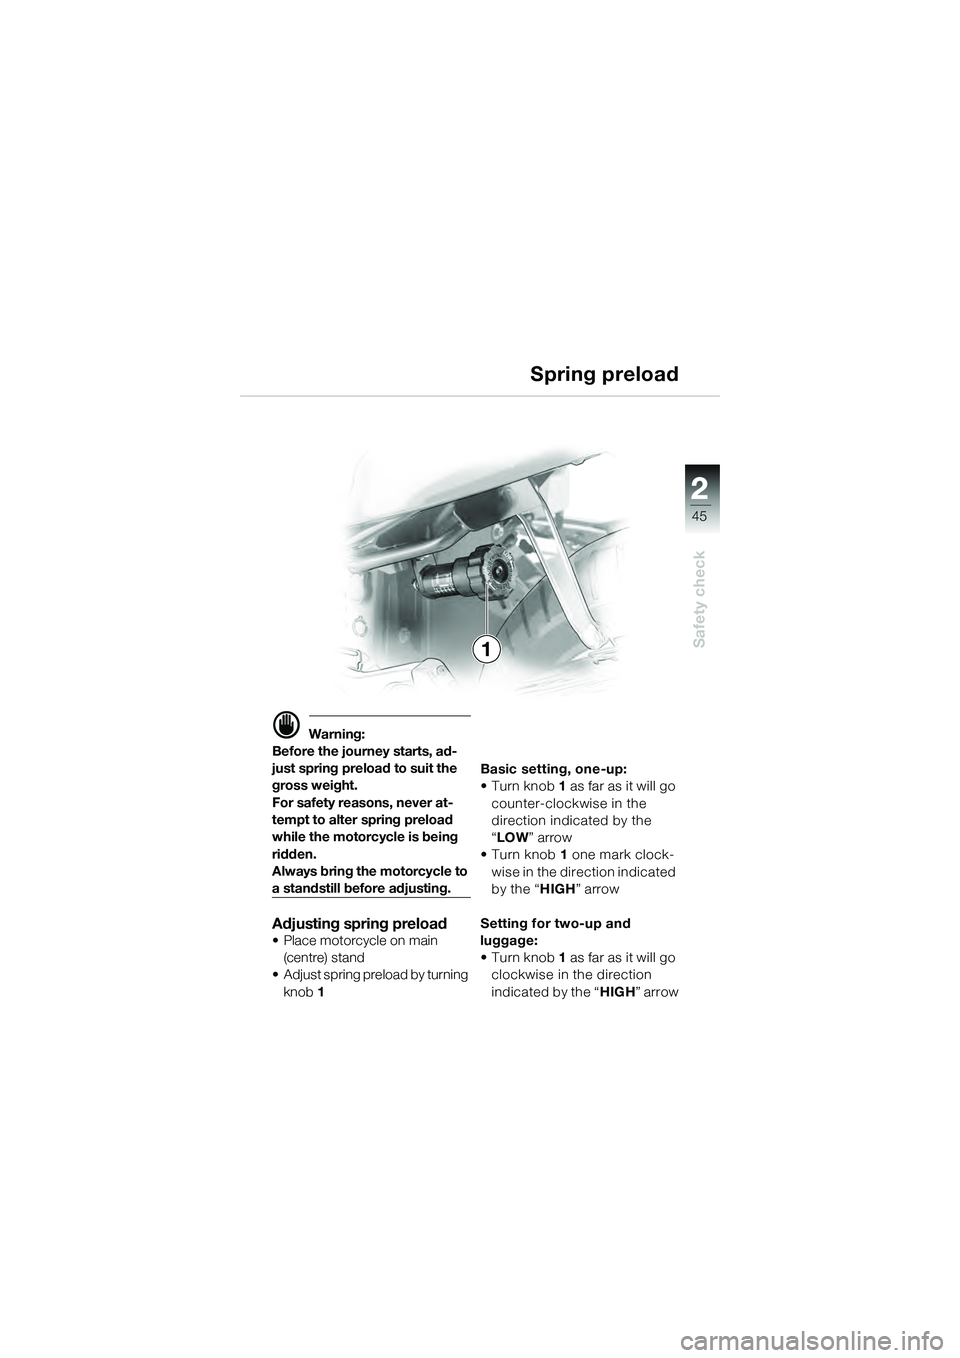
Adjusting spring preload• Place motorcycle on main
(centre) stand
• Adjust spring preload by turning
knob 1 Basic setting, one-up:
•Turn knob 1
as far as it will go
counter-clockwise in the
direction indicated by the
“ LOW ” arrow
•Turn knob 1 one mark clock-
wise in the direction indicated
by the “ HIGH” arrow
Setting for two-up and
luggage:
•Turn knob 1 as far as it will go
clockwise in the direction
indicated by the “ HIGH” arrow
1 Spring preload
10k41bkg3.book Seite 45 Donnerstag, 27. Mai 2004 5:30 17
Page 48 of 100
46
Safety check
2
1
� Warning:
Before the journey starts, ad-
just the rear shock absorber to
suit the gross weight and load
on the motorcycle.
If spring preload is changed,
it is essential to adjust the
shock-absorber setting
accordingly.
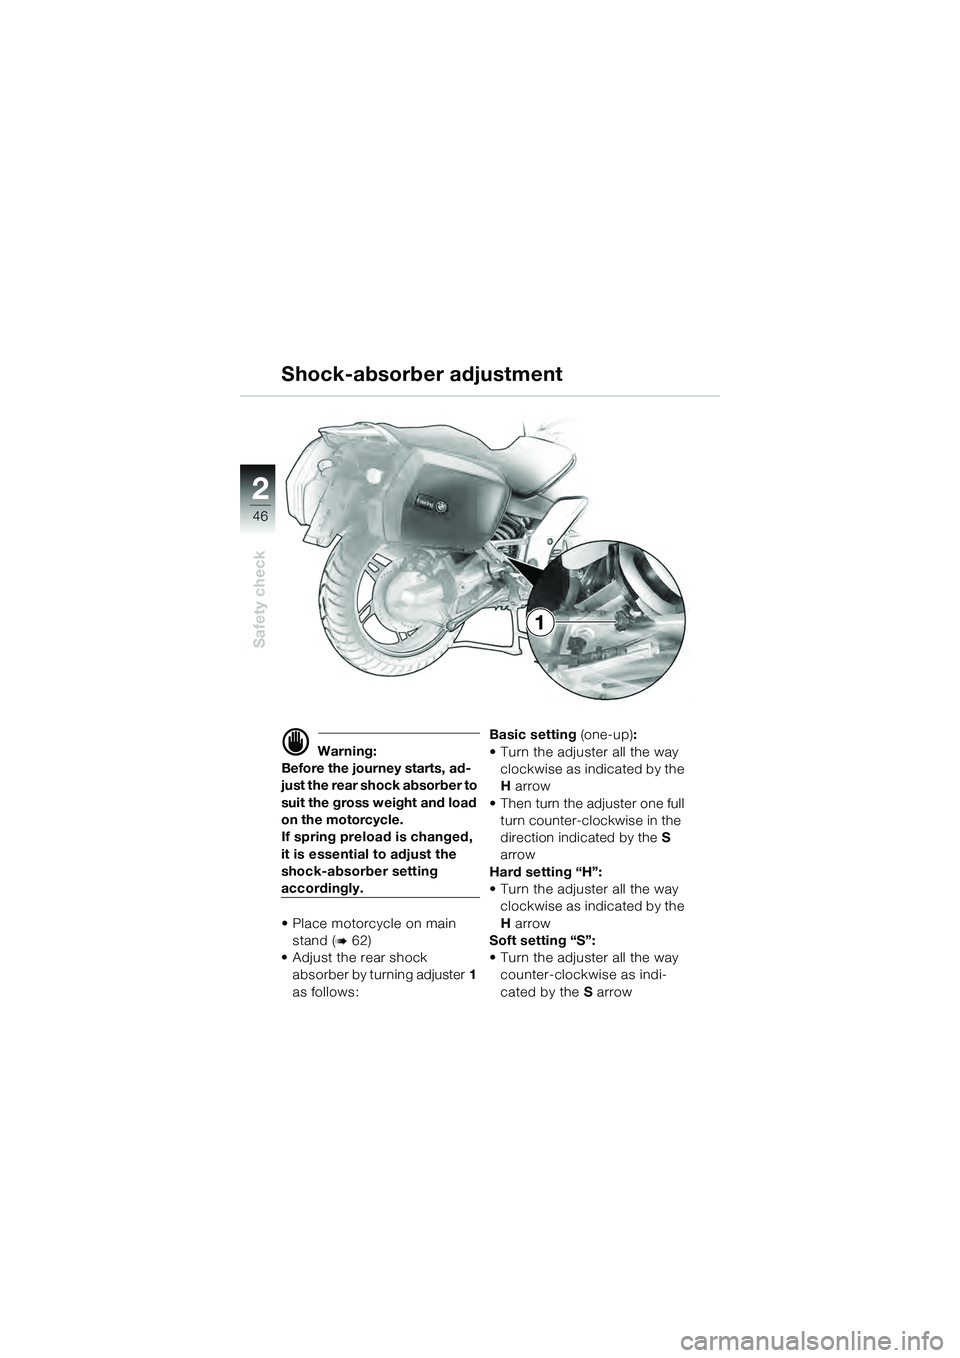
• Place motorcycle on main stand (
� 62)
• Adjust the rear shock absorber by turning adjuster 1
as follows: Basic setting
(one-up):
• Turn the adjuster all the way clockwise as indicated by the
H arrow
• Then turn the adjuster one full
turn counter-clockwise in the
direction indicated by the S
arrow
Hard setting “H”:
• Turn the adjuster all the way clockwise as indicated by the
H arrow
Soft setting “S”:
• Turn the adjuster all the way counter-clockwise as indi-
cated by the S arrow
Shock-absorber adjustment
10k41bkg3.book Seite 46 Donnerstag, 27. Mai 2004 5:30 17
Page 50 of 100
48
Safety check
2
Wheels
Checking tyre pressures
� Warning:
Incorrect tyre pressures have
a considerable influence on
handling and on tyre life.
Adjust tyre pressures to suit
total weight. Never exceed ei-
ther the motorcycle's gross
weight or the individual wheel
load limits (� 51).
– When tyres are cold:
• Remove valve caps
• Check/correct tyre pressure Tyre pressures:
Front Rear
O n e - u p 2 . 5 b a r 2 . 9 b a r
(36.3 psi) (42 psi)
Two-up 2.5 bar 2.9 bar
(36.3 psi) (42 psi)
Two-up
with luggage 2.5 bar 2.9 bar (36.3 psi) (42 psi)
• Fully tighten valve caps
Fully tighten valve caps
� Warning:
At high road speeds, tyre
valves have a tendency to
open as a result of centrifugal
force.
Use only metal valve caps
with rubber seals.
Valve caps that are screwed
on well prevent air from es-
caping suddenly.
10k41bkg3.book Seite 48 Donnerstag, 27. Mai 2004 5:30 17
Page 52 of 100
50
Safety check
2
Correct loading
� Warning:
Overloading can impair the
handling of your motorcycle.
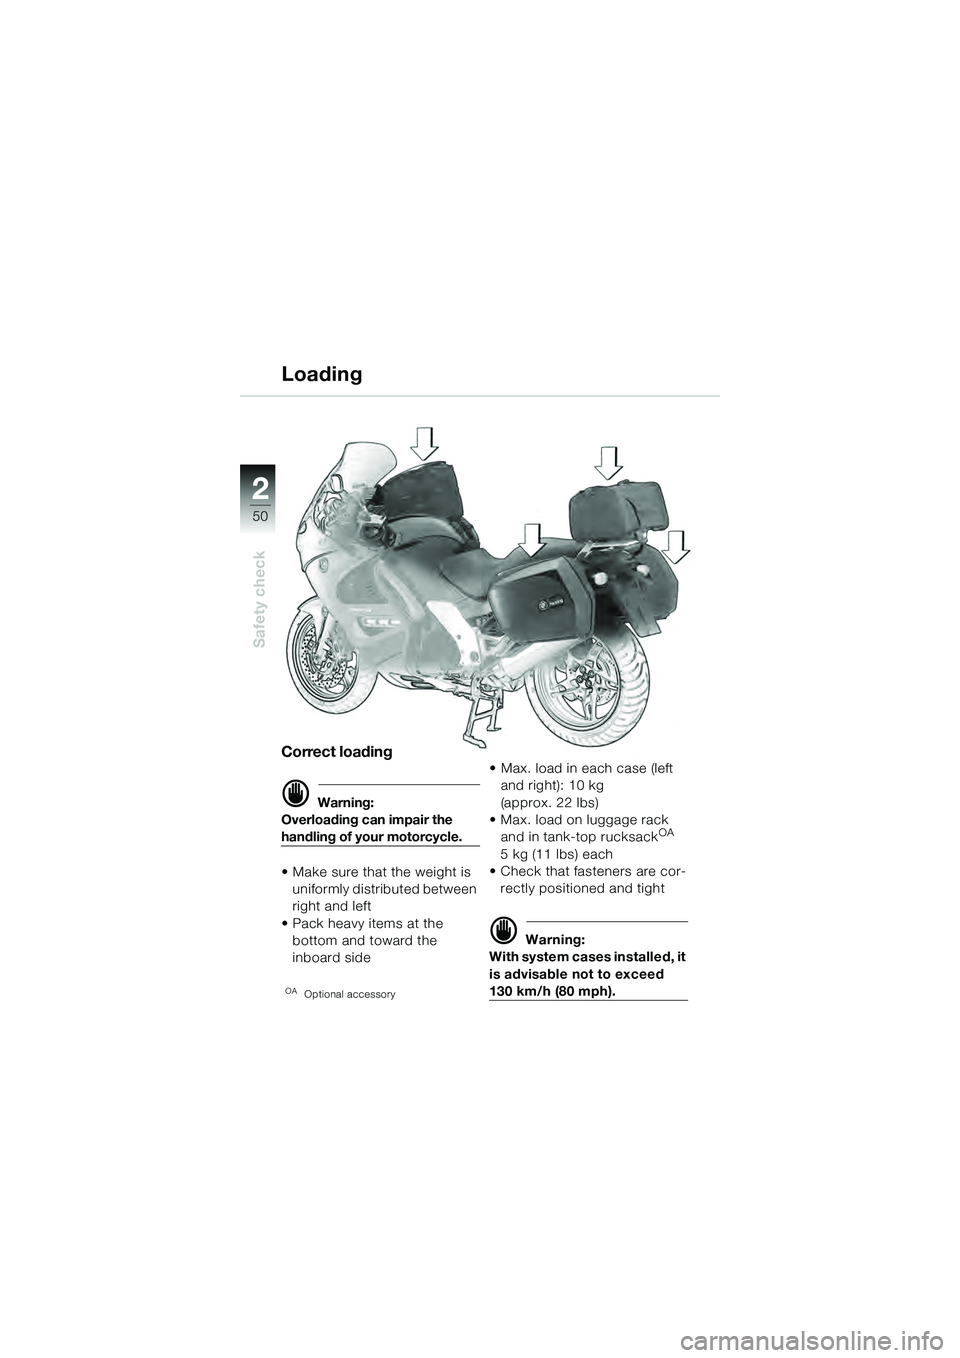
• Make sure that the weight is uniformly distributed between
right and left
• Pack heavy items at the bottom and toward the
inboard side
OAOptional accessory
• Max. load in each case (left and right): 10 kg
(approx. 22 lbs)
• Max. load on luggage rack and in tank-top rucksack
OA
5 kg (11 lbs) each
• Check that fasteners are cor-
rectly positioned and tight
� Warning:
With system cases installed, it
is advisable not to exceed
130 km/h (80 mph).
Loading
10k41bkg3.book Seite 50 Donnerstag, 27. Mai 2004 5:30 17
Page 53 of 100
22
51
Safety check
2
Accessories and loads
� Attention:
Never exceed the motorcycle's
permissible gross weight limit of
500 kg (1,102 lbs). Do not
exceed the wheel load limits of
200 kg (441 lbs) at the front and
330 kg (728 lbs) at the rear.
Adjust the shock absorber and
rear spring settings to suit
gross weight (
� 45, 46).
The gross weight consists of:
– Motorcycle with full tank
–Rider
– Passenger
– Luggage
10k41bkg3.book Seite 51 Donnerstag, 27. Mai 2004 5:30 17
Page 57 of 100
22
55
Safety check
2
Headlight basic setting
� Note:
Do not prop the motorcycle on
the centre or side stand.
• Check tyre pressures and cor-
rect if necessary.
• Set the spring-strut adjuster to the position for one-up riding
–Make sure lever 2 is horizontal
(neutral position)
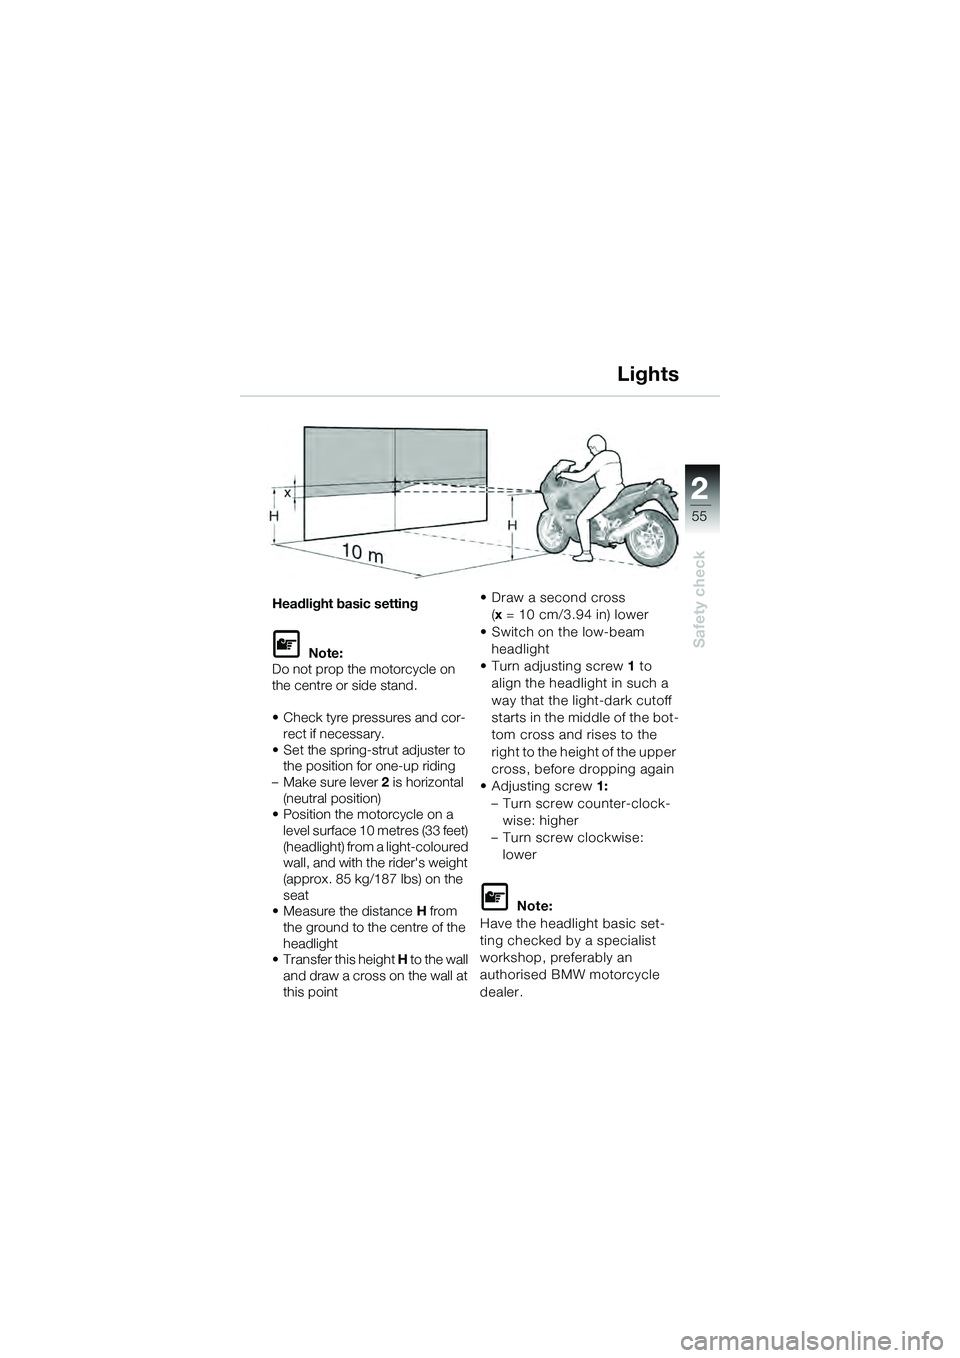
• Position the motorcycle on a
level surface 10 metres (33 feet)
(headlight) from a light-coloured
wall, and with the rider's weight
(approx. 85 kg/187 lbs) on the
seat
• Measure the distance H from
the ground to the centre of the
headlight
• Transfer this height H to the wall
and draw a cross on the wall at
this point • Draw a second cross
(x = 10 cm/3.94 in) lower
• Switch on the low-beam headlight
• Turn adjusting screw 1 to
align the headlight in such a
way that the light-dark cutoff
starts in the middle of the bot-
tom cross and rises to the
right to the height of the upper
cross, before dropping again
•Adjusting screw 1: – Turn screw counter-clock-wise: higher
– Turn screw clockwise: lower
� Note:
Have the headlight basic set-
ting checked by a specialist
workshop, preferably an
authorised BMW motorcycle
dealer.
Lights
10k41bkg3.book Seite 55 Donnerstag, 27. Mai 2004 5:30 17
Page 62 of 100
60
Starting – Riding – Parking
3
Placing motorcycle on
side stand
� Warning:
For safety reasons, never sit
on the motorcycle with the
side stand extended.
� Attention:
Stop the engine before using
the side stand.
Make sure the surface under
the stand is firm.
On a gradient, the motorcycle
should always face uphill; se-
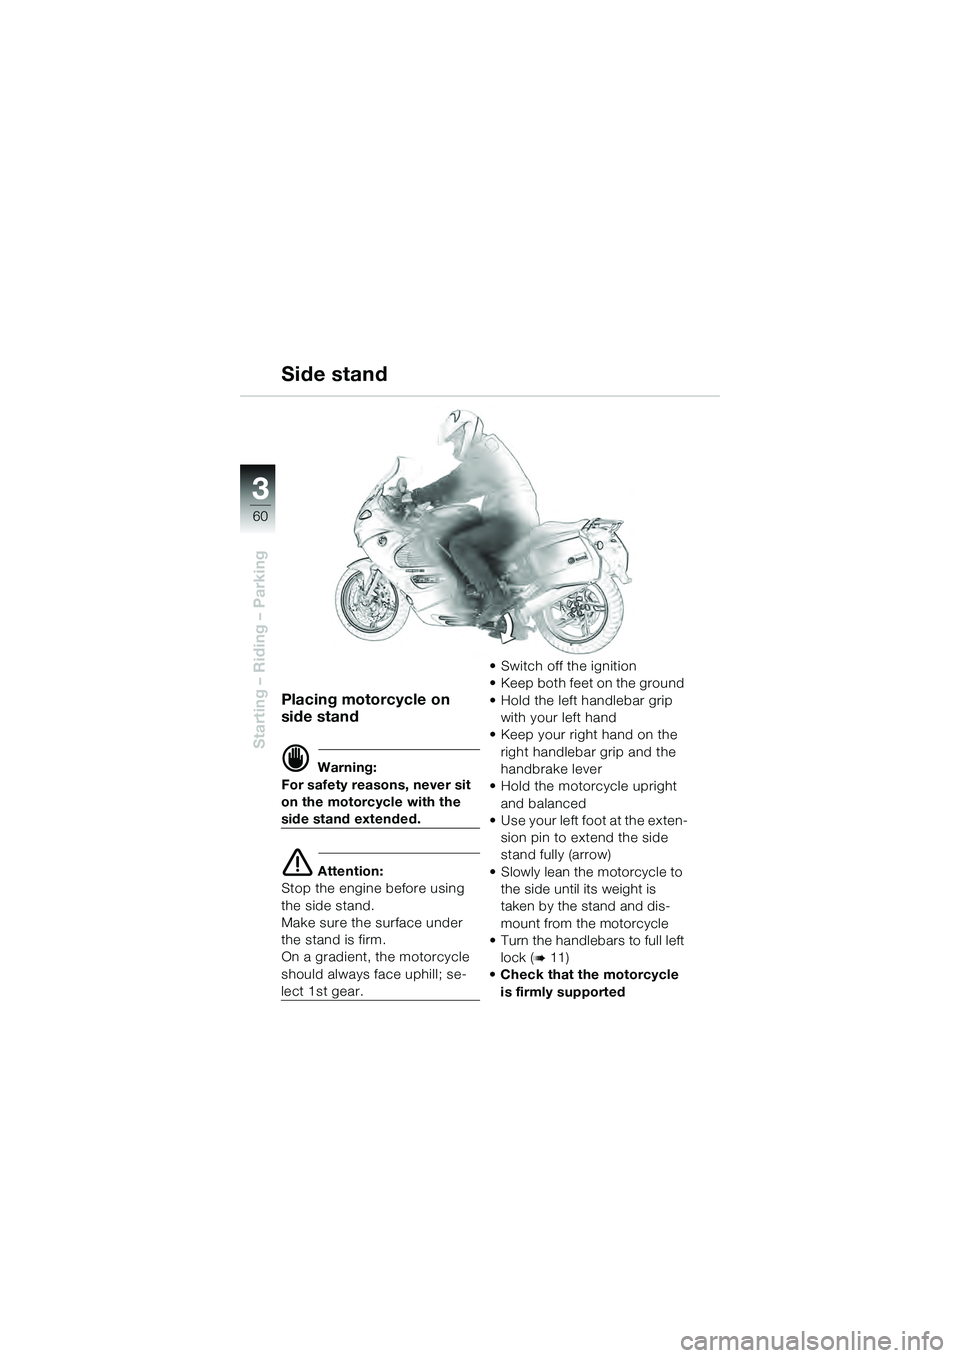
lect 1st gear. • Switch off the ignition
• Keep both feet on the ground
• Hold the left handlebar grip
with your left hand
• Keep your right hand on the
right handlebar grip and the
handbrake lever
• Hold the motorcycle upright and balanced
• U s e y o u r le f t f o o t a t t h e e x t e n -
sion pin to extend the side
stand fully (arrow)
• Slowly lean the motorcycle to the side until its weight is
taken by the stand and dis-
mount from the motorcycle
• Turn the handlebars to full left
lock (
� 11)
• Check that the motorcycle
is firmly supported
Side stand
10k41bkg3.book Seite 60 Donnerstag, 27. Mai 2004 5:30 17