2004 BMW 645CI COUPE rear entertainment
[x] Cancel search: rear entertainmentPage 57 of 216

Controls
55Reference
At a glance
Driving tips
Communications
Navigation
Entertainment
Mobility
SMG Sequential manual
transmission and automatic
transmission
Your BMW is equipped with the conve-
nience starting feature. Here, it is sufficient
to turn the ignition key only briefly to posi-
tion 3 'Start engine' and to let go of it right
away. The system responds by automati-
cally engaging the starter for a certain
period and allowing it to run until the engine
starts, after which it then disengages auto-
matically.
SMG Sequential manual
transmission
1.Press the brake pedal
2.Engage selector-lever position N
3.Start the engine.
If the engine does not start, engage
the last gear selected again, refer to
instrument cluster display, and then
engage selector-lever position N.<
Automatic transmission with
Steptronic
1.Press the brake pedal
2.Engage selector-lever position P or N
3.Start the engine.
Switching off engine
Do not remove the ignition key while
the vehicle is rolling, as otherwise the
steering wheel lock would engage while
steering.
When leaving the vehicle, remove the igni-
tion key and lock the steering.
When parking on a downhill incline, apply
the handbrake, as otherwise the vehicle
could roll away.<
Manual transmission
1.Turn the ignition key to position 1 or 0
2.Engage first or reverse gear.
SMG Sequential manual
transmission
1.Engage a drive position
2.Turn the ignition key to position 1 or 0.
A signal sounds if the idle position N is
engaged on stopping the engine.
Automatic transmission with
Steptronic
1.Engage selector-lever position P
2.Turn the ignition key to position 1 or 0.
Handbrake
The handbrake is primarily intended to pre-
vent the vehicle from rolling while parked;
it brakes the rear wheels.
Indicator lamp
The indicator lamp lights up, and an
acoustic signal also sounds when
starting off. The handbrake is
engaged.
Indicator lamp for Canadian mod-
els.
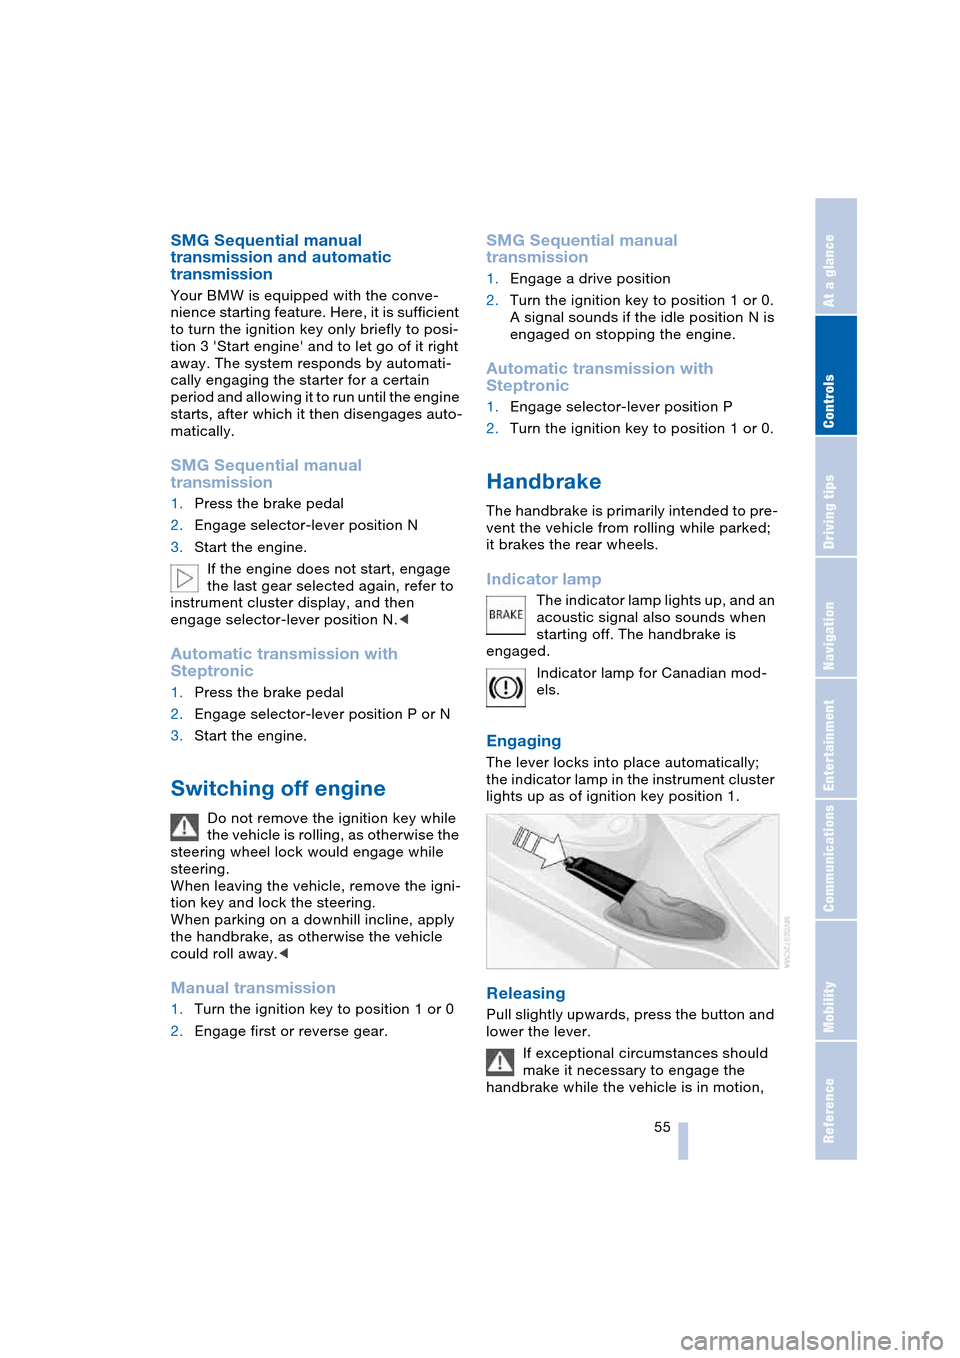
Engaging
The lever locks into place automatically;
the indicator lamp in the instrument cluster
lights up as of ignition key position 1.
Releasing
Pull slightly upwards, press the button and
lower the lever.
If exceptional circumstances should
make it necessary to engage the
handbrake while the vehicle is in motion,
Page 61 of 216

Controls
59Reference
At a glance
Driving tips
Communications
Navigation
Entertainment
Mobility
P Parking
Select only when the vehicle is completely
stationary. The rear wheels are blocked.
R Reverse
Select only when the vehicle is completely
stationary.
N Neutral
E.g. engage in car washes. The vehicle can
roll.
D Drive, automatic position
Position for normal vehicle operation.
All forward gears are available.
Under normal operating conditions, fuel
consumption is lowest when driving in
position D.
Kickdown
The kickdown mode provides maximum
acceleration:
Press the accelerator pedal beyond the
full-throttle resistance point.
M/S manual operation and
Sport program
Move the selector lever from position D to
the left into gearshift gate M/S:
The sport program is activated and DS
appears in the instrument cluster.
This position is recommended for a perfor-
mance-oriented driving style. It is engaged
automatically when the Dynamic Driving
Control is activated, see below.
When the selector lever is moved slightly
towards + or –, the Steptronic shifts gear
and manual operation is activated. The
instrument cluster shows M1 through M6.Upshifts and downshifts are executed only
when they will result in a plausible combi-
nation of engine and vehicle speed; thus,
for example, a downshift that would cause
the engine to overrev will not be executed
by the system. The selected gear appears
briefly in the instrument cluster, followed by
the current gear.
To use the automatic function again, move
the selector lever to the right into posi-
tion D.
Malfunction
The warning lamp lights up and a
message appears on the Control
Display. There is a malfunction in
the transmission system. Avoid heavy
loads.
While it will remain still possible to move
the selector lever to any desired position,
the transmission will revert to operation in
its default mode with only a limited number
of forward gears.
Have the system checked as soon as pos-
sible.
Towing, refer to page, 185, jump-starting,
refer to page 185.
Dynamic Driving Control
The Dynamic Driving Control makes it pos-
sible for your BMW to react in an even more
sports-oriented manner at the push of a
button:
>The engine responds more spontane-
ously to accelerator pedal movements
>The steering conveys a feeling of even
better contact with the road surface
>Cruise control:
The stored speed you call up is reached
more quickly.
Additionally with SMG:
>Gearshifts are faster
>The engine speed range is used opti-
mally in the Drive mode.
With automatic transmission:
>The Sport program is activated.
Page 63 of 216

Controls
61Reference
At a glance
Driving tips
Communications
Navigation
Entertainment
Mobility
Triple turn signal activation is acti-
vated.
Wiper system
1Standard wiper speed: briefly press
once.
The system automatically reverts to
operation in the intermittent mode
whenever the vehicle is stationary.
Fast wipe: briefly press twice or press
beyond the resistance point.
The system automatically reverts to
operation in the standard wipe mode
whenever the vehicle is stationary
2Switching off wipers or for brief wipe
3Activating/deactivating rain sensor
4Cleaning windshield and headlamps
5Adjusting rain sensor sensitivity level
The lever automatically returns to its initial
position when released.
Cleaning windshield and headlamps
The system sprays washer fluid against the
windshield and activates the wipers for a
brief period.
When the vehicle lighting system is
switched on, the headlamps are also cleaned at regular and appropriate inter-
vals.
Do not use the washers if there is any
danger that the fluid will freeze on the
windshield. If you do so, your vision could
be obscured. To avoid freezing, use a
washer fluid antifreeze, refer to Washer
fluid.
Avoid activating the washer when the res-
ervoir is empty, as damage to the pump
could result.<
Windshield washer nozzles
The windshield washer nozzles are auto-
matically heated in ignition key position 2.
Rain sensor
The rain sensor controls windshield wipe
operation depending on the amount of rain.
The rain sensor is located on the wind-
shield, directly in front of the interior rear-
view mirror.
Activating rain sensor
As of ignition key position 1, briefly press
the button. The indicator lamp in the button
lights up. The wipers will always respond
by completing at least one sweep of the
windshield.
Adjusting rain sensor sensitivity level
Turn the serrated dial 5.
Deactivating rain sensor
Press the button again. The indicator lamp
goes out.
The rain sensor is automatically deacti-
vated when you switch off the ignition.
Page 77 of 216

Controls
75Reference
At a glance
Driving tips
Communications
Navigation
Entertainment
Mobility
Technology for comfort, convenience
and safety
PDC Park Distance Control*
The concept
The PDC assists you when you are parking.
Signal tones and a visual display
* indicate
the current distance to an object behind or
in front of your vehicle. To measure the dis-
tance, there are four ultrasonic sensors in
each bumper. The sensors at the front and
at the two rear corners have a range of
approx. 20 in/50 cm; the rear middle sen-
sors have approx. 5 ft/1.50 m.
PDC is a parking aid that can indicate
objects when they are approached
slowly, as is usually the case when parking.
Avoid approaching an object at high speed,
as otherwise the physical circumstances
would mean that the system warning was
too late.<
Automatic mode
In ignition key position 2, the system auto-
matically assumes operational status after
a few seconds each time you engage
reverse gear or selector-lever position R.
Wait this short period before driving.<
The system is automatically deacti-
vated once the vehicle travels approx.
165 ft/50 m or exceeds a speed of roughly
20 mph/30 km/h; the indicator lamp goes
out. You can reactivate the system manu-
ally as needed.
Manual mode
With the ignition key in position 2, press the
button; the indicator lamp lights up.
Deactivating manual mode
Press the button again; the indicator lamp
goes out.
Signal tones
The signal indicating the distance to the
nearest obstacle is directional. Thus, an
object detected to the left rear of the vehi-
cle will be indicated by a signal tone from
the left rear speaker, etc. As the distance
between vehicle and object decreases, the
intervals between the tones become
shorter. The signal tone becomes continu-
ous once the distance to the nearest object
falls to below roughly 1 ft/30 cm.
The warning signal is canceled after
approx. 3 seconds if you are moving paral-
lel to a wall.
Malfunctions
The indicator lamp within the button
flashes and a message appears on the
Control Display. PDC has failed. Switch off
PDC. Have the system checked.
As a preventive measure, keep the sensors
clean and free of ice or snow in order to
ensure that they will continue to operate
effectively.
PDC with visual warning*
You also enjoy the option of having the sys-
tem show distances to objects on the Con-
trol Display. The Control Display will also
Page 83 of 216

Controls
81Reference
At a glance
Driving tips
Communications
Navigation
Entertainment
Mobility
Airbags
The following airbags are located under the
marked covers:
1Front airbags for driver and front pas-
senger
2Coupe: head airbags
3Front side airbags
4Knee airbag for front passenger
5Knee airbag for driver
Protective effect
The front airbags help protect the driver
and front passenger by responding to fron-
tal impacts in which safety belts alone can-
not provide adequate restraint. When
needed, the head and side airbags help
provide protection in the event of a side
impact. The side airbags help restrain the
side of the occupant's upper torso, and the
head airbags help support the head while
also helping provide protection against any
objects penetrating into the passenger
compartment.
The airbags are deliberately not triggered
in every impact situation, e.g. less severe
accidents, certain rollover conditions, or
rear-end collisions.
For information on the correct sitting posi-
tion, refer to page 42.
Even if you adhere to all the instructions
injuries resulting from contact with airbags
cannot be fully excluded, depending on the
circumstances. The ignition and inflation
noise may provoke a mild hearing loss in
extremely sensitive individuals. This effect
is usually only temporary.Do not apply adhesive materials to
the cover panels of the airbags, cover
them or modify them in any other way.
Do not attempt to remove the airbag reten-
tion system from the vehicle. Never modify
or tamper with either the wiring or the indi-
vidual components in the airbag system.
This category includes the upholstery in the
center of the steering wheel, on the instru-
ment panel, the side trim panels on the
doors and on the Coupe the roof pillars
along with the sides of the headliner.
Do not attempt to remove or dismantle the
steering wheel.
Do not touch the individual components
directly after the system has been trig-
gered, because there is a danger of burns.
If you note any indication of system mal-
function, if you desire to have an airbag
deactivated, or if the airbag retention sys-
tem is triggered in response to an accident,
you should always entrust all inspection,
repair and dismantling operations to your
BMW center. Unprofessional attempts to
service the system could lead to failure in
an emergency or undesired airbag activa-
tion, either of which could result in personal
injury.<
Airbag warning information is also provided
on the sun visors.
Page 87 of 216

Controls
85Reference
At a glance
Driving tips
Communications
Navigation
Entertainment
Mobility
Lamps
Parking lamps/low beams
Parking lamps
With the switch in this position, the
front, rear and side vehicle lighting
is switched on. You can use the
parking lamps for parking. For lighting on
one side for parking as an additional fea-
ture, refer to page 86.
Low beams
When you switch off the ignition
with the headlamps on, the head-
lamps go out, and only the parking
lamps remain on.
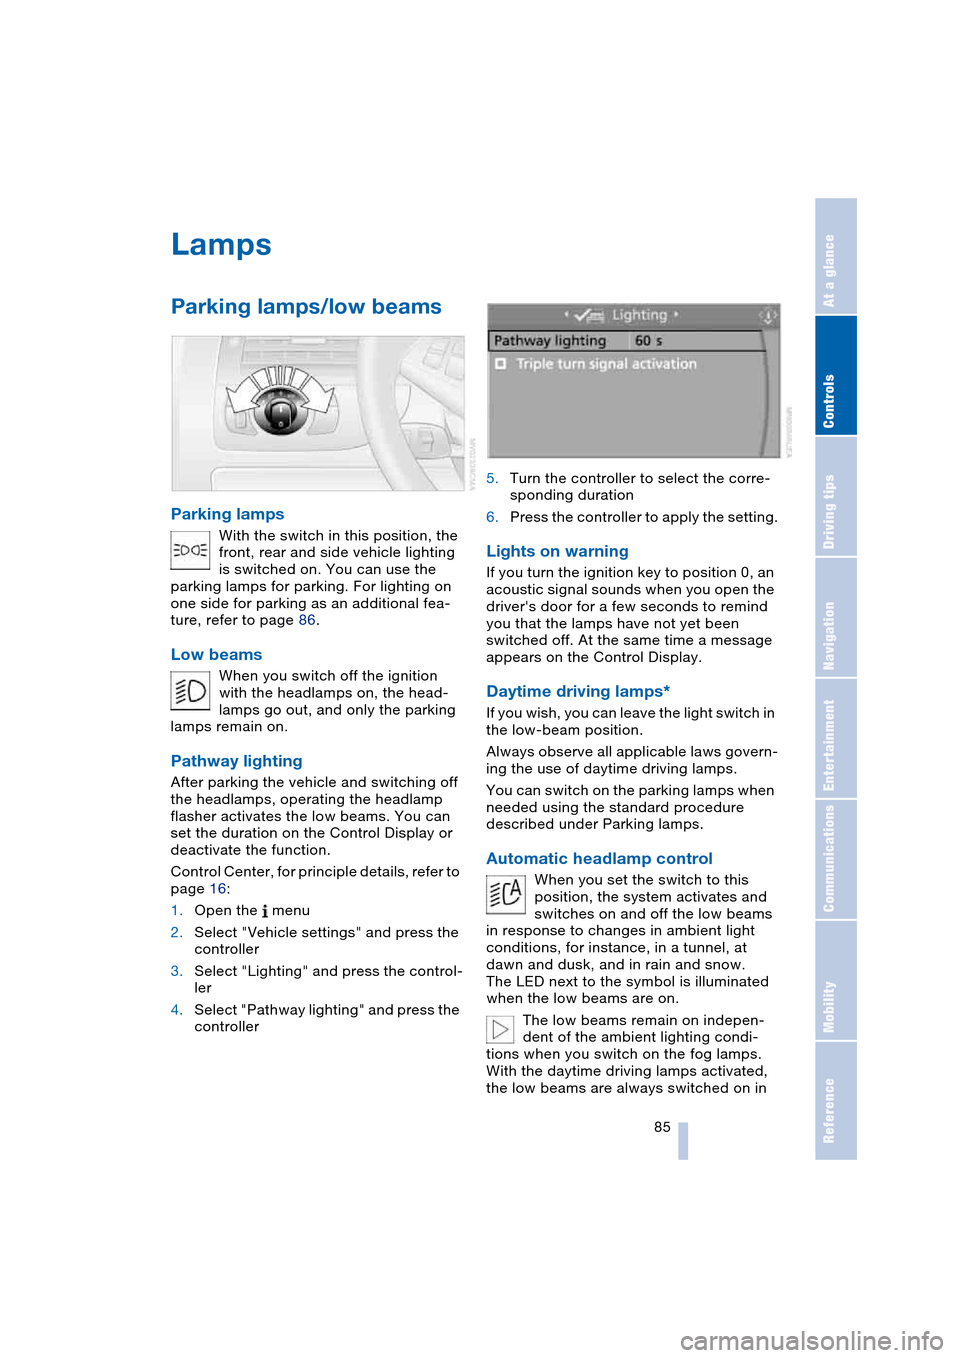
Pathway lighting
After parking the vehicle and switching off
the headlamps, operating the headlamp
flasher activates the low beams. You can
set the duration on the Control Display or
deactivate the function.
Control Center, for principle details, refer to
page 16:
1.Open the menu
2.Select "Vehicle settings" and press the
controller
3.Select "Lighting" and press the control-
ler
4.Select "Pathway lighting" and press the
controller5.Turn the controller to select the corre-
sponding duration
6.Press the controller to apply the setting.
Lights on warning
If you turn the ignition key to position 0, an
acoustic signal sounds when you open the
driver's door for a few seconds to remind
you that the lamps have not yet been
switched off. At the same time a message
appears on the Control Display.
Daytime driving lamps*
If you wish, you can leave the light switch in
the low-beam position.
Always observe all applicable laws govern-
ing the use of daytime driving lamps.
You can switch on the parking lamps when
needed using the standard procedure
described under Parking lamps.
Automatic headlamp control
When you set the switch to this
position, the system activates and
switches on and off the low beams
in response to changes in ambient light
conditions, for instance, in a tunnel, at
dawn and dusk, and in rain and snow.
The LED next to the symbol is illuminated
when the low beams are on.
The low beams remain on indepen-
dent of the ambient lighting condi-
tions when you switch on the fog lamps.
With the daytime driving lamps activated,
the low beams are always switched on in
Page 91 of 216

Controls
89Reference
At a glance
Driving tips
Communications
Navigation
Entertainment
Mobility
14Indicator lamp for independent ventila-
tion
>Activation time set:
The indicator lamp comes on
>Independent ventilation switched on:
The indicator lamp flashes
15Rear window defroster
16Air grill for interior temperature sensor –
please keep clear and unobstructed
All other setting options for the automatic
climate control can be found at "Climate"
and in the menu on the Control Display,
refer to pages 90 and 91.
The current setting for air distribution is dis-
played on the Control Display.
A congenial climate
To use the automatic function, press the
AUTO button. Select an interior tempera-
ture you find pleasant.
The following section contains more
detailed information on the available set-
ting options.
The cooling function is only possible with
the engine running.
AUTO program
The AUTO program adjusts the
air distribution to the wind-
shield and side windows,
towards the upper body and footwell as
well as the air volume, while also using your
preselected temperature setting as the
basis for adjusting the interior climate to
adapt to external seasonal influences.
The cooling function comes on automati-
cally when you select the AUTO program.
At the same time, a condensation sensor
controls the program in such a way that
window condensation is prevented as far
as possible.
Temperature adjustment
The figures on the display pro-
vide a general indication of inte-
rior temperature. A pleasant
adjustment is 727/226.
When you start the vehicle, this system ensures that the selected tempera-
ture is achieved as quickly as possible. It
then maintains this temperature, regard-
less of the season.
Defrosting windows and removing
condensation
This program quickly removes
ice and condensation from the
windshield and front side win-
dows.
Adjusting air volume manually
You can adjust the air volume
by turning. You can reactivate
the automatic mode for the air
volume with the AUTO button.
Switching cooling function on and off
manually
The cooling function cools and
dehumidifies the incoming air
before also reheating it as
required, according to the temperature set-
ting. Depending on the weather, the wind-
shield may fog over briefly when the engine
is started.
The cooling function comes on automati-
cally when you select the AUTO program.
Maximum cooling
This program quickly provides
maximum cooling.
The system switches to the
recirculated-air mode and the
air flows at maximum air volume only from
the vent outlets for the upper body area.
For this reason you should ensure that
these vent outlets are open before select-
ing this program.
AUC Automatic recirculated-air
control
You can respond to unpleasant
odors or pollutants in the imme-
diate environment by tempo-
rarily suspending the supply of outside air.
The system then recirculates the air cur-
Page 99 of 216

Controls
97Reference
At a glance
Driving tips
Communications
Navigation
Entertainment
Mobility
could cause personal injury to occupants
during braking or evasive maneuvers.<
Cup holders
The compartment of the rear center con-
sole contains a built-in and removable cup
holder.
The removable cup holder can be inserted
in the side of the center console.
Do not place glass containers in the
cup holders. This would lead to an
increased risk of injury in the event of an
accident.<
Ashtray
Opening
Press the trim strip of the cover.
Emptying
Press the opened cover beyond the resis-
tance point, refer to arrow:
The ashtray rises for removal.
Cigarette lighter
In ignition key position 2, press in the ciga-
rette lighter.
Remove as soon as the lighter jumps back
out.
Hold or touch the hot cigarette lighter
by the knob only. Holding or touching
it in other areas could result in burns.
Always remove the ignition key when you
leave the vehicle so that, for example, chil-
dren are unable to use the cigarette lighter
and burn themselves.<
Socket
In ignition key position 2, the lighter socket
can be used to plug in hand flashlights, car
vacuum cleaners, etc., with power ratings
of up to approx. 200 W at 12 V. Avoid dam-
aging the socket due to inserting plugs of
different shapes or sizes.