Page 129 of 216

Navigation
Entertainment
Driving tips
127Reference
At a glance
Controls
Communications
Mobility
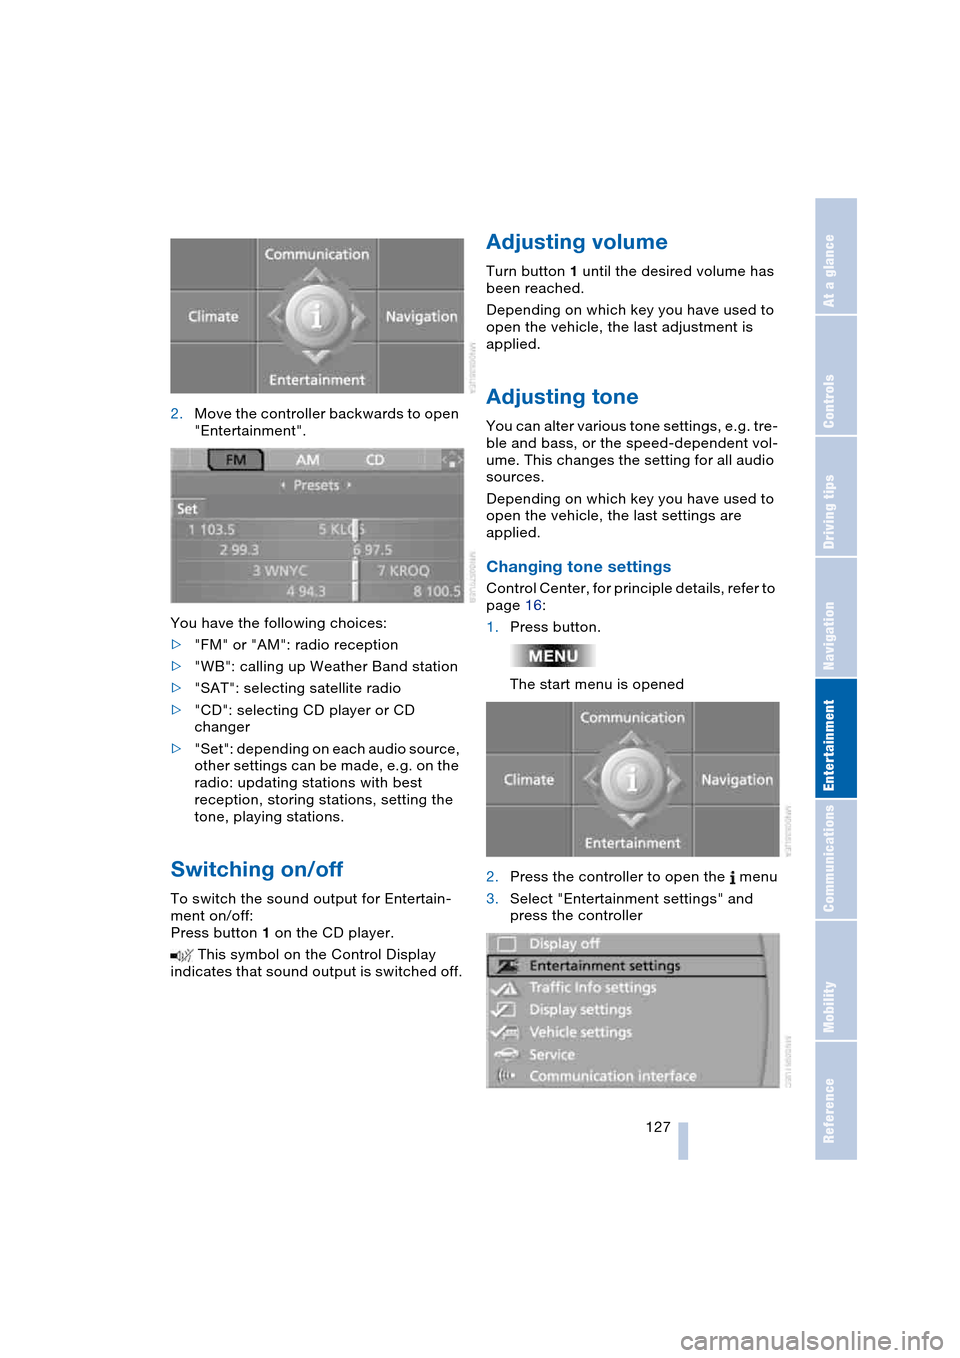
2.Move the controller backwards to open
"Entertainment".
You have the following choices:
>"FM" or "AM": radio reception
>"WB": calling up Weather Band station
>"SAT": selecting satellite radio
>"CD": selecting CD player or CD
changer
>"Set": depending on each audio source,
other settings can be made, e.g. on the
radio: updating stations with best
reception, storing stations, setting the
tone, playing stations.
Switching on/off
To switch the sound output for Entertain-
ment on/off:
Press button 1 on the CD player.
This symbol on the Control Display
indicates that sound output is switched off.
Adjusting volume
Turn button 1 until the desired volume has
been reached.
Depending on which key you have used to
open the vehicle, the last adjustment is
applied.
Adjusting tone
You can alter various tone settings, e.g. tre-
ble and bass, or the speed-dependent vol-
ume. This changes the setting for all audio
sources.
Depending on which key you have used to
open the vehicle, the last settings are
applied.
Changing tone settings
Control Center, for principle details, refer to
page 16:
1.Press button.
The start menu is opened
2.Press the controller to open the menu
3.Select "Entertainment settings" and
press the controller
Page 130 of 216

On/off and tone
128 4.Select "Audio" and press the controller.
The tone settings can also be selected if
you have opened "Entertainment":
Select "Set" or "Tone" and press the con-
troller.
Treble and bass
1.Select "Treble / Bass" and press the
controller
2.Move the controller to the left or right to
select "Treble" or "Bass"
3.Turn the controller until the desired set-
ting is selected.
Balance and fader
You can set the right/left and front/rear
volume balance in the same manner as
"Treble / Bass".
Speed-dependent volume
The speed-dependent volume control
automatically increases the volume with
increasing speed. You can set various
stages for the increase in volume.
1.Select "Speed volume" and press the
controller
2.Turn the controller. The adjustment is
applied; the field can be changed.
Professional LOGIC7 HiFi System*
You can select a spatial sound effect that
improves the spatial acoustics in all fre-
quency ranges.
1.Select "LOGIC7" and press the control-
ler
2.Select "Concert hall" and press the
controller.
LOGIC7 spatial sound is switched on.
Page 131 of 216
Navigation
Entertainment
Driving tips
129Reference
At a glance
Controls
Communications
Mobility
To switch off spatial sound:
Select "Off" and press the controller.
LOGIC7 and the LOGIC7 logo are regis-
tered trade marks of Lexicon, Inc., a com-
pany of the Harman International Group.
Equalizer*
You can set individual sound frequency
ranges:
1.Select "Equalizer" and press the con-
troller
2.Move the controller to the left or right to
select the desired frequency range
3.Turn the controller until the desired set-
ting is selected.
Resetting tone settings
You can reset all tone settings except
"Speed volume" to the standard default
settings.
1.Open the start menu
2.Press the controller to open the menu
3.Select "Entertainment settings" and
press the controller
4.Select "Audio" and press the controller
5.Select "Reset" and press the controller.
Page 132 of 216
Radio
130
Radio
Your radio provides reception of the FM
and AM wavebands.
Listening to the radio
Press the button if the sound output is
switched off.
Control Center, for principle details, refer to
page 16:
1.Press button.
The start menu is opened
2.Move the controller backwards to open
"Entertainment"
3.Select "FM" or "AM"4.Press the controller.
Stations are shown on the Control Display
on the basis of various selection criteria,
e.g. "Presets".
If no station is displayed, update the sta-
tions with the best reception, refer to
page 132.
Changing station
Turn the controller.
In addition to the stations currently dis-
played, you can have stations with another
selection criterion displayed.
You can choose from the following selec-
tion criteria:
>"Autostore":
The six strongest stations, refer to
page 132
>"Presets":
Stations you have stored, refer to
page 132.
Page 133 of 216

Navigation
Entertainment
Driving tips
131Reference
At a glance
Controls
Communications
Mobility
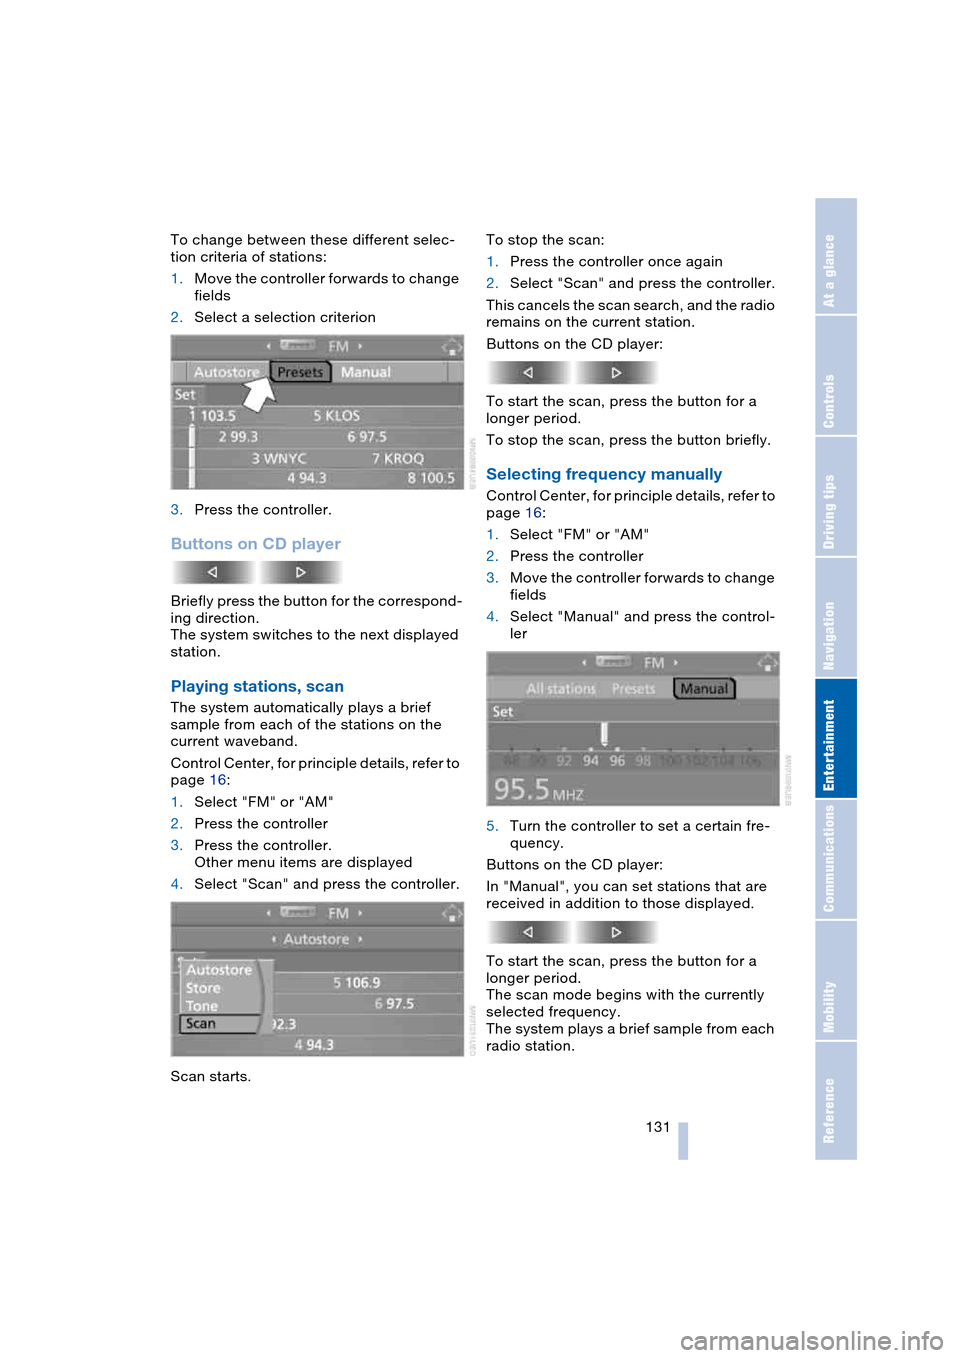
To change between these different selec-
tion criteria of stations:
1.Move the controller forwards to change
fields
2.Select a selection criterion
3.Press the controller.
Buttons on CD player
Briefly press the button for the correspond-
ing direction.
The system switches to the next displayed
station.
Playing stations, scan
The system automatically plays a brief
sample from each of the stations on the
current waveband.
Control Center, for principle details, refer to
page 16:
1.Select "FM" or "AM"
2.Press the controller
3.Press the controller.
Other menu items are displayed
4.Select "Scan" and press the controller.
Scan starts.To stop the scan:
1.Press the controller once again
2.Select "Scan" and press the controller.
This cancels the scan search, and the radio
remains on the current station.
Buttons on the CD player:
To start the scan, press the button for a
longer period.
To stop the scan, press the button briefly.
Selecting frequency manually
Control Center, for principle details, refer to
page 16:
1.Select "FM" or "AM"
2.Press the controller
3.Move the controller forwards to change
fields
4.Select "Manual" and press the control-
ler
5.Turn the controller to set a certain fre-
quency.
Buttons on the CD player:
In "Manual", you can set stations that are
received in addition to those displayed.
To start the scan, press the button for a
longer period.
The scan mode begins with the currently
selected frequency.
The system plays a brief sample from each
radio station.
Page 134 of 216

Radio
132 To stop the scan at the desired frequency
or station:
Press button.
Updating stations with best
reception
If you are on a longer journey and leave the
transmission range of the stations originally
set, you can update the list of stations with
the best reception.
Control Center, for principle details, refer to
page 16:
1.Select "FM" or "AM"
2.Press the controller
3.Move the controller forwards to change
fields
4.Select "Autostore" and press the con-
troller
5.Press the controller.
Other menu items are displayed
6.Select "Autostore" and press the con-
troller.
The display of the stations with the stron-
gest reception is updated. The stations are
displayed based on their frequencies.
Storing stations
Control Center, for principle details, refer to
page 16:
1.Select "FM" or "AM"
2.Select the desired station.
"Set" has been selected
3.Press the controller.
Other menu items are displayed
4.Select "Store" and press the controller.
"Presets" is displayed
5.Turn the controller until the desired
memory location is selected.
The number of the memory location
appears beside the name or frequency
of the station
6.Press the controller.
The station is stored.
Page 135 of 216

Navigation
Entertainment
Driving tips
133Reference
At a glance
Controls
Communications
Mobility
The stations of the last selection criterion
are displayed once again after a short time.
Depending on which key you have used to
open the vehicle, other stored stations are
displayed.
Changing a memory location
Control Center, for principle details, refer to
page 16:
1.Select "Presets" and press the control-
ler
2.Select the desired station
3.Press the controller.
Other menu items are displayed
4.Select "Store" and press the controller
5.Turn the controller until the desired
memory location is selected.
The number of the memory location
appears beside the name or frequency
of the station
6.Press the controller.
The station is stored.
RDS Radio Data System
RDS transmits additional information in the
FM frequency range. RDS stations have the
following properties:
>In the case of broadcasting networks
that transmit over a number of frequen-
cies, there is an automatic switch to the
frequency with the best reception qual-
ity
>If the reception conditions are good, the
station names are shown on the Control
Display. If the reception is weak or dis-
rupted, it can take some time before the
station names appear.
Weather Band*
Weather Radio is a service of the National
Oceanic and Atmospheric Administration –
NOAA – of the U.S. Department of Com-
merce. Weather messages are repeated
every four to six minutes and are routinely
revised every one to three hours, or more
frequently if needed. Most of the stations
operate 24 hours daily. During severe
weather, National Weather Service fore-
casters can interrupt the routine weather
broadcasts and substitute special warning
messages. If you have a question concern-
ing NOAA Weather Radio, please contact
your nearest National Weather Service
Office, or write to National Weather Service
– Attn: W/OM11 –, National Oceanic and
Atmospheric Administration, 1325 East-
West Highway, Silver Spring, MD. 20910.
Selecting Weather Band
Control Center, for principle details, refer to
page 16:
1.Select "WB" and press the controller
2.Select the Weather Band station and
press the controller.
It can occur that the Weather Band station
is not available in some regions.
Satellite radio*
You can receive up to 100 different chan-
nels with high tone quality.
The channels are offered to you in pre-
defined combinations. To receive the chan-
nels of your choice, you must have this
combination enabled.
Page 136 of 216

Radio
134 You may experience signal drops and
muting events related to this new
technology.<
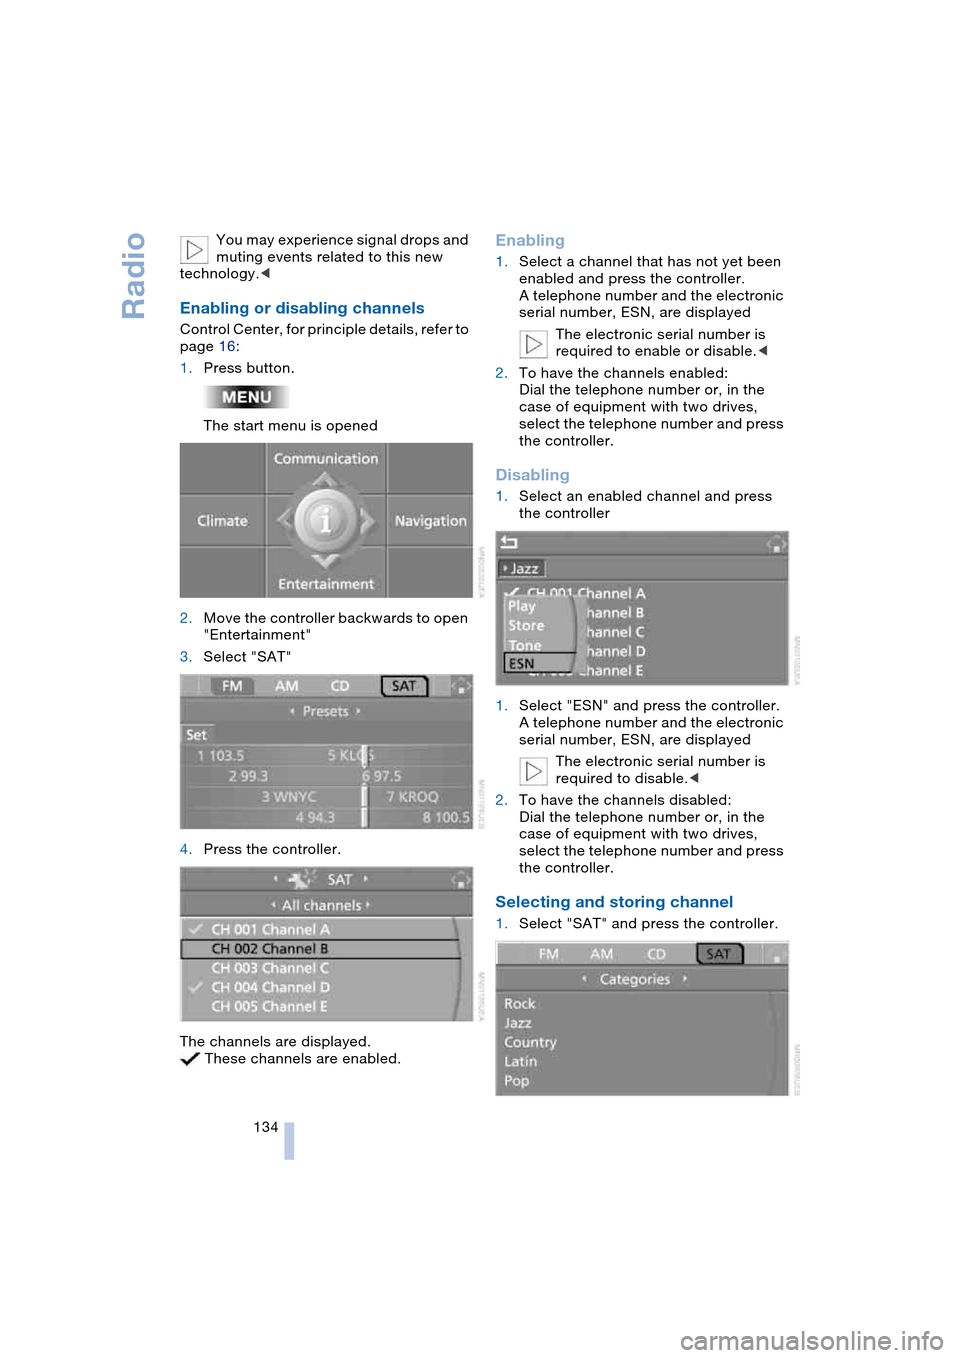
Enabling or disabling channels
Control Center, for principle details, refer to
page 16:
1.Press button.
The start menu is opened
2.Move the controller backwards to open
"Entertainment"
3.Select "SAT"
4.Press the controller.
The channels are displayed.
These channels are enabled.
Enabling
1.Select a channel that has not yet been
enabled and press the controller.
A telephone number and the electronic
serial number, ESN, are displayed
The electronic serial number is
required to enable or disable.<
2.To have the channels enabled:
Dial the telephone number or, in the
case of equipment with two drives,
select the telephone number and press
the controller.
Disabling
1.Select an enabled channel and press
the controller
1.Select "ESN" and press the controller.
A telephone number and the electronic
serial number, ESN, are displayed
The electronic serial number is
required to disable.<
2.To have the channels disabled:
Dial the telephone number or, in the
case of equipment with two drives,
select the telephone number and press
the controller.
Selecting and storing channel
1.Select "SAT" and press the controller.