2004 BMW 645CI COUPE&CONVERTIBLE audio
[x] Cancel search: audioPage 17 of 216
At a glance
15Reference
Controls
Driving tips
Communications
Navigation
Entertainment
Mobility
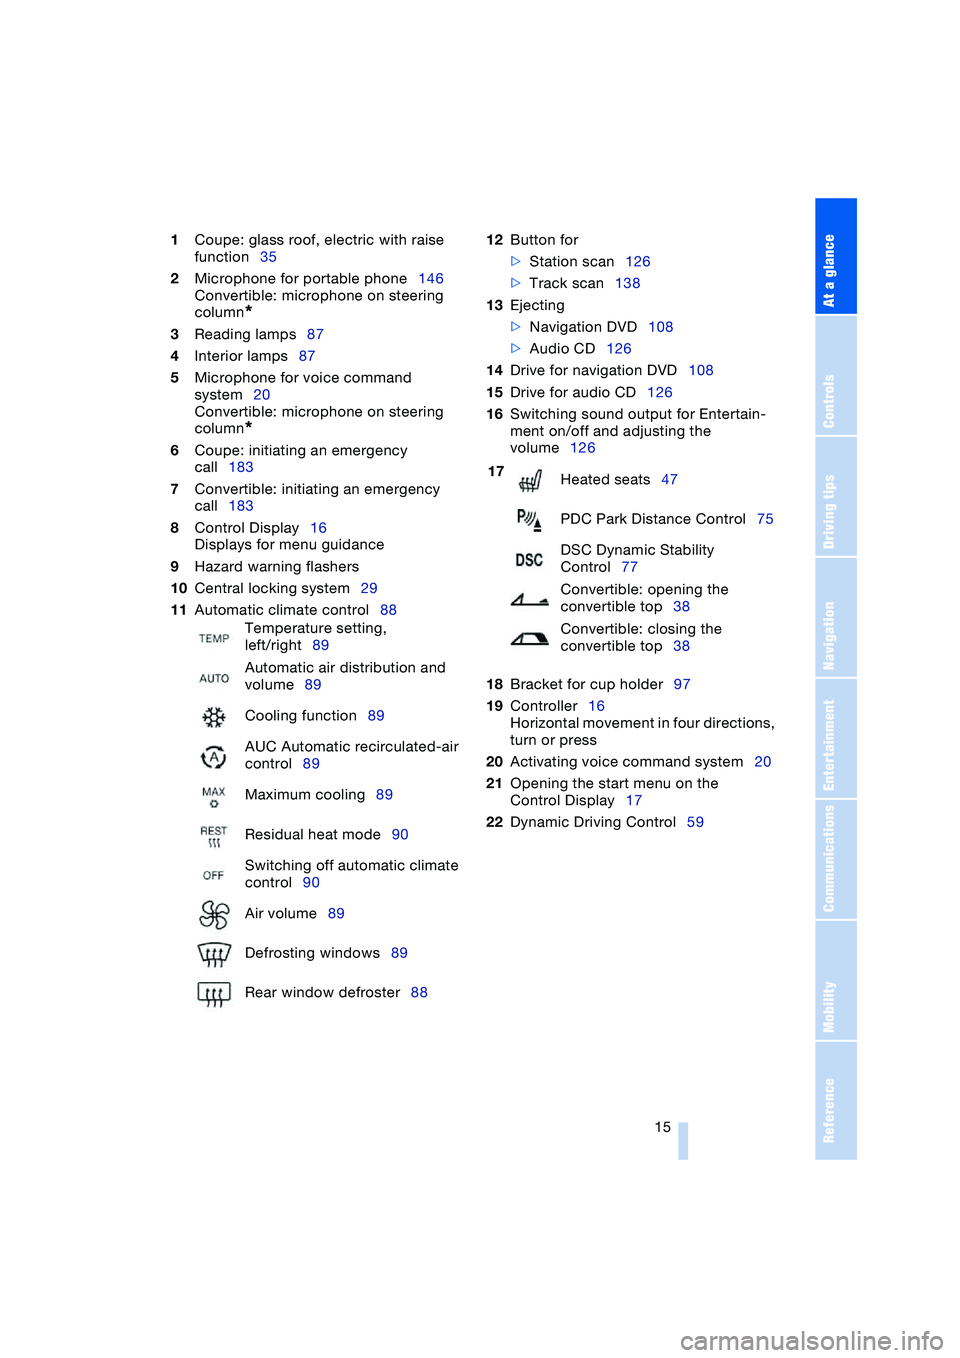
1Coupe: glass roof, electric with raise
function35
2Microphone for portable phone146
Convertible: microphone on steering
column
*
3Reading lamps87
4Interior lamps87
5Microphone for voice command
system20
Convertible: microphone on steering
column
*
6Coupe: initiating an emergency
call183
7Convertible: initiating an emergency
call183
8Control Display16
Displays for menu guidance
9Hazard warning flashers
10Central locking system29
11Automatic climate control8812Button for
>Station scan126
>Track scan138
13Ejecting
>Navigation DVD108
>Audio CD126
14Drive for navigation DVD108
15Drive for audio CD126
16Switching sound output for Entertain-
ment on/off and adjusting the
volume126
18Bracket for cup holder97
19Controller16
Horizontal movement in four directions,
turn or press
20Activating voice command system20
21Opening the start menu on the
Control Display17
22Dynamic Driving Control59 Temperature setting,
left/right89
Automatic air distribution and
volume89
Cooling function89
AUC Automatic recirculated-air
control89
Maximum cooling89
Residual heat mode90
Switching off automatic climate
control90
Air volume89
Defrosting windows89
Rear window defroster88
17
Heated seats47
PDC Park Distance Control75
DSC Dynamic Stability
Control77
Convertible: opening the
convertible top38
Convertible: closing the
convertible top38
Page 51 of 216
Controls
49Reference
At a glance
Driving tips
Communications
Navigation
Entertainment
Mobility
Automatic steering wheel
adjustment
In conjunction with seat, mirror and steer-
ing wheel memory.
The steering wheel automatically moves as
high up and far forward as possible to ease
driver entry and exit before then returning
to the standard position or stored memory
setting.
This automatic feature is governed by the
driver's door and the ignition lock.
Steering wheel heater*
In ignition key position 2, press the button.
The indicator lamp within the button lights
up when the steering wheel heater is in
operation.
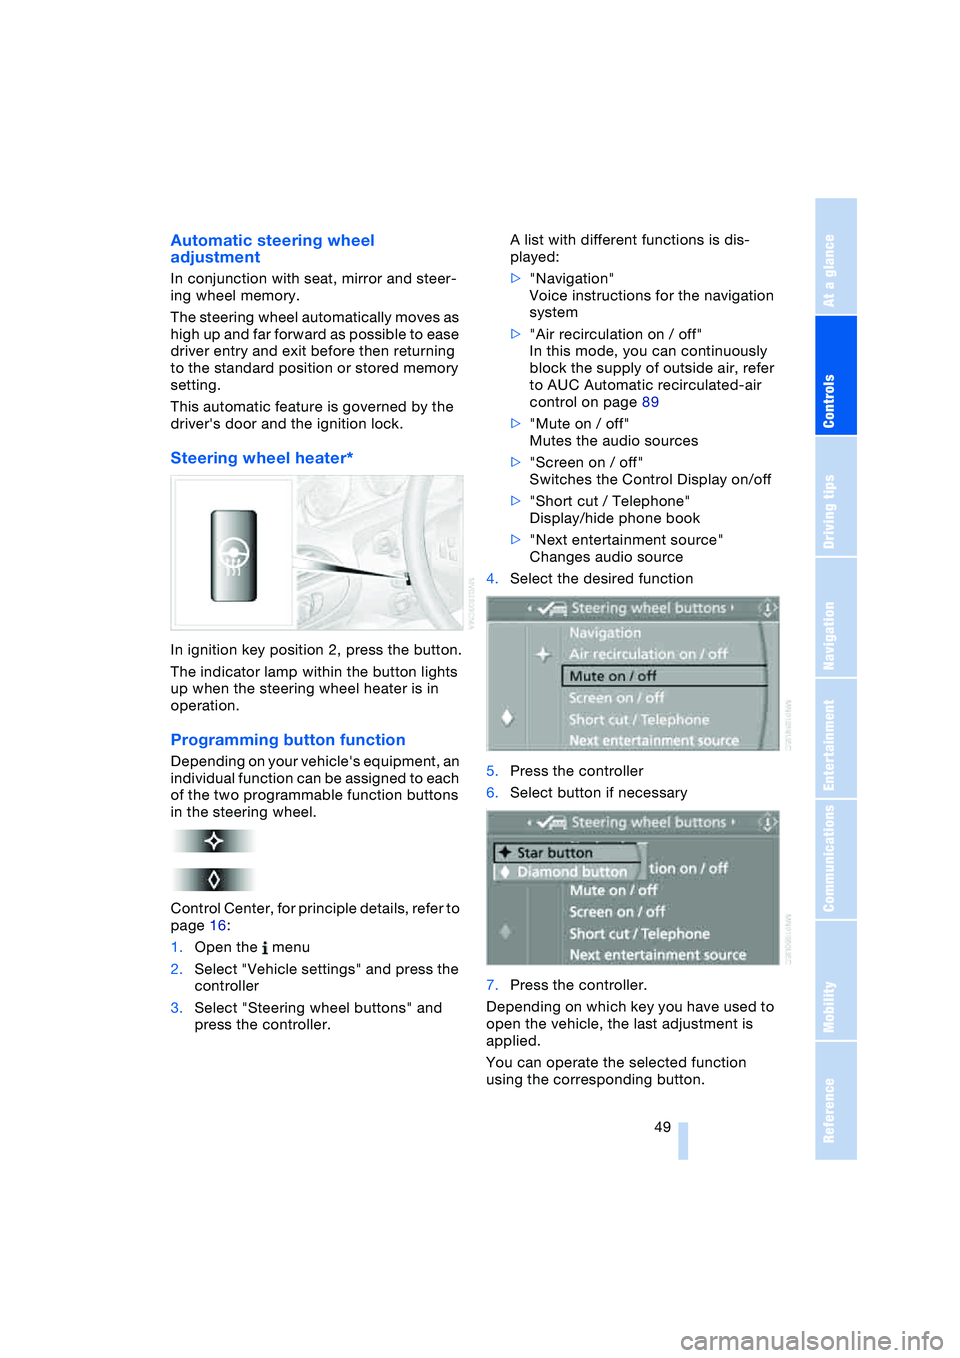
Programming button function
Depending on your vehicle's equipment, an
individual function can be assigned to each
of the two programmable function buttons
in the steering wheel.
Control Center, for principle details, refer to
page 16:
1.Open the menu
2.Select "Vehicle settings" and press the
controller
3.Select "Steering wheel buttons" and
press the controller.A list with different functions is dis-
played:
>"Navigation"
Voice instructions for the navigation
system
>"Air recirculation on / off"
In this mode, you can continuously
block the supply of outside air, refer
to AUC Automatic recirculated-air
control on page 89
>"Mute on / off"
Mutes the audio sources
>"Screen on / off"
Switches the Control Display on/off
>"Short cut / Telephone"
Display/hide phone book
>"Next entertainment source"
Changes audio source
4.Select the desired function
5.Press the controller
6.Select button if necessary
.
7.Press the controller.
Depending on which key you have used to
open the vehicle, the last adjustment is
applied.
You can operate the selected function
using the corresponding button.
Page 52 of 216
Adjustments
50
Operating function
Briefly press the corresponding button on
the steering wheel.
Voice instructions of navigation system:
>Switch voice instructions on/off:
Maintain pressure on the button for
several seconds
>Repeat the last voice instruction:
Briefly press the button
>To prevent the navigation system from
interrupting other audio sources, such
as a news program or traffic bulletin,
you can cancel the voice instructions:
Press the button briefly during an
instruction.
Page 92 of 216
A congenial climate
90 rently within the vehicle. AUC executes this
function automatically.
Press the button repeatedly to run through
the following control sequence:
>Indicator lamps off: outside air flows
into the vehicle continuously
>Right indicator lamp on, AUC mode: the
system detects pollutants in the outside
air and responds by blocking the supply
of outside air when required.
Depending upon air quality require-
ments, in the automatic mode the sys-
tem alternates between its outside-air
and recirculated-air modes
>Left indicator lamp on, recirculated-air
mode: the supply of outside air into the
vehicle is continuously blocked.
If condensation starts to form on the
inside window surfaces during opera-
tion in the recirculated-air mode, you
should switch it off while also increasing
the air volume as required.
The recirculated-air mode should not be
used over a longer period of time, as the air
quality inside the vehicle deteriorates con-
tinuously.<
Residual heat mode
If you press this button with the
engine switched off, the system
uses the warmth stored in the
engine to heat the interior, for
instance, while the vehicle is
stationary at a school to pick up a child.
You can adjust the automatic climate con-
trol settings as of ignition key position 2.
Provided that the engine has warmed to its
normal operating temperature and the bat-
tery is charged, you can use this function
for up to 15 minutes after switching off the
ignition. The LED within the button lights up
to confirm compliance with both of these
conditions.
Switching off automatic climate
control
The air volume, the heater and
the cooling function are all
switched off. You can restart
the automatic climate control
by pressing any of its buttons
except the REST button.
Settings using Control Center
Ignition key:
>On vehicles with separate drives for
audio CDs and navigation DVDs, igni-
tion key in position 2
>On vehicles with one drive for audio
CDs, ignition key in position 1.
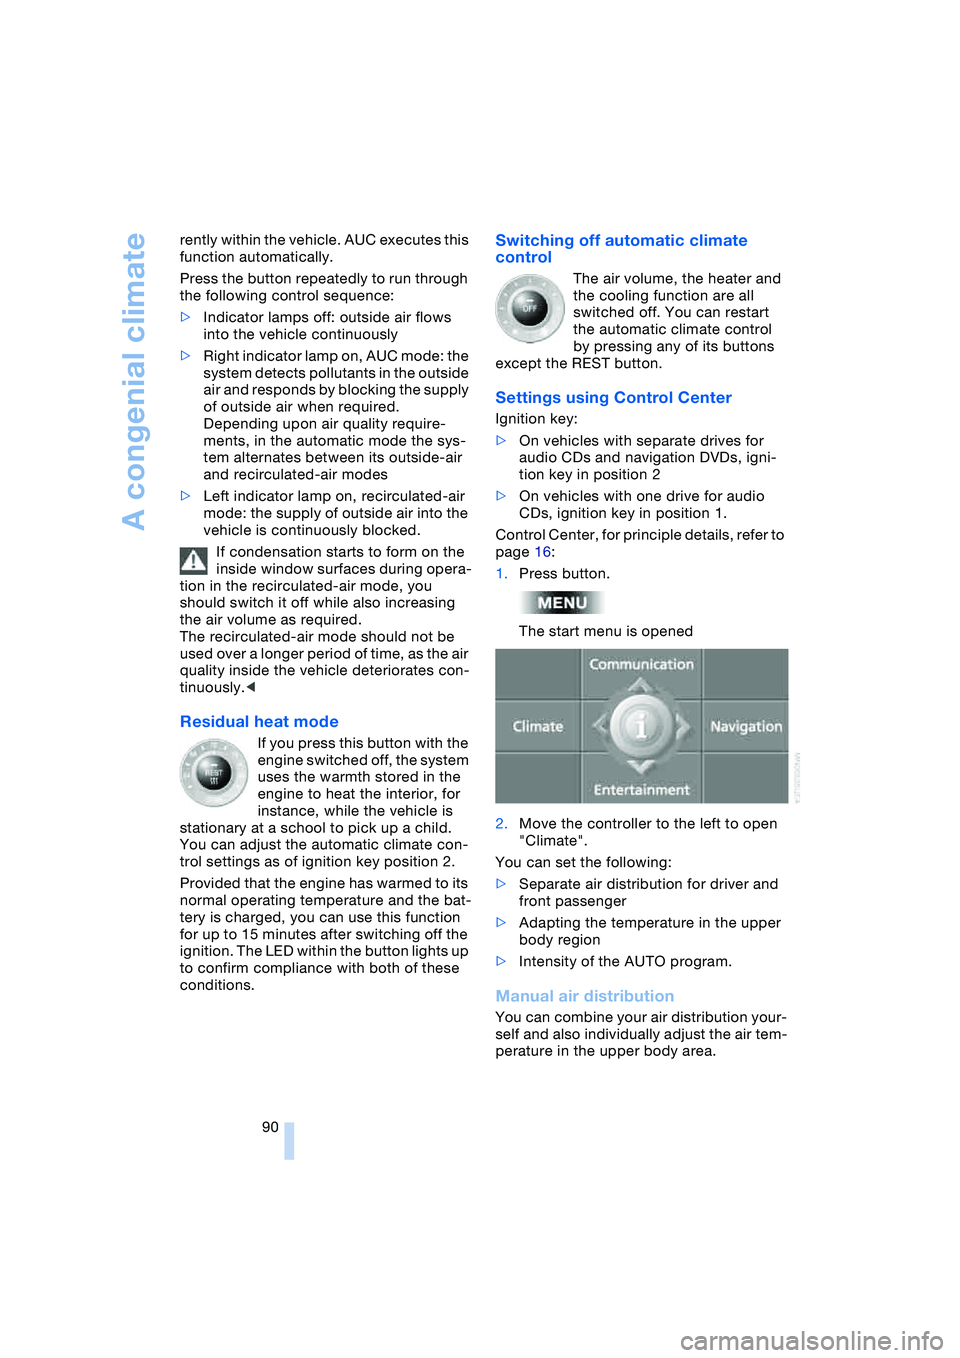
Control Center, for principle details, refer to
page 16:
1.Press button.
The start menu is opened
2.Move the controller to the left to open
"Climate".
You can set the following:
>Separate air distribution for driver and
front passenger
>Adapting the temperature in the upper
body region
>Intensity of the AUTO program.
Manual air distribution
You can combine your air distribution your-
self and also individually adjust the air tem-
perature in the upper body area.
Page 121 of 216
Navigation
Driving tips
119Reference
At a glance
Controls
Communications
Entertainment
Mobility
2.Select "Start guidance" and press the
controller.
The destination guidance is switched
off.
When you park the vehicle before reaching
the entered destination, upon restarting
you will see the question "Continue guid-
ance to dest.?".
To restart destination guidance:
Select "Yes" and press the controller.
Destination guidance
through voice instructions
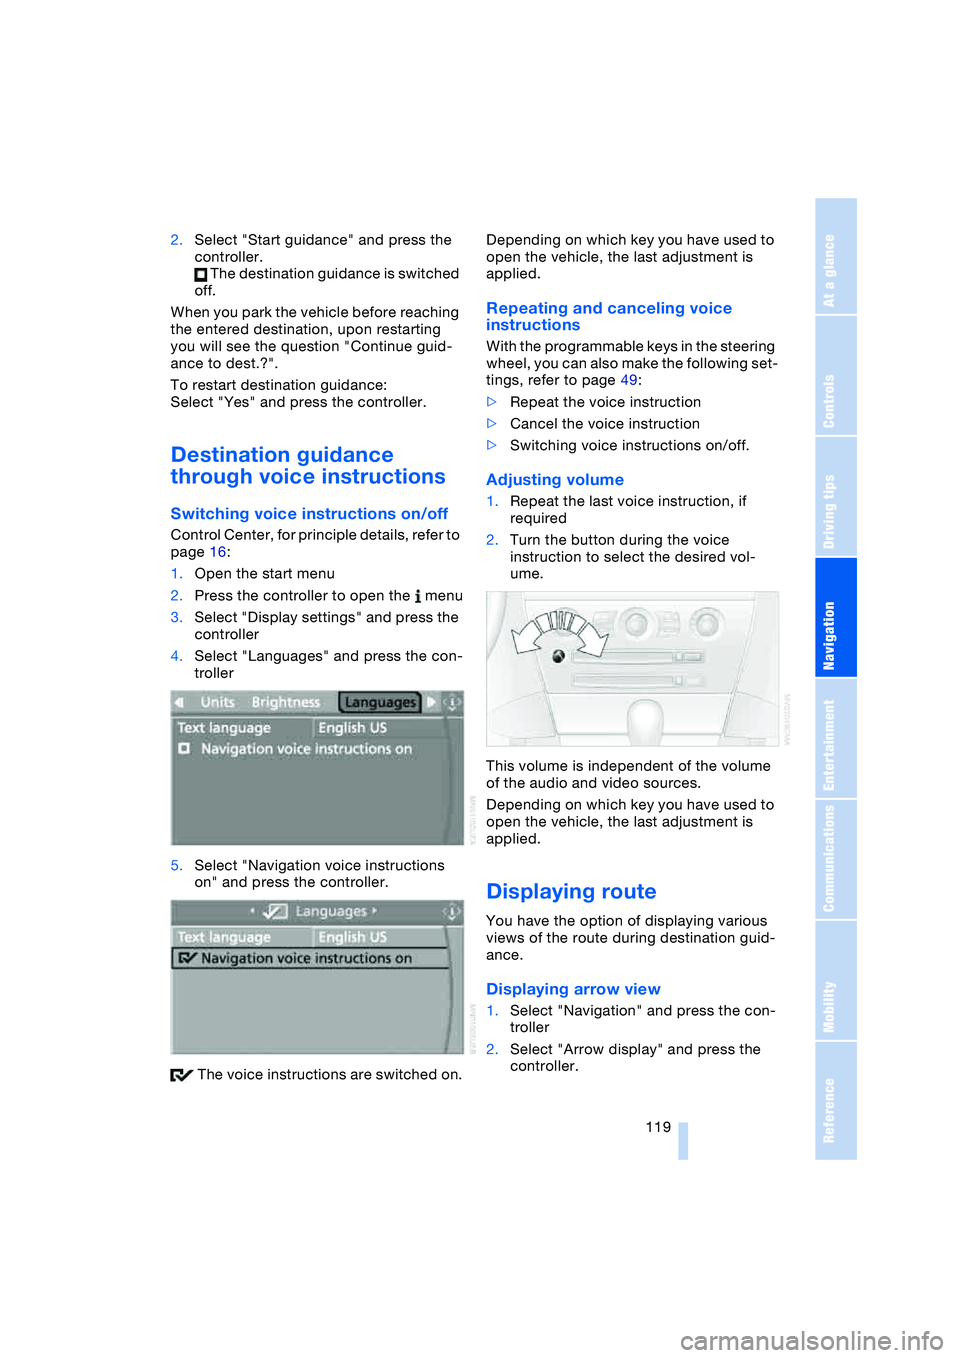
Switching voice instructions on/off
Control Center, for principle details, refer to
page 16:
1.Open the start menu
2.Press the controller to open the menu
3.Select "Display settings" and press the
controller
4.Select "Languages" and press the con-
troller
5.Select "Navigation voice instructions
on" and press the controller.
The voice instructions are switched on.Depending on which key you have used to
open the vehicle, the last adjustment is
applied.
Repeating and canceling voice
instructions
With the programmable keys in the steering
wheel, you can also make the following set-
tings, refer to page 49:
>Repeat the voice instruction
>Cancel the voice instruction
>Switching voice instructions on/off.
Adjusting volume
1.Repeat the last voice instruction, if
required
2.Turn the button during the voice
instruction to select the desired vol-
ume.
This volume is independent of the volume
of the audio and video sources.
Depending on which key you have used to
open the vehicle, the last adjustment is
applied.
Displaying route
You have the option of displaying various
views of the route during destination guid-
ance.
Displaying arrow view
1.Select "Navigation" and press the con-
troller
2.Select "Arrow display" and press the
controller.
Page 128 of 216
On/off and tone
126
On/off and tone
The following equipment has shared con-
trols and setting options:
>Radio Business
>CD player
>CD changer
*.
Controls
The audio sources can be operated using:
>Buttons on the CD player
>Control Center
>Buttons on the steering wheel, refer to
page 11.
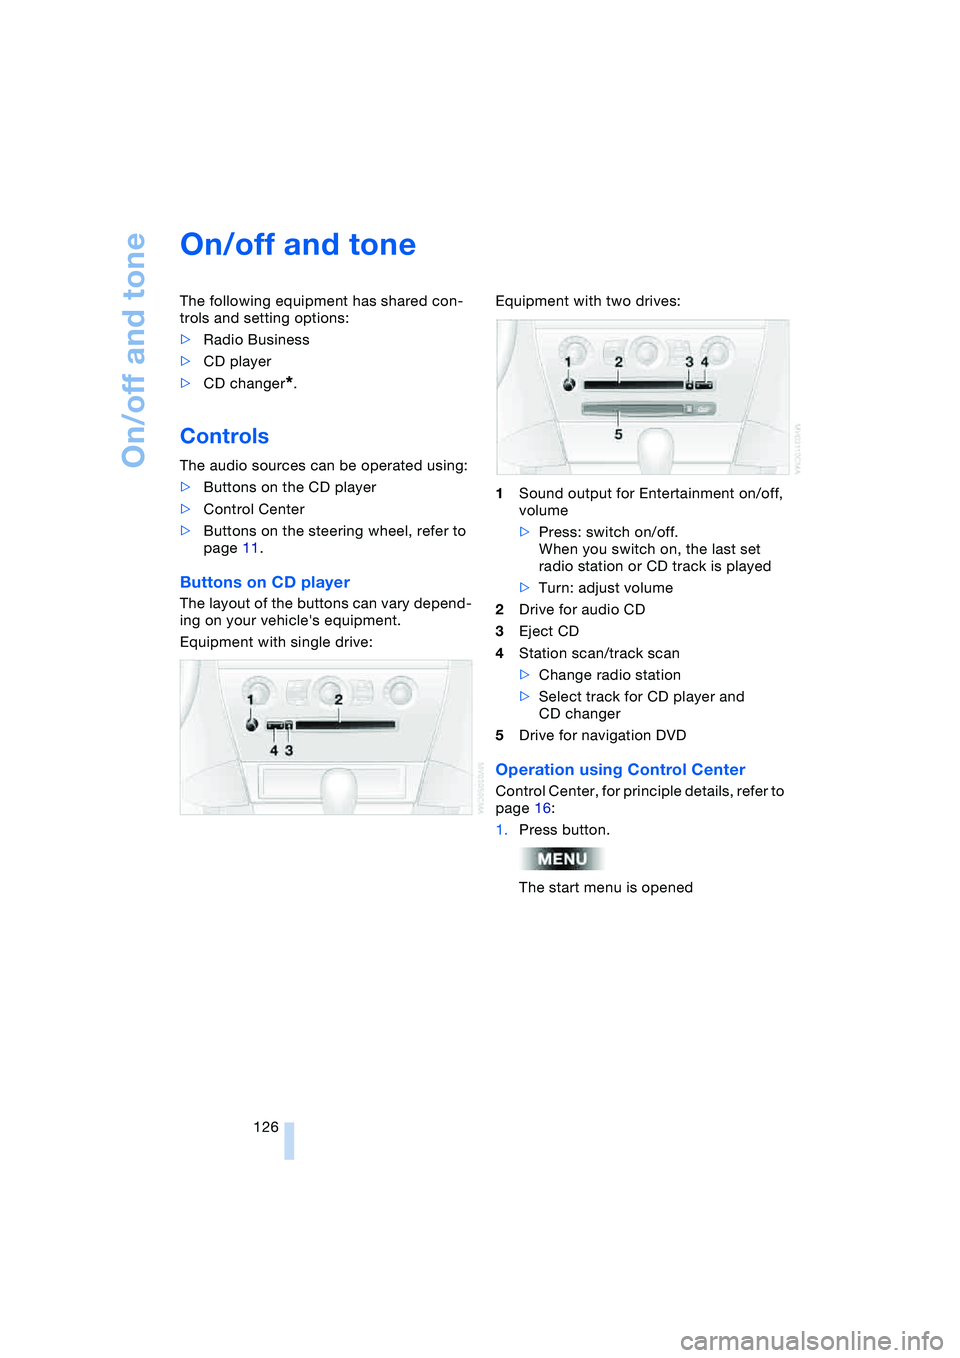
Buttons on CD player
The layout of the buttons can vary depend-
ing on your vehicle's equipment.
Equipment with single drive:Equipment with two drives:
1Sound output for Entertainment on/off,
volume
>Press: switch on/off.
When you switch on, the last set
radio station or CD track is played
>Turn: adjust volume
2Drive for audio CD
3Eject CD
4Station scan/track scan
>Change radio station
>Select track for CD player and
CD changer
5Drive for navigation DVD
Operation using Control Center
Control Center, for principle details, refer to
page 16:
1.Press button.
The start menu is opened
Page 129 of 216
Navigation
Entertainment
Driving tips
127Reference
At a glance
Controls
Communications
Mobility
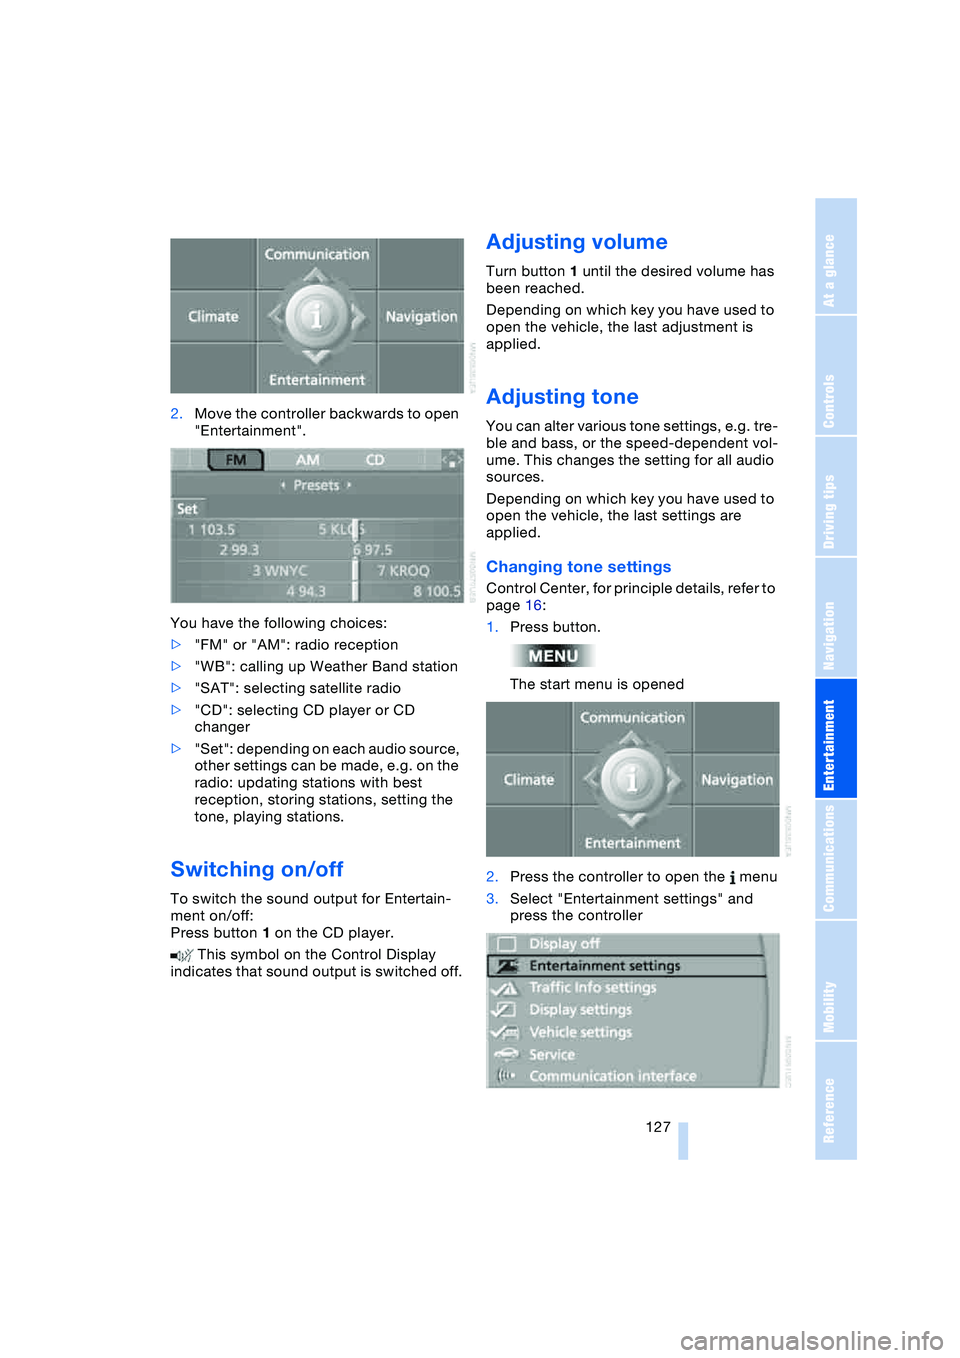
2.Move the controller backwards to open
"Entertainment".
You have the following choices:
>"FM" or "AM": radio reception
>"WB": calling up Weather Band station
>"SAT": selecting satellite radio
>"CD": selecting CD player or CD
changer
>"Set": depending on each audio source,
other settings can be made, e.g. on the
radio: updating stations with best
reception, storing stations, setting the
tone, playing stations.
Switching on/off
To switch the sound output for Entertain-
ment on/off:
Press button 1 on the CD player.
This symbol on the Control Display
indicates that sound output is switched off.
Adjusting volume
Turn button 1 until the desired volume has
been reached.
Depending on which key you have used to
open the vehicle, the last adjustment is
applied.
Adjusting tone
You can alter various tone settings, e.g. tre-
ble and bass, or the speed-dependent vol-
ume. This changes the setting for all audio
sources.
Depending on which key you have used to
open the vehicle, the last settings are
applied.
Changing tone settings
Control Center, for principle details, refer to
page 16:
1.Press button.
The start menu is opened
2.Press the controller to open the menu
3.Select "Entertainment settings" and
press the controller
Page 130 of 216
On/off and tone
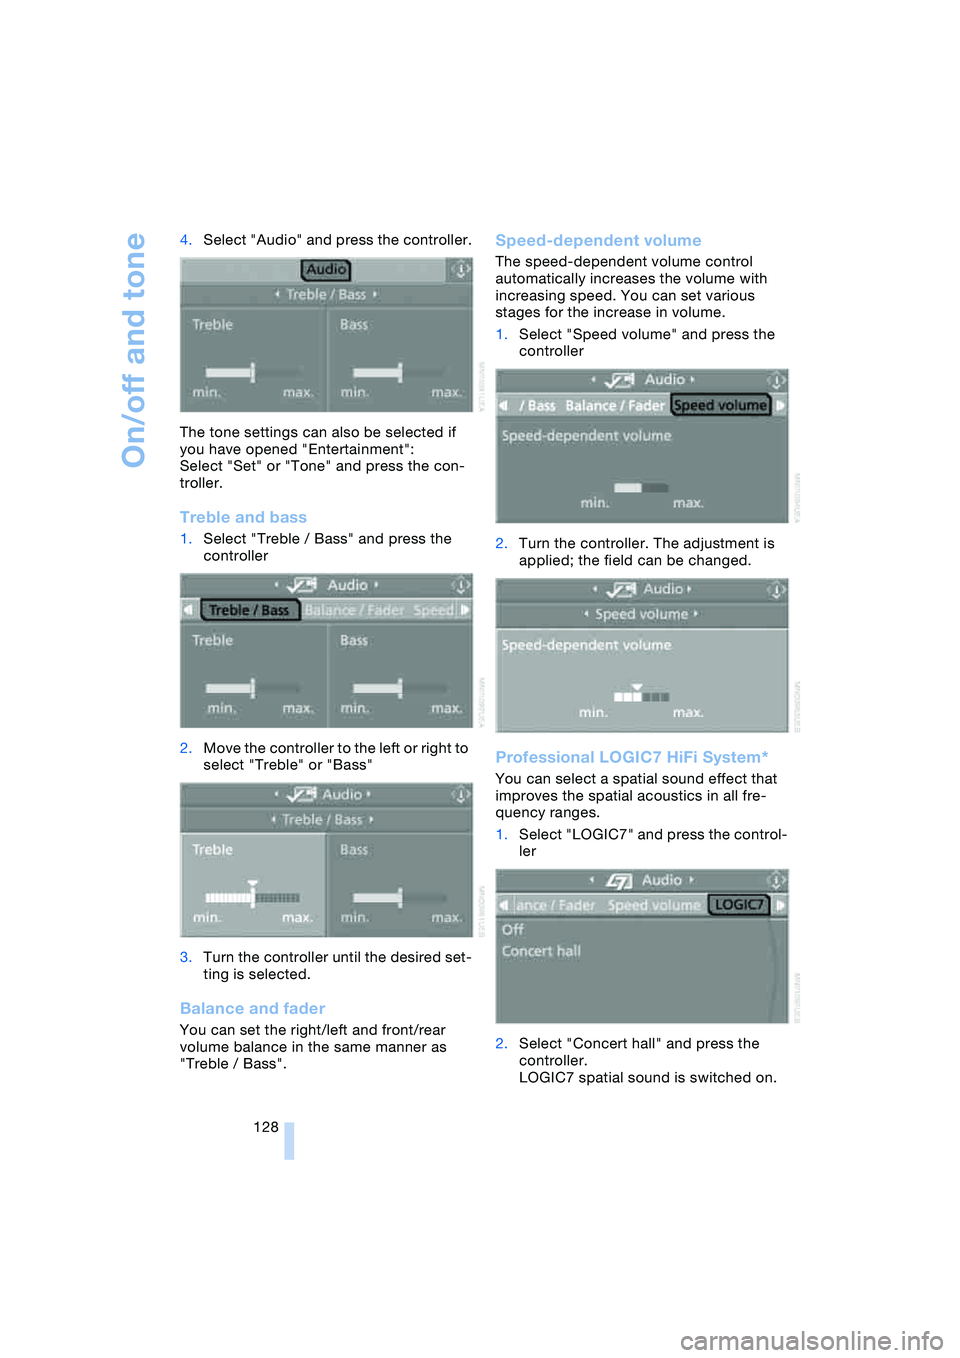
128 4.Select "Audio" and press the controller.
The tone settings can also be selected if
you have opened "Entertainment":
Select "Set" or "Tone" and press the con-
troller.
Treble and bass
1.Select "Treble / Bass" and press the
controller
2.Move the controller to the left or right to
select "Treble" or "Bass"
3.Turn the controller until the desired set-
ting is selected.
Balance and fader
You can set the right/left and front/rear
volume balance in the same manner as
"Treble / Bass".
Speed-dependent volume
The speed-dependent volume control
automatically increases the volume with
increasing speed. You can set various
stages for the increase in volume.
1.Select "Speed volume" and press the
controller
2.Turn the controller. The adjustment is
applied; the field can be changed.
Professional LOGIC7 HiFi System*
You can select a spatial sound effect that
improves the spatial acoustics in all fre-
quency ranges.
1.Select "LOGIC7" and press the control-
ler
2.Select "Concert hall" and press the
controller.
LOGIC7 spatial sound is switched on.