2004 BMW 525I SEDAN parking brake
[x] Cancel search: parking brakePage 52 of 220
Driving
50 lever in idle position and apply the hand-
brake.
Never leave an unattended vehicle with the
engine running, as such a vehicle repre-
sents a potential safety hazard.<
Automatic transmission
1.Press the brake pedal
2.Place the selector lever in position P
or N
3.Start the engine.
To prevent the vehicle from rolling,
always select position P or N and
engage the handbrake before leaving the
vehicle with the engine running.
Never leave an unattended vehicle with the
engine running, as such a vehicle repre-
sents a potential safety hazard.<
Sequential manual transmission
SMG
1.Press the brake pedal
2.Place the selector lever in the idle posi-
tion N
3.Start the engine.
If the engine does not start, engage
the last gear selected, refer to Display
in the instrument cluster, and return the
selector lever to the idle position N.<
Before leaving the vehicle with the
engine running, place the selector
lever in position N and apply the hand-
brake.
Never leave an unattended vehicle with the
engine running, as such a vehicle repre-
sents a potential safety hazard.<
Switching off engine
Do not remove the ignition key while
the vehicle is rolling, as otherwise the
steering wheel lock would engage while
steering.
When leaving the vehicle, always remove
the ignition key and lock the steering.
When parking on downward inclines, apply
the handbrake.<
Manual transmission
Turn the ignition key to position 1 or 0.
Automatic transmission
1.Engage selector-lever position P
2.Turn the ignition key to position 1 or 0.
Sequential manual transmission
SMG
If the selector lever is in position R or in the
sequential mode and you turn the ignition
key to position 1 or 0, the gear remains
engaged automatically.
If the selector lever is in the idle position N
and you turn the ignition key to position 1
or 0, an acoustic signal and the flashing
gear indicator in the display reminds you
that the vehicle is not secured against roll-
ing away.
The warning stops sounding after approx.
9 seconds.
When parking on downward inclines,
apply the handbrake. Engaging a gear
is not sufficient to secure the vehicle from
rolling away under certain circumstances.<
Handbrake
The handbrake is primarily intended to pre-
vent the vehicle from rolling while parked; it
brakes the rear wheels.
Indicator lamp
The indicator lamp lights up with
the handbrake applied, and an
acoustic signal also sounds when
starting off.
Indicator lamp for Canadian mod-
els.
Applying
The lever locks into place automatically;
the indicator lamp in the instrument cluster
lights up in ignition key position 2.
Page 53 of 220
Controls
51Reference
At a glance
Driving tips
Communications
Navigation
Entertainment
Mobility
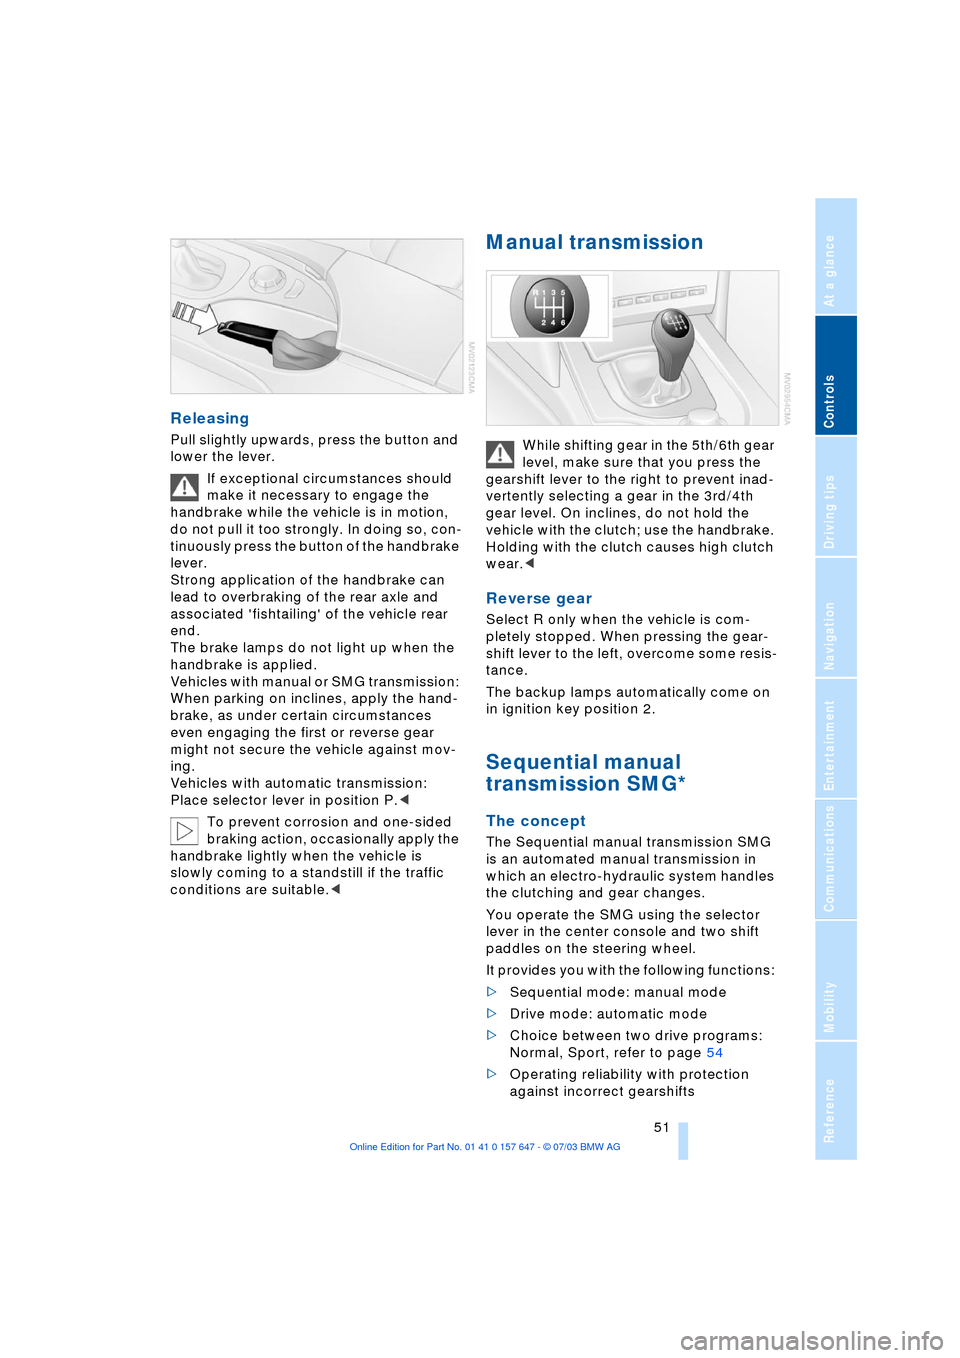
Releasing
Pull slightly upwards, press the button and
lower the lever.
If exceptional circumstances should
make it necessary to engage the
handbrake while the vehicle is in motion,
do not pull it too strongly. In doing so, con-
tinuously press the button of the handbrake
lever.
Strong application of the handbrake can
lead to overbraking of the rear axle and
associated 'fishtailing' of the vehicle rear
end.
The brake lamps do not light up when the
handbrake is applied.
Vehicles with manual or SMG transmission:
When parking on inclines, apply the hand-
brake, as under certain circumstances
even engaging the first or reverse gear
might not secure the vehicle against mov-
ing.
Vehicles with automatic transmission:
Place selector lever in position P.<
To prevent corrosion and one-sided
braking action, occasionally apply the
handbrake lightly when the vehicle is
slowly coming to a standstill if the traffic
conditions are suitable.<
Manual transmission
While shifting gear in the 5th/6th gear
level, make sure that you press the
gearshift lever to the right to prevent inad-
vertently selecting a gear in the 3rd/4th
gear level. On inclines, do not hold the
vehicle with the clutch; use the handbrake.
Holding with the clutch causes high clutch
wear.<
Reverse gear
Select R only when the vehicle is com-
pletely stopped. When pressing the gear-
shift lever to the left, overcome some resis-
tance.
The backup lamps automatically come on
in ignition key position 2.
Sequential manual
transmission SMG*
The concept
The Sequential manual transmission SMG
is an automated manual transmission in
which an electro-hydraulic system handles
the clutching and gear changes.
You operate the SMG using the selector
lever in the center console and two shift
paddles on the steering wheel.
It provides you with the following functions:
>Sequential mode: manual mode
>Drive mode: automatic mode
>Choice between two drive programs:
Normal, Sport, refer to page 54
>Operating reliability with protection
against incorrect gearshifts
Page 57 of 220
Controls
55Reference
At a glance
Driving tips
Communications
Navigation
Entertainment
Mobility
Changing the selector-lever
positions
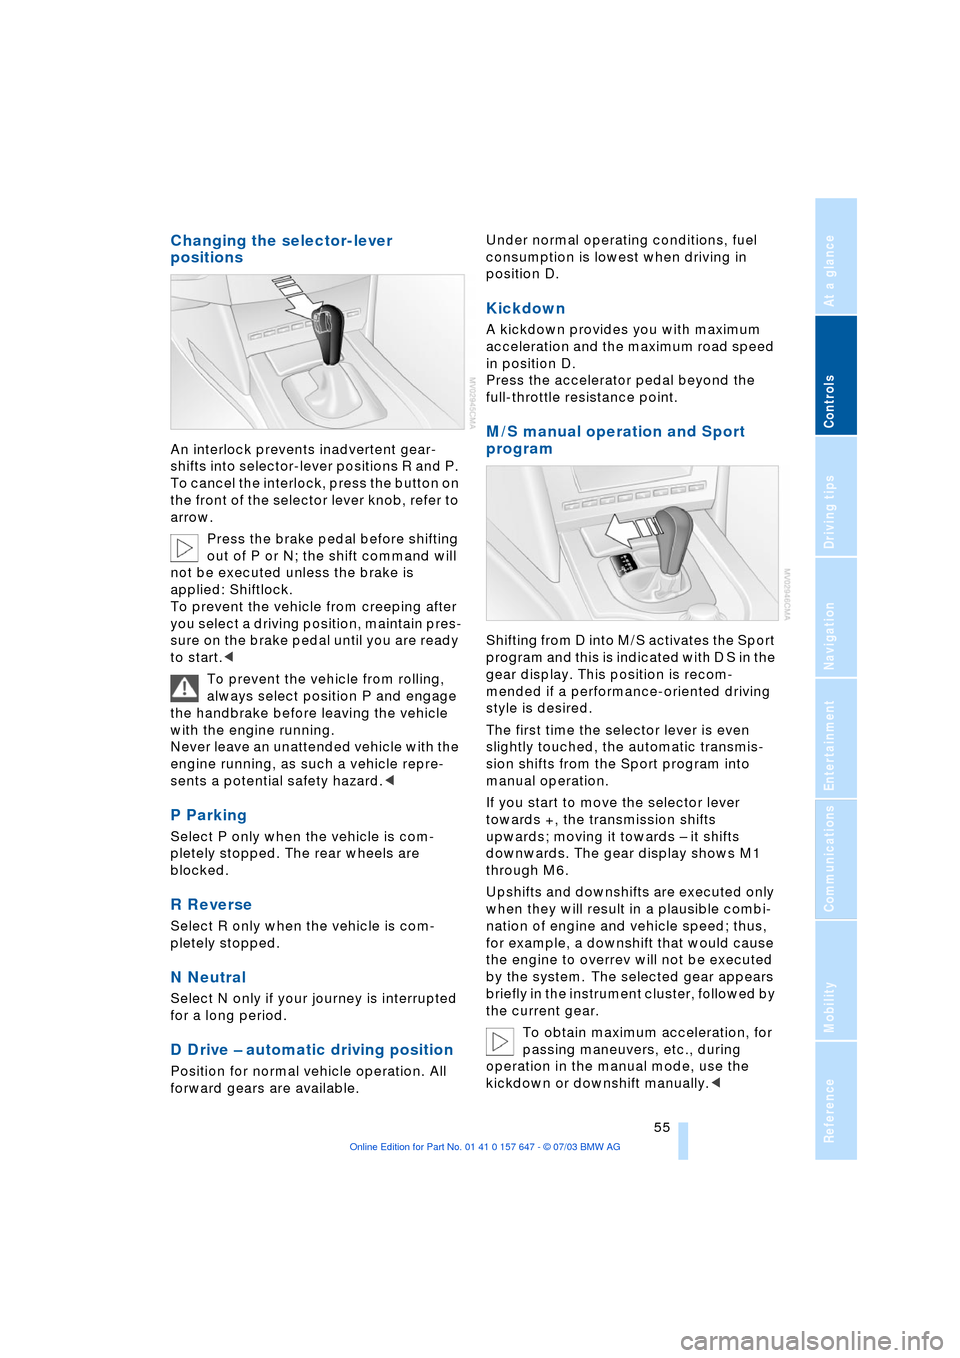
An interlock prevents inadvertent gear-
shifts into selector-lever positions R and P.
To cancel the interlock, press the button on
the front of the selector lever knob, refer to
arrow.
Press the brake pedal before shifting
out of P or N; the shift command will
not be executed unless the brake is
applied: Shiftlock.
To prevent the vehicle from creeping after
you select a driving position, maintain pres-
sure on the brake pedal until you are ready
to start.<
To prevent the vehicle from rolling,
always select position P and engage
the handbrake before leaving the vehicle
with the engine running.
Never leave an unattended vehicle with the
engine running, as such a vehicle repre-
sents a potential safety hazard.<
P Parking
Select P only when the vehicle is com-
pletely stopped. The rear wheels are
blocked.
R Reverse
Select R only when the vehicle is com-
pletely stopped.
N Neutral
Select N only if your journey is interrupted
for a long period.
D Drive Ð automatic driving position
Position for normal vehicle operation. All
forward gears are available.Under normal operating conditions, fuel
consumption is lowest when driving in
position D.
Kickdown
A kickdown provides you with maximum
acceleration and the maximum road speed
in position D.
Press the accelerator pedal beyond the
full-throttle resistance point.
M/S manual operation and Sport
program
Shifting from D into M/S activates the Sport
program and this is indicated with D S in the
gear display. This position is recom-
mended if a performance-oriented driving
style is desired.
The first time the selector lever is even
slightly touched, the automatic transmis-
sion shifts from the Sport program into
manual operation.
If you start to move the selector lever
towards +, the transmission shifts
upwards; moving it towards Ð it shifts
downwards. The gear display shows M1
through M6.
Upshifts and downshifts are executed only
when they will result in a plausible combi-
nation of engine and vehicle speed; thus,
for example, a downshift that would cause
the engine to overrev will not be executed
by the system. The selected gear appears
briefly in the instrument cluster, followed by
the current gear.
To obtain maximum acceleration, for
passing maneuvers, etc., during
operation in the manual mode, use the
kickdown or downshift manually.<
Page 63 of 220
Controls
61Reference
At a glance
Driving tips
Communications
Navigation
Entertainment
Mobility
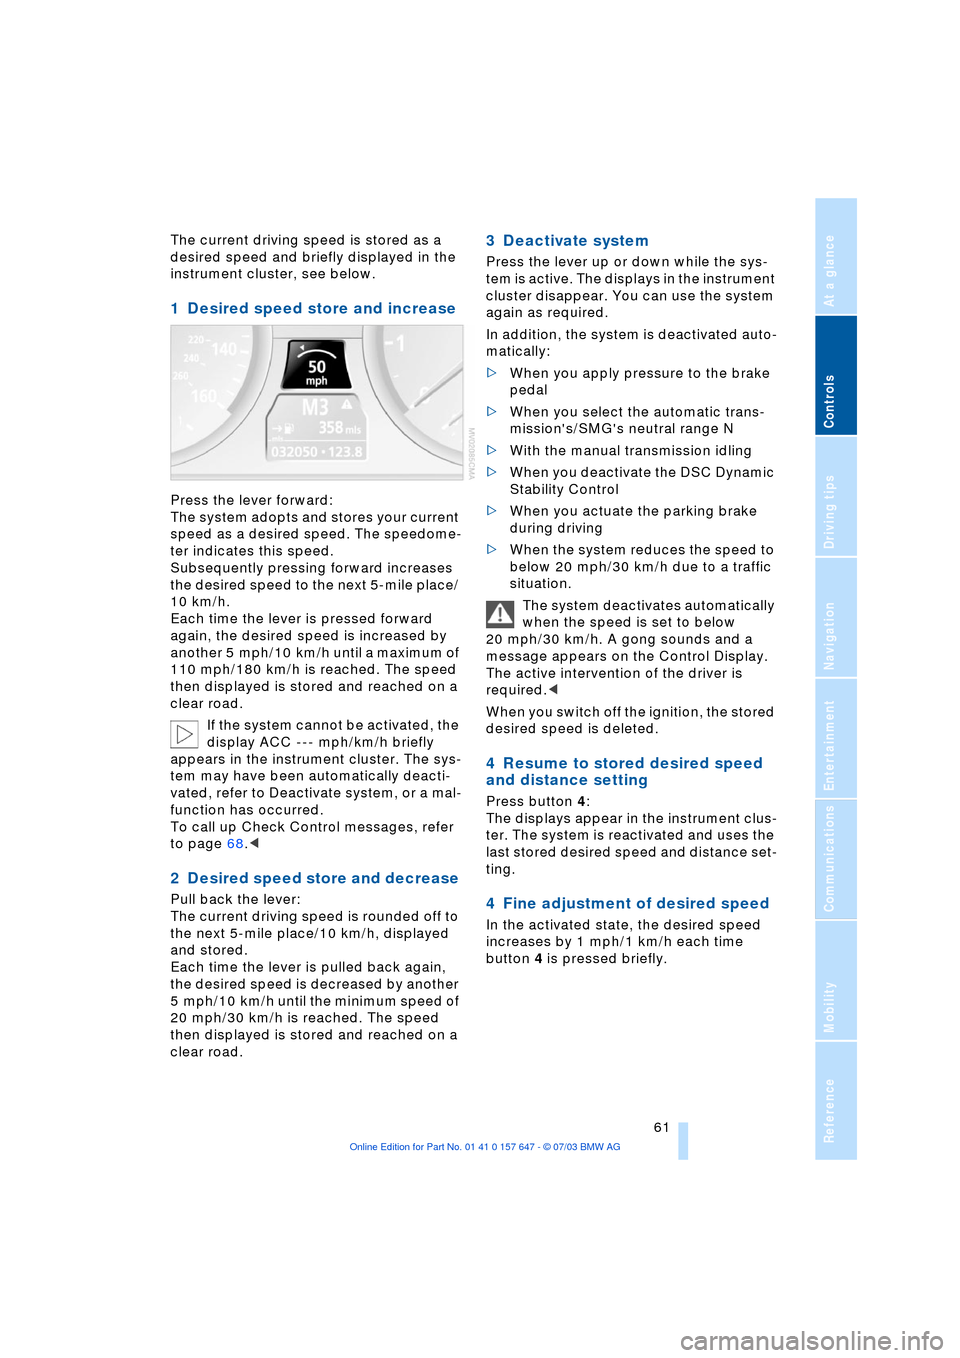
The current driving speed is stored as a
desired speed and briefly displayed in the
instrument cluster, see below.
1 Desired speed store and increase
Press the lever forward:
The system adopts and stores your current
speed as a desired speed. The speedome-
ter indicates this speed.
Subsequently pressing forward increases
the desired speed to the next 5-mile place/
10 km/h.
Each time the lever is pressed forward
again, the desired speed is increased by
another 5 mph/10 km/h until a maximum of
110 mph/180 km/h is reached. The speed
then displayed is stored and reached on a
clear road.
If the system cannot be activated, the
display ACC --- mph/km/h briefly
appears in the instrument cluster. The sys-
tem may have been automatically deacti-
vated, refer to Deactivate system, or a mal-
function has occurred.
To call up Check Control messages, refer
to page 68.<
2 Desired speed store and decrease
Pull back the lever:
The current driving speed is rounded off to
the next 5-mile place/10 km/h, displayed
and stored.
Each time the lever is pulled back again,
the desired speed is decreased by another
5 mph/10 km/h until the minimum speed of
20 mph/30 km/h is reached. The speed
then displayed is stored and reached on a
clear road.
3 Deactivate system
Press the lever up or down while the sys-
tem is active. The displays in the instrument
cluster disappear. You can use the system
again as required.
In addition, the system is deactivated auto-
matically:
>When you apply pressure to the brake
pedal
>When you select the automatic trans-
mission's/SMG's neutral range N
>With the manual transmission idling
>When you deactivate the DSC Dynamic
Stability Control
>When you actuate the parking brake
during driving
>When the system reduces the speed to
below 20 mph/30 km/h due to a traffic
situation.
The system deactivates automatically
when the speed is set to below
20 mph/30 km/h. A gong sounds and a
message appears on the Control Display.
The active intervention of the driver is
required.<
When you switch off the ignition, the stored
desired speed is deleted.
4 Resume to stored desired speed
and distance setting
Press button 4:
The displays appear in the instrument clus-
ter. The system is reactivated and uses the
last stored desired speed and distance set-
ting.
4 Fine adjustment of desired speed
In the activated state, the desired speed
increases by 1 mph/1 km/h each time
button 4 is pressed briefly.
Page 64 of 220
Driving
62
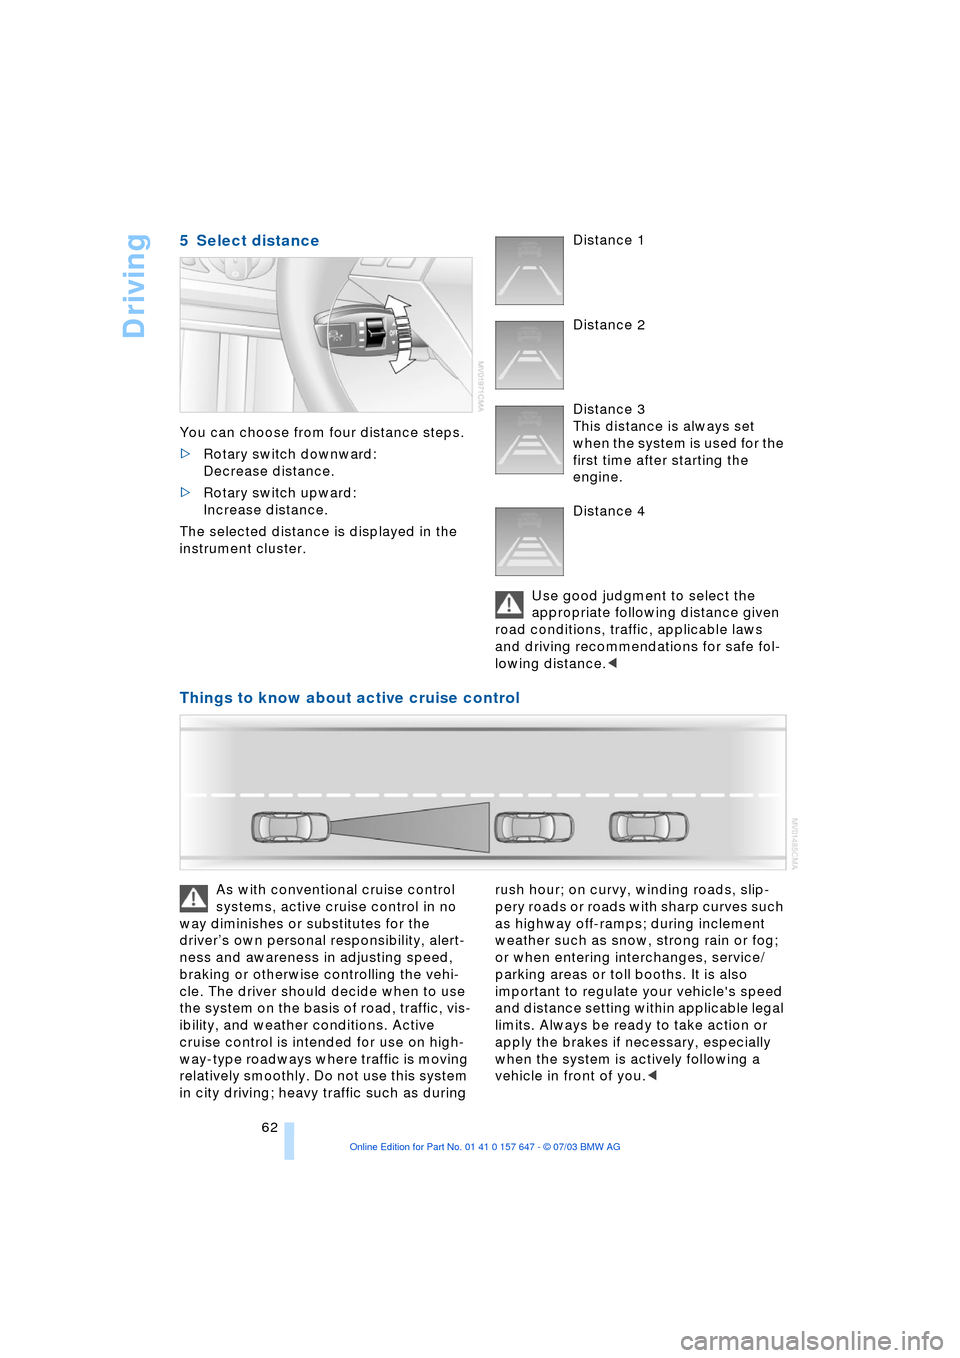
5 Select distance
You can choose from four distance steps.
>Rotary switch downward:
Decrease distance.
>Rotary switch upward:
Increase distance.
The selected distance is displayed in the
instrument cluster. Distance 1
Distance 2
Distance 3
This distance is always set
when the system is used for the
first time after starting the
engine.
Distance 4
Use good judgment to select the
appropriate following distance given
road conditions, traffic, applicable laws
and driving recommendations for safe fol-
lowing distance.<
Things to know about active cruise control
As with conventional cruise control
systems, active cruise control in no
way diminishes or substitutes for the
driverÕs own personal responsibility, alert-
ness and awareness in adjusting speed,
braking or otherwise controlling the vehi-
cle. The driver should decide when to use
the system on the basis of road, traffic, vis-
ibility, and weather conditions. Active
cruise control is intended for use on high-
way-type roadways where traffic is moving
relatively smoothly. Do not use this system
in city driving; heavy traffic such as during rush hour; on curvy, winding roads, slip-
pery roads or roads with sharp curves such
as highway off-ramps; during inclement
weather such as snow, strong rain or fog;
or when entering interchanges, service/
parking areas or toll booths. It is also
important to regulate your vehicle's speed
and distance setting within applicable legal
limits. Always be ready to take action or
apply the brakes if necessary, especially
when the system is actively following a
vehicle in front of you.<
Page 84 of 220
Technology for comfort, convenience and safety
82
System malfunctions
Indicator lamp
The symbol in the instrument clus-
ter lights up yellow and a message
appears on the Control Display.
Please contact your BMW center.
Please note any supplementary information
that appears on the Control Display.
Active steering*
The concept
The active steering is a system that actively
varies the steering angle of the front wheels
in relation to the steering wheel move-
ments.
When you are driving in the low road speed
range, e.g. in a town or when parking, the
steering angle is reinforced, i.e. the steer-
ing becomes very direct and significantly
improves the handling capability of your
BMW.
In the higher road speed range, on the
other hand, the steering angle is reduced,
also optimizing the handling capability.
In critical situations, the system can make
targeted changes to the steering angle pro-
vided by the driver and thus stabilize the
vehicle before the driver intervenes.
Indicator lamp
The indicator lamp lights up perma-
nently: malfunction in the system.
Please have the system inspected
at your BMW center.
Conventional steering efficiency remains
available without limitations.
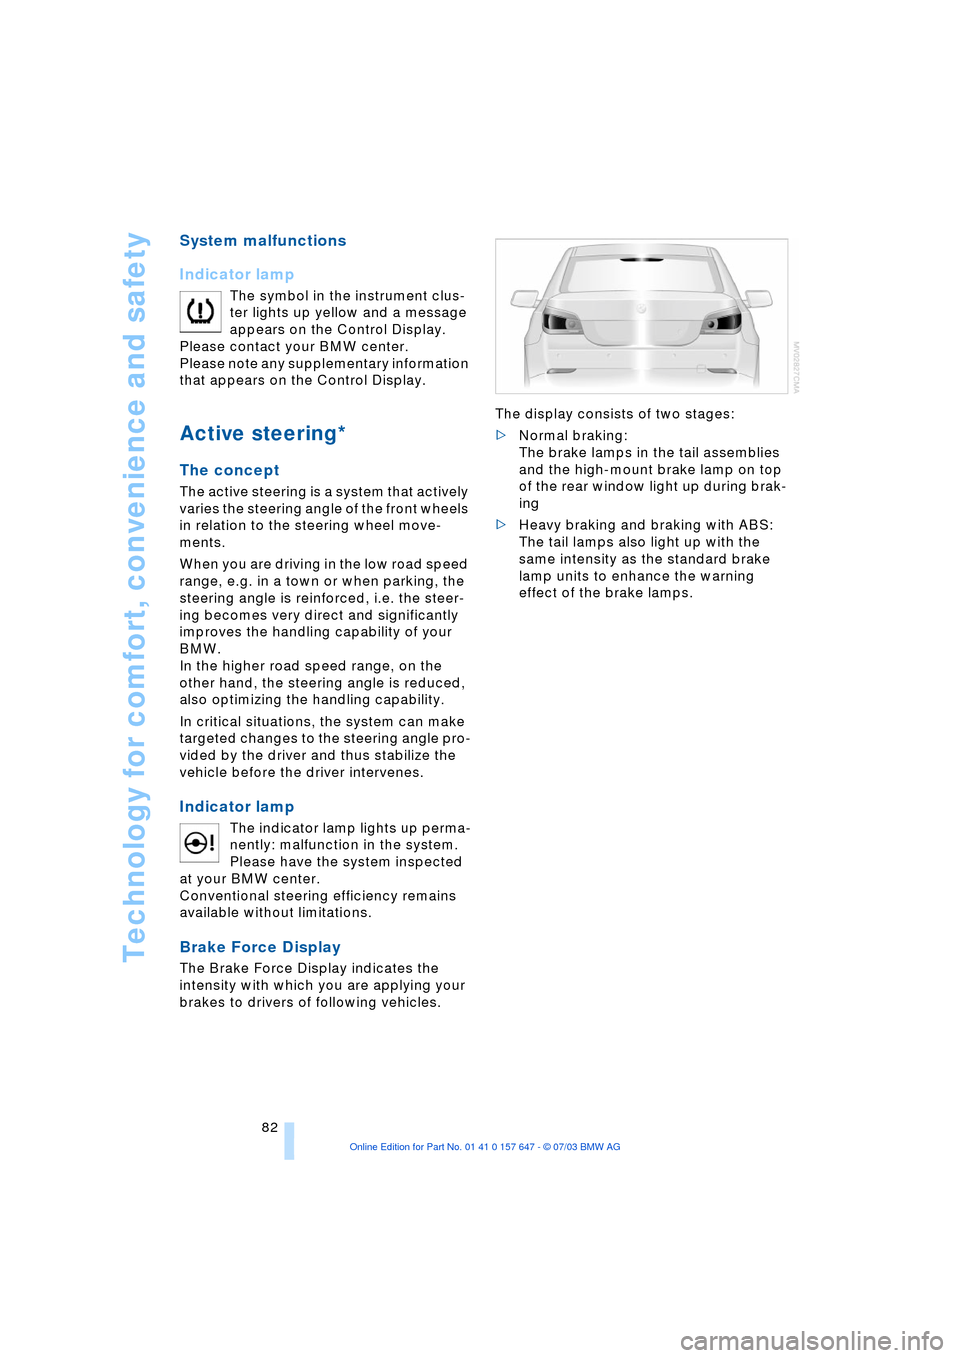
Brake Force Display
The Brake Force Display indicates the
intensity with which you are applying your
brakes to drivers of following vehicles. The display consists of two stages:
>Normal braking:
The brake lamps in the tail assemblies
and the high-mount brake lamp on top
of the rear window light up during brak-
ing
>Heavy braking and braking with ABS:
The tail lamps also light up with the
same intensity as the standard brake
lamp units to enhance the warning
effect of the brake lamps.
Page 108 of 220
Things to remember when driving
106
Things to remember when driving
Break-in procedures
To ensure that your vehicle continues to
provide optimized economy of operation
throughout an extended service life, we
request that you devote careful attention to
the following section.
Engine and differential
Up to 1,200 miles/2,000 km:
You should attempt to vary both vehicle
and engine speeds. Until the break-in
period has been completed, you should
also refrain from exceeding an engine
speed of 4,500 rpm or a driving speed of
100 mph/160 km/h.
Always obey all official speed limits.
Avoid full-throttle operation and use of the
transmission's kickdown mode during
these initial miles.
Once you have driven 1,200 miles/
2,000 km, the engine and vehicle speeds
can be gradually increased.
You should also comply with these break-in
procedures should the engine or differen-
tial need to be replaced at a later point.
Sequential manual transmission
SMG
Do not use the acceleration assistant dur-
ing the break-in period.
Tires
Due to technical factors associated with
their manufacture, tires do not achieve their
full traction potential until after an initial
break-in period. Therefore, drive reservedly
during the first 200 miles/300 km.
Brake system
Brakes require an initial break-in period of
approx. 300 miles/500 km to achieve opti-
mized contact and wear patterns between
brake pads and rotors.
Clutch
The function of the clutch is only at its opti-
mized level after a distance driven of
approx. 300 miles/500 km. During this
break-in period, engage the clutch gently.
General driving notes
High temperatures
Extreme temperatures occur at the
catalytic converter on this and every
catalyst-equipped vehicle. Do not remove
the heat shields installed adjacent to vari-
ous sections of the exhaust system, and
never apply undercoating to them. When
driving, standing at idle and while parking
take care to avoid possible contact
between the hot exhaust system and any
highly flammable materials such as hay,
leaves, grass, etc. Such contact could lead
to a fire, and with it the risk of serious prop-
erty damage as well as personal injury.<
Parking the vehicle
Condensation forms in the air conditioner
system during operation, and then exits
under the vehicle. Traces of condensed
water under the vehicle are thus normal.
Before driving into the car wash
Fold in the exterior mirrors, refer to
page 42, as otherwise they could be dam-
aged due to the width of the vehicle.
Hydroplaning
When driving on wet or slushy roads,
reduce road speed. If you do not, a
wedge of water can form between tires and
road surface.This phenomenon is referred
to as hydroplaning, and is characterized by
a partial or complete loss of contact
between the tires and the road surface, ulti-
mately undermining your ability to steer
and brake the vehicle.<
Page 208 of 220
Everything from A to Z
206 Directory for navigation,
refer to Address
book 120
Disc brakes 107
Displacement, refer to
Engine data 198
Display lighting 88
Displays
Ð refer to Cockpit 10
Ð refer to Control Display 17
Ð refer to Instrument
cluster 12
Displays on the windshield,
refer to Head-Up
Display 85
Disposal
Ð brake fluid 180
Ð coolant 179
Ð engine oil 179
Ð vehicle battery 189
Distance, refer to
Computer 71
Distance cruise control,
refer to Active cruise
control 59
"Distance to destin.Ò 71
Distance to destination,
refer to Computer 71
Distance warning, refer to
Park Distance Control 76
Divided rear seat back,
refer to Fold down rear
seat 101
Door entry lighting 89
Door keys 26
Door lock 29
"Door locks" 28
Doors
Ð manual operation 29
Ð remote control 28
DOT Quality Grades 173
Draft-free ventilation 94
"Driver" 42
"Driver's door only" 28
Driving light, refer to
Parking lamps/low
beams 87
Driving notes 106
Driving stability control 78
Driving tips, refer to Driving
notes 106Dry air, refer to Cooling
function 91
Drying the air, refer to
Cooling function 91
DSC Dynamic Stability
Control 78
Ð indicator lamp 78
DTC Dynamic Traction
Control 79
Ð indicator lamp 79
DVD for navigation 114
Dynamic Brake Control 79
Ð indicator lamp 79
Dynamic Driving Control 54
"Dynamic route" for
navigation 121
Dynamic Stability
Control 78
Ð indicator lamp 78
Dynamic Traction
Control 79
Ð indicator lamp 79
E
EBV Electronic Brake Force
Distribution 78
"Edit" on the portable
phone 154
Electrical malfunction
Ð door lock 29
Ð fuel filler door 168
Ð glass roof 35
Ð luggage compartment
lid 31
Electrical power windows,
refer to Windows 33
Electronic Brake
Force Distribution EBV 78
Electronic Stability
Program ESP, refer to
DSC Dynamic Stability
Control 78
Emergency assistance,
refer to Roadside
Assistance 191
Emergency call 190
Emergency operation, refer
to Manual operationEmergency release of
luggage compartment lid
from luggage
compartmentÕs interior 32
Emergency services, refer
to Roadside
Assistance 191
"Emission inspect." 67, 67
"Enable services" 162
"End call" 154
Energy-conscious driving,
refer to Energy Control 66
Energy Control 66
Engine
Ð breaking-in
procedure 106
Ð data 198
Ð speed 198
Ð starting 49
Engine compartment 178
Engine coolant 179
Engine hood 177
Engine oil
Ð adding 179
Ð checking the oil level 178
Ð prescribed oils 179
Engine output, refer to
Engine data 198
Engine speed 198
"Enter address" 116
Entering destination 117
Entering house number or
intersection 117
Entering switch-on times of
independent ventilation/
heating 95
Entering the address 116
Entering the
intersection 117
Entering the town/city for
navigation 117
Entering zip code for
navigation 117
"Entertainment" 130
"Entertainment
settings" 131
"Equalizer" 133
"Equalizer", audio
systems 131