2004 BMW 525I SEDAN brake
[x] Cancel search: brakePage 8 of 220
Notes
6
For your own safety
Fuels
Use unleaded gasoline only. Fuels
containing up to and including
10% ethanol or other oxygenates with up
to 2.8% oxygen by weight Ð that is,
15% MTBE or 3% methanol plus an equiv-
alent amount of co-solvent Ð will not void
the applicable warranties with respect to
defects in materials or workmanship. Field
experience has indicated significant differ-
ences in fuel quality Ð volatility, composi-
tion, additives, etc. Ð among gasolines
offered for sale in the United States and
Canada. The use of poor-quality fuels may
result in driveability, starting and stalling
problems, especially under certain environ-
mental conditions such as high ambient
temperature and high altitude.
Should you encounter driveability prob-
lems which you suspect could be related to
the fuel you are using, we recommend that
you respond by switching to a recognized
high-quality brand.
Failure to comply with these recommenda-
tions may result in unscheduled mainte-
nance.
Follow the relevant safety rules when you
are handling gasoline.
<
Maintenance and repair
Advanced technology, e. g. the use of
modern materials and high-perform-
ance electronics, requires specially
adapted maintenance and repair methods.
Therefore, only have corresponding work
on your BMW carried out by a BMW center
or a workshop that works according to
BMW repair procedures with correspond-
ingly trained personnel. If work is carried
out improperly there is a danger of conse-
quential damage and the related safety
risks.
<
Parts and accessories
For your own safety, use genuine
parts and accessories approved by
BMW.
When you purchase accessories tested
and approved by BMW and Genuine BMW
Parts, you simultaneously acquire the
assurance that they have been thoroughly
tested by BMW to ensure optimum perfor-
mance when installed on your vehicle.
BMW warrants these parts to be free from
defects in material and workmanship.
BMW will not accept any liability for dam-
age resulting from installation of parts and
accessories not approved by BMW.
BMW cannot test every product made by
other manufacturers to verify if it can be
used on a BMW safely and without risk to
either the vehicle, its operation, or its occu-
pants.
Genuine BMW Parts, BMW Accessories
and other products approved by BMW,
together with professional advice on using
these items, are available from all BMW
centers.
Installation and operation of non-BMW
approved accessories such as alarms,
radios, amplifiers, radar detectors, wheels,
suspension components, brake dust
shields, telephones Ð including operation of
any portable phone from within the vehicle
without using an externally mounted
antenna Ð or transceiver equipment, for
instance, CBs, walkie-talkie, ham radio or
similar accessories, may cause extensive
damage to the vehicle, compromise its
safety, interfere with the vehicle's electrical
system or affect the validity of the BMW
Limited Warranty. Consult your BMW cen-
ter for additional information.
<
Maintenance, replacement, or repair
of the emission control devices and
systems may be performed by any automo-
tive repair establishment or individual using
any certified automotive part.
<
Page 15 of 220

At a glance
13Reference
Controls
Driving tips
Communications
Navigation
Entertainment
Mobility
Indicator and warning
lamps
Technology that monitors itself
The indicator and warning lamps identified
by the
+ symbol are subjected to an oper-
ation check each time you switch on the
ignition or start the engine. They each light
up once for different periods of time.
When a malfunction occurs in a monitored
system, the corresponding lamp will either
fail to go out when the engine is started, or
it will come on again during normal driving.
For information on how you should respond
when this happens, please refer to the
pages indicated.
Colors
The indicator and warning lamps can light
up in different colors and combinations.
The following section explains the signifi-
cance of the individual colors as well as
how you should respond when they
appear.
>Red:
Stop immediately
or
important reminder
>Red and yellow:
Continue driving moderately
>Yellow:
Have checked soon
or
for your information
>Green or blue:
For your information.
Indicator and warning lamps of the
Check Control
Other indicator and warning lamps appear
in display 6 of the instrument cluster as
necessary, accompanied by supplemen-
tary text on the Control Display, refer to
Check Control, page 68. Turn signal indicators 56
Active steering
+82
Handbrake/brake fluid, brake
hydraulics/DBC Dynamic Brake
Control
+50/ 180/ 79
Handbrake/brake fluid, brake
hydraulics/DBC Dynamic Brake
Control for Canadian models
Airbags
+83
Service Engine Soon
+183
If the indicator lamp comes on
either continuously or intermit-
tently, this indicates a fault in the
emissions-related electronic sys-
tems. Although the vehicle
remains operational, you should
have the systems checked by your
BMW center at the earliest possi-
ble opportunity.
Service Engine Soon indicator
lamp for Canadian models.
Front fog lamps 89
ABS Antilock Brake System
+77
DTC Dynamic Traction Control79
High beams/headlamp flasher 88
Please fasten safety belt
+40
DSC Dynamic Stability
Control
+78
Check Gas Cap168
lamp for US models
Page 51 of 220
Controls
49Reference
At a glance
Driving tips
Communications
Navigation
Entertainment
Mobility
Driving
Ignition lock
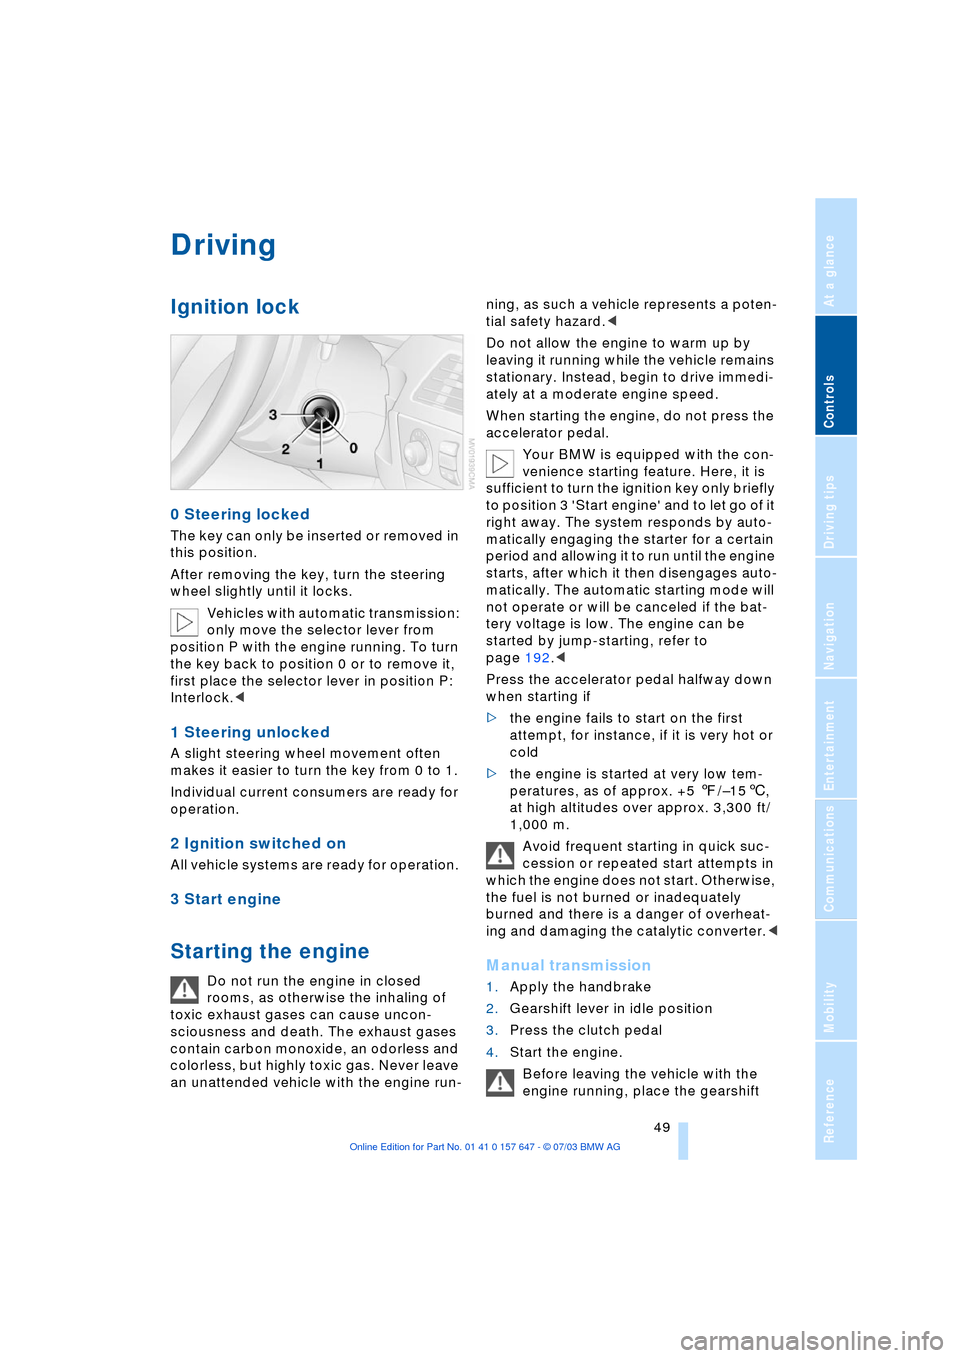
0 Steering locked
The key can only be inserted or removed in
this position.
After removing the key, turn the steering
wheel slightly until it locks.
Vehicles with automatic transmission:
only move the selector lever from
position P with the engine running. To turn
the key back to position 0 or to remove it,
first place the selector lever in position P:
Interlock.<
1 Steering unlocked
A slight steering wheel movement often
makes it easier to turn the key from 0 to 1.
Individual current consumers are ready for
operation.
2 Ignition switched on
All vehicle systems are ready for operation.
3 Start engine
Starting the engine
Do not run the engine in closed
rooms, as otherwise the inhaling of
toxic exhaust gases can cause uncon-
sciousness and death. The exhaust gases
contain carbon monoxide, an odorless and
colorless, but highly toxic gas. Never leave
an unattended vehicle with the engine run-ning, as such a vehicle represents a poten-
tial safety hazard.<
Do not allow the engine to warm up by
leaving it running while the vehicle remains
stationary. Instead, begin to drive immedi-
ately at a moderate engine speed.
When starting the engine, do not press the
accelerator pedal.
Your BMW is equipped with the con-
venience starting feature. Here, it is
sufficient to turn the ignition key only briefly
to position 3 'Start engine' and to let go of it
right away. The system responds by auto-
matically engaging the starter for a certain
period and allowing it to run until the engine
starts, after which it then disengages auto-
matically. The automatic starting mode will
not operate or will be canceled if the bat-
tery voltage is low. The engine can be
started by jump-starting, refer to
page 192.<
Press the accelerator pedal halfway down
when starting if
>the engine fails to start on the first
attempt, for instance, if it is very hot or
cold
>the engine is started at very low tem-
peratures, as of approx. +5 7/Ð156,
at high altitudes over approx. 3,300 ft/
1,000 m.
Avoid frequent starting in quick suc-
cession or repeated start attempts in
which the engine does not start. Otherwise,
the fuel is not burned or inadequately
burned and there is a danger of overheat-
ing and damaging the catalytic converter.
2.Gearshift lever in idle position
3.Press the clutch pedal
4.Start the engine.
Before leaving the vehicle with the
engine running, place the gearshift
Page 52 of 220
Driving
50 lever in idle position and apply the hand-
brake.
Never leave an unattended vehicle with the
engine running, as such a vehicle repre-
sents a potential safety hazard.<
Automatic transmission
1.Press the brake pedal
2.Place the selector lever in position P
or N
3.Start the engine.
To prevent the vehicle from rolling,
always select position P or N and
engage the handbrake before leaving the
vehicle with the engine running.
Never leave an unattended vehicle with the
engine running, as such a vehicle repre-
sents a potential safety hazard.<
Sequential manual transmission
SMG
1.Press the brake pedal
2.Place the selector lever in the idle posi-
tion N
3.Start the engine.
If the engine does not start, engage
the last gear selected, refer to Display
in the instrument cluster, and return the
selector lever to the idle position N.<
Before leaving the vehicle with the
engine running, place the selector
lever in position N and apply the hand-
brake.
Never leave an unattended vehicle with the
engine running, as such a vehicle repre-
sents a potential safety hazard.<
Switching off engine
Do not remove the ignition key while
the vehicle is rolling, as otherwise the
steering wheel lock would engage while
steering.
When leaving the vehicle, always remove
the ignition key and lock the steering.
When parking on downward inclines, apply
the handbrake.<
Manual transmission
Turn the ignition key to position 1 or 0.
Automatic transmission
1.Engage selector-lever position P
2.Turn the ignition key to position 1 or 0.
Sequential manual transmission
SMG
If the selector lever is in position R or in the
sequential mode and you turn the ignition
key to position 1 or 0, the gear remains
engaged automatically.
If the selector lever is in the idle position N
and you turn the ignition key to position 1
or 0, an acoustic signal and the flashing
gear indicator in the display reminds you
that the vehicle is not secured against roll-
ing away.
The warning stops sounding after approx.
9 seconds.
When parking on downward inclines,
apply the handbrake. Engaging a gear
is not sufficient to secure the vehicle from
rolling away under certain circumstances.<
Handbrake
The handbrake is primarily intended to pre-
vent the vehicle from rolling while parked; it
brakes the rear wheels.
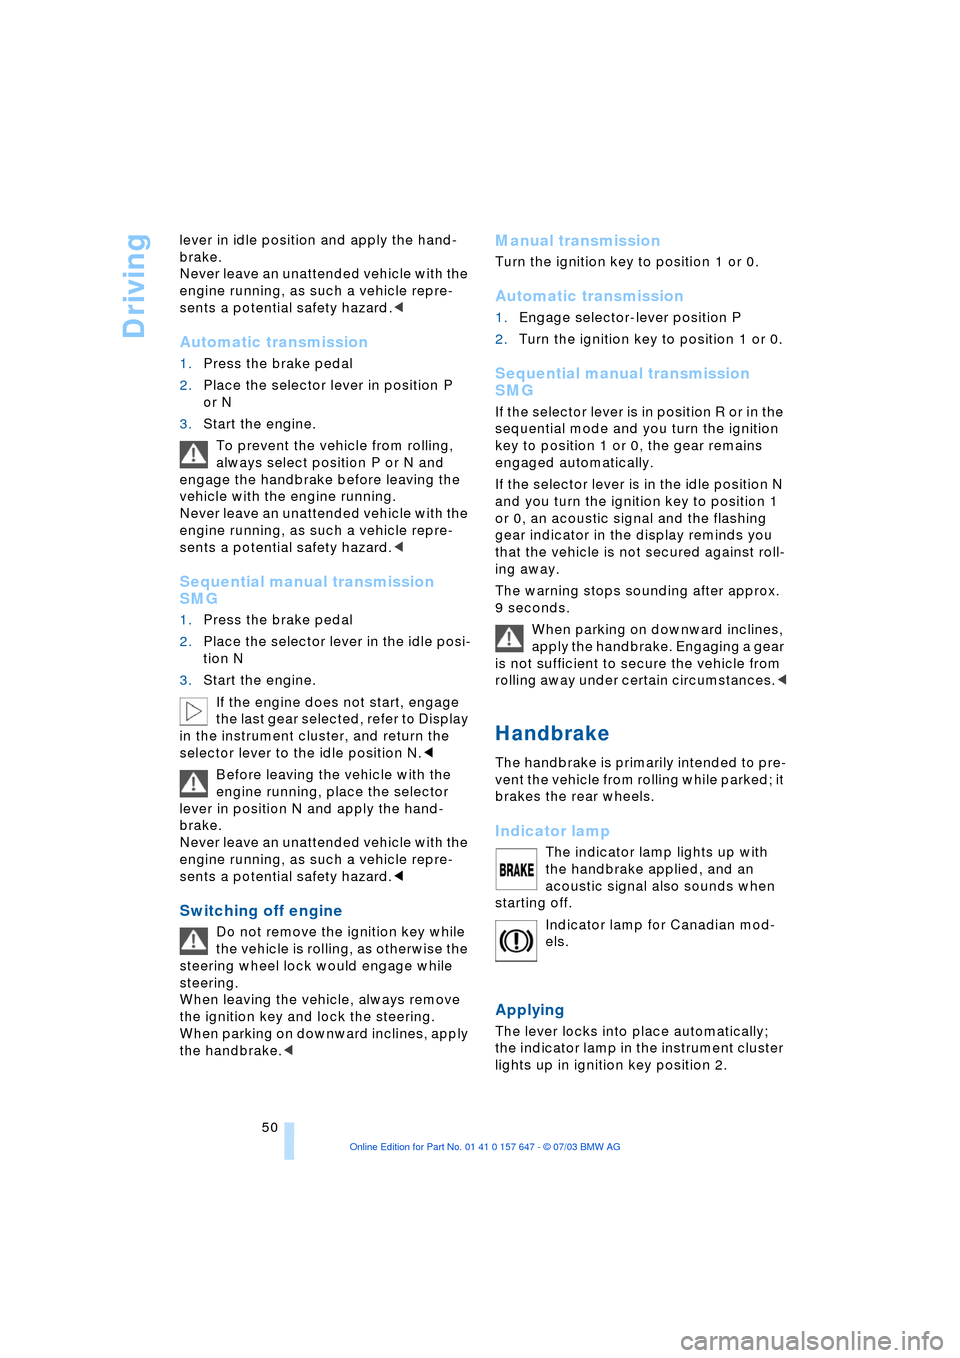
Indicator lamp
The indicator lamp lights up with
the handbrake applied, and an
acoustic signal also sounds when
starting off.
Indicator lamp for Canadian mod-
els.
Applying
The lever locks into place automatically;
the indicator lamp in the instrument cluster
lights up in ignition key position 2.
Page 53 of 220
Controls
51Reference
At a glance
Driving tips
Communications
Navigation
Entertainment
Mobility
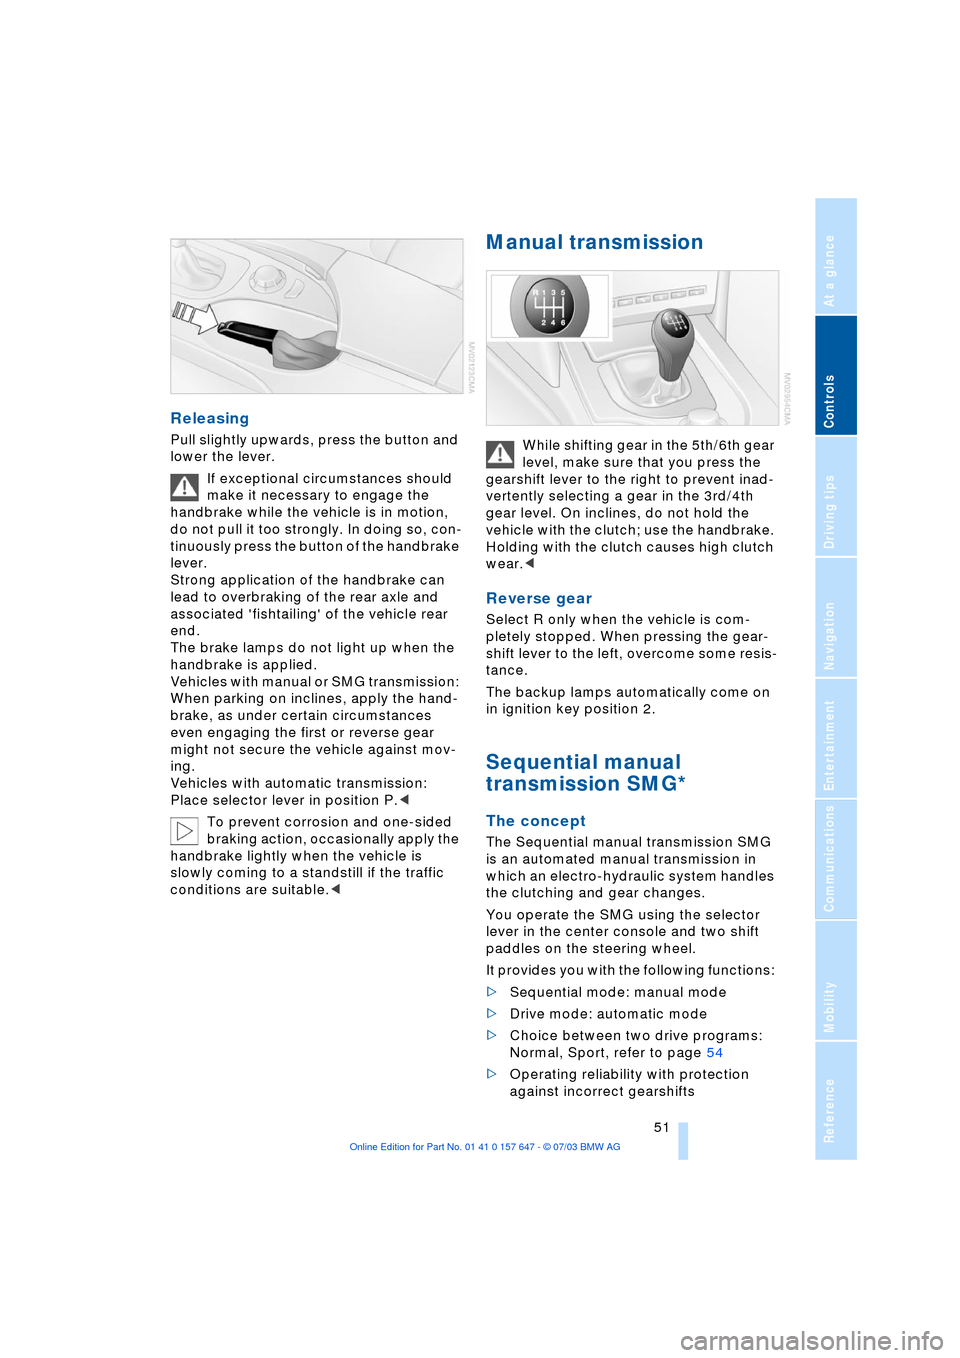
Releasing
Pull slightly upwards, press the button and
lower the lever.
If exceptional circumstances should
make it necessary to engage the
handbrake while the vehicle is in motion,
do not pull it too strongly. In doing so, con-
tinuously press the button of the handbrake
lever.
Strong application of the handbrake can
lead to overbraking of the rear axle and
associated 'fishtailing' of the vehicle rear
end.
The brake lamps do not light up when the
handbrake is applied.
Vehicles with manual or SMG transmission:
When parking on inclines, apply the hand-
brake, as under certain circumstances
even engaging the first or reverse gear
might not secure the vehicle against mov-
ing.
Vehicles with automatic transmission:
Place selector lever in position P.<
To prevent corrosion and one-sided
braking action, occasionally apply the
handbrake lightly when the vehicle is
slowly coming to a standstill if the traffic
conditions are suitable.<
Manual transmission
While shifting gear in the 5th/6th gear
level, make sure that you press the
gearshift lever to the right to prevent inad-
vertently selecting a gear in the 3rd/4th
gear level. On inclines, do not hold the
vehicle with the clutch; use the handbrake.
Holding with the clutch causes high clutch
wear.<
Reverse gear
Select R only when the vehicle is com-
pletely stopped. When pressing the gear-
shift lever to the left, overcome some resis-
tance.
The backup lamps automatically come on
in ignition key position 2.
Sequential manual
transmission SMG*
The concept
The Sequential manual transmission SMG
is an automated manual transmission in
which an electro-hydraulic system handles
the clutching and gear changes.
You operate the SMG using the selector
lever in the center console and two shift
paddles on the steering wheel.
It provides you with the following functions:
>Sequential mode: manual mode
>Drive mode: automatic mode
>Choice between two drive programs:
Normal, Sport, refer to page 54
>Operating reliability with protection
against incorrect gearshifts
Page 54 of 220
Driving
52 >Automatic upshifts and downshifts in
the Drive mode
>Automatic downshifts with minimum
engine speed
>Kickdown function in the Drive mode
>Acceleration assistant, refer to
page 54.
Selector-lever positions
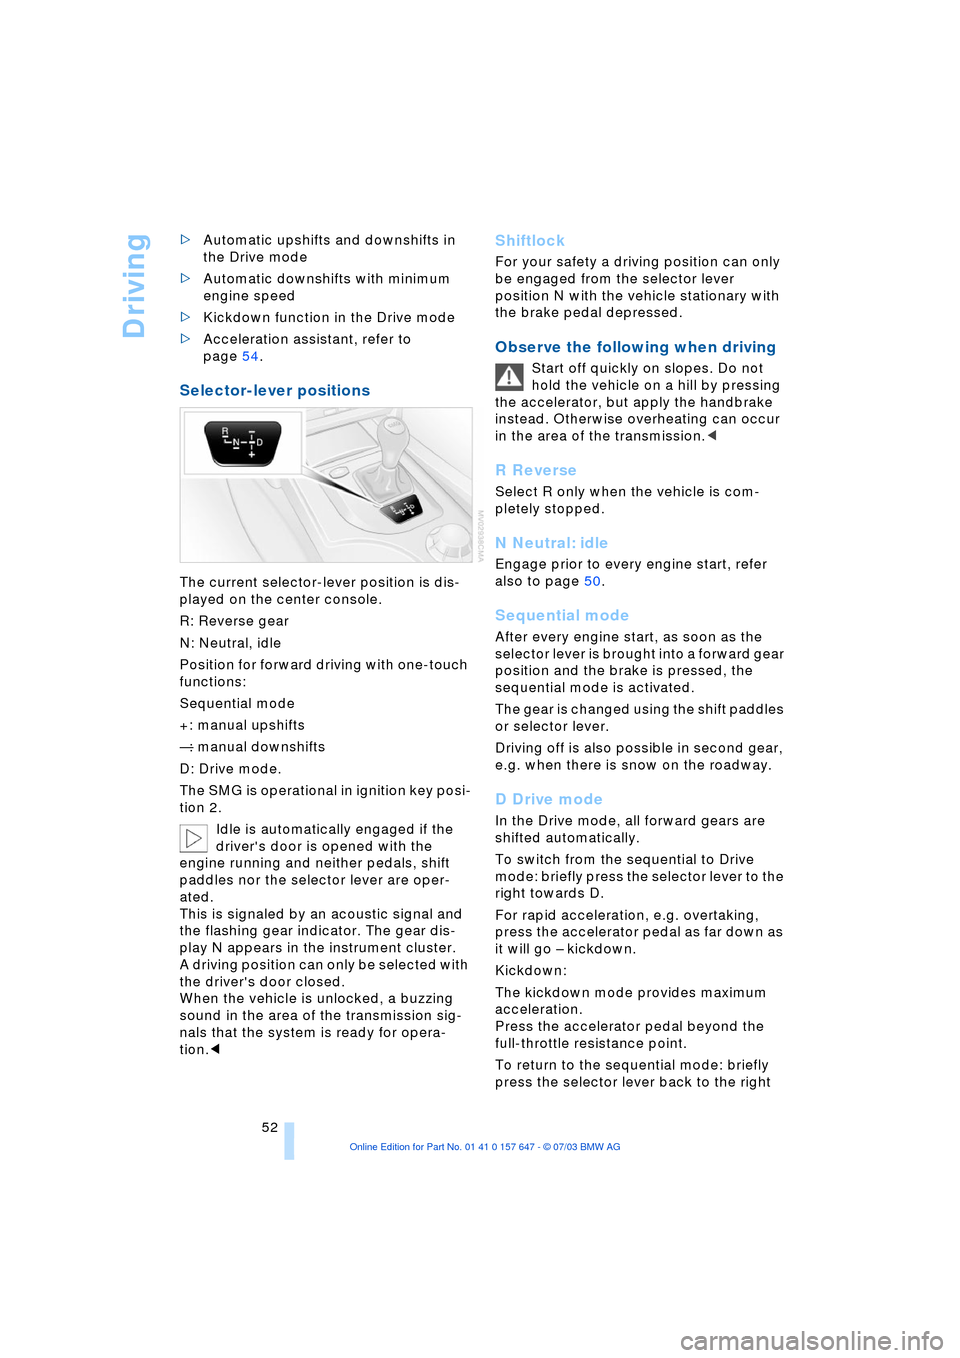
The current selector-lever position is dis-
played on the center console.
R: Reverse gear
N: Neutral, idle
Position for forward driving with one-touch
functions:
Sequential mode
+: manual upshifts
Ñ: manual downshifts
D: Drive mode.
The SMG is operational in ignition key posi-
tion 2.
Idle is automatically engaged if the
driver's door is opened with the
engine running and neither pedals, shift
paddles nor the selector lever are oper-
ated.
This is signaled by an acoustic signal and
the flashing gear indicator. The gear dis-
play N appears in the instrument cluster.
A driving position can only be selected with
the driver's door closed.
When the vehicle is unlocked, a buzzing
sound in the area of the transmission sig-
nals that the system is ready for opera-
tion.<
Shiftlock
For your safety a driving position can only
be engaged from the selector lever
position N with the vehicle stationary with
the brake pedal depressed.
Observe the following when driving
Start off quickly on slopes. Do not
hold the vehicle on a hill by pressing
the accelerator, but apply the handbrake
instead. Otherwise overheating can occur
in the area of the transmission.<
R Reverse
Select R only when the vehicle is com-
pletely stopped.
N Neutral: idle
Engage prior to every engine start, refer
also to page 50.
Sequential mode
After every engine start, as soon as the
selector lever is brought into a forward gear
position and the brake is pressed, the
sequential mode is activated.
The gear is changed using the shift paddles
or selector lever.
Driving off is also possible in second gear,
e.g. when there is snow on the roadway.
D Drive mode
In the Drive mode, all forward gears are
shifted automatically.
To switch from the sequential to Drive
mode: briefly press the selector lever to the
right towards D.
For rapid acceleration, e.g. overtaking,
press the accelerator pedal as far down as
it will go Ð kickdown.
Kickdown:
The kickdown mode provides maximum
acceleration.
Press the accelerator pedal beyond the
full-throttle resistance point.
To return to the sequential mode: briefly
press the selector lever back to the right
Page 57 of 220
Controls
55Reference
At a glance
Driving tips
Communications
Navigation
Entertainment
Mobility
Changing the selector-lever
positions
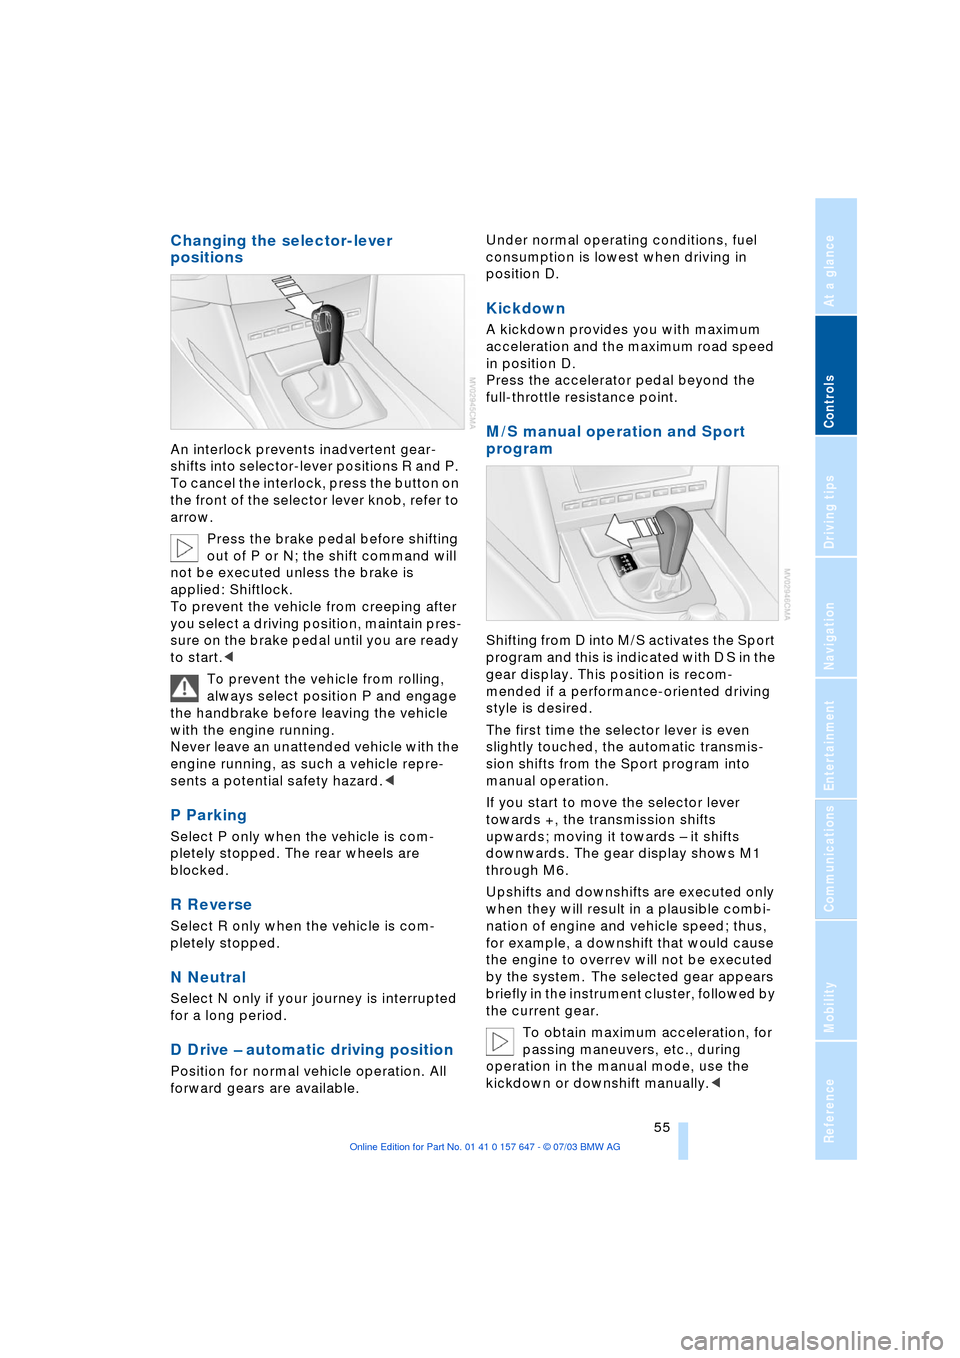
An interlock prevents inadvertent gear-
shifts into selector-lever positions R and P.
To cancel the interlock, press the button on
the front of the selector lever knob, refer to
arrow.
Press the brake pedal before shifting
out of P or N; the shift command will
not be executed unless the brake is
applied: Shiftlock.
To prevent the vehicle from creeping after
you select a driving position, maintain pres-
sure on the brake pedal until you are ready
to start.<
To prevent the vehicle from rolling,
always select position P and engage
the handbrake before leaving the vehicle
with the engine running.
Never leave an unattended vehicle with the
engine running, as such a vehicle repre-
sents a potential safety hazard.<
P Parking
Select P only when the vehicle is com-
pletely stopped. The rear wheels are
blocked.
R Reverse
Select R only when the vehicle is com-
pletely stopped.
N Neutral
Select N only if your journey is interrupted
for a long period.
D Drive Ð automatic driving position
Position for normal vehicle operation. All
forward gears are available.Under normal operating conditions, fuel
consumption is lowest when driving in
position D.
Kickdown
A kickdown provides you with maximum
acceleration and the maximum road speed
in position D.
Press the accelerator pedal beyond the
full-throttle resistance point.
M/S manual operation and Sport
program
Shifting from D into M/S activates the Sport
program and this is indicated with D S in the
gear display. This position is recom-
mended if a performance-oriented driving
style is desired.
The first time the selector lever is even
slightly touched, the automatic transmis-
sion shifts from the Sport program into
manual operation.
If you start to move the selector lever
towards +, the transmission shifts
upwards; moving it towards Ð it shifts
downwards. The gear display shows M1
through M6.
Upshifts and downshifts are executed only
when they will result in a plausible combi-
nation of engine and vehicle speed; thus,
for example, a downshift that would cause
the engine to overrev will not be executed
by the system. The selected gear appears
briefly in the instrument cluster, followed by
the current gear.
To obtain maximum acceleration, for
passing maneuvers, etc., during
operation in the manual mode, use the
kickdown or downshift manually.<
Page 60 of 220
Driving
58 children. Always observe the instructions
for use provided on the containers.<
Washer fluid reservoir
Capacity: approx. 3.2 US quarts/3 liters for
the windshield washer system or approx.
5.3 US quarts/5 liters in conjunction with
headlamp washer system.
Fill with water and Ð if required Ð with a
washer antifreeze, according to manufac-
turer's recommendations.
In order to keep to the mixture ratio,
mix the washer fluid before filling.<
Cruise control*
The concept
The cruise control is available for use at
speeds of approx. 20 mph/30 km/h and
higher. The vehicle maintains and stores
the speed that you set using the lever
mounted on the steering column.
Do not use the cruise control when
driving on winding roads, in heavy
traffic or in poor road conditions Ð e.g.
snow, rain, ice, loose road surface Ð that do
not permit a constant speed.<
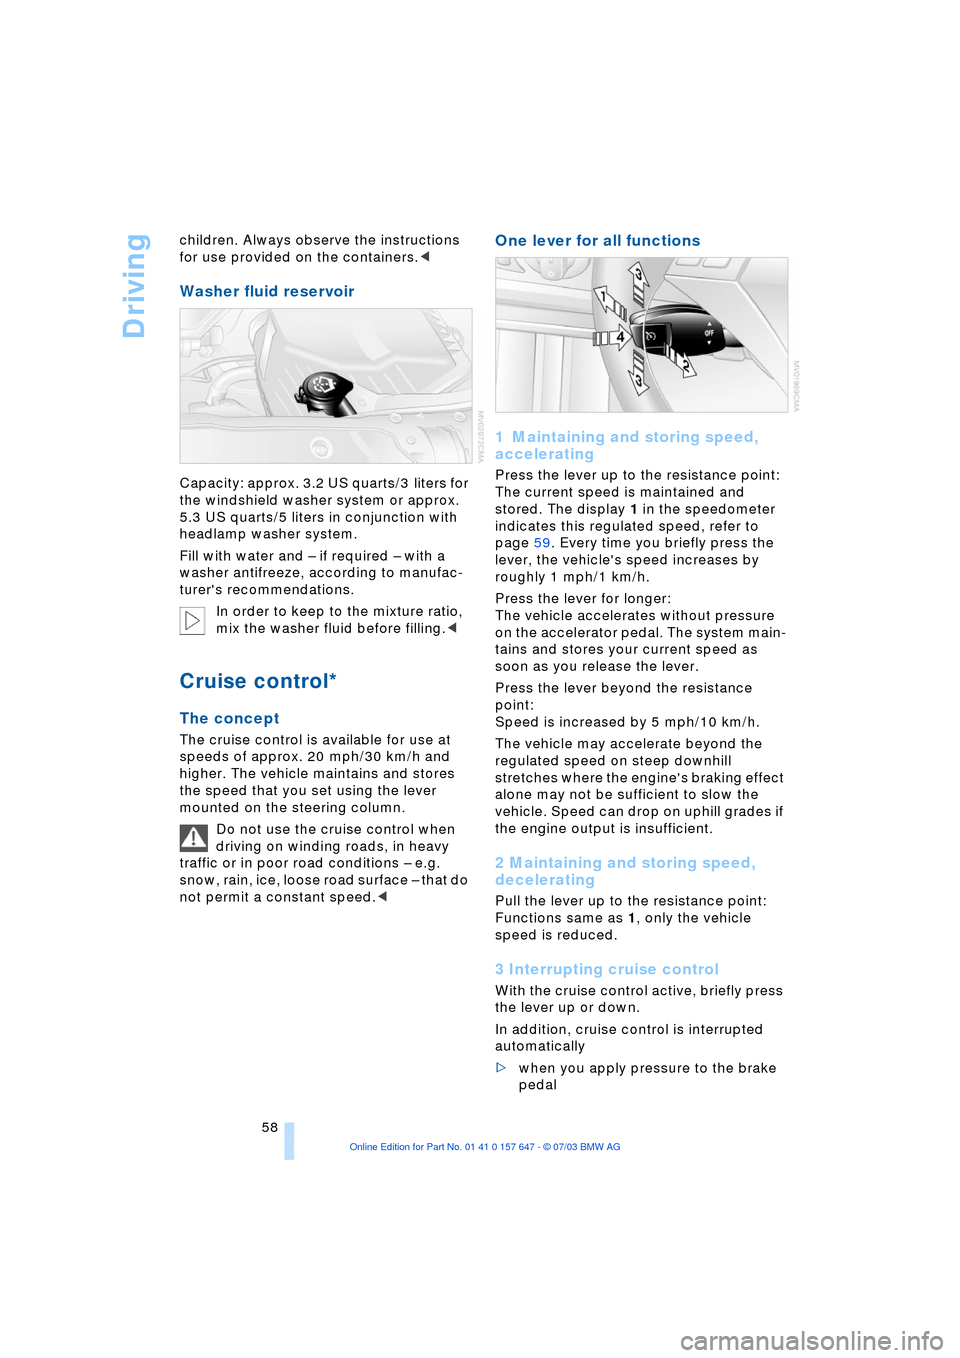
One lever for all functions
1 Maintaining and storing speed,
accelerating
Press the lever up to the resistance point:
The current speed is maintained and
stored. The display 1 in the speedometer
indicates this regulated speed, refer to
page 59. Every time you briefly press the
lever, the vehicle's speed increases by
roughly 1 mph/1 km/h.
Press the lever for longer:
The vehicle accelerates without pressure
on the accelerator pedal. The system main-
tains and stores your current speed as
soon as you release the lever.
Press the lever beyond the resistance
point:
Speed is increased by 5 mph/10 km/h.
The vehicle may accelerate beyond the
regulated speed on steep downhill
stretches where the engine's braking effect
alone may not be sufficient to slow the
vehicle. Speed can drop on uphill grades if
the engine output is insufficient.
2 Maintaining and storing speed,
decelerating
Pull the lever up to the resistance point:
Functions same as 1, only the vehicle
speed is reduced.
3 Interrupting cruise control
With the cruise control active, briefly press
the lever up or down.
In addition, cruise control is interrupted
automatically
>when you apply pressure to the brake
pedal