2004 BMW 525I SEDAN rear entertainment
[x] Cancel search: rear entertainmentPage 101 of 220
Controls
99Reference
At a glance
Driving tips
Communications
Navigation
Entertainment
Mobility
higher than in the rest of the interior. Close
the vent as required.<
Adjustments
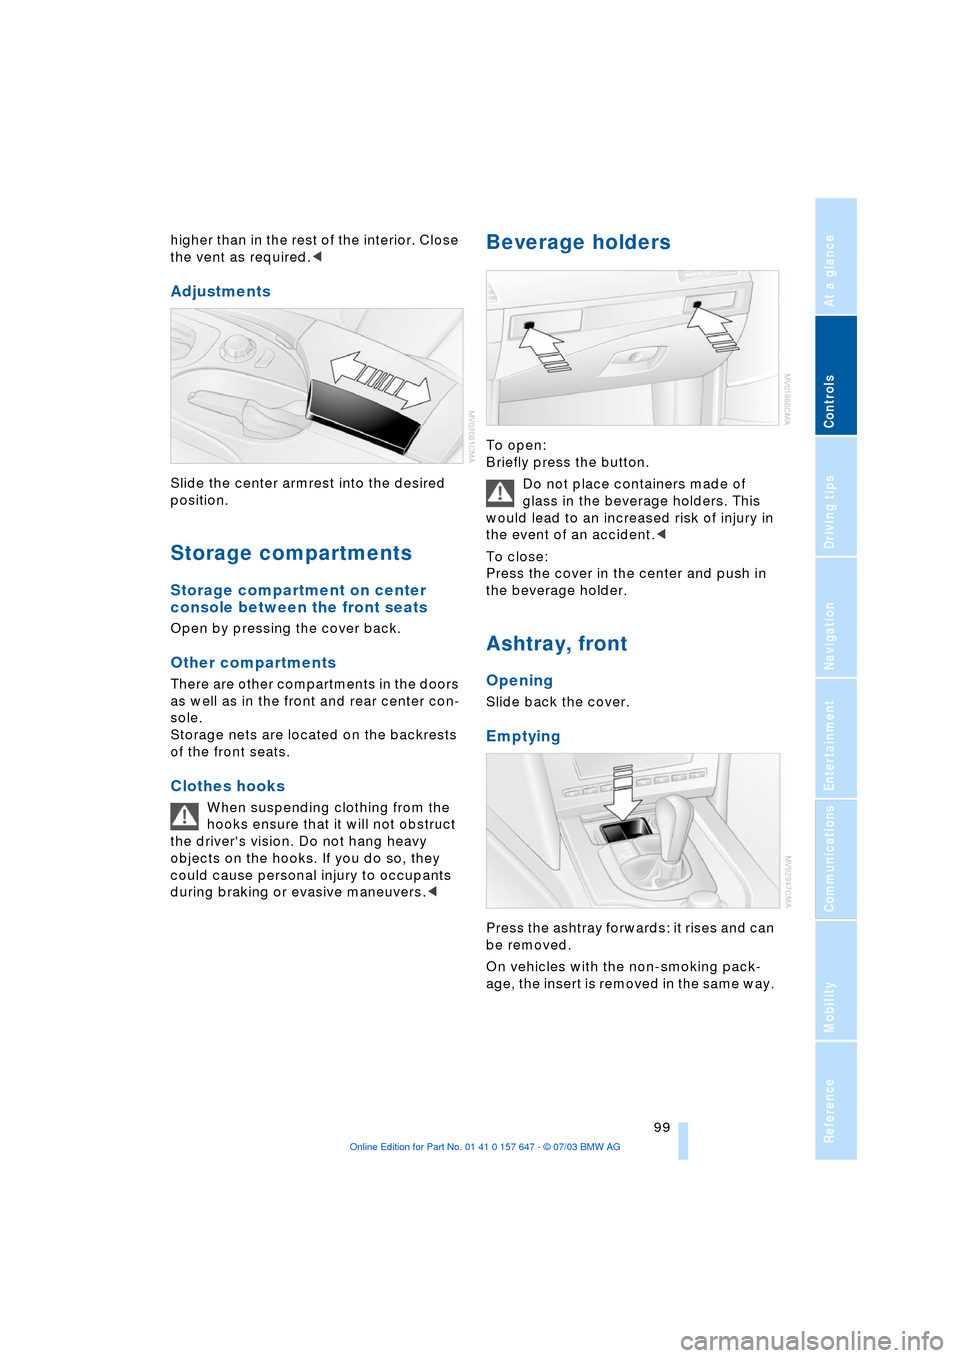
Slide the center armrest into the desired
position.
Storage compartments
Storage compartment on center
console between the front seats
Open by pressing the cover back.
Other compartments
There are other compartments in the doors
as well as in the front and rear center con-
sole.
Storage nets are located on the backrests
of the front seats.
Clothes hooks
When suspending clothing from the
hooks ensure that it will not obstruct
the driver's vision. Do not hang heavy
objects on the hooks. If you do so, they
could cause personal injury to occupants
during braking or evasive maneuvers.<
Beverage holders
To open:
Briefly press the button.
Do not place containers made of
glass in the beverage holders. This
would lead to an increased risk of injury in
the event of an accident.<
To close:
Press the cover in the center and push in
the beverage holder.
Ashtray, front
Opening
Slide back the cover.
Emptying
Press the ashtray forwards: it rises and can
be removed.
On vehicles with the non-smoking pack-
age, the insert is removed in the same way.
Page 103 of 220
Controls
101Reference
At a glance
Driving tips
Communications
Navigation
Entertainment
Mobility
Rear center armrest
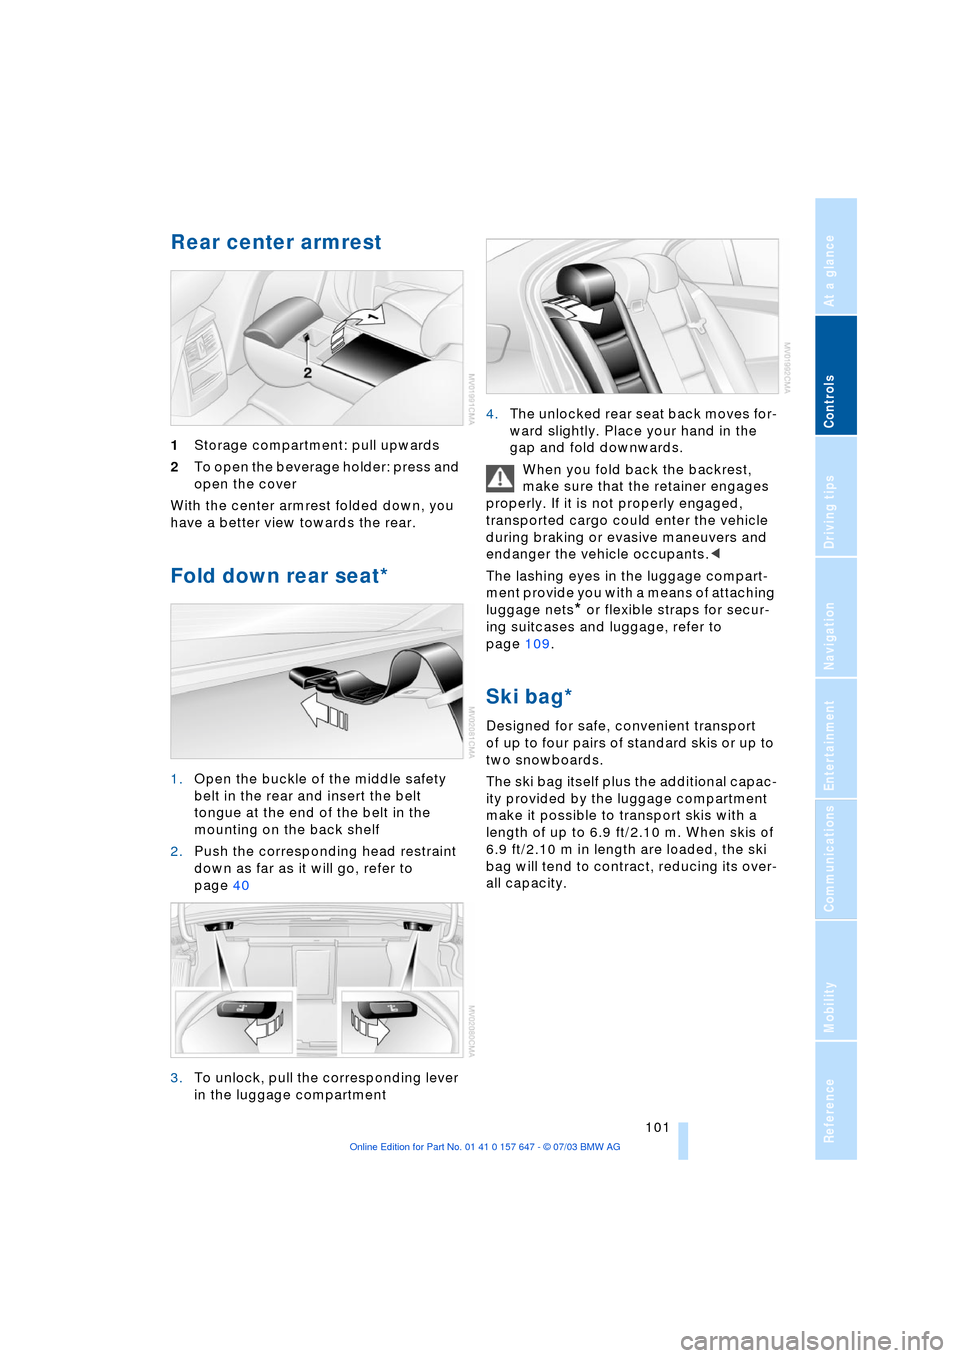
1Storage compartment: pull upwards
2To open the beverage holder: press and
open the cover
With the center armrest folded down, you
have a better view towards the rear.
Fold down rear seat*
1.Open the buckle of the middle safety
belt in the rear and insert the belt
tongue at the end of the belt in the
mounting on the back shelf
2.Push the corresponding head restraint
down as far as it will go, refer to
page 40
3.To unlock, pull the corresponding lever
in the luggage compartment 4.The unlocked rear seat back moves for-
ward slightly. Place your hand in the
gap and fold downwards.
When you fold back the backrest,
make sure that the retainer engages
properly. If it is not properly engaged,
transported cargo could enter the vehicle
during braking or evasive maneuvers and
endanger the vehicle occupants.<
The lashing eyes in the luggage compart-
ment provide you with a means of attaching
luggage nets
* or flexible straps for secur-
ing suitcases and luggage, refer to
page 109.
Ski bag*
Designed for safe, convenient transport
of up to four pairs of standard skis or up to
two snowboards.
The ski bag itself plus the additional capac-
ity provided by the luggage compartment
make it possible to transport skis with a
length of up to 6.9 ft/2.10 m. When skis of
6.9 ft/2.10 m in length are loaded, the ski
bag will tend to contract, reducing its over-
all capacity.
Page 111 of 220
Driving tips
109Reference
At a glance
Controls
Communications
Navigation
Entertainment
Mobility
Stowing cargo
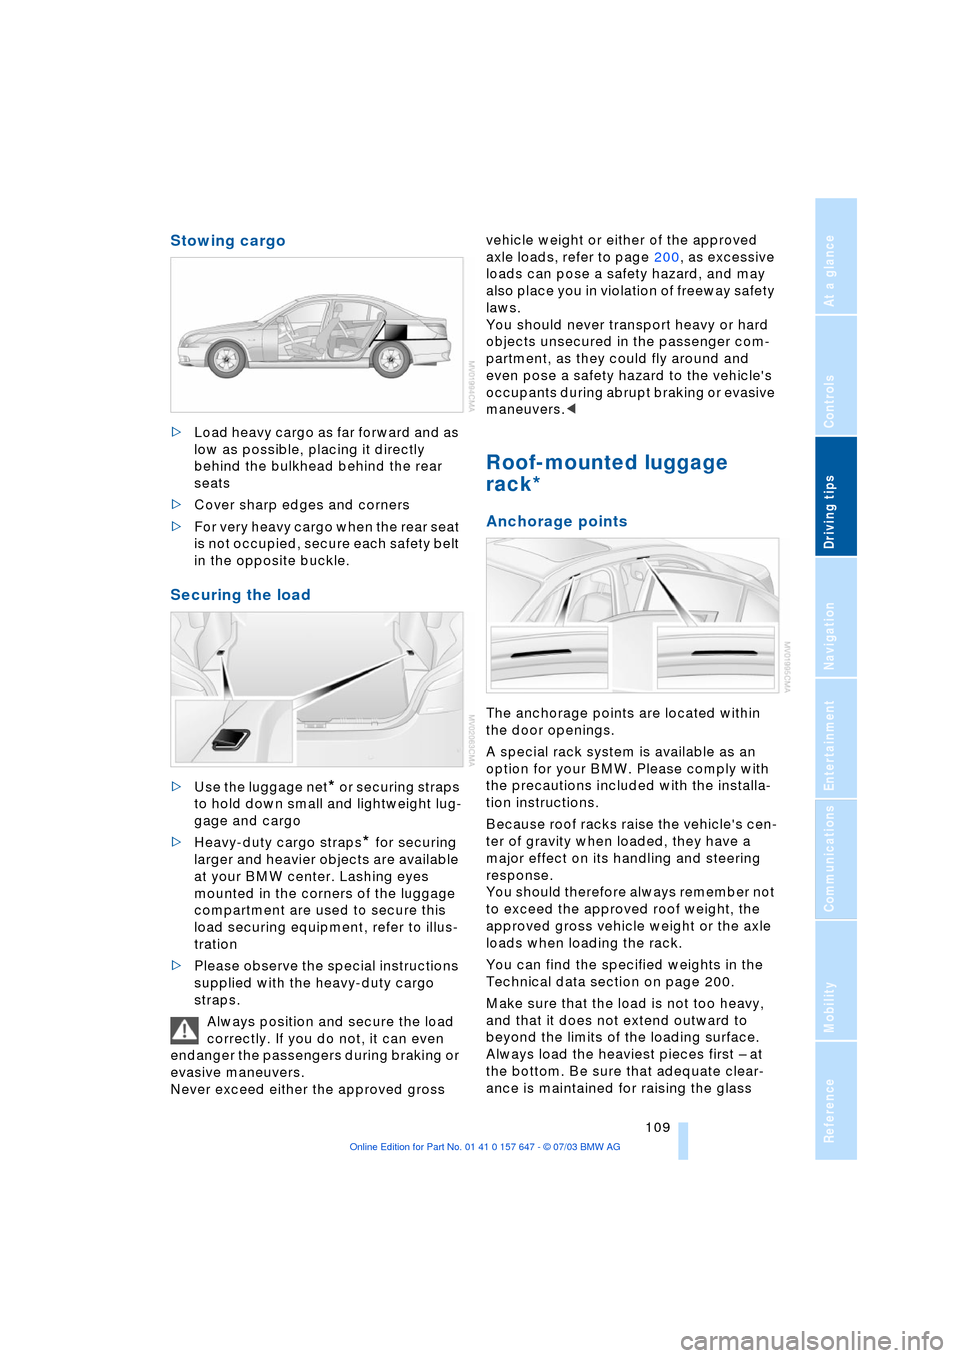
>Load heavy cargo as far forward and as
low as possible, placing it directly
behind the bulkhead behind the rear
seats
>Cover sharp edges and corners
>For very heavy cargo when the rear seat
is not occupied, secure each safety belt
in the opposite buckle.
Securing the load
>Use the luggage net* or securing straps
to hold down small and lightweight lug-
gage and cargo
>Heavy-duty cargo straps
* for securing
larger and heavier objects are available
at your BMW center. Lashing eyes
mounted in the corners of the luggage
compartment are used to secure this
load securing equipment, refer to illus-
tration
>Please observe the special instructions
supplied with the heavy-duty cargo
straps.
Always position and secure the load
correctly. If you do not, it can even
endanger the passengers during braking or
evasive maneuvers.
Never exceed either the approved gross vehicle weight or either of the approved
axle loads, refer to page 200, as excessive
loads can pose a safety hazard, and may
also place you in violation of freeway safety
laws.
You should never transport heavy or hard
objects unsecured in the passenger com-
partment, as they could fly around and
even pose a safety hazard to the vehicle's
occupants during abrupt braking or evasive
maneuvers.<
Roof-mounted luggage
rack*
Anchorage points
The anchorage points are located within
the door openings.
A special rack system is available as an
option for your BMW. Please comply with
the precautions included with the installa-
tion instructions.
Because roof racks raise the vehicle's cen-
ter of gravity when loaded, they have a
major effect on its handling and steering
response.
You should therefore always remember not
to exceed the approved roof weight, the
approved gross vehicle weight or the axle
loads when loading the rack.
You can find the specified weights in the
Technical data section on page 200.
Make sure that the load is not too heavy,
and that it does not extend outward to
beyond the limits of the loading surface.
Always load the heaviest pieces first Ð at
the bottom. Be sure that adequate clear-
ance is maintained for raising the glass
Page 133 of 220
Navigation
Entertainment
Driving tips
131Reference
At a glance
Controls
Communications
Mobility
Operating temperatures
The system is configured for operat-
ing temperatures of 57/Ð156 to
1407/+606. Outside this temperature
range, malfunctions can occur.<
Care instructions
You can find everything you need to know
on this topic by consulting the separate
Caring for your vehicle brochure.
Switching on/off
Press button 1, refer to page 130.
Adjusting the volume
Adjusting the volume for audio
sources
The setting is made in dependence on a
specific key.
Turn button 1 until the desired volume has
been reached.
Tone control
You can change the following tone settings
in dependence on a specific key:
>Treble
>Bass
>Balance:
Right/left volume balance
>Fader:
Front/rear volume balance
>Speed volume:
Raises the volume with increasing
speed
>LOGIC7 spatial sound
*:
Improvement in spatial acoustics in all
frequency ranges
>Equalizer
*:
Setting individual frequency ranges to
include spatial acoustics>Reset:
Resets the tone settings to their stan-
dard default settings.
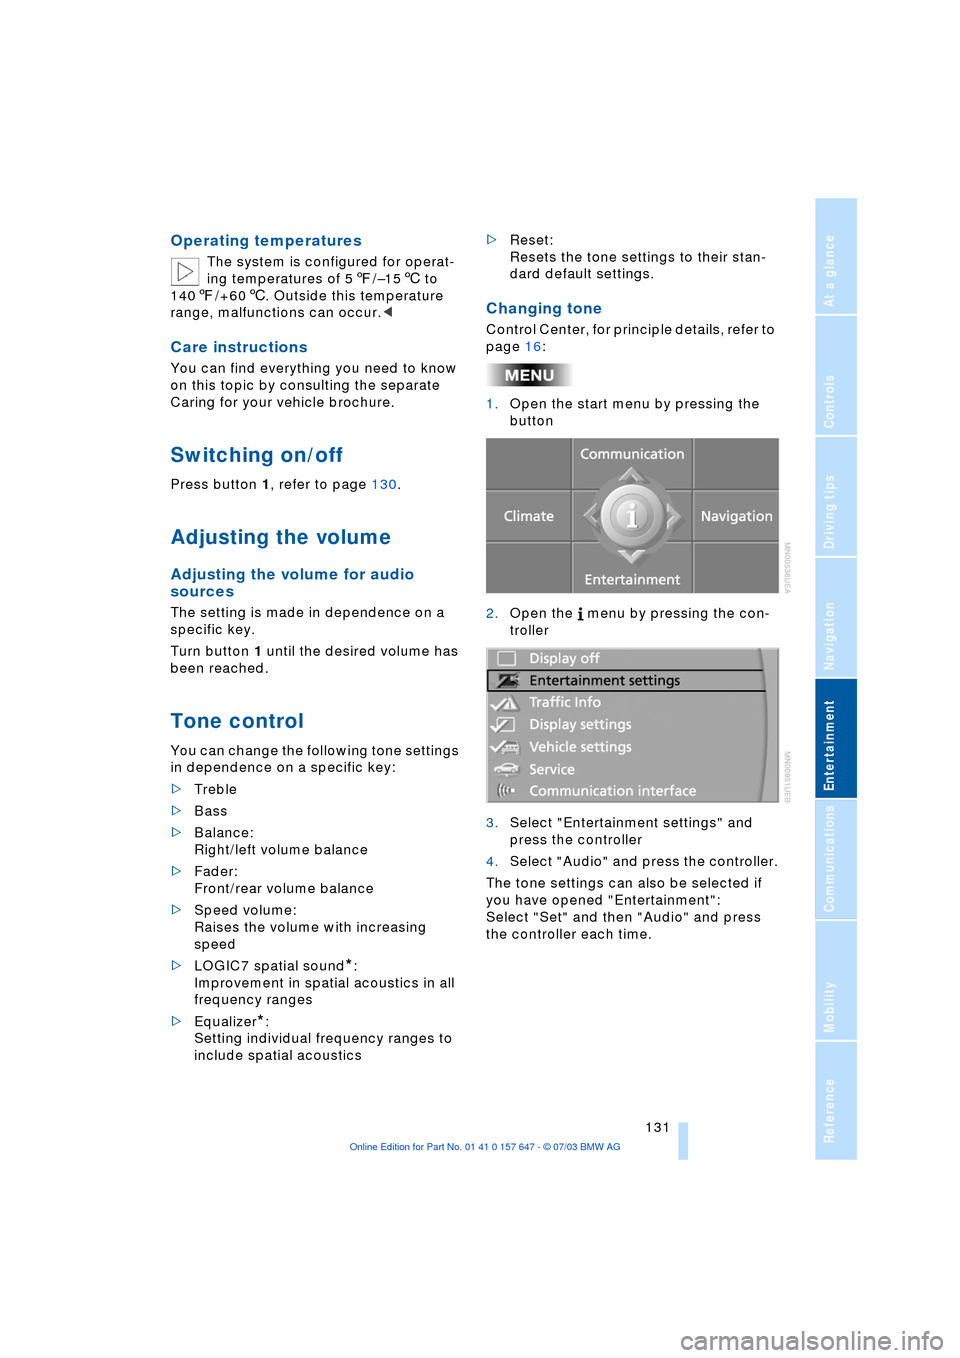
Changing tone
Control Center, for principle details, refer to
page 16:
1.Open the start menu by pressing the
button
2.Open the menu by pressing the con-
troller
3.Select "Entertainment settings" and
press the controller
4.Select "Audio" and press the controller.
The tone settings can also be selected if
you have opened "Entertainment":
Select "Set" and then "Audio" and press
the controller each time.
Page 153 of 220
151
Entertainment
Reference
At a glance
Controls
Driving tips Communications
Navigation
Mobility
Batteries
Never attempt to disassemble your
BMW portable phone or its battery.
Use only approved battery types Ð the
wrong battery can destroy your portable
phone.
To avoid possible short circuits, after
removing a battery you should never allow
it to come into contact with metallic sur-
faces of any kind.<
Disposing of used batteries
Return used batteries to a recycling
collection point or to your BMW cen-
ter.<
Care instructions
You can find useful information on caring
for your portable phone in the separate
portable phone Owner's Manual and in the
separate Caring for your vehicle brochure.
Controls
You can operate the BMW portable phone*
using:
>The steering wheel, refer to page 11
>The Control Center, refer to page 152
>The voice control, refer to page 157.
You can use the car phone via the hands-
free unit for BMW Assist calls.
The Control Display indicates which tele-
phone you are using to establish a connec-
tion.
Telephoning with the
car phone: BMW Assist calls
You can use the car phone via the hands-
free unit for BMW Assist calls.
The car phone must have been
enabled prior to initial use. In this con-
nection, please contact your BMW cen-
ter.<
Starting the BMW portable phone*
Before starting off, place the BMW portable
phone in the cradle. If you are making a call
using the car phone, you can only use the
BMW portable phone once you have termi-
nated this call.
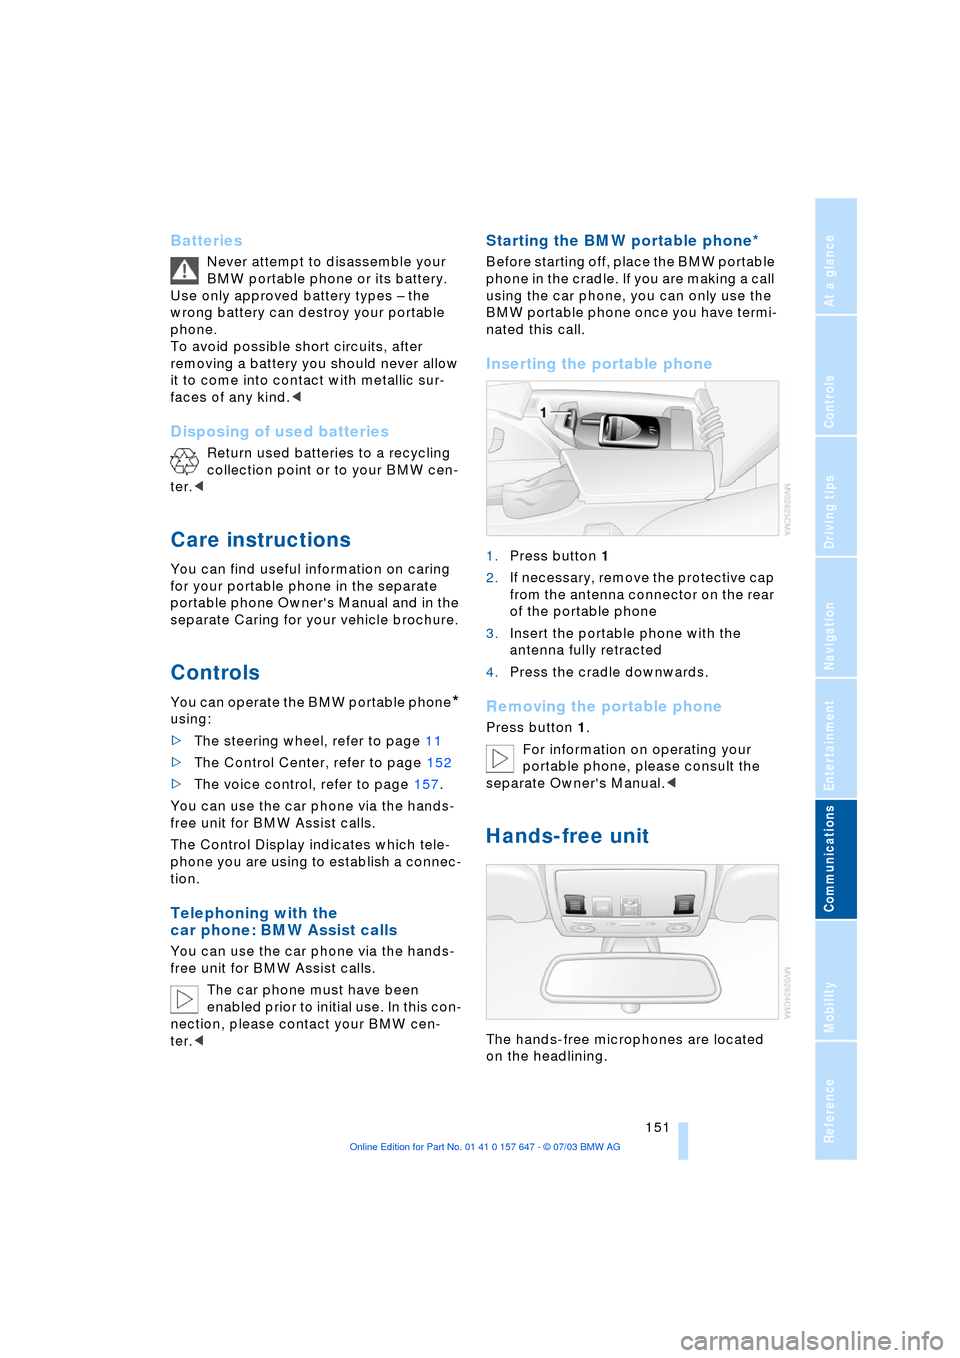
Inserting the portable phone
1.Press button 1
2.If necessary, remove the protective cap
from the antenna connector on the rear
of the portable phone
3.Insert the portable phone with the
antenna fully retracted
4.Press the cradle downwards.
Removing the portable phone
Press button 1.
For information on operating your
portable phone, please consult the
separate Owner's Manual.<
Hands-free unit
The hands-free microphones are located
on the headlining.
Page 173 of 220

Mobility
171Reference
At a glance
Controls
Driving tips
Communications
Navigation
Entertainment
525i/530i
Tire size Pressure specifications in psi/kPa
All pressure specifications in
the table are indicated in psi/
kilopascal with cold tires.
Cold = ambient temperature
225/50 R 17 94 V M+S
225/50 R 17 94 W
245/40 R 18 93 W
225/55 R 16 95 Q,T,H M+S
225/50 R 17 94 Q,T,H M+S
Only 525i:
225/55 R 16 95 V M+S
225/55 R 16 95 V 29/200 35/240 36/250 44/300
245/45 R 17 95 W
245/45 R 17 95 V M+S 29/200 32/220 33/230 41/280
Front: 245/40 R 18 93 W 29/200 - 36/250 -
Rear: 275/35 R 18 95 W - 32/220 - 41/280
Front: 245/35 R 19 89 Y 29/200 - 33/230 -
Rear: 275/30 R 19 92 Y - 32/220 - 41/280
Compact wheel:
T 135/80 R 17 102 M61/420
More details on the permitted load and weights can be found on page 200.
Page 183 of 220
Mobility
181Reference
At a glance
Controls
Driving tips
Communications
Navigation
Entertainment
Maintenance
The BMW Maintenance
System
The BMW Maintenance System is
designed to ensure that your vehicle will
continue to furnish consistent reliability
combined with optimal safety. The service
schedule also includes operations related
to the vehicle's comfort and convenience
features, such as replacement of the filters
for the inside air. The ultimate objective is
to ensure economical maintenance by pro-
viding the ideal service for your vehicle.
Should the day come when you decide to
sell your BMW, you will find that a complete
dealer service history is an asset of inesti-
mable value.
CBS Condition Based Service
CBS is a more advanced version of the Ser-
vice Interval Display. Sensors combine with
highly-specialized algorithms to supply
service information that reflects your vehi-
cle's actual operating conditions more pre-
cisely than ever before.
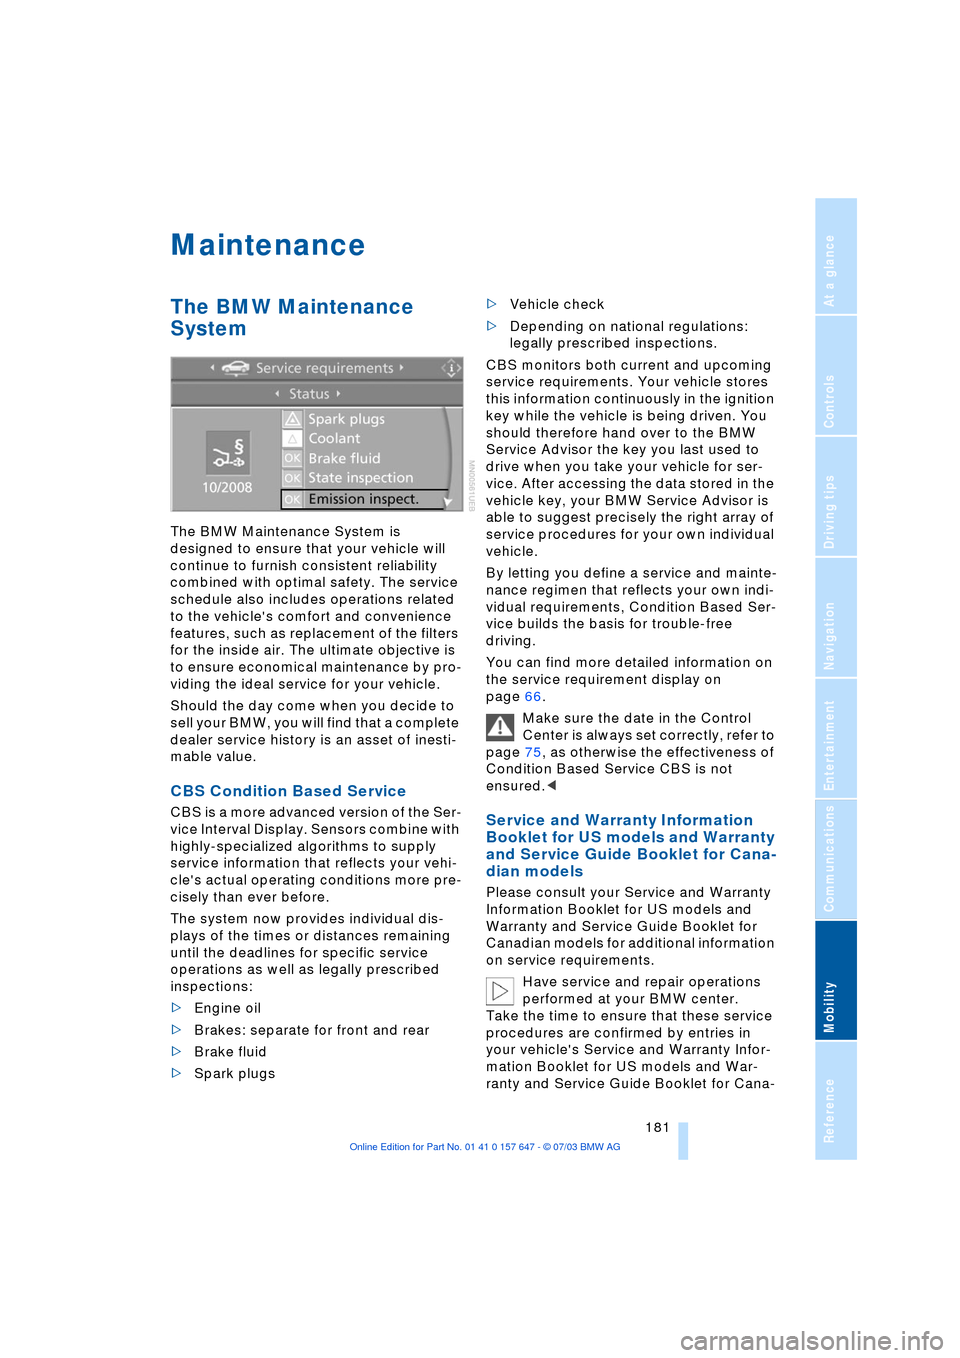
The system now provides individual dis-
plays of the times or distances remaining
until the deadlines for specific service
operations as well as legally prescribed
inspections:
>Engine oil
>Brakes: separate for front and rear
>Brake fluid
>Spark plugs >Vehicle check
>Depending on national regulations:
legally prescribed inspections.
CBS monitors both current and upcoming
service requirements. Your vehicle stores
this information continuously in the ignition
key while the vehicle is being driven. You
should therefore hand over to the BMW
Service Advisor the key you last used to
drive when you take your vehicle for ser-
vice. After accessing the data stored in the
vehicle key, your BMW Service Advisor is
able to suggest precisely the right array of
service procedures for your own individual
vehicle.
By letting you define a service and mainte-
nance regimen that reflects your own indi-
vidual requirements, Condition Based Ser-
vice builds the basis for trouble-free
driving.
You can find more detailed information on
the service requirement display on
page 66.
Make sure the date in the Control
Center is always set correctly, refer to
page 75, as otherwise the effectiveness of
Condition Based Service CBS is not
ensured.
and Service Guide Booklet for Cana-
dian models
Please consult your Service and Warranty
Information Booklet for US models and
Warranty and Service Guide Booklet for
Canadian models for additional information
on service requirements.
Have service and repair operations
performed at your BMW center.
Take the time to ensure that these service
procedures are confirmed by entries in
your vehicle's Service and Warranty Infor-
mation Booklet for US models and War-
ranty and Service Guide Booklet for Cana-
Page 189 of 220
Mobility
187Reference
At a glance
Controls
Driving tips
Communications
Navigation
Entertainment
Changing a wheel
Safety measures in the event of a
breakdown or wheel change:
Park the vehicle as far away as possible
from moving traffic and on firm ground.
Switch on the hazard warning flashers.
Lock the steering wheel in straight-ahead
setting of the wheels. Apply the handbrake
and engage first gear, reverse gear or
selector lever to position P.
Have all vehicle occupants get out of the
vehicle and ensure that they remain outside
the immediate area in a safe place, such as
behind a guardrail.
If a warning triangle or portable hazard
warning lamp is required, set it up on the
roadside at an appropriate distance from
the rear of the vehicle.
Comply with all safety guidelines and regu-
lations.
Change the wheel only on a level, firm sur-
face which is not slippery.
The vehicle or the jack could slip to the side
if you attempt to raise the vehicle on a soft
or slippery surface such as snow, ice, tiles,
etc.
Position the jack on a firm support surface.
Do not use a wooden block or similar
object as a support base for the jack, as
this would prevent it from extending to its
full support height and reduce its load-car-
rying capacity.
To avoid serious or fatal injury: never lie
under the vehicle, and never start the
engine while it is supported by the jack.<
What you will need
To avoid rattling noises later on, note the
positions of the tools before removing
them, then return them to their initial posi-
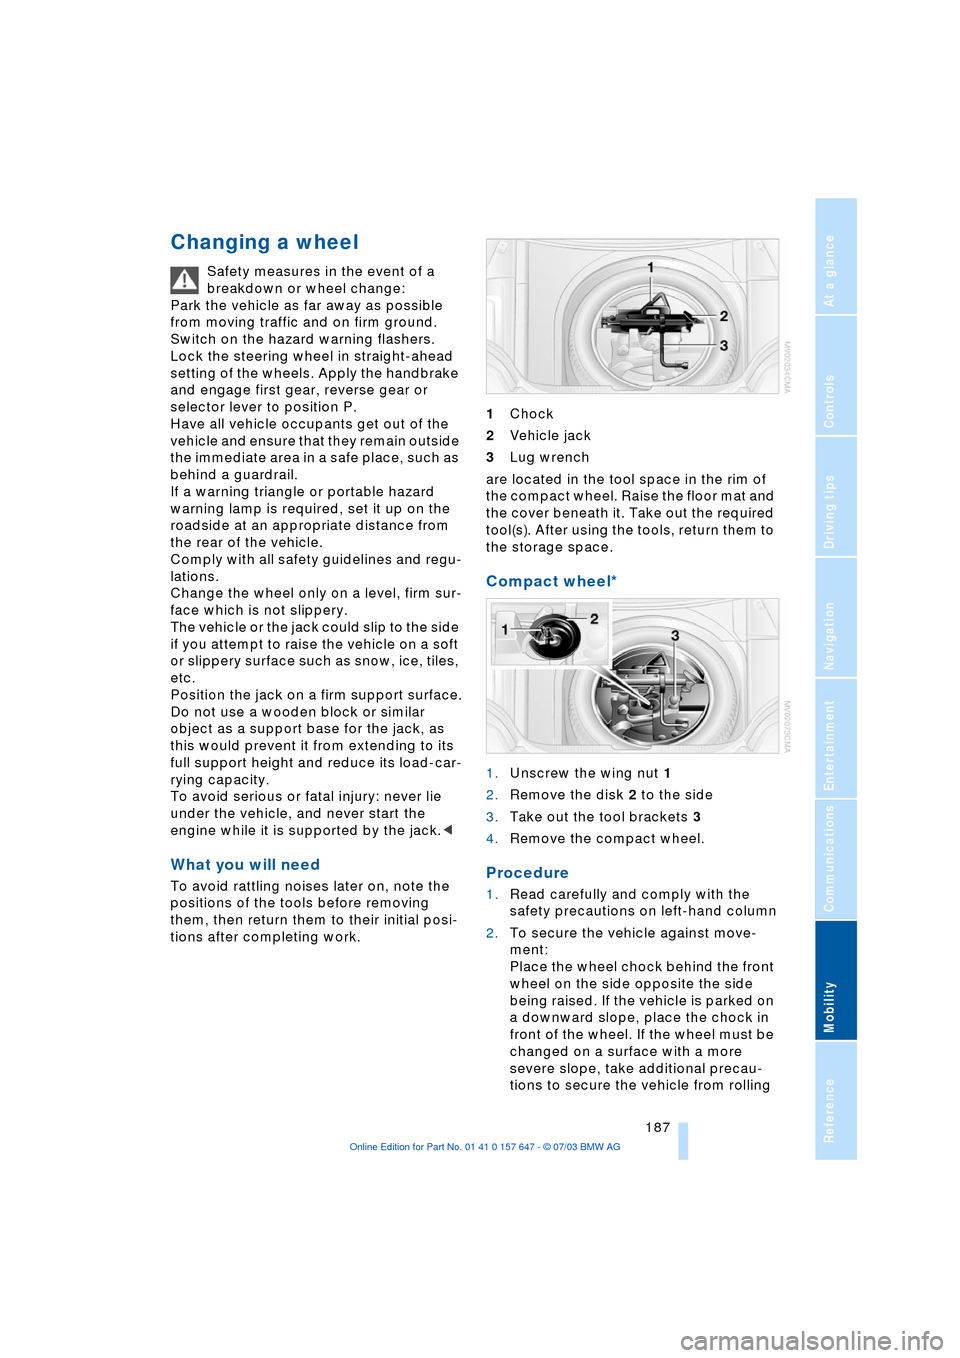
tions after completing work.1Chock
2Vehicle jack
3Lug wrench
are located in the tool space in the rim of
the compact wheel. Raise the floor mat and
the cover beneath it. Take out the required
tool(s). After using the tools, return them to
the storage space.
Compact wheel*
1.Unscrew the wing nut 1
2.Remove the disk 2 to the side
3.Take out the tool brackets 3
4.Remove the compact wheel.
Procedure
1.Read carefully and comply with the
safety precautions on left-hand column
2.To secure the vehicle against move-
ment:
Place the wheel chock behind the front
wheel on the side opposite the side
being raised. If the vehicle is parked on
a downward slope, place the chock in
front of the wheel. If the wheel must be
changed on a surface with a more
severe slope, take additional precau-
tions to secure the vehicle from rolling