2004 BMW 525I SEDAN sensor
[x] Cancel search: sensorPage 13 of 220

At a glance
11
Reference
Controls
Driving tips
Communications
Navigation
Entertainment
Mobility
6
Buttons on steering wheel
Portable phone
*
:
>
Accepting a call
>
Start calling
>
Ending call.
Volume
Voice command system.
Fast forward/reverse:
>
Radio
Press briefly: change station
Press longer: manual tuning or auto-
matic search scan
>
CD
Press briefly: select track
Press longer: fast forward/reverse.
Individually programmable, refer to
page 44.
>
Individually programmable, refer to
page 44
>
Voice instructions for navigation.
7
Instrument cluster12
9
Ignition lock49
10
Horn: the entire surface
13
Opening the hood177
14
Opening the luggage compartment
lid31
16
Parking lamps and low beams87
8
Windshield wipers57
Rain sensor57
11
Steering wheel heater44
Steering wheel adjustment43
12
Cruise control58
Active cruise control59
15
Head-Up Display85
17
Instrument lighting88
Front fog lamps89
Page 30 of 220
Opening and closing
28 3.Select "Door locks" and press the con-
troller
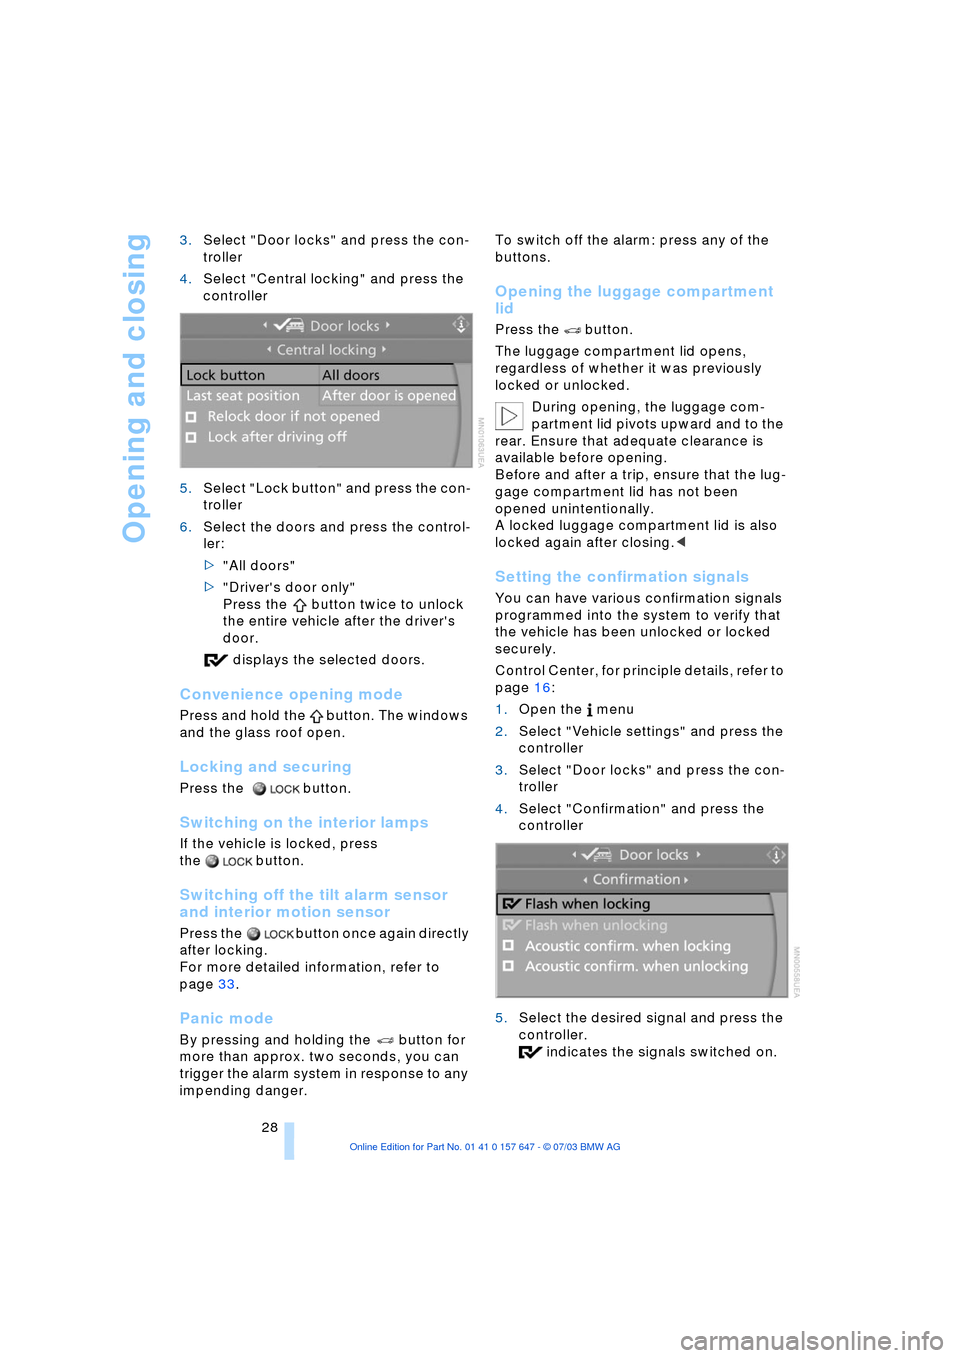
4.Select "Central locking" and press the
controller
5.Select "Lock button" and press the con-
troller
6.Select the doors and press the control-
ler:
>"All doors"
>"Driver's door only"
Press the button twice to unlock
the entire vehicle after the driver's
door.
displays the selected doors.
Convenience opening mode
Press and hold the button. The windows
and the glass roof open.
Locking and securing
Press the button.
Switching on the interior lamps
If the vehicle is locked, press
the button.
Switching off the tilt alarm sensor
and interior motion sensor
Press the button once again directly
after locking.
For more detailed information, refer to
page 33.
Panic mode
By pressing and holding the button for
more than approx. two seconds, you can
trigger the alarm system in response to any
impending danger. To switch off the alarm: press any of the
buttons.
Opening the luggage compartment
lid
Press the button.
The luggage compartment lid opens,
regardless of whether it was previously
locked or unlocked.
During opening, the luggage com-
partment lid pivots upward and to the
rear. Ensure that adequate clearance is
available before opening.
Before and after a trip, ensure that the lug-
gage compartment lid has not been
opened unintentionally.
A locked luggage compartment lid is also
locked again after closing.<
Setting the confirmation signals
You can have various confirmation signals
programmed into the system to verify that
the vehicle has been unlocked or locked
securely.
Control Center, for principle details, refer to
page 16:
1.Open the menu
2.Select "Vehicle settings" and press the
controller
3.Select "Door locks" and press the con-
troller
4.Select "Confirmation" and press the
controller
5.Select the desired signal and press the
controller.
indicates the signals switched on.
Page 34 of 220
Opening and closing
32
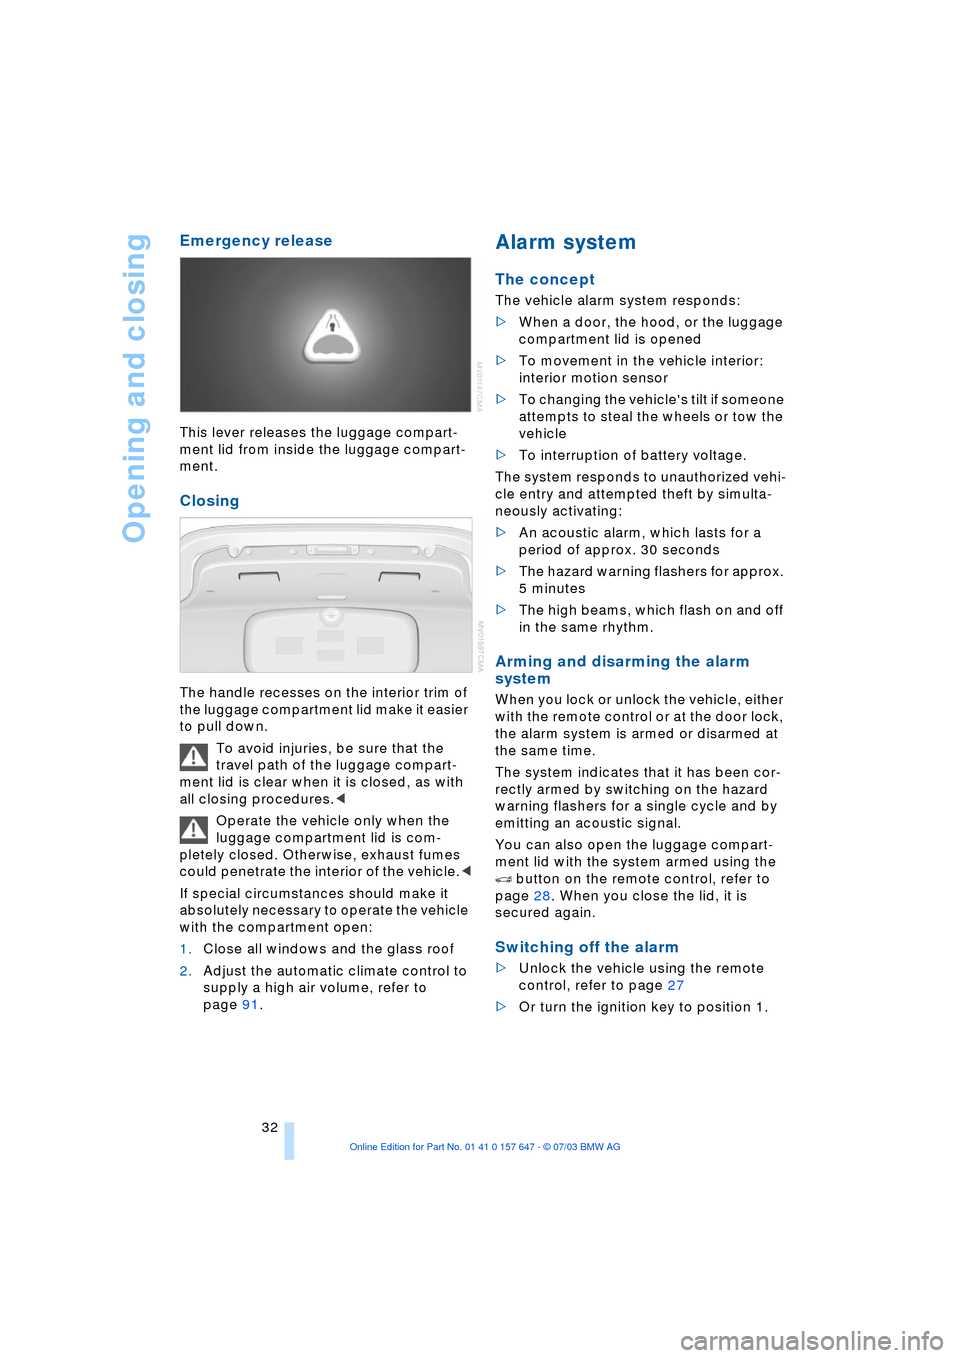
Emergency release
This lever releases the luggage compart-
ment lid from inside the luggage compart-
ment.
Closing
The handle recesses on the interior trim of
the luggage compartment lid make it easier
to pull down.
To avoid injuries, be sure that the
travel path of the luggage compart-
ment lid is clear when it is closed, as with
all closing procedures.<
Operate the vehicle only when the
luggage compartment lid is com-
pletely closed. Otherwise, exhaust fumes
could penetrate the interior of the vehicle.<
If special circumstances should make it
absolutely necessary to operate the vehicle
with the compartment open:
1.Close all windows and the glass roof
2.Adjust the automatic climate control to
supply a high air volume, refer to
page 91.
Alarm system
The concept
The vehicle alarm system responds:
>When a door, the hood, or the luggage
compartment lid is opened
>To movement in the vehicle interior:
interior motion sensor
>To changing the vehicle's tilt if someone
attempts to steal the wheels or tow the
vehicle
>To interruption of battery voltage.
The system responds to unauthorized vehi-
cle entry and attempted theft by simulta-
neously activating:
>An acoustic alarm, which lasts for a
period of approx. 30 seconds
>The hazard warning flashers for approx.
5 minutes
>The high beams, which flash on and off
in the same rhythm.
Arming and disarming the alarm
system
When you lock or unlock the vehicle, either
with the remote control or at the door lock,
the alarm system is armed or disarmed at
the same time.
The system indicates that it has been cor-
rectly armed by switching on the hazard
warning flashers for a single cycle and by
emitting an acoustic signal.
You can also open the luggage compart-
ment lid with the system armed using the
button on the remote control, refer to
page 28. When you close the lid, it is
secured again.
Switching off the alarm
>Unlock the vehicle using the remote
control, refer to page 27
>Or turn the ignition key to position 1.
Page 35 of 220
Controls
33Reference
At a glance
Driving tips
Communications
Navigation
Entertainment
Mobility
Indicator lamp displays
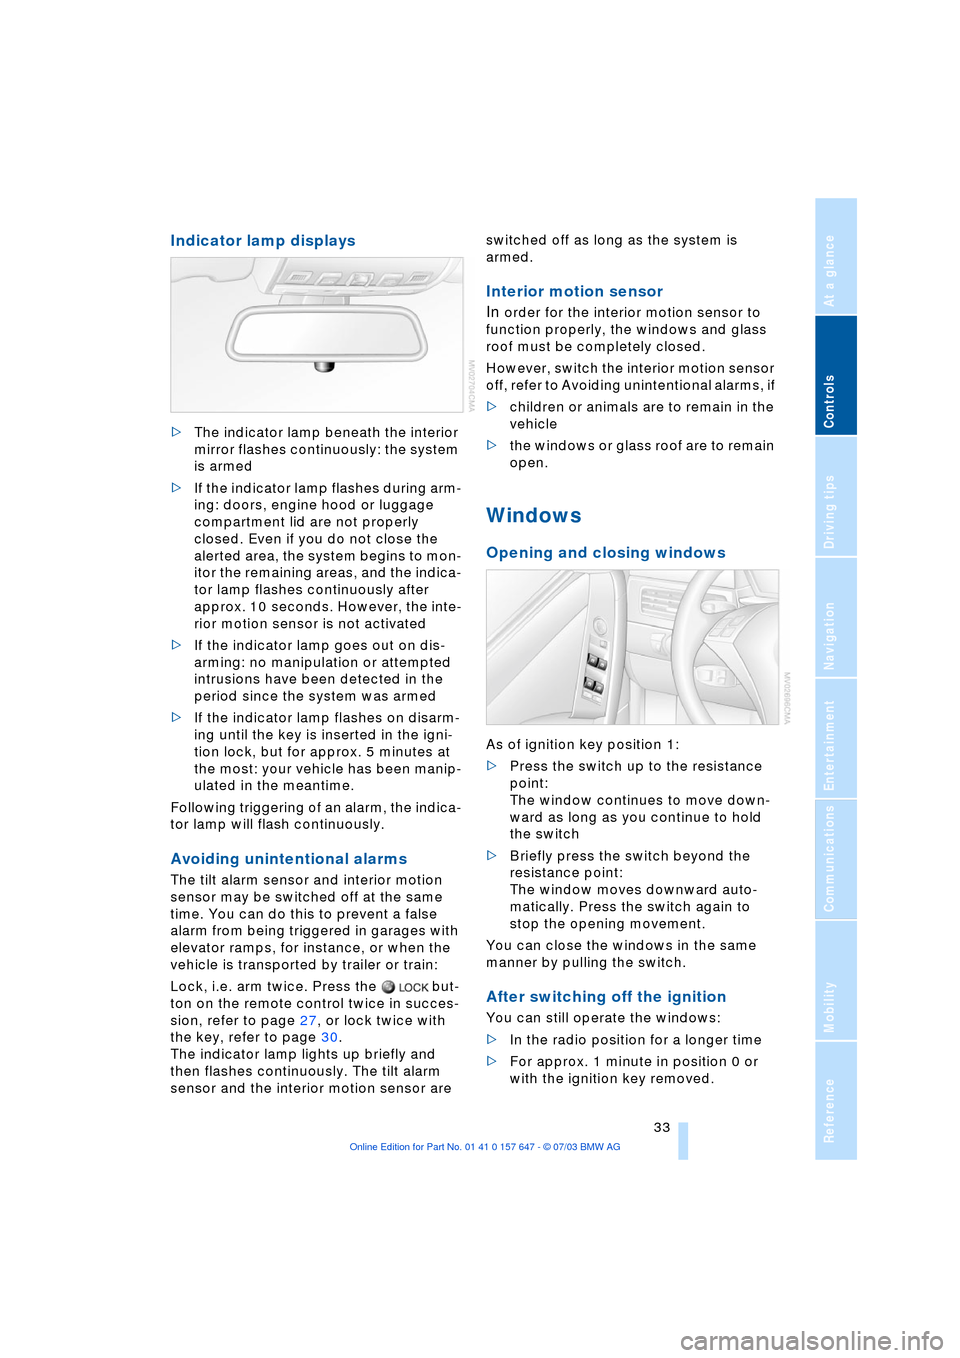
>The indicator lamp beneath the interior
mirror flashes continuously: the system
is armed
>If the indicator lamp flashes during arm-
ing: doors, engine hood or luggage
compartment lid are not properly
closed. Even if you do not close the
alerted area, the system begins to mon-
itor the remaining areas, and the indica-
tor lamp flashes continuously after
approx. 10 seconds. However, the inte-
rior motion sensor is not activated
>If the indicator lamp goes out on dis-
arming: no manipulation or attempted
intrusions have been detected in the
period since the system was armed
>If the indicator lamp flashes on disarm-
ing until the key is inserted in the igni-
tion lock, but for approx. 5 minutes at
the most: your vehicle has been manip-
ulated in the meantime.
Following triggering of an alarm, the indica-
tor lamp will flash continuously.
Avoiding unintentional alarms
The tilt alarm sensor and interior motion
sensor may be switched off at the same
time. You can do this to prevent a false
alarm from being triggered in garages with
elevator ramps, for instance, or when the
vehicle is transported by trailer or train:
Lock, i.e. arm twice. Press the but-
ton on the remote control twice in succes-
sion, refer to page 27, or lock twice with
the key, refer to page 30.
The indicator lamp lights up briefly and
then flashes continuously. The tilt alarm
sensor and the interior motion sensor are switched off as long as the system is
armed.
Interior motion sensor
In
order for the interior motion sensor to
function properly, the windows and glass
roof must be completely closed.
However, switch the interior motion sensor
off, refer to Avoiding unintentional alarms, if
>children or animals are to remain in the
vehicle
>the windows or glass roof are to remain
open.
Windows
Opening and closing windows
As of ignition key position 1:
>Press the switch up to the resistance
point:
The window continues to move down-
ward as long as you continue to hold
the switch
>Briefly press the switch beyond the
resistance point:
The window moves downward auto-
matically. Press the switch again to
stop the opening movement.
You can close the windows in the same
manner by pulling the switch.
After switching off the ignition
You can still operate the windows:
>In the radio position for a longer time
>For approx. 1 minute in position 0 or
with the ignition key removed.
Page 59 of 220
Controls
57Reference
At a glance
Driving tips
Communications
Navigation
Entertainment
Mobility
Wiper system
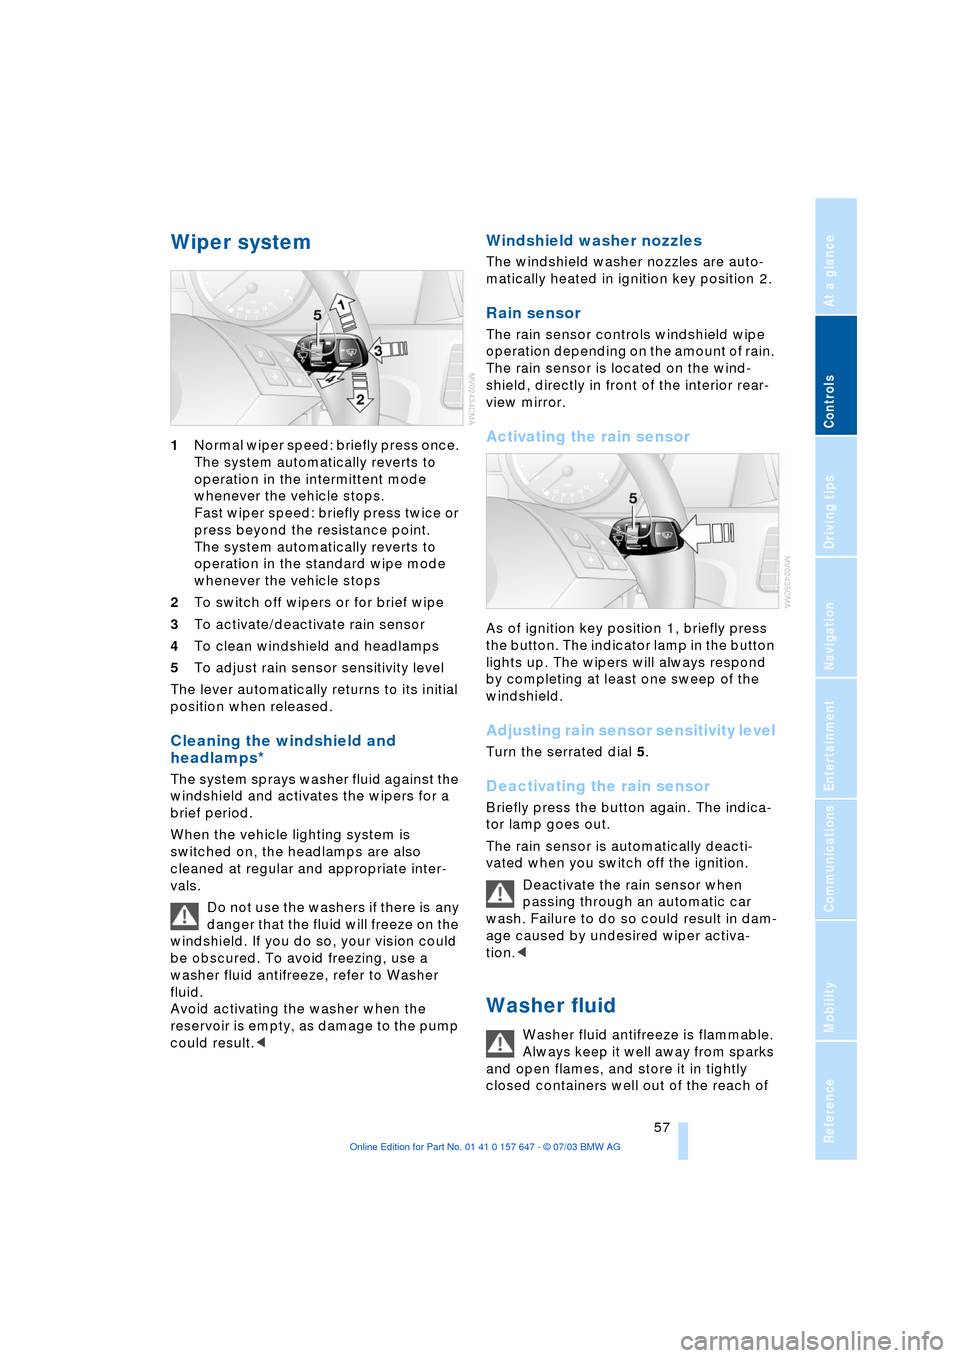
1Normal wiper speed: briefly press once.
The system automatically reverts to
operation in the intermittent mode
whenever the vehicle stops.
Fast wiper speed: briefly press twice or
press beyond the resistance point.
The system automatically reverts to
operation in the standard wipe mode
whenever the vehicle stops
2To switch off wipers or for brief wipe
3To activate/deactivate rain sensor
4To clean windshield and headlamps
5To adjust rain sensor sensitivity level
The lever automatically returns to its initial
position when released.
Cleaning the windshield and
headlamps*
The system sprays washer fluid against the
windshield and activates the wipers for a
brief period.
When the vehicle lighting system is
switched on, the headlamps are also
cleaned at regular and appropriate inter-
vals.
Do not use the washers if there is any
danger that the fluid will freeze on the
windshield. If you do so, your vision could
be obscured. To avoid freezing, use a
washer fluid antifreeze, refer to Washer
fluid.
Avoid activating the washer when the
reservoir is empty, as damage to the pump
could result.<
Windshield washer nozzles
The windshield washer nozzles are auto-
matically heated in ignition key position 2.
Rain sensor
The rain sensor controls windshield wipe
operation depending on the amount of rain.
The rain sensor is located on the wind-
shield, directly in front of the interior rear-
view mirror.
Activating the rain sensor
As of ignition key position 1, briefly press
the button. The indicator lamp in the button
lights up. The wipers will always respond
by completing at least one sweep of the
windshield.
Adjusting rain sensor sensitivity level
Turn the serrated dial 5.
Deactivating the rain sensor
Briefly press the button again. The indica-
tor lamp goes out.
The rain sensor is automatically deacti-
vated when you switch off the ignition.
Deactivate the rain sensor when
passing through an automatic car
wash. Failure to do so could result in dam-
age caused by undesired wiper activa-
tion.<
Washer fluid
Washer fluid antifreeze is flammable.
Always keep it well away from sparks
and open flames, and store it in tightly
closed containers well out of the reach of
Page 66 of 220
Driving
64 choose to overcome the deceleration by
briefly pressing the accelerator pedal.
Driver interventions
Anytime the driver presses down on
the accelerator pedal, any automatic
braking action by the system is interrupted
until the pedal is fully released. After doing
this, release the accelerator and the system
again controls your cruising speed and dis-
tance setting. While driving with activated
system, resting your foot on the accelerator
pedal will cause the system not to brake
even if necessary. Be certain that floormats
or other objects on the vehicle floor do not
interfere with movement of the accelerator
pedal.<
While active cruise control is capable
of braking your vehicle automatically
when you approach a slower vehicle
ahead, it is important to be aware that the
ability of the system to apply the brakes is
also limited, if you are driving down a steep
grade or when you reduce your desired
speed sharply. The system cannot stop
your vehicle. It uses only a portion of brak-
ing system capacity and does not utilize the
full capacity of the vehicle braking system.
Therefore, the system cannot decrease
your speed for large differences in speed
between your vehicle and the vehicle
ahead. Examples: during emergency brak-
ing, when you approach a vehicle traveling
at a much lower speed than your own
speed such as approaching a toll booth or
when a much slower vehicle cuts in front of
you at close range.<
Whenever active cruise control
recognizes a situation that
requires driver braking because
the system capacity has been
reached or has been exceeded,
the system alerts the driver by flashing this
symbol in the instrument cluster and
sounding a signal.
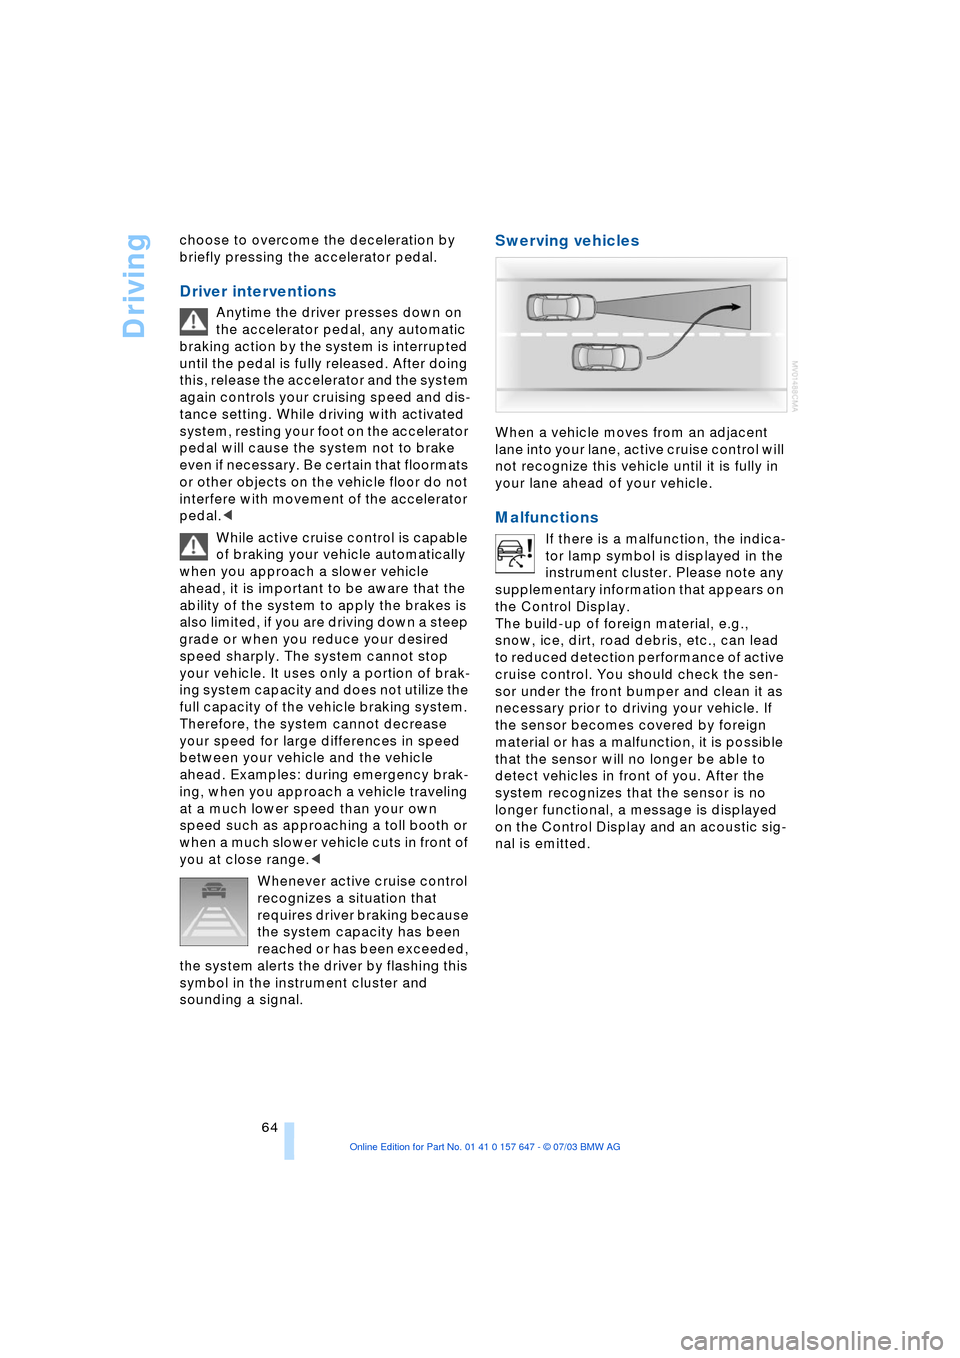
Swerving vehicles
When a vehicle moves from an adjacent
lane into your lane, active cruise control will
not recognize this vehicle until it is fully in
your lane ahead of your vehicle.
Malfunctions
If there is a malfunction, the indica-
tor lamp symbol is displayed in the
instrument cluster. Please note any
supplementary information that appears on
the Control Display.
The build-up of foreign material, e.g.,
snow, ice, dirt, road debris, etc., can lead
to reduced detection performance of active
cruise control. You should check the sen-
sor under the front bumper and clean it as
necessary prior to driving your vehicle. If
the sensor becomes covered by foreign
material or has a malfunction, it is possible
that the sensor will no longer be able to
detect vehicles in front of you. After the
system recognizes that the sensor is no
longer functional, a message is displayed
on the Control Display and an acoustic sig-
nal is emitted.
Page 78 of 220
Technology for comfort, convenience and safety
76
Technology for comfort, convenience
and safety
PDC Park Distance Control*
The concept
The PDC assists you when you are parking.
Signal tones indicate the current distance
to an object behind or in front of your vehi-
cle. Four ultrasonic sensors in both the
bumpers monitor the distance to the near-
est object. The sensors at the front and at
the two rear corners have a range of
approx. 1.64 ft/50 cm; the rear middle sen-
sors have approx. 5 ft/1.50 m.
PDC is a parking aid that can indicate
objects when they are approached
slowly, as is usually the case when parking.
Avoid approaching an object at high speed,
as otherwise the physical circumstances
would mean that the system warning was
too late.<
Automatic function
In ignition key position 2, the system auto-
matically assumes operational status after
a few seconds each time you engage
reverse gear or selector-lever position R.
Wait this short period before revers-
ing.<
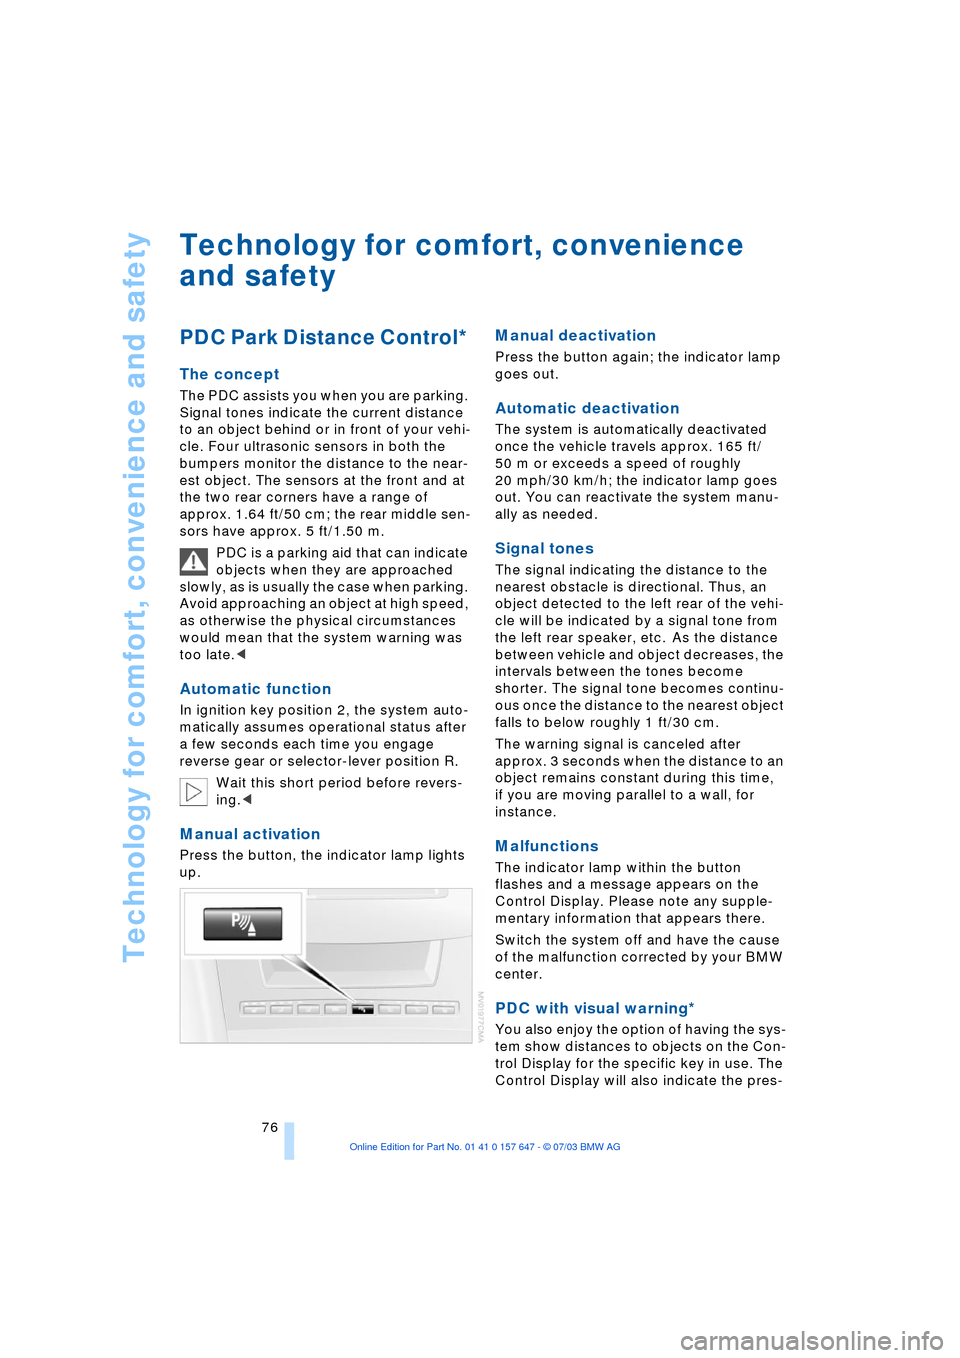
Manual activation
Press the button, the indicator lamp lights
up.
Manual deactivation
Press the button again; the indicator lamp
goes out.
Automatic deactivation
The system is automatically deactivated
once the vehicle travels approx. 165 ft/
50 m or exceeds a speed of roughly
20 mph/30 km/h; the indicator lamp goes
out. You can reactivate the system manu-
ally as needed.
Signal tones
The signal indicating the distance to the
nearest obstacle is directional. Thus, an
object detected to the left rear of the vehi-
cle will be indicated by a signal tone from
the left rear speaker, etc. As the distance
between vehicle and object decreases, the
intervals between the tones become
shorter. The signal tone becomes continu-
ous once the distance to the nearest object
falls to below roughly 1 ft/30 cm.
The warning signal is canceled after
approx. 3 seconds when the distance to an
object remains constant during this time,
if you are moving parallel to a wall, for
instance.
Malfunctions
The indicator lamp within the button
flashes and a message appears on the
Control Display. Please note any supple-
mentary information that appears there.
Switch the system off and have the cause
of the malfunction corrected by your BMW
center.
PDC with visual warning*
You also enjoy the option of having the sys-
tem show distances to objects on the Con-
trol Display for the specific key in use. The
Control Display will also indicate the pres-
Page 79 of 220
Controls
77Reference
At a glance
Driving tips
Communications
Navigation
Entertainment
Mobility
ence of objects in green before they are
close enough to generate a signal tone.
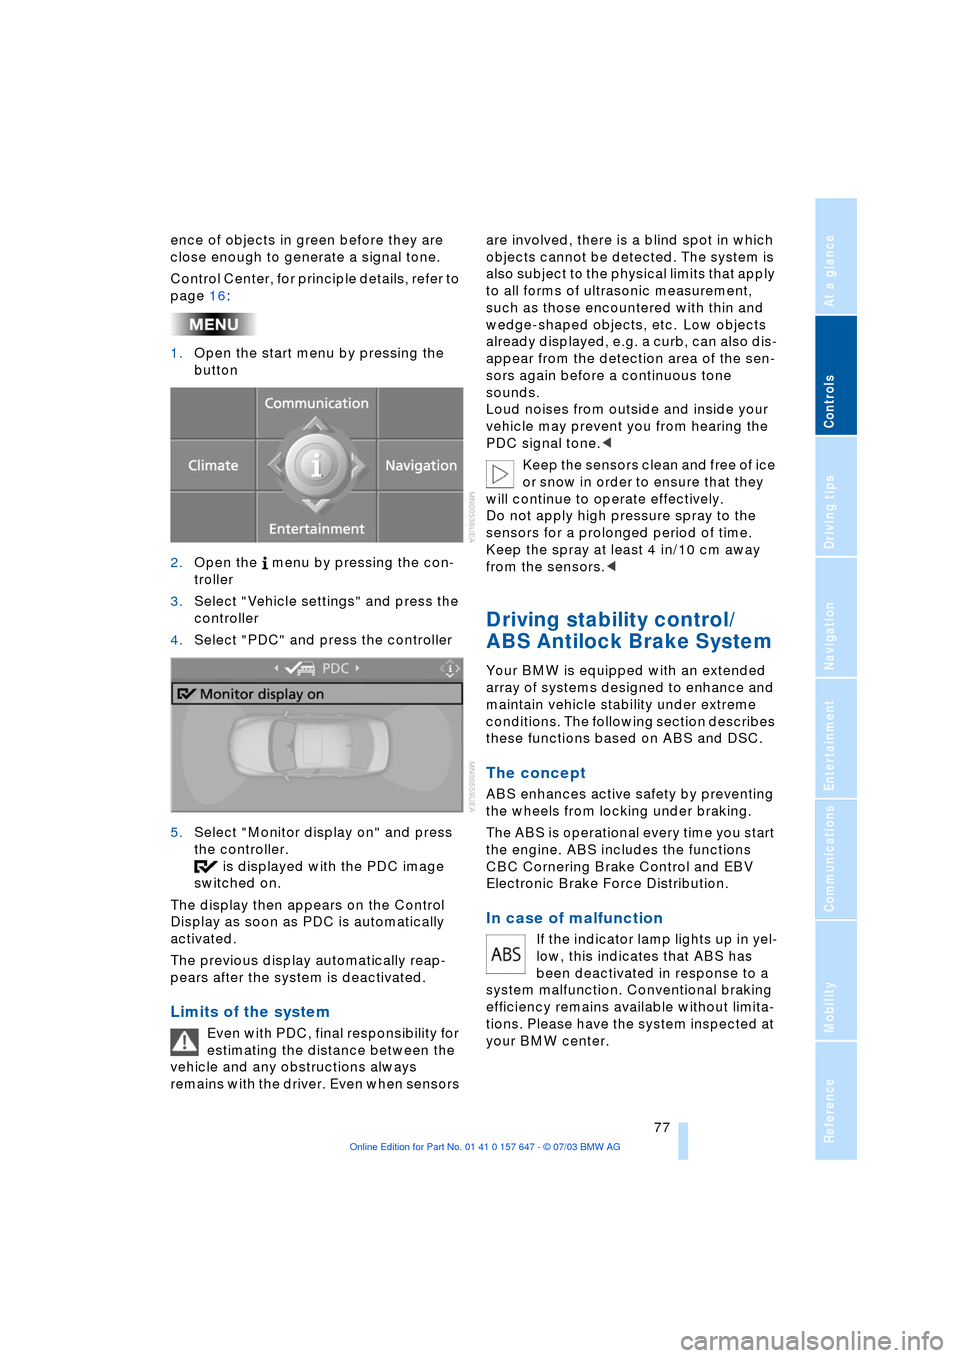
Control Center, for principle details, refer to
page 16:
1.Open the start menu by pressing the
button
2.Open the menu by pressing the con-
troller
3.Select "Vehicle settings" and press the
controller
4.Select "PDC" and press the controller
5.Select "Monitor display on" and press
the controller.
is displayed with the PDC image
switched on.
The display then appears on the Control
Display as soon as PDC is automatically
activated.
The previous display automatically reap-
pears after the system is deactivated.
Limits of the system
Even with PDC, final responsibility for
estimating the distance between the
vehicle and any obstructions always
remains with the driver. Even when sensors are involved, there is a blind spot in which
objects cannot be detected. The system is
also subject to the physical limits that apply
to all forms of ultrasonic measurement,
such as those encountered with thin and
wedge-shaped objects, etc. Low objects
already displayed, e.g. a curb, can also dis-
appear from the detection area of the sen-
sors again before a continuous tone
sounds.
Loud noises from outside and inside your
vehicle may prevent you from hearing the
PDC signal tone.<
Keep the sensors clean and free of ice
or snow in order to ensure that they
will continue to operate effectively.
Do not apply high pressure spray to the
sensors for a prolonged period of time.
Keep the spray at least 4 in/10 cm away
from the sensors.<
Driving stability control/
ABS Antilock Brake System
Your BMW is equipped with an extended
array of systems designed to enhance and
maintain vehicle stability under extreme
conditions. The following section describes
these functions based on ABS and DSC.
The concept
ABS enhances active safety by preventing
the wheels from locking under braking.
The ABS is operational every time you start
the engine. ABS includes the functions
CBC Cornering Brake Control and EBV
Electronic Brake Force Distribution.
In case of malfunction
If the indicator lamp lights up in yel-
low, this indicates that ABS has
been deactivated in response to a
system malfunction. Conventional braking
efficiency remains available without limita-
tions. Please have the system inspected at
your BMW center.