2004 BMW 525I SEDAN center console
[x] Cancel search: center consolePage 17 of 220

At a glance
15Reference
Controls
Driving tips
Communications
Navigation
Entertainment
Mobility
1Microphone for
>Telephone/portable phone151
>Voice command system20
2Reading lamps89
3Starting emergency call190
4Interior lamps89
5Glass roof, electric34
6Front passenger's airbag indicator
lamp84
7Control Display16
displays for menu guidance
8Hazard warning flashers
9Central locking system30
10Automatic climate control90
11Button for
>Station scan/track search130
>CD player141
>CD changer145 12Ejecting
>Navigation CD/DVD114
>Audio CD130
13Drive for navigation CD/DVD114
14Drive for audio CD130
15Switching audio sources on/off and
adjusting the volume130
16Center console switching center
17Controller16
Horizontal movement in four directions,
turn or press
18Activating voice command system20
19Open start menu17 Temperature setting,
left/right91
Automatic air distribution and
supply91
Cooling function91
Automatic recirculated-air
control AUC91
Maximum cooling91
Residual heat mode92
To switch off automatic climate
control92
Air volume91
Defrost windows91
Rear window defroster90
Heated seats 41
Active seat ventilation42
Active seat42
PDC Park Distance Control 76
DSC Dynamic Stability
Control78
Page 22 of 220
Voice command system
20
Voice command system
The concept
The voice command system allows you to
control operation of various vehicle sys-
tems without ever removing your hands
from the steering wheel.
The menu items on the Control Display
serve as voice commands for the equip-
ment that can be operated using the voice
command system. This means you can
open these menu items using the voice
command system instead of with the con-
troller.
The voice command system transforms
your oral commands into control signals for
the selected systems and provides support
in the form of instructions or questions.
Precondition
If the language of the voice command and
Control Display do not match, change the
language of the Control Display, refer to
page 74.
Symbols used
Voice commands
Activating voice command system
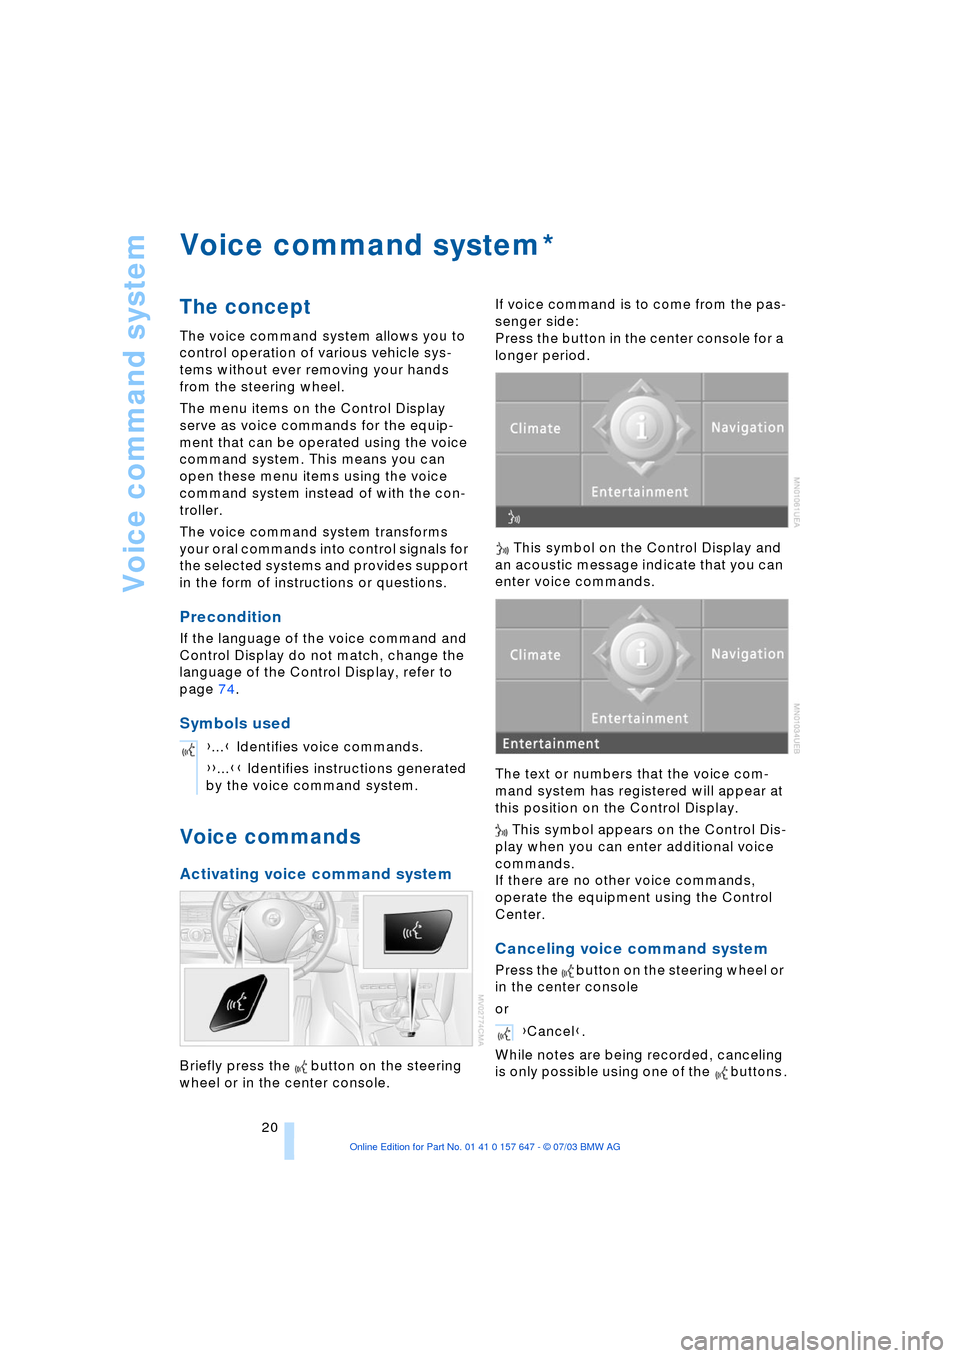
Briefly press the button on the steering
wheel or in the center console.If voice command is to come from the pas-
senger side:
Press the button in the center console for a
longer period.
This symbol on the Control Display and
an acoustic message indicate that you can
enter voice commands.
The text or numbers that the voice com-
mand system has registered will appear at
this position on the Control Display.
This symbol appears on the Control Dis-
play when you can enter additional voice
commands.
If there are no other voice commands,
operate the equipment using the Control
Center.
Canceling voice command system
Press the button on the steering wheel or
in the center console
or
While notes are being recorded, canceling
is only possible using one of the buttons .
*
{...} Identifies voice commands.
{{...}} Identifies instructions generated
by the voice command system.
Entertainment{Cancel}.
Page 23 of 220

At a glance
21Reference
Controls
Driving tips
Communications
Navigation
Entertainment
Mobility
Voice commands
You can have the system list the possible
voice commands:
In addition to the commands described in
this Owner's Manual, alternative com-
mands are often possible for the same
functions, e.g.:
You can use short commands to make it
easier to run certain functions.
An example: selecting a radio station
1.Switch on radio
2.Press the button on the steering
wheel or in the center console{Options}.
{Radio on} or {Switch on radio}.
3.{Entertainment}.
The system issues:
{{Entertainment}}
4.{AM}.
The system issues:
{{AM}}
5.Select the station, e.g.:
>{Frequency 95 Point 5}.
The system issues:
{{95.5}}.
Page 44 of 220
Adjustments
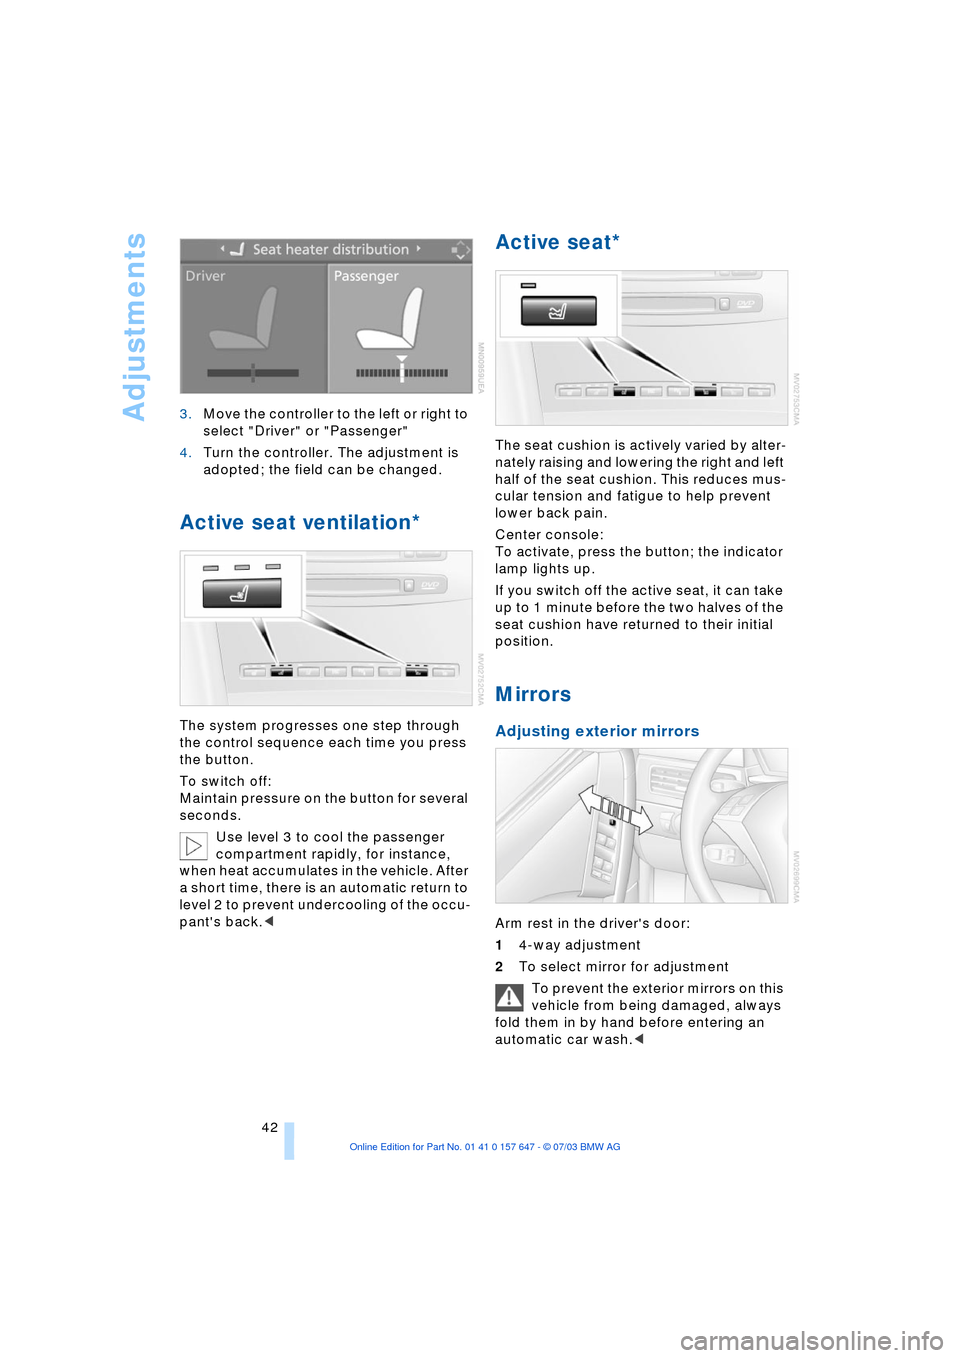
42 3.Move the controller to the left or right to
select "Driver" or "Passenger"
4.Turn the controller. The adjustment is
adopted; the field can be changed.
Active seat ventilation*
The system progresses one step through
the control sequence each time you press
the button.
To switch off:
Maintain pressure on the button for several
seconds.
Use level 3 to cool the passenger
compartment rapidly, for instance,
when heat accumulates in the vehicle. After
a short time, there is an automatic return to
level 2 to prevent undercooling of the occu-
pant's back.<
Active seat*
The seat cushion is actively varied by alter-
nately raising and lowering the right and left
half of the seat cushion. This reduces mus-
cular tension and fatigue to help prevent
lower back pain.
Center console:
To activate, press the button; the indicator
lamp lights up.
If you switch off the active seat, it can take
up to 1 minute before the two halves of the
seat cushion have returned to their initial
position.
Mirrors
Adjusting exterior mirrors
Arm rest in the driver's door:
14-way adjustment
2To select mirror for adjustment
To prevent the exterior mirrors on this
vehicle from being damaged, always
fold them in by hand before entering an
automatic car wash.<
Page 53 of 220
Controls
51Reference
At a glance
Driving tips
Communications
Navigation
Entertainment
Mobility
Releasing
Pull slightly upwards, press the button and
lower the lever.
If exceptional circumstances should
make it necessary to engage the
handbrake while the vehicle is in motion,
do not pull it too strongly. In doing so, con-
tinuously press the button of the handbrake
lever.
Strong application of the handbrake can
lead to overbraking of the rear axle and
associated 'fishtailing' of the vehicle rear
end.
The brake lamps do not light up when the
handbrake is applied.
Vehicles with manual or SMG transmission:
When parking on inclines, apply the hand-
brake, as under certain circumstances
even engaging the first or reverse gear
might not secure the vehicle against mov-
ing.
Vehicles with automatic transmission:
Place selector lever in position P.<
To prevent corrosion and one-sided
braking action, occasionally apply the
handbrake lightly when the vehicle is
slowly coming to a standstill if the traffic
conditions are suitable.<
Manual transmission
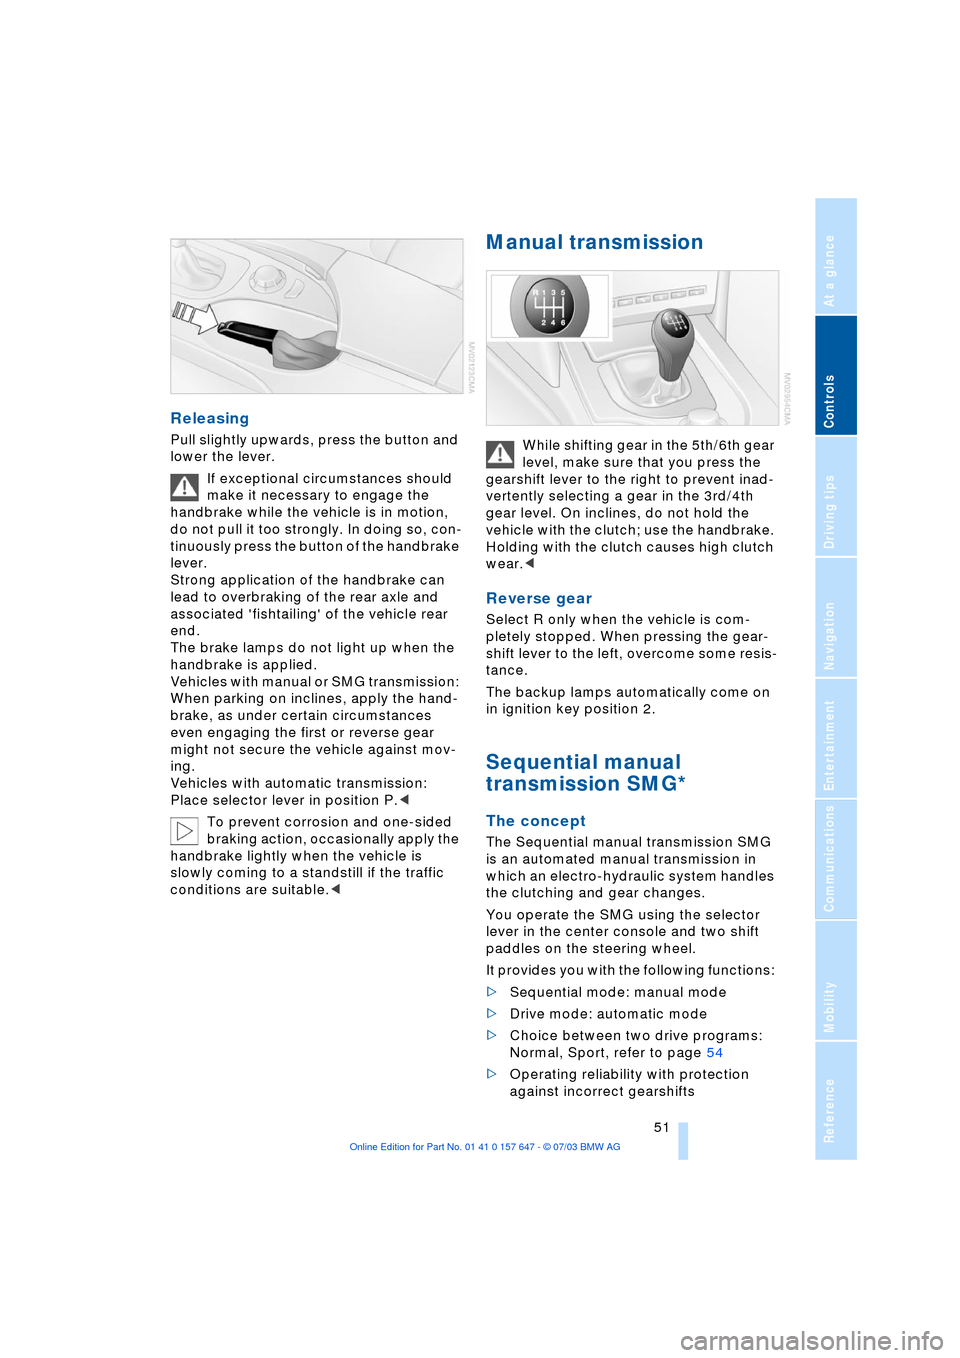
While shifting gear in the 5th/6th gear
level, make sure that you press the
gearshift lever to the right to prevent inad-
vertently selecting a gear in the 3rd/4th
gear level. On inclines, do not hold the
vehicle with the clutch; use the handbrake.
Holding with the clutch causes high clutch
wear.<
Reverse gear
Select R only when the vehicle is com-
pletely stopped. When pressing the gear-
shift lever to the left, overcome some resis-
tance.
The backup lamps automatically come on
in ignition key position 2.
Sequential manual
transmission SMG*
The concept
The Sequential manual transmission SMG
is an automated manual transmission in
which an electro-hydraulic system handles
the clutching and gear changes.
You operate the SMG using the selector
lever in the center console and two shift
paddles on the steering wheel.
It provides you with the following functions:
>Sequential mode: manual mode
>Drive mode: automatic mode
>Choice between two drive programs:
Normal, Sport, refer to page 54
>Operating reliability with protection
against incorrect gearshifts
Page 54 of 220
Driving
52 >Automatic upshifts and downshifts in
the Drive mode
>Automatic downshifts with minimum
engine speed
>Kickdown function in the Drive mode
>Acceleration assistant, refer to
page 54.
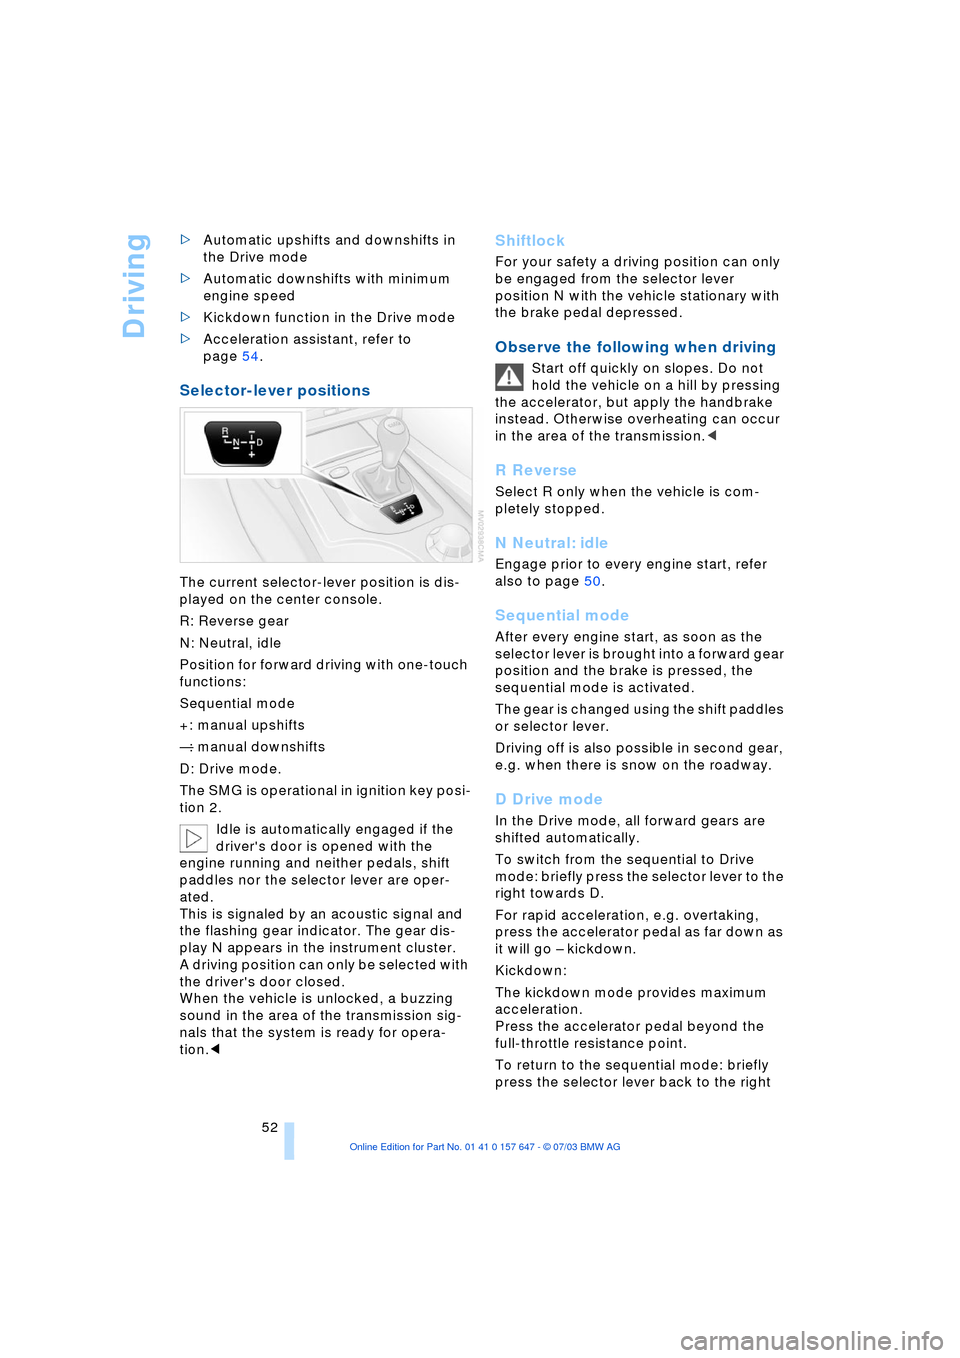
Selector-lever positions
The current selector-lever position is dis-
played on the center console.
R: Reverse gear
N: Neutral, idle
Position for forward driving with one-touch
functions:
Sequential mode
+: manual upshifts
Ñ: manual downshifts
D: Drive mode.
The SMG is operational in ignition key posi-
tion 2.
Idle is automatically engaged if the
driver's door is opened with the
engine running and neither pedals, shift
paddles nor the selector lever are oper-
ated.
This is signaled by an acoustic signal and
the flashing gear indicator. The gear dis-
play N appears in the instrument cluster.
A driving position can only be selected with
the driver's door closed.
When the vehicle is unlocked, a buzzing
sound in the area of the transmission sig-
nals that the system is ready for opera-
tion.<
Shiftlock
For your safety a driving position can only
be engaged from the selector lever
position N with the vehicle stationary with
the brake pedal depressed.
Observe the following when driving
Start off quickly on slopes. Do not
hold the vehicle on a hill by pressing
the accelerator, but apply the handbrake
instead. Otherwise overheating can occur
in the area of the transmission.<
R Reverse
Select R only when the vehicle is com-
pletely stopped.
N Neutral: idle
Engage prior to every engine start, refer
also to page 50.
Sequential mode
After every engine start, as soon as the
selector lever is brought into a forward gear
position and the brake is pressed, the
sequential mode is activated.
The gear is changed using the shift paddles
or selector lever.
Driving off is also possible in second gear,
e.g. when there is snow on the roadway.
D Drive mode
In the Drive mode, all forward gears are
shifted automatically.
To switch from the sequential to Drive
mode: briefly press the selector lever to the
right towards D.
For rapid acceleration, e.g. overtaking,
press the accelerator pedal as far down as
it will go Ð kickdown.
Kickdown:
The kickdown mode provides maximum
acceleration.
Press the accelerator pedal beyond the
full-throttle resistance point.
To return to the sequential mode: briefly
press the selector lever back to the right
Page 101 of 220
Controls
99Reference
At a glance
Driving tips
Communications
Navigation
Entertainment
Mobility
higher than in the rest of the interior. Close
the vent as required.<
Adjustments
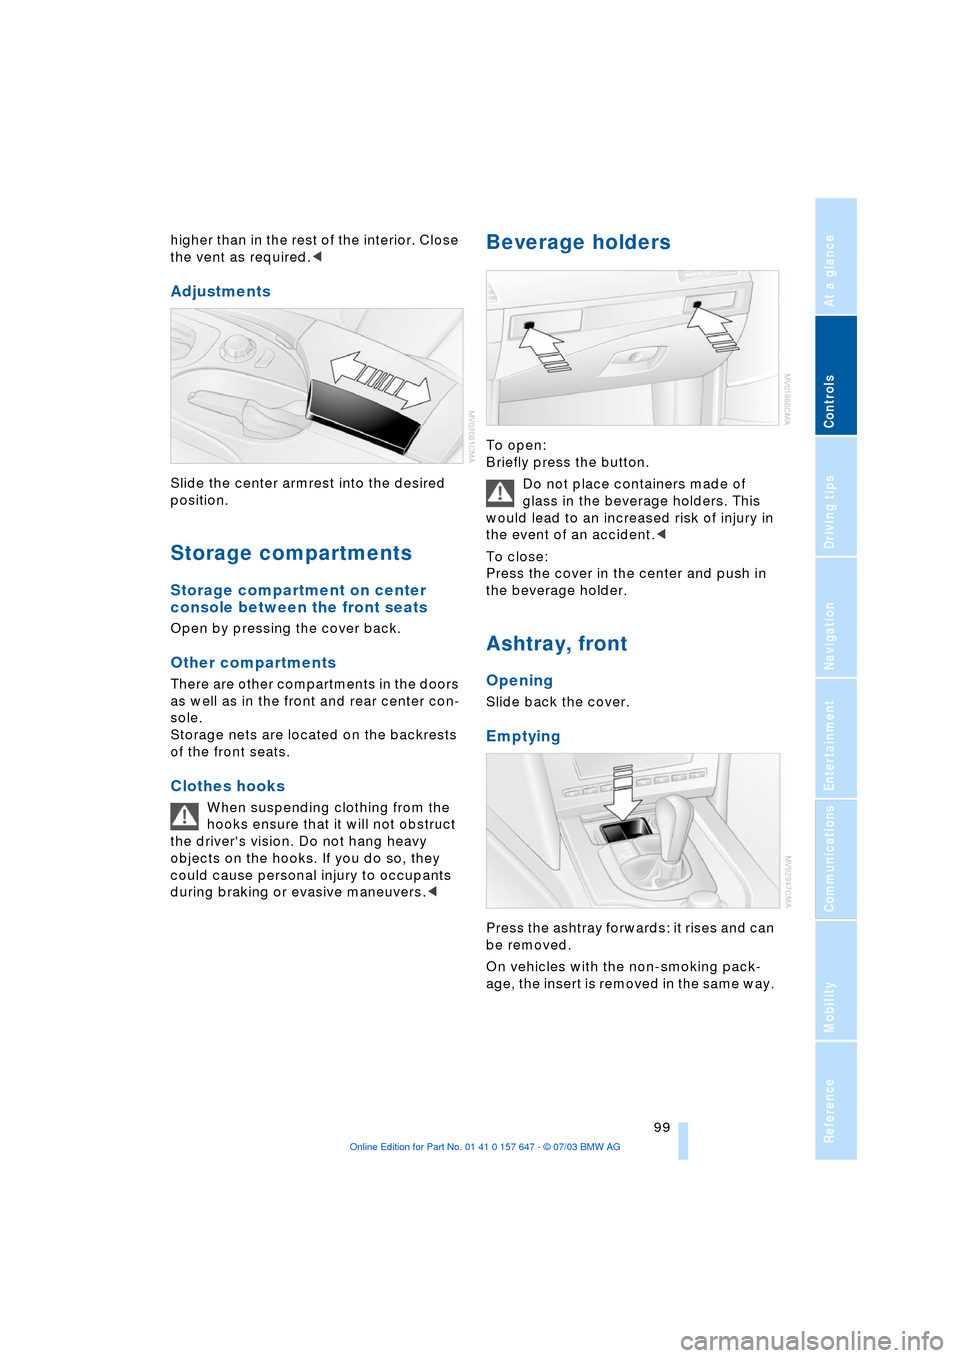
Slide the center armrest into the desired
position.
Storage compartments
Storage compartment on center
console between the front seats
Open by pressing the cover back.
Other compartments
There are other compartments in the doors
as well as in the front and rear center con-
sole.
Storage nets are located on the backrests
of the front seats.
Clothes hooks
When suspending clothing from the
hooks ensure that it will not obstruct
the driver's vision. Do not hang heavy
objects on the hooks. If you do so, they
could cause personal injury to occupants
during braking or evasive maneuvers.<
Beverage holders
To open:
Briefly press the button.
Do not place containers made of
glass in the beverage holders. This
would lead to an increased risk of injury in
the event of an accident.<
To close:
Press the cover in the center and push in
the beverage holder.
Ashtray, front
Opening
Slide back the cover.
Emptying
Press the ashtray forwards: it rises and can
be removed.
On vehicles with the non-smoking pack-
age, the insert is removed in the same way.
Page 116 of 220
Starting navigation system
114
Starting navigation system
Your navigation system can use satellites
to ascertain the precise position of your
vehicle and guide you reliably to any desti-
nation you enter.
Navigation CD/DVD
In your navigation computer, you can use
special navigation CDs/DVDs.
To ensure that your vehicle's navigation
system has access to the latest highway
network information, always load the most
recent CD/DVD version.
Navigation CDs/DVDs are available at your
BMW center.
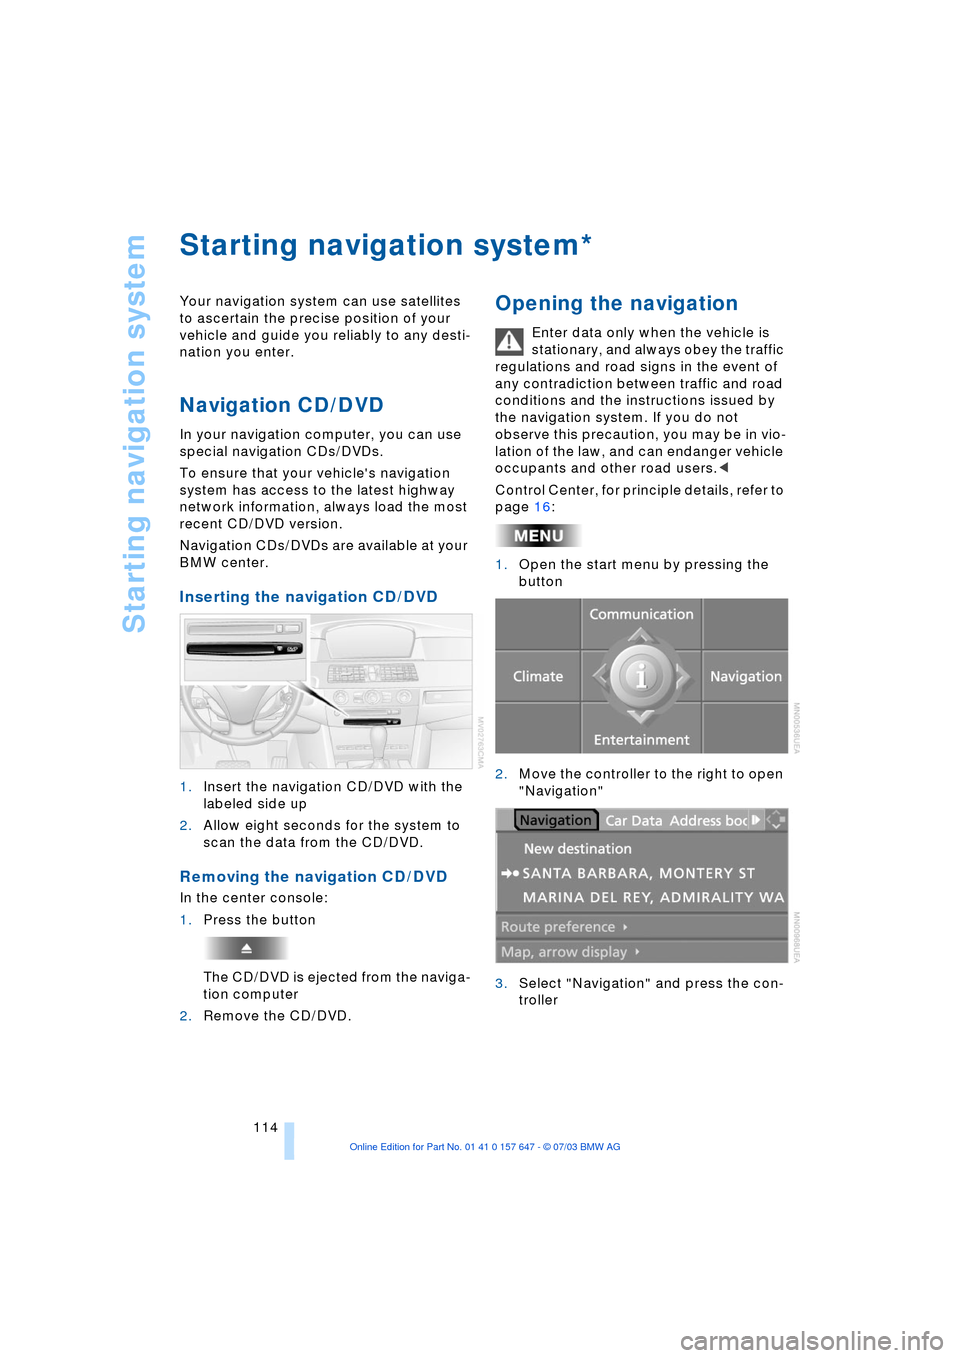
Inserting the navigation CD/DVD
1.Insert the navigation CD/DVD with the
labeled side up
2.Allow eight seconds for the system to
scan the data from the CD/DVD.
Removing the navigation CD/DVD
In the center console:
1.Press the button
The CD/DVD is ejected from the naviga-
tion computer
2.Remove the CD/DVD.
Opening the navigation
Enter data only when the vehicle is
stationary, and always obey the traffic
regulations and road signs in the event of
any contradiction between traffic and road
conditions and the instructions issued by
the navigation system. If you do not
observe this precaution, you may be in vio-
lation of the law, and can endanger vehicle
occupants and other road users.<
Control Center, for principle details, refer to
page 16:
1.Open the start menu by pressing the
button
2.Move the controller to the right to open
"Navigation"
3.Select "Navigation" and press the con-
troller
*