Page 35 of 174
35
Emergency releaseThis lever releases the luggage com-
partment lid from the luggage compart-
ment's interior.
Luggage compartmentFloor panelLift the floor panel with the ring, then
use the tab to suspend it from the
weather-stripping on the drip rail.
Luggage compartment lid
OverviewControlsMaintenanceRepairsDataIndex
Page 37 of 174

37
Indicator lamp displays>The indicator lamp below the interior
rearview mirror flashes continuously:
the system is armed
>The indicator lamp flashes immedi-
ately after the vehicle is locked: doors
or luggage compartment lid are not
completely closed. Even if you do not
close the alerted area(s), the remain-
ing areas are secured, and the indi-
cator lamp will flash continuously
after 10 seconds. However, the inte-
rior motion sensor is not activated
>The indicator lamp goes out immedi-
ately after the vehicle is unlocked: no
manipulation or attempted intrusions
have been detected in the period
since the system was armed
>The indicator lamp flashes for
10 seconds immediately after the
system is armed: an attempted entry
has been detected in the period since
the system was armed.
Following triggering of an alarm, the
indicator lamp will flash continuously.Tilt alarm sensor and interior
motion sensorTilt alarm sensor:
The tilt of the vehicle is monitored. The
alarm system reacts, for example, to
attempts to steal the wheels or tow the
vehicle
Interior motion sensor:
In order for the interior motion sensor to
function properly, the windows and the
glass sunroof must be completely
closed.Avoiding unintentional alarmsThe tilt alarm sensor and interior motion
sensor may be switched off at the same
time. You can do this to prevent a false
alarm, e.g. in the following situations:
>In garages with elevator ramps
>When the vehicle is being trans-
ported by train
>When animals are to remain in the
vehicle.
To deactivate the tilt alarm and
interior motion sensors>Press the button on the remote con-
trol twice.
The indicator lamp lights up briefly and
then flashes continuously. The tilt alarm
sensor and the interior motion sensor
are deactivated until the vehicle is
unlocked and locked again.
You can have the tilt alarm sensor
and the interior motion sensor
permanently deactivated.<
The system inadvertently deacti-
vates the tilt alarm sensor and the
interior motion sensor if the conve-
nience closing of windows and glass
sunroof is interrupted within the first
10 seconds and then restarted. The
vehicle must then be unlocked and
relocked before the sensors will resume
operation.<
Alarm system*
OverviewControlsMaintenanceRepairsDataIndex
Page 39 of 174

39
Glass sunroof, electric*
To prevent injuries, exercise care
when closing the glass sunroof
and keep it in your field of vision until it
is shut.
When leaving the vehicle, always
remove the ignition key from the lock
and remember to close the doors to
prevent children from operating the
glass sunroof and injuring themselves,
etc.<
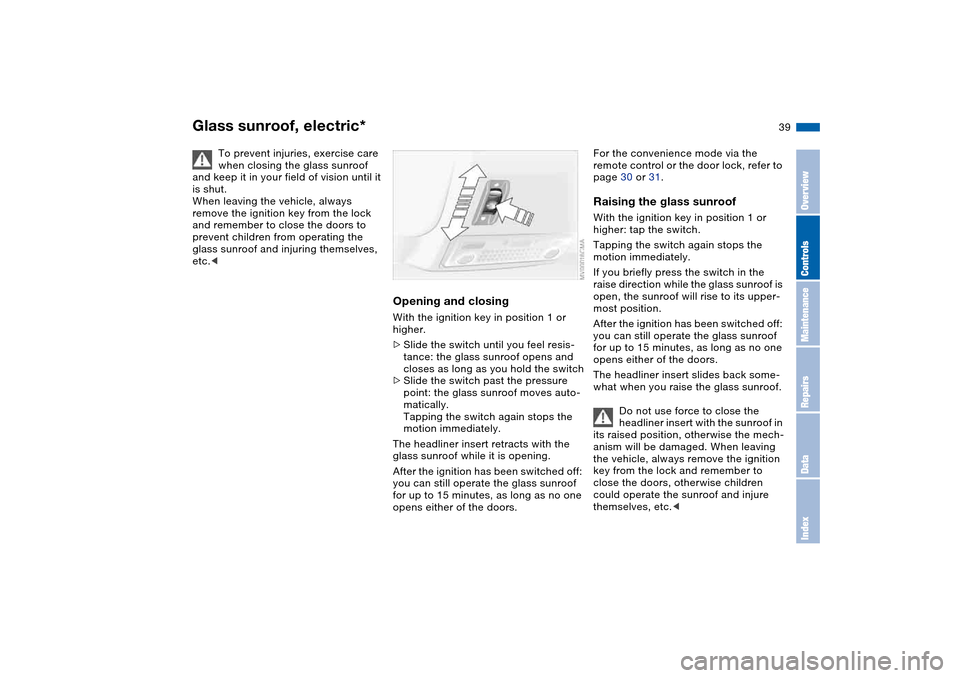
Opening and closingWith the ignition key in position 1 or
higher.
>Slide the switch until you feel resis-
tance: the glass sunroof opens and
closes as long as you hold the switch
>Slide the switch past the pressure
point: the glass sunroof moves auto-
matically.
Tapping the switch again stops the
motion immediately.
The headliner insert retracts with the
glass sunroof while it is opening.
After the ignition has been switched off:
you can still operate the glass sunroof
for up to 15 minutes, as long as no one
opens either of the doors.
For the convenience mode via the
remote control or the door lock, refer to
page 30 or 31.Raising the glass sunroofWith the ignition key in position 1 or
higher: tap the switch.
Tapping the switch again stops the
motion immediately.
If you briefly press the switch in the
raise direction while the glass sunroof is
open, the sunroof will rise to its upper-
most position.
After the ignition has been switched off:
you can still operate the glass sunroof
for up to 15 minutes, as long as no one
opens either of the doors.
The headliner insert slides back some-
what when you raise the glass sunroof.
Do not use force to close the
headliner insert with the sunroof in
its raised position, otherwise the mech-
anism will be damaged. When leaving
the vehicle, always remove the ignition
key from the lock and remember to
close the doors, otherwise children
could operate the sunroof and injure
themselves, etc.<
OverviewControlsMaintenanceRepairsDataIndex
Page 41 of 174

41 Adjustments
Safe seating positionFor driving that is relaxed and less likely
to cause fatigue, you should select a
sitting position that reflects your per-
sonal requirements. In combination
with the safety belts and airbags, the
correct seating position also plays an
important role in enhancing occupant
safety in the event of an accident. To
ensure that the vehicle's safety systems
provide you with optimal protection, we
request that you direct your careful
attention to the following section.
For supplementary information on
transporting children, refer to page 54.Sitting safely with airbags
Always maintain an adequate dis-
tance between yourself and the
airbags. Always hold the steering wheel
by the rim to keep any chance of injury
to hands or arms to an absolute mini-
mum should the airbag be deployed.
Never allow any objects, individuals or
animals to obstruct the areas between
passengers and airbags. Never use the
front airbag's cover as a storage tray or
support for objects of any kind. Never
allow front passengers to rest their feet
or legs on the airbag cover.<
For airbag locations and additional
information on airbags, refer to
page 51.Sitting safely with safety beltsYour vehicle offers five sitting positions,
each of which is provided with a safety
belt.Never allow more than one person
to wear a single safety belt. Never
allow infants or small children to ride in
a passenger's lap. Avoid twisting the
belt while routing it firmly across the
pelvis and shoulder, wear it as snugly
against your body as possible. Do not
allow the belt to rest against hard or
fragile objects. Do not route the belt
across your neck, or run it across sharp
edges. Be sure that the belt does not
become caught or jammed. Avoid
wearing bulky clothing and pull on the
lap belt periodically to retension it over
your shoulders. In the event of a frontal
impact, a loose lap belt could slide over
the hips, leading to abdominal injury. In
addition, the safety belt's restraint
effectiveness is reduced if it is worn
loosely. Expectant mothers should
always wear their safety belts, taking
care to position the lap belt against the
lower hips, where it will not exert pres-
sure against the abdominal area.<
For information on using the safety
belts, refer to page 46.
OverviewControlsMaintenanceRepairsDataIndex
Page 43 of 174
43
BMW sports seat* adjustmentYou can also adjust the tilt angle and
the thigh support:
1To tilt up:
Pull the lever up repeatedly, continu-
ing until the seat reaches the desired
tilt angle
2To tilt down:
Push the lever down repeatedly, con-
tinuing until the seat reaches the
desired tilt angle
3Thigh support:
Pull the lever and adjust the position
of the cushion for thigh support as
desiredManual seat adjustment
OverviewControlsMaintenanceRepairsDataIndex
Page 45 of 174
45
Head restraintsAdjustmentsHeight: adjust by pulling up or pressing
down.
Press button to retract to the
lowest position – see arrow 1.<
Adjust the angle of the front head
restraints by tilting them manually.
You can reduce the risk of spinal
injury and whiplash by adjusting
the head restraint to a height at which it
is centered roughly at ear level.
until it is at maximum extension
2. Press button – see arrow 1 – and
remove the head restraint.Installation – frontSlide the head restraint into the sock-
ets.
Entering the rearTo release the backrestPull the lever upward and fold the back-
rest forward.
Lock both backrests while driving,
otherwise there is a danger of an
unexpected movement causing an
accident.<
OverviewControlsMaintenanceRepairsDataIndex
Page 47 of 174

47
Seat and mirror memory*You can store and recall three different
driver's seat and exterior mirror posi-
tions.
Memory will not retain the adjust-
ment made to the lumbar sup-
port.
2. Adjust your seat and exterior mirrors
to the desired position
3. Press the M
EMORY
button: the indica-
tor lamp in the button lights up
4. Press memory button 1, 2 or 3, as
desired. Indicator lamp goes out.
To select a stored setting
Do not select a memory position
while the vehicle is moving. If you
do so, there is a risk of accident from
unexpected seat movement.<
Ignition key in position 1:
>Briefly press memory button 1, 2 or 3,
as desired.
Movement stops immediately when
one of the seat-adjustment or mem-
ory buttons is activated during the
adjustment process.
The driver's door is closed and the igni-
tion key is either removed or in position
0 or 2:
>Press and hold the desired memory
button – 1, 2 or 3 – until the adjust-
ment process is completed.
If you press the M
EMORY
button acci-
dentally: press the button again; the
indicator lamp goes out.
Your BMW center can adjust your
vehicle's systems in such a man-
ner that your personalized settings are
automatically set for the seat and exte-
rior mirror positions when you unlock
the vehicle with your personal remote
control.<
Before activating the programmed
adjustment feature, ensure that
the footwell behind the driver's seat is
empty and unobstructed. If you fail to
do so, persons, animals or objects
could be injured or damaged if the seat
should move backward.<
OverviewControlsMaintenanceRepairsDataIndex
Page 49 of 174
49
MirrorsTo adjust exterior mirrors1Switch for 4-way adjustment
2Switch to select between mirrorsTo adjust manuallyThe mirrors can also be adjusted by
hand: press against the edges of the
lens.
For storing mirror settings, refer to Seat
and mirror memory on page 47.
The mirror on the passenger's
side is convex. When estimating
the distance between yourself and
other traffic, bear in mind that the
objects reflected in the mirror are closer
than they appear. This means that esti-
mates of the distance to following traffic
should not be regarded as precise.<
Electric defrosting*Both mirrors are automatically heated
when you turn the ignition key to posi-
tion 2.
Interior rearview mirrorTo reduce glare from vehicles behind
you when you are driving at night, tilt
the lens by turning the button.
Vehicles without alarm system:
Tilt the small lever forward.
OverviewControlsMaintenanceRepairsDataIndex