2004 BMW 3.0i ROADSTER&COUPE check engine
[x] Cancel search: check enginePage 86 of 120
In the engine compartment
84 The oil volume between the two marks on
the dipstick corresponds to approx.
1.1 quarts/1 liter. Do not fill beyond the
upper mark on the dipstick. Excess oil will
damage the engine.
Adding engine oil
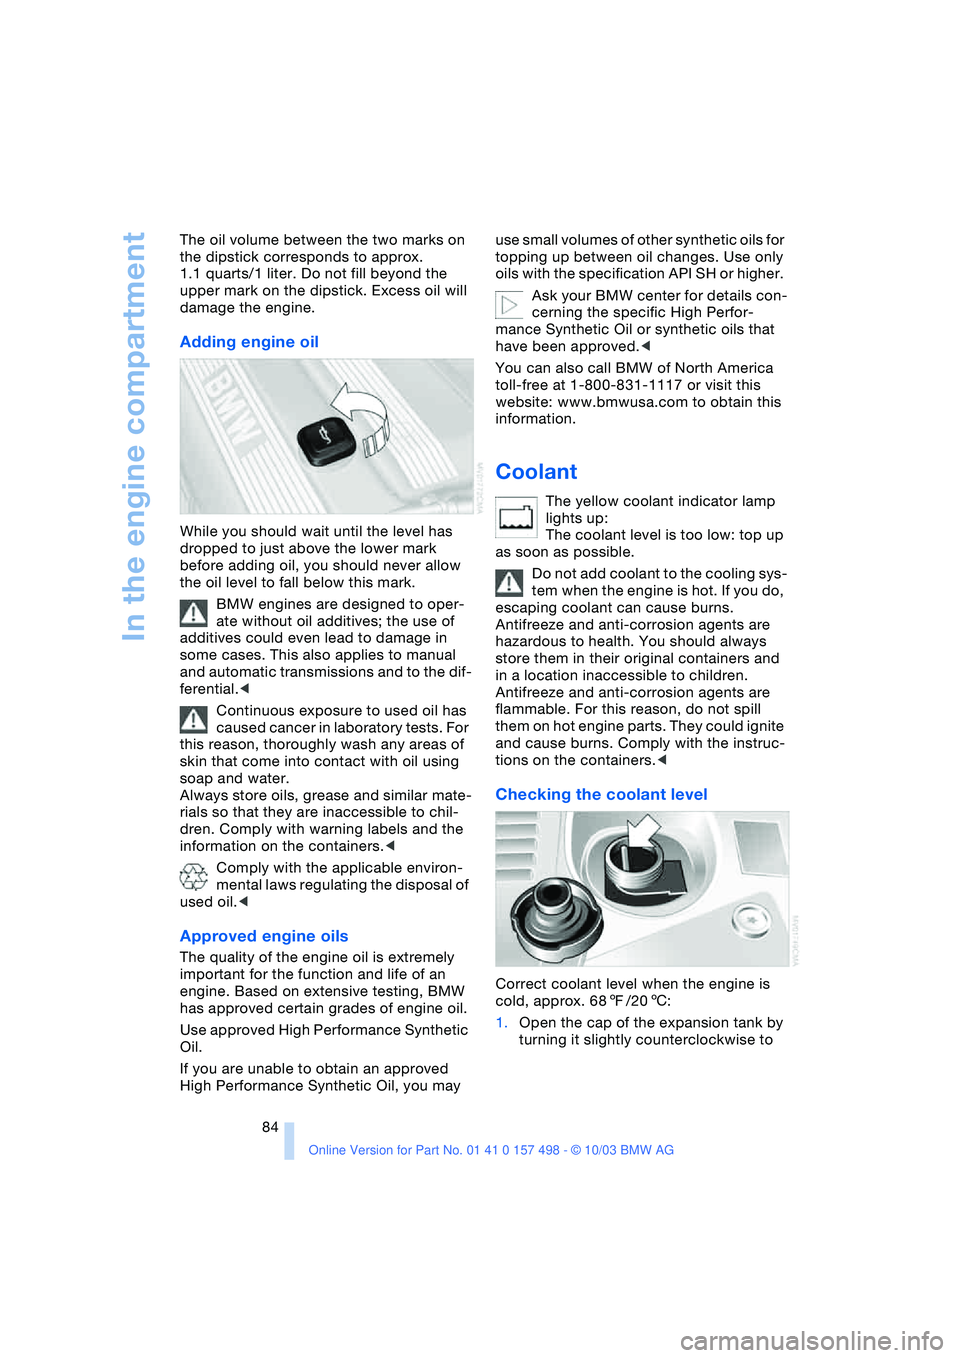
While you should wait until the level has
dropped to just above the lower mark
before adding oil, you should never allow
the oil level to fall below this mark.
BMW engines are designed to oper-
ate without oil additives; the use of
additives could even lead to damage in
some cases. This also applies to manual
and automatic transmissions and to the dif-
ferential.<
Continuous exposure to used oil has
caused cancer in laboratory tests. For
this reason, thoroughly wash any areas of
skin that come into contact with oil using
soap and water.
Always store oils, grease and similar mate-
rials so that they are inaccessible to chil-
dren. Comply with warning labels and the
information on the containers.<
Comply with the applicable environ-
mental laws regulating the disposal of
used oil.<
Approved engine oils
The quality of the engine oil is extremely
important for the function and life of an
engine. Based on extensive testing, BMW
has approved certain grades of engine oil.
Use approved High Performance Synthetic
Oil.
If you are unable to obtain an approved
High Performance Synthetic Oil, you may use small volumes of other synthetic oils for
topping up between oil changes. Use only
oils with the specification API SH or higher.
Ask your BMW center for details con-
cerning the specific High Perfor-
mance Synthetic Oil or synthetic oils that
have been approved.<
You can also call BMW of North America
toll-free at 1-800-831-1117 or visit this
website: www.bmwusa.com to obtain this
information.
Coolant
The yellow coolant indicator lamp
lights up:
The coolant level is too low: top up
as soon as possible.
Do not add coolant to the cooling sys-
tem when the engine is hot. If you do,
escaping coolant can cause burns.
Antifreeze and anti-corrosion agents are
hazardous to health. You should always
store them in their original containers and
in a location inaccessible to children.
Antifreeze and anti-corrosion agents are
flammable. For this reason, do not spill
them on hot engine parts. They could ignite
and cause burns. Comply with the instruc-
tions on the containers.<
Checking the coolant level
Correct coolant level when the engine is
cold, approx. 687/206:
1.Open the cap of the expansion tank by
turning it slightly counterclockwise to
Page 88 of 120
Maintenance
86
Maintenance
The BMW Maintenance
System
The BMW Maintenance System has been
designed as a reliable means of providing
maximum driving and operating safety, and
as cost-effectively for you as possible.
Please keep in mind that regular mainte-
nance is not only necessary for the safety
of your vehicle, but also plays a significant
role in maintaining the resale value of your
vehicle.
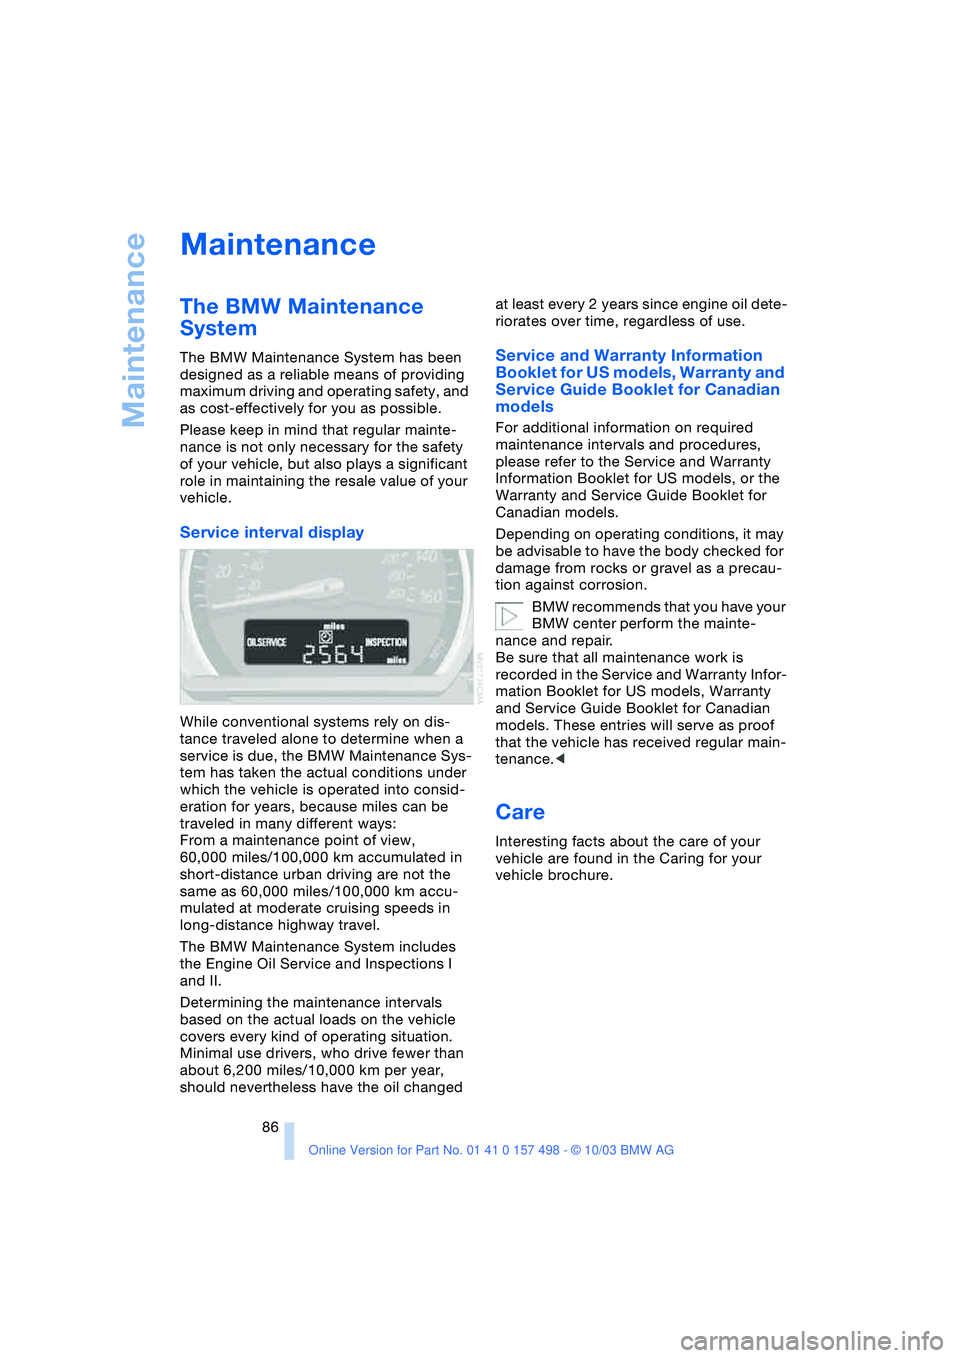
Service interval display
While conventional systems rely on dis-
tance traveled alone to determine when a
service is due, the BMW Maintenance Sys-
tem has taken the actual conditions under
which the vehicle is operated into consid-
eration for years, because miles can be
traveled in many different ways:
From a maintenance point of view,
60,000 miles/100,000 km accumulated in
short-distance urban driving are not the
same as 60,000 miles/100,000 km accu-
mulated at moderate cruising speeds in
long-distance highway travel.
The BMW Maintenance System includes
the Engine Oil Service and Inspections I
and II.
Determining the maintenance intervals
based on the actual loads on the vehicle
covers every kind of operating situation.
Minimal use drivers, who drive fewer than
about 6,200 miles/10,000 km per year,
should nevertheless have the oil changed at least every 2 years since engine oil dete-
riorates over time, regardless of use.
Service and Warranty Information
Booklet for US models, Warranty and
Service Guide Booklet for Canadian
models
For additional information on required
maintenance intervals and procedures,
please refer to the Service and Warranty
Information Booklet for US models, or the
Warranty and Service Guide Booklet for
Canadian models.
Depending on operating conditions, it may
be advisable to have the body checked for
damage from rocks or gravel as a precau-
tion against corrosion.
BMW recommends that you have your
BMW center perform the mainte-
nance and repair.
Be sure that all maintenance work is
recorded in the Service and Warranty Infor-
mation Booklet for US models, Warranty
and Service Guide Booklet for Canadian
models. These entries will serve as proof
that the vehicle has received regular main-
tenance.<
Care
Interesting facts about the care of your
vehicle are found in the Caring for your
vehicle brochure.
Page 89 of 120
Reference
At a glance
Controls
Driving tips
Mobility
87
Laws and regulations
California Proposition 65
warning
California laws require us to state the fol-
lowing warning:
Engine exhaust and a wide variety of
automobile components and parts,
including components found in the interior
furnishings in a vehicle, contain or emit
chemicals known to the State of California
to cause cancer and birth defects and
reproductive harm. In addition, certain flu-
ids contained in vehicles and certain prod-
ucts of component wear contain or emit
chemicals known to the State of CA to
cause cancer and birth defects or other
reproductive harm. Battery posts, terminals
and related accessories contain lead and
lead compounds. Wash your hands after
handling. Used engine oil contains chemi-
cals that have caused cancer in laboratory
animals. Always protect your skin by wash-
ing thoroughly with soap and water.<
OBD interface socket
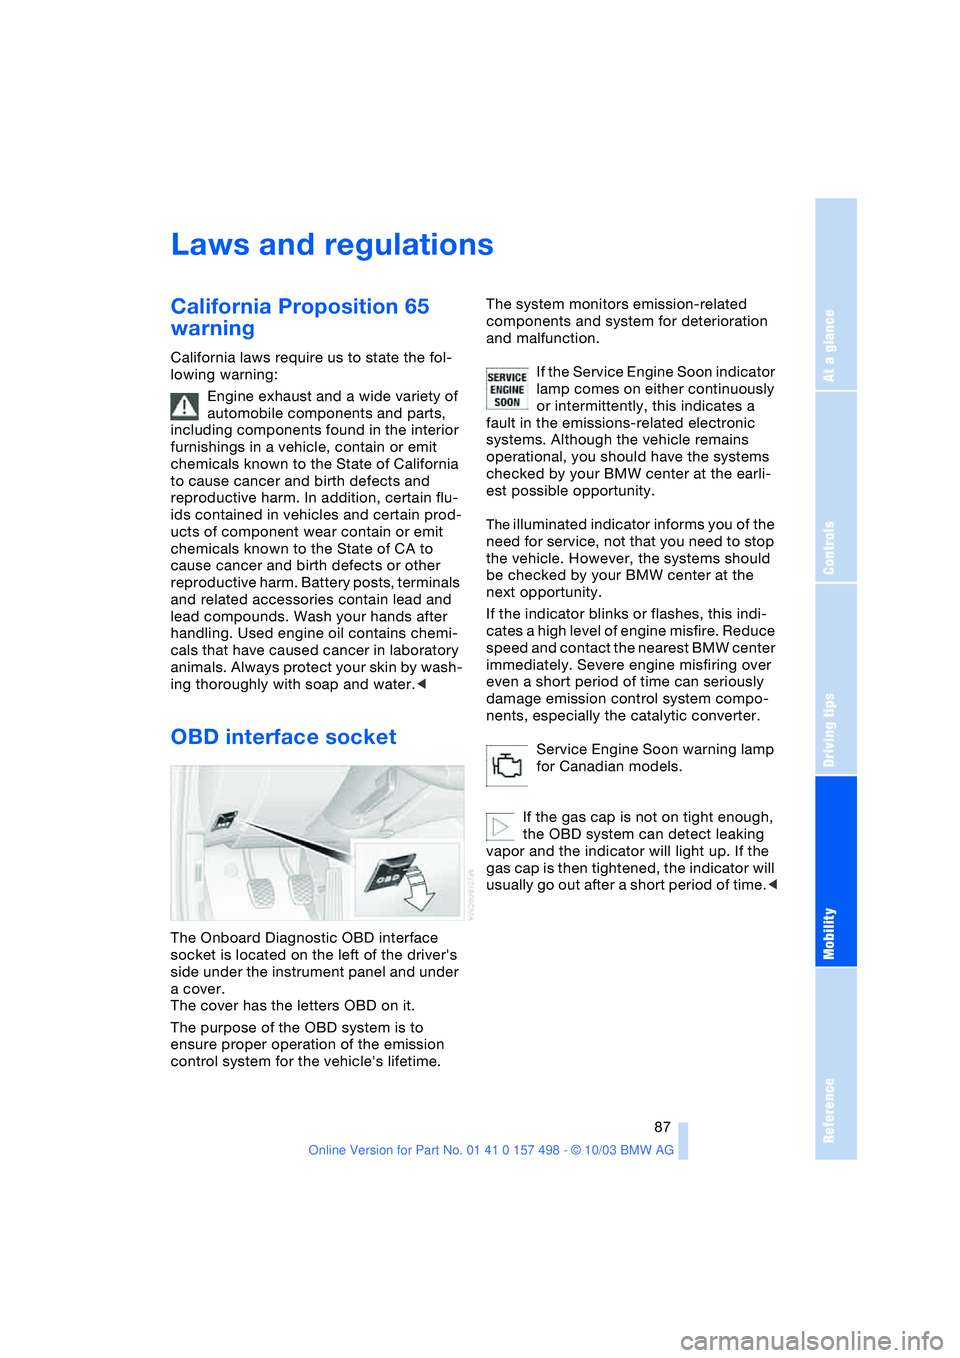
The Onboard Diagnostic OBD interface
socket is located on the left of the driver's
side under the instrument panel and under
a cover.
The cover has the letters OBD on it.
The purpose of the OBD system is to
ensure proper operation of the emission
control system for the vehicle's lifetime. The system monitors emission-related
components and system for deterioration
and malfunction.
If the Service Engine Soon indicator
lamp comes on either continuously
or intermittently, this indicates a
fault in the emissions-related electronic
systems. Although the vehicle remains
operational, you should have the systems
checked by your BMW center at the earli-
est possible opportunity.
The illuminated indicator informs you of the
need for service, not that you need to stop
the vehicle. However, the systems should
be checked by your BMW center at the
next opportunity.
If the indicator blinks or flashes, this indi-
cates a high level of engine misfire. Reduce
speed and contact the nearest BMW center
immediately. Severe engine misfiring over
even a short period of time can seriously
damage emission control system compo-
nents, especially the catalytic converter.
Service Engine Soon warning lamp
for Canadian models.
If the gas cap is not on tight enough,
the OBD system can detect leaking
vapor and the indicator will light up. If the
gas cap is then tightened, the indicator will
usually go out after a short period of time.<
Page 96 of 120
Giving and receiving assistance
94
Warning triangle*
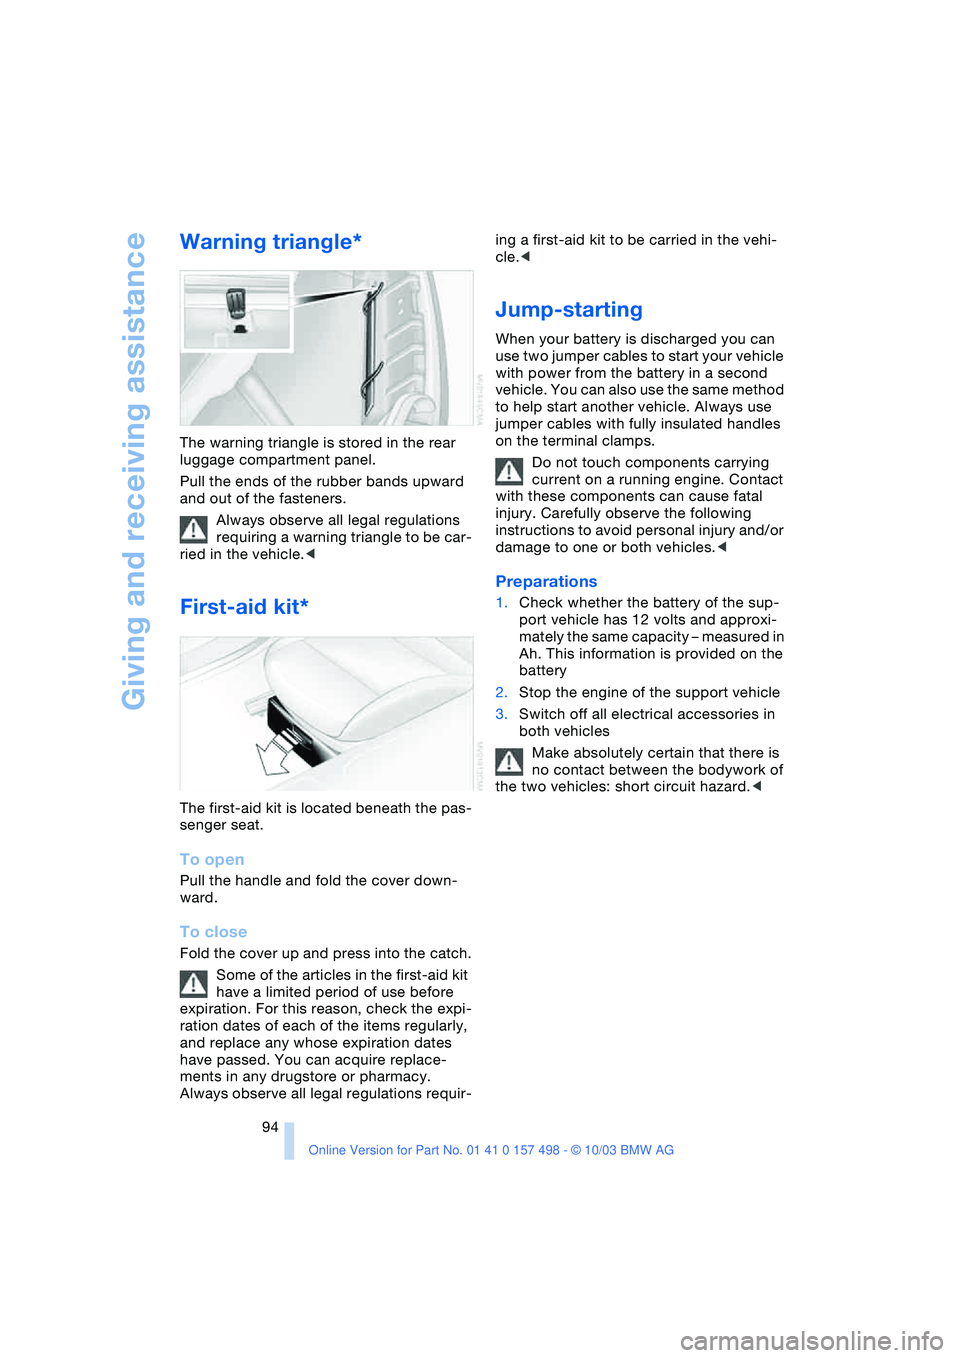
The warning triangle is stored in the rear
luggage compartment panel.
Pull the ends of the rubber bands upward
and out of the fasteners.
Always observe all legal regulations
requiring a warning triangle to be car-
ried in the vehicle.<
First-aid kit*
The first-aid kit is located beneath the pas-
senger seat.
To open
Pull the handle and fold the cover down-
ward.
To close
Fold the cover up and press into the catch.
Some of the articles in the first-aid kit
have a limited period of use before
expiration. For this reason, check the expi-
ration dates of each of the items regularly,
and replace any whose expiration dates
have passed. You can acquire replace-
ments in any drugstore or pharmacy.
Always observe all legal regulations requir-ing a first-aid kit to be carried in the vehi-
cle.<
Jump-starting
When your battery is discharged you can
use two jumper cables to start your vehicle
with power from the battery in a second
vehicle. You can also use the same method
to help start another vehicle. Always use
jumper cables with fully insulated handles
on the terminal clamps.
Do not touch components carrying
current on a running engine. Contact
with these components can cause fatal
injury. Carefully observe the following
instructions to avoid personal injury and/or
damage to one or both vehicles.<
Preparations
1.Check whether the battery of the sup-
port vehicle has 12 volts and approxi-
mately the same capacity – measured in
Ah. This information is provided on the
battery
2.Stop the engine of the support vehicle
3.Switch off all electrical accessories in
both vehicles
Make absolutely certain that there is
no contact between the bodywork of
the two vehicles: short circuit hazard.<
Page 97 of 120
Reference
At a glance
Controls
Driving tips
Mobility
95
Connecting jumper cables
Always adhere to this sequence when
connecting jumper cables; failure to
observe this procedure can lead to sparks
at the battery terminals and pose an injury
hazard.<
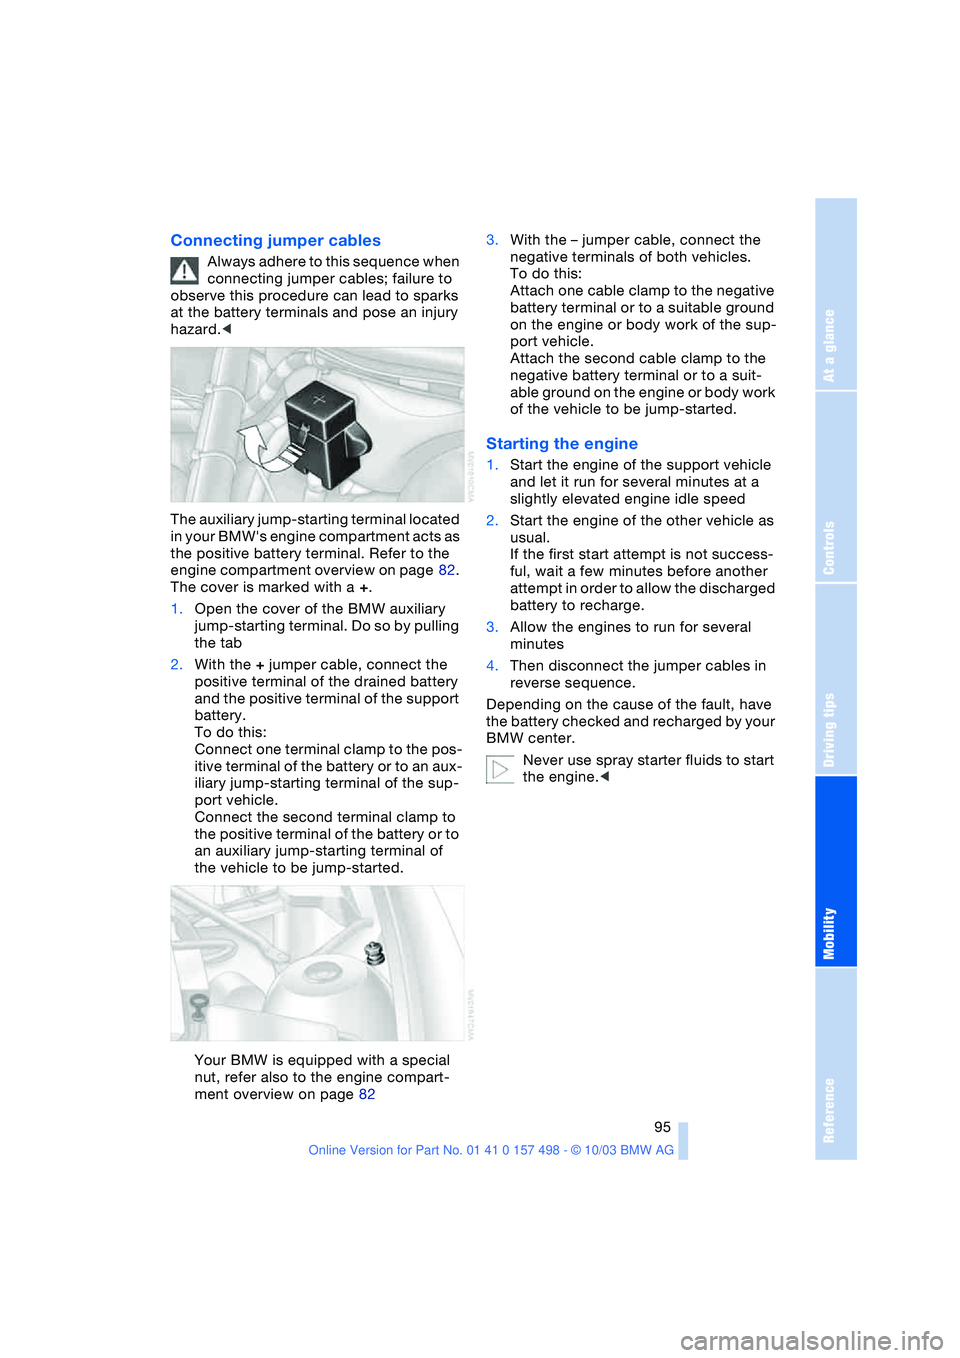
The auxiliary jump-starting terminal located
in your BMW's engine compartment acts as
the positive battery terminal. Refer to the
engine compartment overview on page 82.
The cover is marked with a +.
1.Open the cover of the BMW auxiliary
jump-starting terminal. Do so by pulling
the tab
2.With the + jumper cable, connect the
positive terminal of the drained battery
and the positive terminal of the support
battery.
To do this:
Connect one terminal clamp to the pos-
itive terminal of the battery or to an aux-
iliary jump-starting terminal of the sup-
port vehicle.
Connect the second terminal clamp to
the positive terminal of the battery or to
an auxiliary jump-starting terminal of
the vehicle to be jump-started.
Your BMW is equipped with a special
nut, refer also to the engine compart-
ment overview on page 823.With the – jumper cable, connect the
negative terminals of both vehicles.
To do this:
Attach one cable clamp to the negative
battery terminal or to a suitable ground
on the engine or body work of the sup-
port vehicle.
Attach the second cable clamp to the
negative battery terminal or to a suit-
able ground on the engine or body work
of the vehicle to be jump-started.
Starting the engine
1.Start the engine of the support vehicle
and let it run for several minutes at a
slightly elevated engine idle speed
2.Start the engine of the other vehicle as
usual.
If the first start attempt is not success-
ful, wait a few minutes before another
attempt in order to allow the discharged
battery to recharge.
3.Allow the engines to run for several
minutes
4.Then disconnect the jumper cables in
reverse sequence.
Depending on the cause of the fault, have
the battery checked and recharged by your
BMW center.
Never use spray starter fluids to start
the engine.<
Page 107 of 120
Reference
At a glance
Controls
Driving tips
Mobility
105
Battery 91
– disposal 92
– indicator lamp 13, 91
– jump-starting 94
– remote control 17
Belts, refer to Safety
belts 30
Belt tensioner, refer to
Safety belts 30
Beverage holders 65
Blower
– air conditioning 59
– automatic climate
control 62
Blower, refer to Air
supply 59, 62
BMW 5
Bore, refer to Engine
data 100
Bottle holders, refer to
Beverage holders 65
Brake fluid 85
– filling 85
– indicator/warning
lamp 13, 85
– level 85
Brake force display 53
Brake hydraulic system 85
– indicator/warning
lamp 13, 69, 85
Brake lamps
– bulb replacement 90
– indicator lamp, defective
lamp 13
Brake pads 70
– break-in procedures 68
– indicator lamp 70
Brake pad wear indicator
– brake pads 70
– indicator lamp 13
Brake rotors
– brake system 69
– break-in procedures 68
Brakes 69
– ABS 54
– brake fluid 85
– break-in procedures 68
– indicator/warning
lamps 13, 52, 53, 54
– parking brake 38Brake system 69
– brake fluid level 85
– brake pads 70
– break-in procedures 68
– disc brakes 69
– indicator lamp 13
Breakdown
– Flat Tire Monitor 54
Break-in procedures 68
Bulb replacement, refer to
Lamps and bulbs 88
Buttons in steering
wheel 11
C
California Proposition
65 warning 87
Can holders, refer to
Beverage holders 65
Capacities 103
Car battery 91
Car care, refer to the Caring
for your vehicle brochure
Car-care products, refer to
the Caring for your
vehicle brochure
Care, refer to the Caring for
your vehicle brochure
Cargo loading
– vehicle 70
Car keys, refer to Keys 16
Carpet care, refer to the
Caring for your vehicle
brochure
Car radio, refer to Owner's
Manual for Radio
Car telephone, refer to
Owner's Manual for
Telephone
Car wash, refer to the
Caring for your vehicle
brochure
Catalytic converter, refer to
High temperatures 69
CD player operation, refer
to Owner's Manual
for Radio
Center high-mount brake
lamp
– bulb replacement 90Central locking system 16
– interior 18
Changing a wheel 91
Charge indicator
lamp 13, 91
Check Gas Cap
– indicator lamp 13
Child-restraint mounting
system, LATCH 35
Child-restraint systems 33
Child seat, refer to Child-
restraint systems 33
Chrome parts, refer to the
Caring for your vehicle
brochure
Cigarette lighter 65
Cigarette lighter socket 65
Cleaning the rear window,
refer to the Caring for
your vehicle brochure
Cleaning the vehicle, refer
to the Caring for your
vehicle brochure
Cleaning the windshield 44
Clock 49, 50
– 12- or 24-hour mode 50
– refer to Owner's Manual
for Radio/Onboard
Computer
– setting 49
Clothes hooks 25
Clutch
– break-in procedures 68
Cockpit 10
Cold start, refer to
Starting the engine 36
Compact disc operation,
refer to Owner's Manual
for Radio
Compartments 64
Compression ratio, refer to
Engine data 100
Computer 50
– clock, 12- or 24-hour
mode 50
– refer to Owner's Manual
for Onboard Computer
Computer, refer to
Onboard Computer 50
Condensation, refer to Air
conditioning mode 59, 62
Page 111 of 120
Reference
At a glance
Controls
Driving tips
Mobility
109
Lock buttons on doors,
refer to Locking 19
Locking the doors
– from inside 19
– from outside 17, 18
Locking the vehicle
– from inside 18
– from outside 16
Low beams 46
– automatic 46
– bulb replacement 89
– indicator lamp, defective
lamp 13
Lug bolts
– keys 88
Luggage compartment 20
– capacity 101
– increasing capacity 20
– opening/closing,
refer to Luggage
compartment lid 19
– opening from inside the
vehicle 19
– opening from the
outside 19
– opening via remote
control 17
Luggage compartment
lid 19
– opening from inside the
vehicle 19
– opening from the
outside 19
– remote control 17
M
Maintenance, refer to
Service interval
display 49, 86
Maintenance System 86
Making phone calls, refer to
Owner's Manual for
Telephone
Malfunction
– convertible top 23
– door lock 18
– fuel filler door 74
– storage compartments 64
Malfunction of electrical
accessory 92Manual convertible top 21
Manual mode, refer to
Automatic transmission
with Steptronic 39
Manual operation
– door lock 18
– driver's door 18
– fuel filler door 74
– luggage compartment
lid 19
– power convertible top 23
– storage compartments 64
Manual transmission 38
Manufacturer 5
Master key 16
– with remote control 16
Maximum cooling 62
Maximum speed
– with winter tires 79
Measurements, refer to
Dimensions 102
Mechanical seat 28
Memory, refer to Vehicle
Memory, Key Memory 31
Microfilter
– air conditioning 59
– automatic climate
control 63
Mirrors 31
– heated 31
Mobile Service 93
Modifications, technical,
refer to For your own
safety 5
M Sports seat 29
Multifunction steering
wheel MFL 11
Multifunction switch
– turn signal indicators/
headlamp flasher 43
– washer/wiper system 43
N
Neck supports, refer to
Head restraints 28
Nets 64
O
OBD interface socket 87Octane numbers, refer to
Fuel specifications 74
Odometer 48
Oil, refer to Engine oil
– alternative oils 84
– approved oils 84
– capacity 103
– dipstick 83
– indicator lamp 13
Oil change intervals,
refer to the Service and
Warranty Information
Booklet for US models,
Warranty and Service
Guide Booklet for
Canadian models
Oil consumption 83
Oil filter change 103
Oil level 83
– checking 83
– indicator lamp 13
Oil pressure 83
– indicator/warning
lamp 13
Oil sensor 83
– indicator lamp 13
OIL SERVICE 49
Oil types 84
Onboard computer, refer to
Computer or to the
Owner's Manual for
Onboard Computer
Onboard monitor, refer to
Computer or to the
Owner's Manual for
Onboard Computer
Onboard tool kit 88
Opening and closing the
vehicle
– from inside 18
– from outside 16, 17
– via the door lock 18
– via the remote control 17
Operating elements 10
Outlets, refer to
Ventilation 59, 63
Page 114 of 120
Everything from A to Z
112 Tire inflation pressure
– checking 75
– restoring 75
Tire pressure monitoring,
refer to Flat Tire
Monitor 54
Tires
– age 77
– break-in procedures 68
– changing 79
– condition 78
– damage 78
– DOT quality grades 77
– inflation pressure 75
– replacement 79
– Run Flat tires 80
– size 75
– storage 79
– temperature 78
– traction 77
– tread 78
– tread depth indicator,
refer to Tire tread, Tire
damage 78
– tread wear 77
– Uniform Tire Quality
Grading 77
Tool kit, refer to Onboard
tool kit 88
Torque, refer to Engine
data 100
To unlock
– from inside 18
– from outside 17
Towing 96
– eyelet 96
Towing the vehicle 96
– with the front axle
raised 96
Tow sockets for towing
eyelet 96
Track width, refer to
Dimensions 102
Transmission
– automatic transmission
with Steptronic 39
– manual transmission 38
Transmission interlock,
refer to Changing selector
lever positions 39Transmission
malfunction 40
Transporting children
safely 33
Tread depth, refer to Tire
tread 78
Tread wear indicators in the
tires, refer to
Tire tread, Tire
damage 78
Trip distance recorder,
refer to Trip odometer 48
Trip meter, refer to Trip
odometer 48
Trip odometer 48
Trunk, refer to Luggage
compartment 20
Trunk lid
– opening via remote
control 17
Trunk lid, refer to Luggage
compartment lid 19
Trunk volume, refer to
Luggage compartment
capacity 101
Turning circle, refer to
Dimensions 102
Turn signal indicators 43
– indicator lamp 13
TV function, refer to
Owner's Manual
for Onboard Computer
U
Undercoating, refer to the
Caring for your vehicle
brochure
Unintentional alarm 26
Units
– average
consumption 50
– average
speed 50
– temperature 50
Used batteries, refer to
Battery disposal 92
V
Vehicle
– battery 91
– break-in procedures 68
– care, refer to the Caring
for your vehicle brochure
– cargo loading 70
– measurements, refer to
Dimensions 102
– storage, refer to the
Caring for your vehicle
brochure
– switching off the
engine 69
– washing, refer to the
Caring for your vehicle
brochure
– weight 101
Vehicle Memory 31
Vehicle vacuum cleaner,
refer to Cigarette lighter
socket 65
Ventilation 59, 63
– air conditioning 59
– automatic climate
control 63
Vents, refer to
Ventilation 59, 63
Volume
– fuel tank, refer to
Capacities 103
W
Warning and indicator
lamps 12
Warning triangle 94
Warranty, see Service and
Warranty Information
Booklet for US models,
Warranty and Service
Guide Booklet for
Canadian models 86
Warranty and service 6
Washer/wiper system 43
Washer fluid reservoir, refer
to Capacities 103