2004 BMW 3.0i ROADSTER&COUPE turn signal
[x] Cancel search: turn signalPage 12 of 120
Cockpit
10
Cockpit
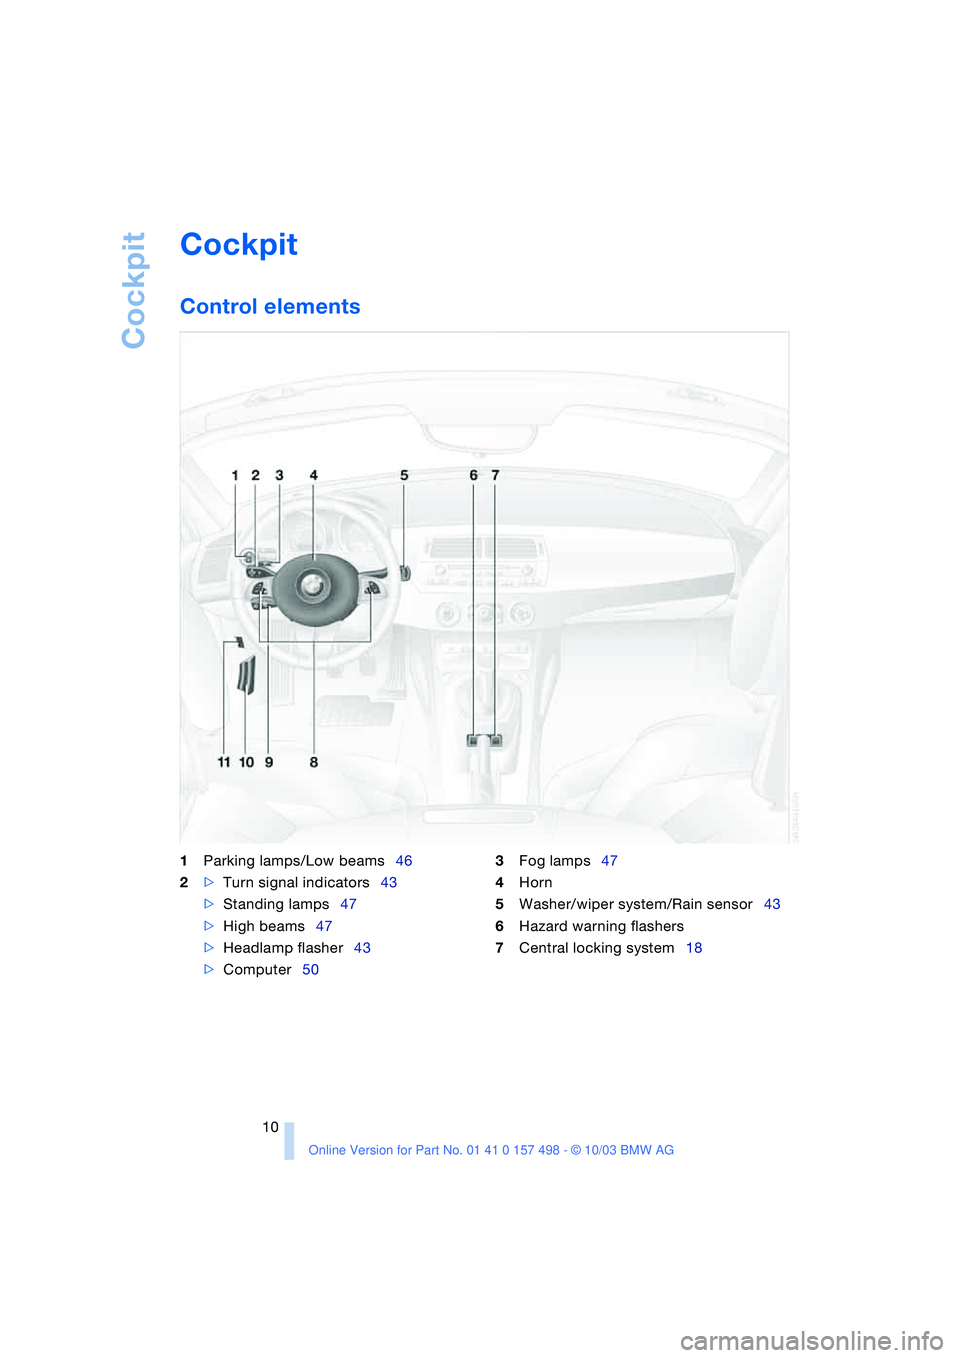
Control elements
1
Parking lamps/Low beams46
2
>
Turn signal indicators43
>
Standing lamps47
>
High beams47
>
Headlamp flasher43
>
Computer50
3
Fog lamps47
4
Horn
5
Washer/wiper system/Rain sensor43
6
Hazard warning flashers
7
Central locking system18
Page 15 of 120
At a glance
Controls
Driving tips
Mobility Reference
13
Colors
The indicator and warning lamps can light
up in various colors and combinations.
The following section explains the signifi-
cance of the individual colors as well as
how you should respond.
>Red:
Stop the vehicle immediately
or
an important reminder
>Red and yellow:
Continue driving cautiously
>Yellow:
Have the system checked soon
or
for your information
>Green:
For your information
>Blue:
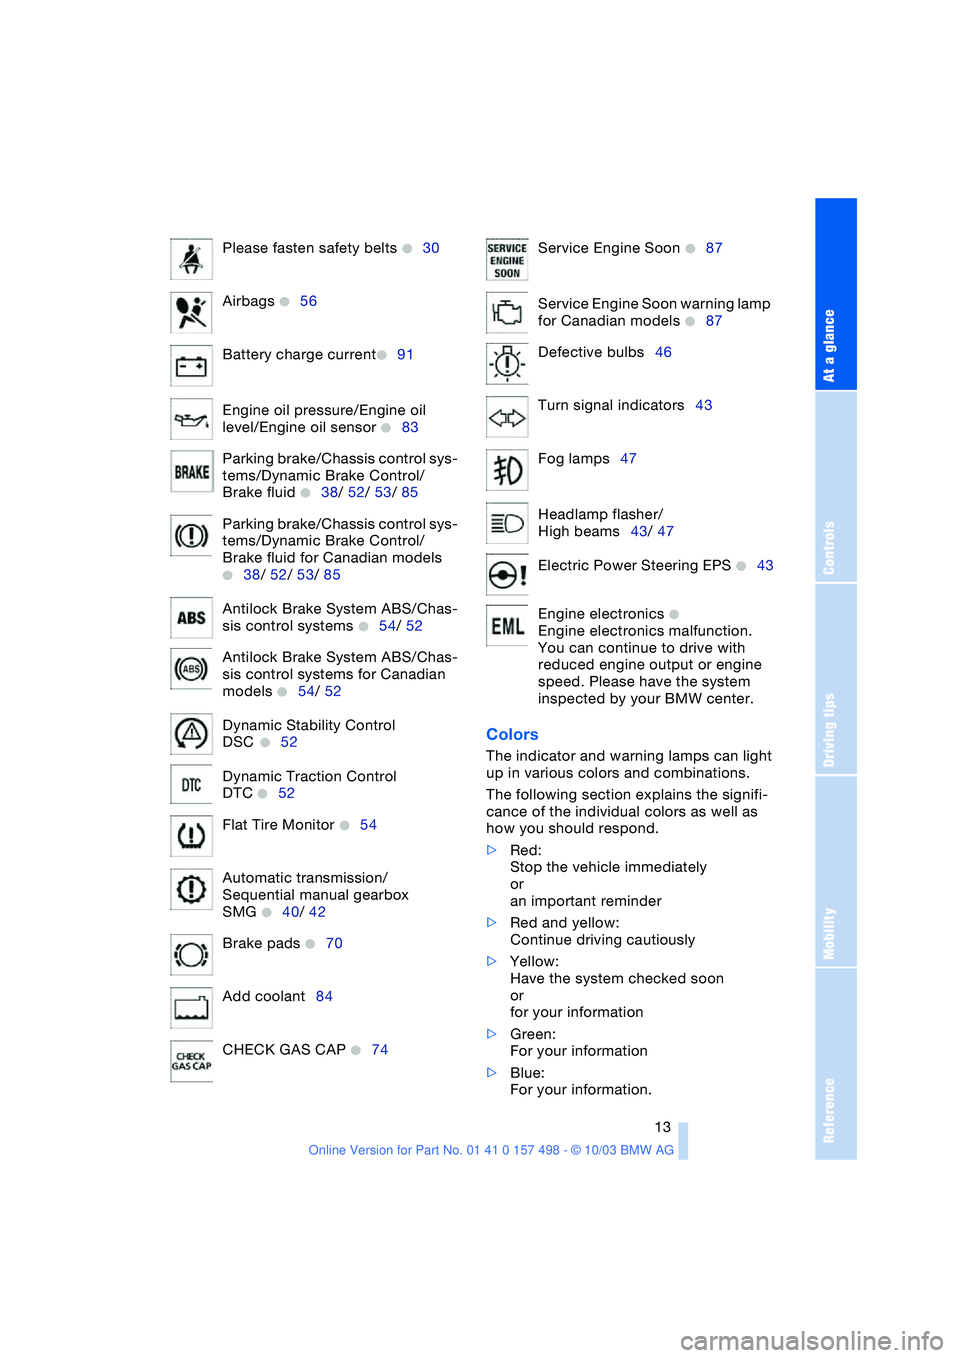
For your information. Please fasten safety belts
+30
Airbags
+56
Battery charge current
+91
Engine oil pressure/Engine oil
level/Engine oil sensor
+83
Parking brake/Chassis control sys-
tems/Dynamic Brake Control/
Brake fluid
+38/ 52/ 53/ 85
Parking brake/Chassis control sys-
tems/Dynamic Brake Control/
Brake fluid for Canadian models
+38/ 52/ 53/ 85
Antilock Brake System ABS/Chas-
sis control systems
+54/ 52
Antilock Brake System ABS/Chas-
sis control systems for Canadian
models
+54/ 52
Dynamic Stability Control
DSC
+52
Dynamic Traction Control
DTC
+52
Flat Tire Monitor
+54
Automatic transmission/
Sequential manual gearbox
SMG
+40/ 42
Brake pads
+70
Add coolant84
CHECK GAS CAP
+74
Service Engine Soon +87
Service Engine Soon warning lamp
for Canadian models
+87
Defective bulbs46
Turn signal indicators43
Fog lamps47
Headlamp flasher/
High beams43/ 47
Electric Power Steering EPS
+43
Engine electronics
+
Engine electronics malfunction.
You can continue to drive with
reduced engine output or engine
speed. Please have the system
inspected by your BMW center.
Page 19 of 120
Reference
At a glance
Controls
Driving tips
Mobility
17
system and switch the interior lamps on/
off.
You can have a signal set to confirm
that the vehicle's locks have engaged
securely.<
Since persons or animals in the vehi-
cle could lock the doors from the
inside, always take the vehicle keys with
you so that the vehicle can be opened
again from the outside at any time.<
If it is no longer possible to lock the
vehicle via the remote control, the
battery is discharged. Use this key while
driving for an extended period in order to
recharge the battery.
In the event of a system malfunction,
please contact your BMW center. You can
also obtain replacement keys there.<
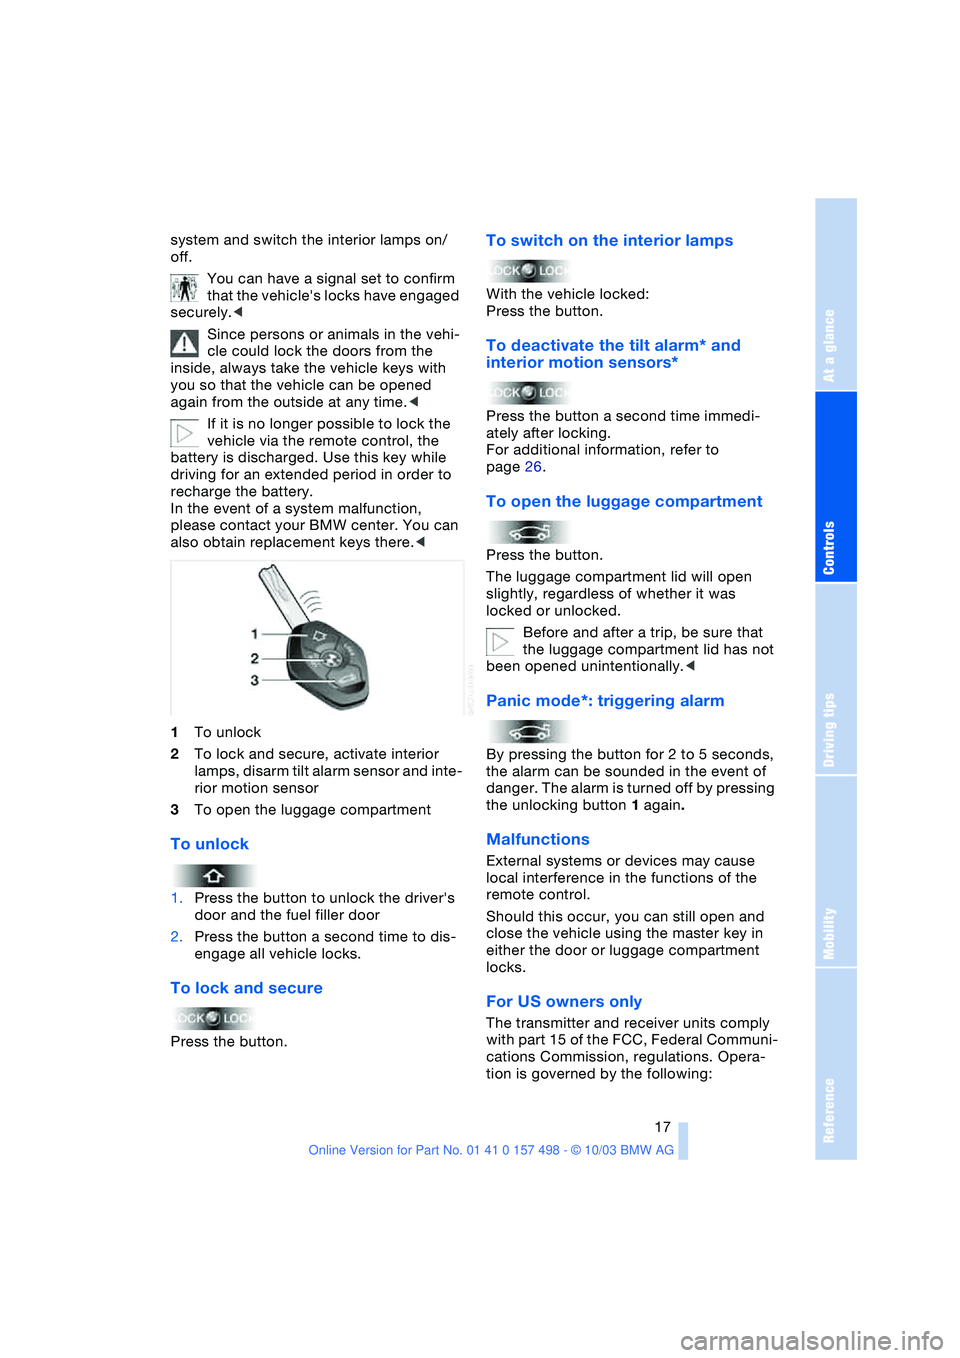
1To unlock
2To lock and secure, activate interior
lamps, disarm tilt alarm sensor and inte-
rior motion sensor
3To open the luggage compartment
To unlock
1.Press the button to unlock the driver's
door and the fuel filler door
2.Press the button a second time to dis-
engage all vehicle locks.
To lock and secure
Press the button.
To switch on the interior lamps
With the vehicle locked:
Press the button.
To deactivate the tilt alarm* and
interior motion sensors*
Press the button a second time immedi-
ately after locking.
For additional information, refer to
page 26.
To open the luggage compartment
Press the button.
The luggage compartment lid will open
slightly, regardless of whether it was
locked or unlocked.
Before and after a trip, be sure that
the luggage compartment lid has not
been opened unintentionally.<
Panic mode*: triggering alarm
By pressing the button for 2 to 5 seconds,
the alarm can be sounded in the event of
danger. The alarm is turned off by pressing
the unlocking button 1 again.
Malfunctions
External systems or devices may cause
local interference in the functions of the
remote control.
Should this occur, you can still open and
close the vehicle using the master key in
either the door or luggage compartment
locks.
For US owners only
The transmitter and receiver units comply
with part 15 of the FCC, Federal Communi-
cations Commission, regulations. Opera-
tion is governed by the following:
Page 20 of 120

Opening and closing
18 FCC ID: LX8EWS
LX8FZVS
LX8FZVE
Compliance statement:
This device complies with part 15 of the
FCC Rules. Operation is subject to the fol-
lowing two conditions:
>This device may not cause harmful
interference, and
>this device must accept any interfer-
ence received, including interference
that may cause undesired operation.
Any unauthorized modifications to
these devices could void the user's
authority to operate the equipment.<
Door lock
One turn of the key in the driver's door lock
to unlock the driver's door only and the fuel
filler door.
Turn the key a second time to disengage all
other vehicle locks.
You can have a signal set to confirm
that the vehicle's locks have engaged
securely.<
Convenience operation
You can also operate the power windows
and the fully automatic convertible top via
the door lock.
>To open:
With the door closed, hold the key in the
Unlock position
>To close:
With the door closed, hold the key in the
Lock position.Watch the closing process carefully
and be sure that no one is trapped by
the closing motion. Releasing the key stops
the operation.<
Manual operation
In the event of an electrical malfunction
Turn the key all the way to the left or right to
unlock/lock the driver's door.
Interior
You can use this button to control the cen-
tral locking system whenever the doors are
closed. The doors and luggage compart-
ment lid are unlocked or locked only. The
anti-theft system is not activated.
If only the driver's door was unlocked from
the outside and you press the button, then,
with the driver's door still open, the lug-
gage compartment lid and the fuel filler
door will unlock, too. If the driver's door is
closed, it will be locked.
If you desire, the central locking sys-
tem can be activated automatically as
soon as you begin to drive. This can be
adjusted to be key-specific.<
To unlock and open
>Either unlock the doors together with
the button for the central locking sys-
tem and then pull each of the release
handles above the armrests
or
>pull the release handle for each door
twice: the initial pull unlocks the door,
and the second one opens it.
Page 28 of 120
Opening and closing
26
Arming and disarming the alarm
system
When the vehicle is locked or unlocked
either via the driver's door lock or with the
remote control, the alarm system is simul-
taneously armed or disarmed.
The hazard warning flashers blink once
when the alarm system has been properly
armed.
You can have different acknowledg-
ment signals set to confirm arming
and disarming.<
You can still open the luggage compart-
ment lid when the system is armed by
pressing the remote control button, refer to
page 17. When it is closed, the lid is once
again secured.
Manual operation of the luggage
compartment lid triggers the alarm.
Refer to page 19.<
To cancel an alarm:
Press the button on the remote control,
refer to page 16, or turn the ignition key to
position 1. Refer to page 36.
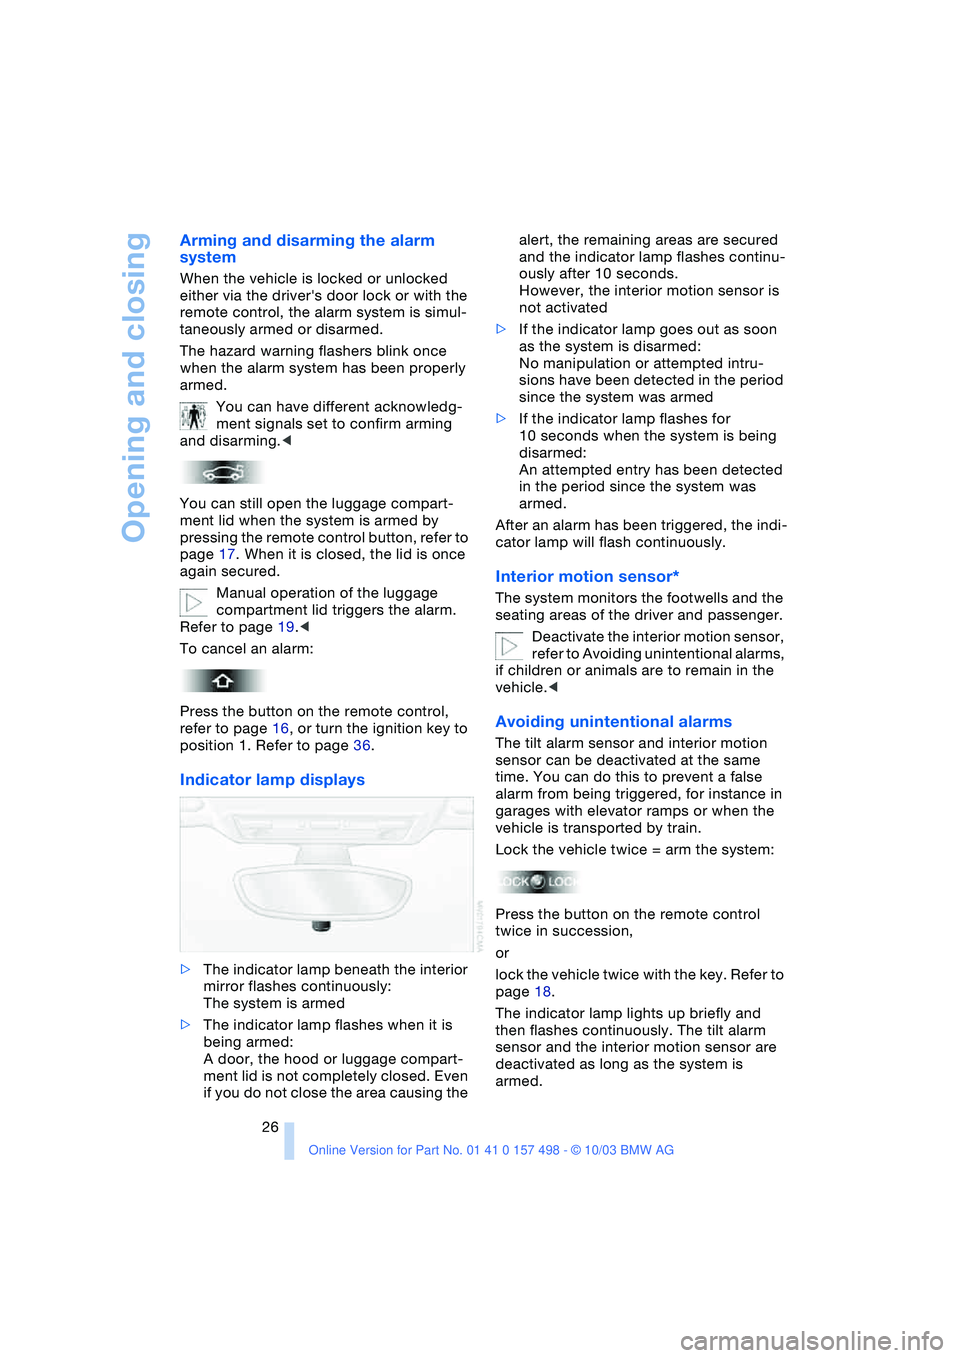
Indicator lamp displays
>The indicator lamp beneath the interior
mirror flashes continuously:
The system is armed
>The indicator lamp flashes when it is
being armed:
A door, the hood or luggage compart-
ment lid is not completely closed. Even
if you do not close the area causing the alert, the remaining areas are secured
and the indicator lamp flashes continu-
ously after 10 seconds.
However, the interior motion sensor is
not activated
>If the indicator lamp goes out as soon
as the system is disarmed:
No manipulation or attempted intru-
sions have been detected in the period
since the system was armed
>If the indicator lamp flashes for
10 seconds when the system is being
disarmed:
An attempted entry has been detected
in the period since the system was
armed.
After an alarm has been triggered, the indi-
cator lamp will flash continuously.
Interior motion sensor*
The system monitors the footwells and the
seating areas of the driver and passenger.
Deactivate the interior motion sensor,
refer to Avoiding unintentional alarms,
if children or animals are to remain in the
vehicle.<
Avoiding unintentional alarms
The tilt alarm sensor and interior motion
sensor can be deactivated at the same
time. You can do this to prevent a false
alarm from being triggered, for instance in
garages with elevator ramps or when the
vehicle is transported by train.
Lock the vehicle twice = arm the system:
Press the button on the remote control
twice in succession,
or
lock the vehicle twice with the key. Refer to
page 18.
The indicator lamp lights up briefly and
then flashes continuously. The tilt alarm
sensor and the interior motion sensor are
deactivated as long as the system is
armed.
Page 32 of 120
Adjustments
30
Safety function
1.Close the driver's door and turn the
ignition key to position 0 or 2
2.Press and hold the desired memory
button 1, 2 or 3 until the adjustment
process is completed.
If you press the
MEMORY button acciden-
tally:
Press the button again; the indicator lamp
goes out.
Seat heating*
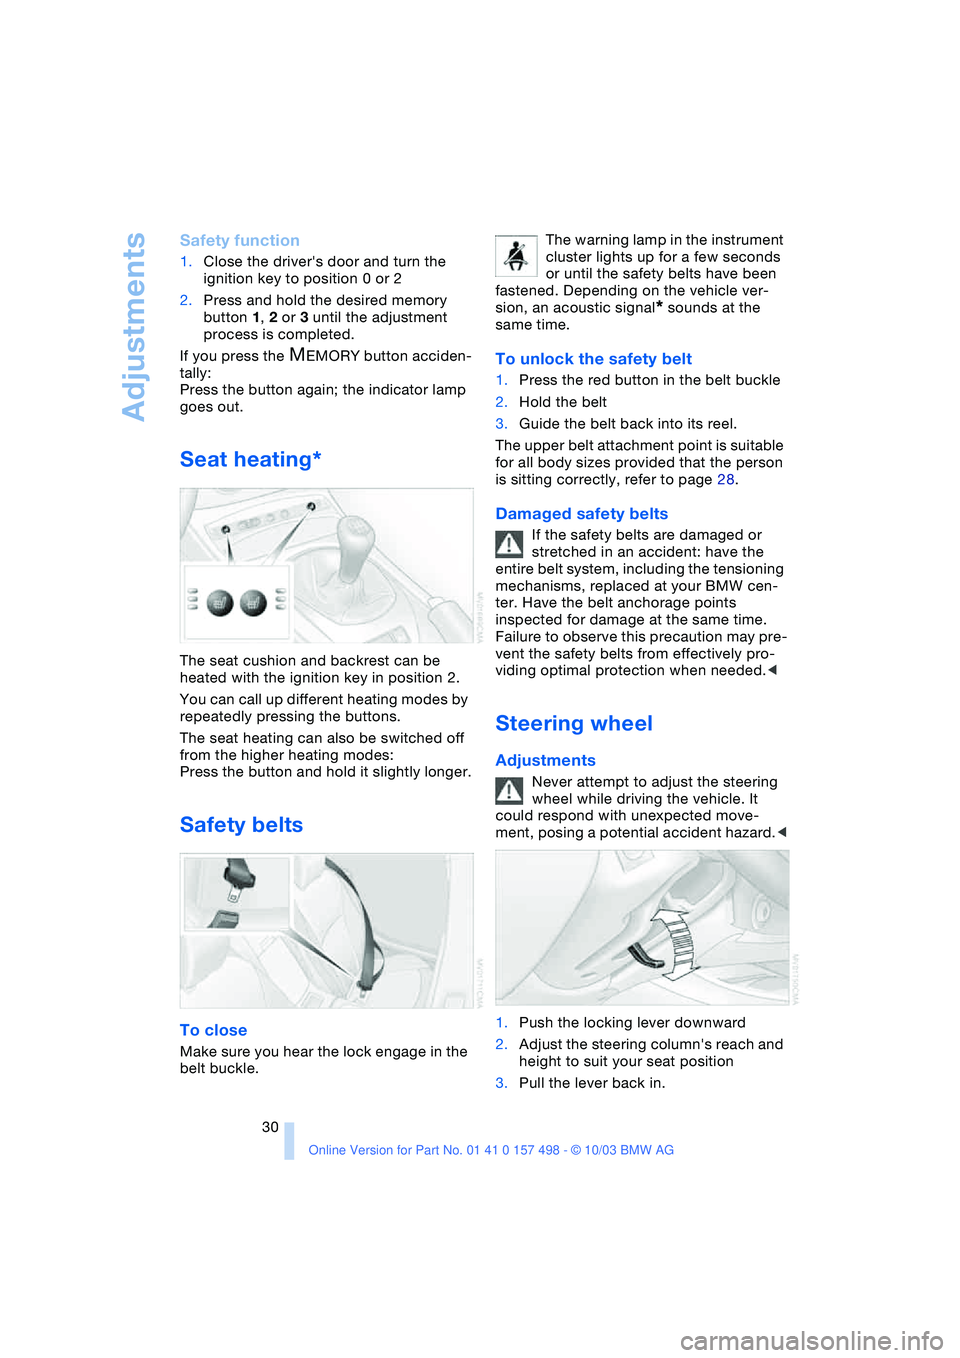
The seat cushion and backrest can be
heated with the ignition key in position 2.
You can call up different heating modes by
repeatedly pressing the buttons.
The seat heating can also be switched off
from the higher heating modes:
Press the button and hold it slightly longer.
Safety belts
To close
Make sure you hear the lock engage in the
belt buckle.The warning lamp in the instrument
cluster lights up for a few seconds
or until the safety belts have been
fastened. Depending on the vehicle ver-
sion, an acoustic signal
* sounds at the
same time.
To unlock the safety belt
1.Press the red button in the belt buckle
2.Hold the belt
3.Guide the belt back into its reel.
The upper belt attachment point is suitable
for all body sizes provided that the person
is sitting correctly, refer to page 28.
Damaged safety belts
If the safety belts are damaged or
stretched in an accident: have the
entire belt system, including the tensioning
mechanisms, replaced at your BMW cen-
ter. Have the belt anchorage points
inspected for damage at the same time.
Failure to observe this precaution may pre-
vent the safety belts from effectively pro-
viding optimal protection when needed.<
Steering wheel
Adjustments
Never attempt to adjust the steering
wheel while driving the vehicle. It
could respond with unexpected move-
ment, posing a potential accident hazard.<
1.Push the locking lever downward
2.Adjust the steering column's reach and
height to suit your seat position
3.Pull the lever back in.
Page 34 of 120
Adjustments
32 that each person uses his or her own
remote control key.
When your vehicle is unlocked with the
remote control, the vehicle recognizes the
individual user by means of a data
exchange with the key, and makes adjust-
ments accordingly.
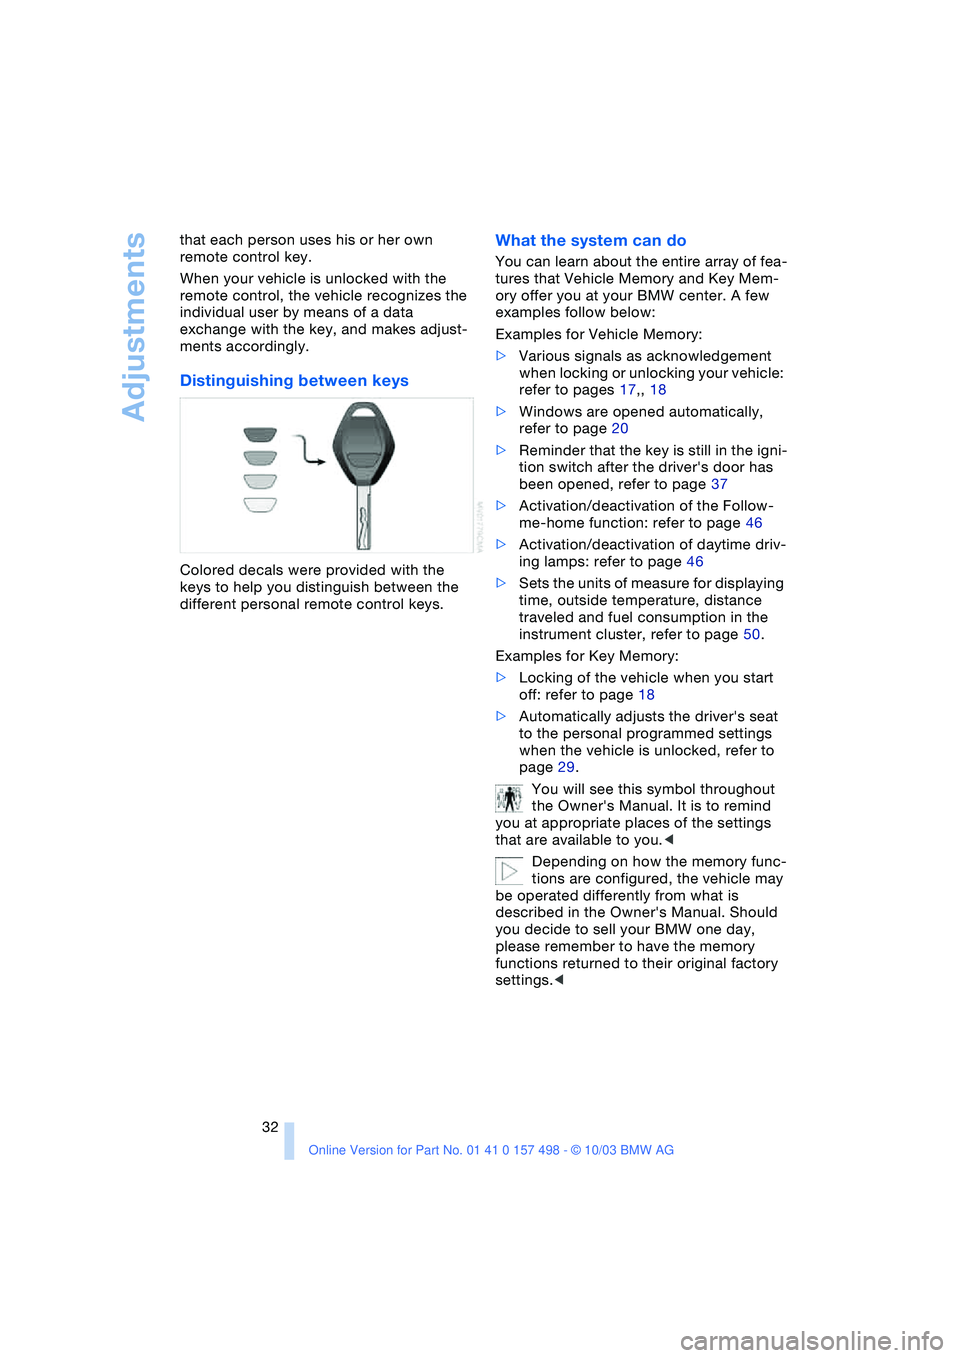
Distinguishing between keys
Colored decals were provided with the
keys to help you distinguish between the
different personal remote control keys.
What the system can do
You can learn about the entire array of fea-
tures that Vehicle Memory and Key Mem-
ory offer you at your BMW center. A few
examples follow below:
Examples for Vehicle Memory:
>Various signals as acknowledgement
when locking or unlocking your vehicle:
refer to pages 17,, 18
>Windows are opened automatically,
refer to page 20
>Reminder that the key is still in the igni-
tion switch after the driver's door has
been opened, refer to page 37
>Activation/deactivation of the Follow-
me-home function: refer to page 46
>Activation/deactivation of daytime driv-
ing lamps: refer to page 46
>Sets the units of measure for displaying
time, outside temperature, distance
traveled and fuel consumption in the
instrument cluster, refer to page 50.
Examples for Key Memory:
>Locking of the vehicle when you start
off: refer to page 18
>Automatically adjusts the driver's seat
to the personal programmed settings
when the vehicle is unlocked, refer to
page 29.
You will see this symbol throughout
the Owner's Manual. It is to remind
you at appropriate places of the settings
that are available to you.<
Depending on how the memory func-
tions are configured, the vehicle may
be operated differently from what is
described in the Owner's Manual. Should
you decide to sell your BMW one day,
please remember to have the memory
functions returned to their original factory
settings.<
Page 38 of 120
Driving
36
Driving
Ignition lock
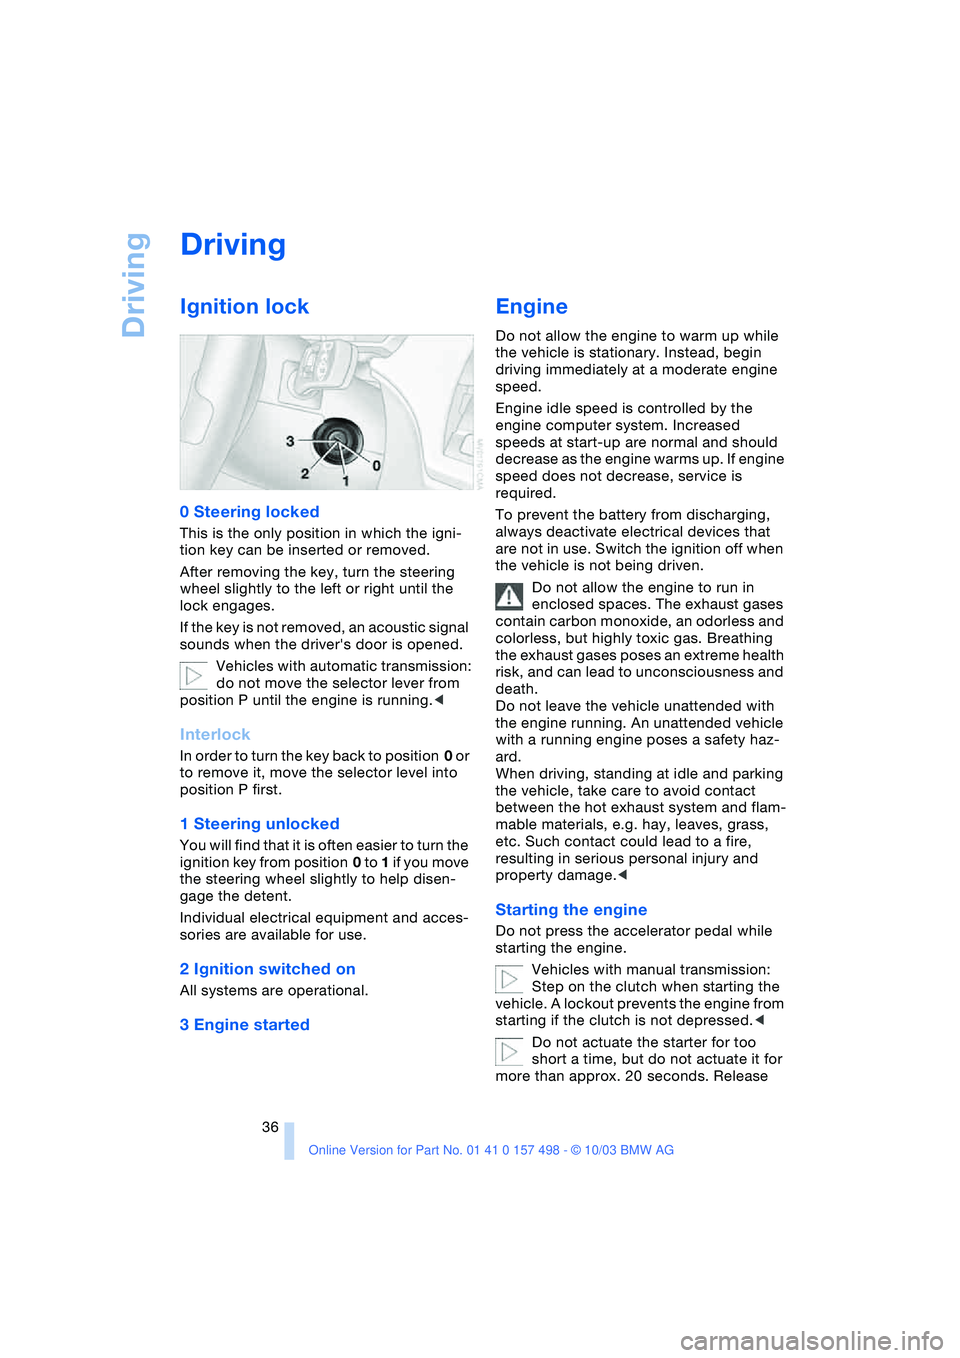
0 Steering locked
This is the only position in which the igni-
tion key can be inserted or removed.
After removing the key, turn the steering
wheel slightly to the left or right until the
lock engages.
If the key is not removed, an acoustic signal
sounds when the driver's door is opened.
Vehicles with automatic transmission:
do not move the selector lever from
position P until the engine is running.<
Interlock
In order to turn the key back to position 0 or
to remove it, move the selector level into
position P first.
1 Steering unlocked
You will find that it is often easier to turn the
ignition key from position 0 to 1 if you move
the steering wheel slightly to help disen-
gage the detent.
Individual electrical equipment and acces-
sories are available for use.
2 Ignition switched on
All systems are operational.
3 Engine started
Engine
Do not allow the engine to warm up while
the vehicle is stationary. Instead, begin
driving immediately at a moderate engine
speed.
Engine idle speed is controlled by the
engine computer system. Increased
speeds at start-up are normal and should
decrease as the engine warms up. If engine
speed does not decrease, service is
required.
To prevent the battery from discharging,
always deactivate electrical devices that
are not in use. Switch the ignition off when
the vehicle is not being driven.
Do not allow the engine to run in
enclosed spaces. The exhaust gases
contain carbon monoxide, an odorless and
colorless, but highly toxic gas. Breathing
the exhaust gases poses an extreme health
risk, and can lead to unconsciousness and
death.
Do not leave the vehicle unattended with
the engine running. An unattended vehicle
with a running engine poses a safety haz-
ard.
When driving, standing at idle and parking
the vehicle, take care to avoid contact
between the hot exhaust system and flam-
mable materials, e.g. hay, leaves, grass,
etc. Such contact could lead to a fire,
resulting in serious personal injury and
property damage.<
Starting the engine
Do not press the accelerator pedal while
starting the engine.
Vehicles with manual transmission:
Step on the clutch when starting the
vehicle. A lockout prevents the engine from
starting if the clutch is not depressed.<
Do not actuate the starter for too
short a time, but do not actuate it for
more than approx. 20 seconds. Release