2004 BMW 3.0i ROADSTER&COUPE towing
[x] Cancel search: towingPage 42 of 120
Driving
40 direction, the transmission shifts up. When
the lever is tapped in the – direction, the
transmission shifts down. M1 to M 5 appear
in the gear indicator.
The Adaptive Transmission Control ATC
executes upshifts or downshifts only when
the new gear will provide a suitable combi-
nation of engine and road speed, e.g. ATC
will not execute downshifts if the engine
speed is too high. The desired gear will
appear briefly in the instrument cluster, fol-
lowed by the actual gear.
If you are driving in the manual mode
and wish to accelerate rapidly, e.g. to
pass another vehicle, shift down manually
or with the kickdown function.<
Shifting from M/S to selector lever posi-
tions P, R and N is possible only by going
through position D.
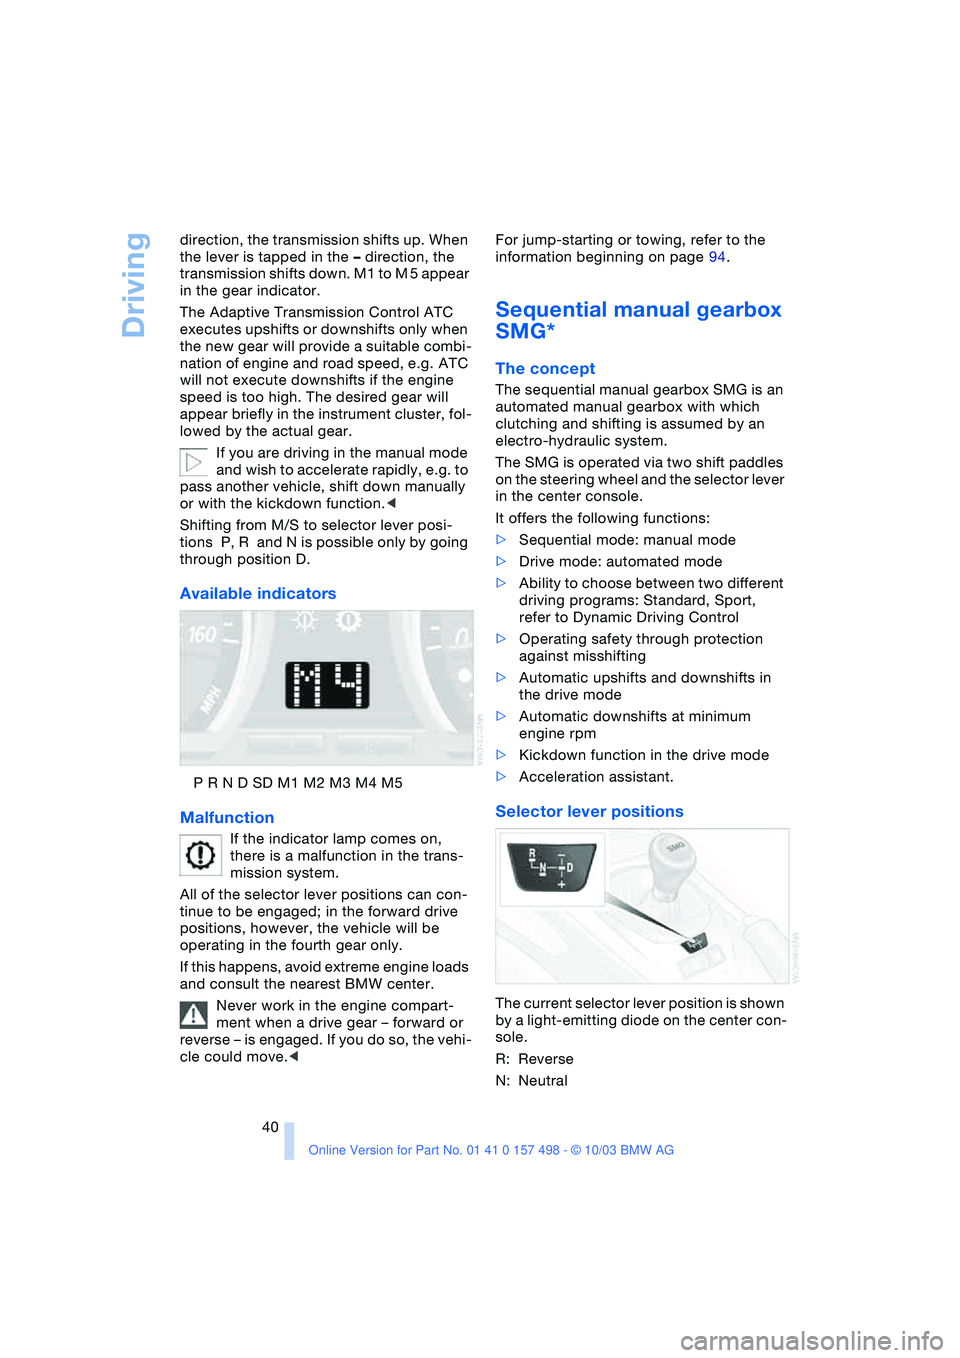
Available indicators
P R N D SD M1 M2 M3 M4 M5
Malfunction
If the indicator lamp comes on,
there is a malfunction in the trans-
mission system.
All of the selector lever positions can con-
tinue to be engaged; in the forward drive
positions, however, the vehicle will be
operating in the fourth gear only.
If this happens, avoid extreme engine loads
and consult the nearest BMW center.
Never work in the engine compart-
ment when a drive gear – forward or
reverse – is engaged. If you do so, the vehi-
cle could move.
Sequential manual gearbox
SMG*
The concept
The sequential manual gearbox SMG is an
automated manual gearbox with which
clutching and shifting is assumed by an
electro-hydraulic system.
The SMG is operated via two shift paddles
on the steering wheel and the selector lever
in the center console.
It offers the following functions:
>Sequential mode: manual mode
>Drive mode: automated mode
>Ability to choose between two different
driving programs: Standard, Sport,
refer to Dynamic Driving Control
>Operating safety through protection
against misshifting
>Automatic upshifts and downshifts in
the drive mode
>Automatic downshifts at minimum
engine rpm
>Kickdown function in the drive mode
>Acceleration assistant.
Selector lever positions
The current selector lever position is shown
by a light-emitting diode on the center con-
sole.
R: Reverse
N: Neutral
Page 44 of 120
Driving
42 You accelerate from higher gears, e.g. dur-
ing passing, by downshifting manually.
In the following situations, the SMG in the
sequential mode assists you:
>The transmission will only execute
upshifts and downshifts that will result
in an appropriate combination of vehi-
cle speed and engine rpm. For
instance, downshifts that would result
in excessive engine speed cannot be
executed
>During a stop the gearbox is automati-
cally downshifted into first gear
>Shortly before a gear-dependent mini-
mum speed is reached, the gearbox
shifts down automatically without you
taking any action.
Display in the instrument cluster
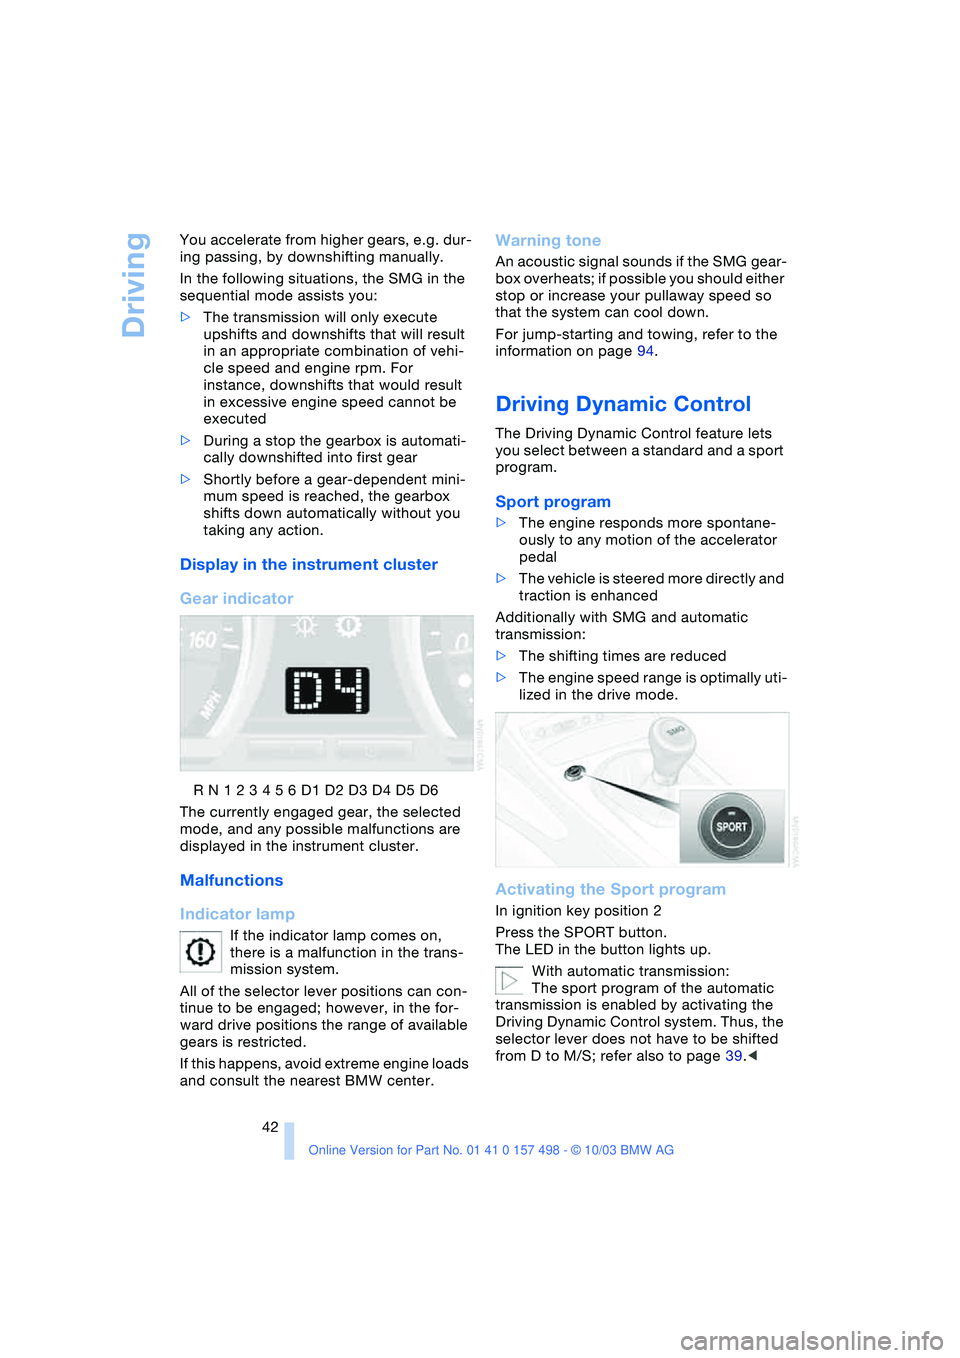
Gear indicator
R N 1 2 3 4 5 6 D1 D2 D3 D4 D5 D6
The currently engaged gear, the selected
mode, and any possible malfunctions are
displayed in the instrument cluster.
Malfunctions
Indicator lamp
If the indicator lamp comes on,
there is a malfunction in the trans-
mission system.
All of the selector lever positions can con-
tinue to be engaged; however, in the for-
ward drive positions the range of available
gears is restricted.
If this happens, avoid extreme engine loads
and consult the nearest BMW center.
Warning tone
An acoustic signal sounds if the SMG gear-
box overheats; if possible you should either
stop or increase your pullaway speed so
that the system can cool down.
For jump-starting and towing, refer to the
information on page 94.
Driving Dynamic Control
The Driving Dynamic Control feature lets
you select between a standard and a sport
program.
Sport program
>The engine responds more spontane-
ously to any motion of the accelerator
pedal
>The vehicle is steered more directly and
traction is enhanced
Additionally with SMG and automatic
transmission:
>The shifting times are reduced
>The engine speed range is optimally uti-
lized in the drive mode.
Activating the Sport program
In ignition key position 2
Press the SPORT button.
The LED in the button lights up.
With automatic transmission:
The sport program of the automatic
transmission is enabled by activating the
Driving Dynamic Control system. Thus, the
selector lever does not have to be shifted
from D to M/S; refer also to page 39.<
Page 70 of 120
Special operating instructions
68
Special operating instructions
Break-in procedures
To ensure that your vehicle provides maxi-
mum economy throughout a long service
life, we request that you observe the fol-
lowing:
Engine and differential
Up to 1,200 miles / 2,000 km:
Drive at varying engine and road speeds,
but do not exceed the following engine or
road speed:
4,500 rpm / 4,500/min or
100 mph / 160 km/h.
Obey your local and state maximum speed
limits.
Refrain from using full throttle and avoid
pressing the accelerator beyond the kick-
down point.
After you have driven 1,200 miles /
2,000 km, you can gradually increase the
engine or road speeds.
You should also comply with these break-in
procedures if the engine or differential is
replaced later in the course of the vehicle's
service life.
Sequential manual gearbox SMG
Up to 1,200 miles / 2,000 km:
Avoid using the acceleration assistant dur-
ing the vehicle's break-in period.
Tires
Due to technical factors associated with
their manufacture, tires do not achieve their
full traction potential until an initial break-in
period has elapsed. You should therefore
drive with extra caution during the first
200 miles / 300 km.
Obey your local and state maximum speed
limits.
When the vehicle is operated on wet
or slushy roads, a wedge of water
may form between the tire and the road surface. This phenomenon is referred to as
hydroplaning and can lead to partial or
complete loss of traction, vehicle control
and braking effectiveness. Reduce your
speed on wet roads.<
Brake system
Approx. 300 miles / 500 km must elapse
before the brake pads and rotors achieve
their optimal surface and wear pattern.
To break in the separate parking brake
drums, apply the parking brake lightly when
coasting to a standstill – at a traffic signal,
for instance; use caution to avoid posing a
danger to other road users.
To avoid corrosion, repeat this procedure
from time to time.
The brake lamps do not come on when the
parking brake is set.
Vacuum for the brake system servo
unit on your BMW is available only
when the engine is running. When you
move the car with the engine off, e.g. by
towing, substantially higher levels of pedal
force will be required to brake the vehicle.<
Clutch
The clutch will achieve its optimal function-
ality after approx. 300 miles / 500 km. Shift
gears carefully during the break-in period.
Page 72 of 120
Special operating instructions
70 Do not coast with the clutch
depressed or with the transmission or
selector lever in Neutral. Do not coast with
the engine switched off. Otherwise the
engine provides no braking effect and there
is no power-assist for braking or steering
when the engine is off.<
Brake pads
The yellow indicator lamp for the
brake pads lights up:
Have the condition of the brake
pads inspected.
For your own safety: use brake pads
which the manufacturer has approved
for your specific vehicle model. The manu-
facturer cannot evaluate non-approved
brake pads to determine if they are suitable
for use, and therefore cannot ensure the
operating safety of the vehicle in the event
of their use.<
Cargo loading
Avoid overloading the vehicle so that
the permitted load on the tires is not
exceeded. Otherwise, overheating and
inner damage to the tires may result. The
ultimate result can assume the form of a
sudden air loss.<
Determining the maximum load
1.Locate the following statement on your
vehicle's placard
*:
The combined weight of occu-
pants and cargo should never
exceed XXX kg or YYY lbs; otherwise
damage to the vehicle and unstable
driving conditions could result.<2.Determine the combined weight of the
driver and passenger that will be riding
in your vehicle
3.Substract the combined weight of the
driver and passenger from XXX kilo-
grams or YYY pounds
4.The resulting figure equals the available
amount of cargo and luggage load
capacity.
For example, if the XXX amount equals
551 lbs. and there will be two 150 lbs.
passengers in your vehicle, the amount
of available cargo and luggage load
capacity is 251 lbs.
551 lbs. minus 300 lbs. = 251 lbs.
5.Determine the combined weight of lug-
gage and cargo being loaded on the
vehicle. That weight may not safely
exceed the available cargo and luggage
load capacity calculated in Step 4.
Load
The permissible load is the sum of the
occupants' weights and the weight of the
cargo. The greater the weight of the occu-
pants, the less cargo can be transported.
Stowing cargo
>Load heavy cargo as far forward as
possible, directly behind the luggage
compartment partition, and as low as
possible
>Cover sharp edges and corners.
To avoid damaging the rear of the
backrest or the rear interior trim
panel, do not stow heavy cargo or cargo
with sharp edges and corners behind the
seats.
In addition, large and bulky cargo stowed
Page 73 of 120
Reference
At a glance
Controls
Driving tips
Mobility
71
behind the seats may prevent the backrest
from engaging properly. Ensure that the
backrest is securely locked by moving the
seat forward if necessary. Refer to
page 28.<
Always position and secure the load
correctly. If you do not, it can endan-
ger the passengers during braking or eva-
sive maneuvers.
Do not exceed the approved gross vehicle
weight or the specified maximum axle
loads. Refer to page 101. Otherwise the
vehicle's operating safety is no longer
assured and you are in violation of the law.
Do not stow heavy or hard objects in the
passenger compartment without first
securing them. Otherwise they would be
thrown around during braking and evasive
maneuvers and would endanger the occu-
pants.<
Convertible top compartment
With the convertible top closed, you
can enlarge the luggage compart-
ment, refer to page 20.
It is recommended that you always fold the
convertible top compartment panel down
as soon as you have removed cargo from
the luggage compartment. This way, you
can be sure that you can always operate
the convertible top at any time.
Conversely, when the convertible top is
closed, raise the convertible top compart-
ment panel before stowing your cargo in
the luggage compartment to avoid any
damage to the convertible top compart-
ment or your load.<
If you stow cargo behind the seats of your
BMW:
>Only stow light objects such as cloth-
ing, etc.
>Do not pile objects higher than the top
edge of the backrests.
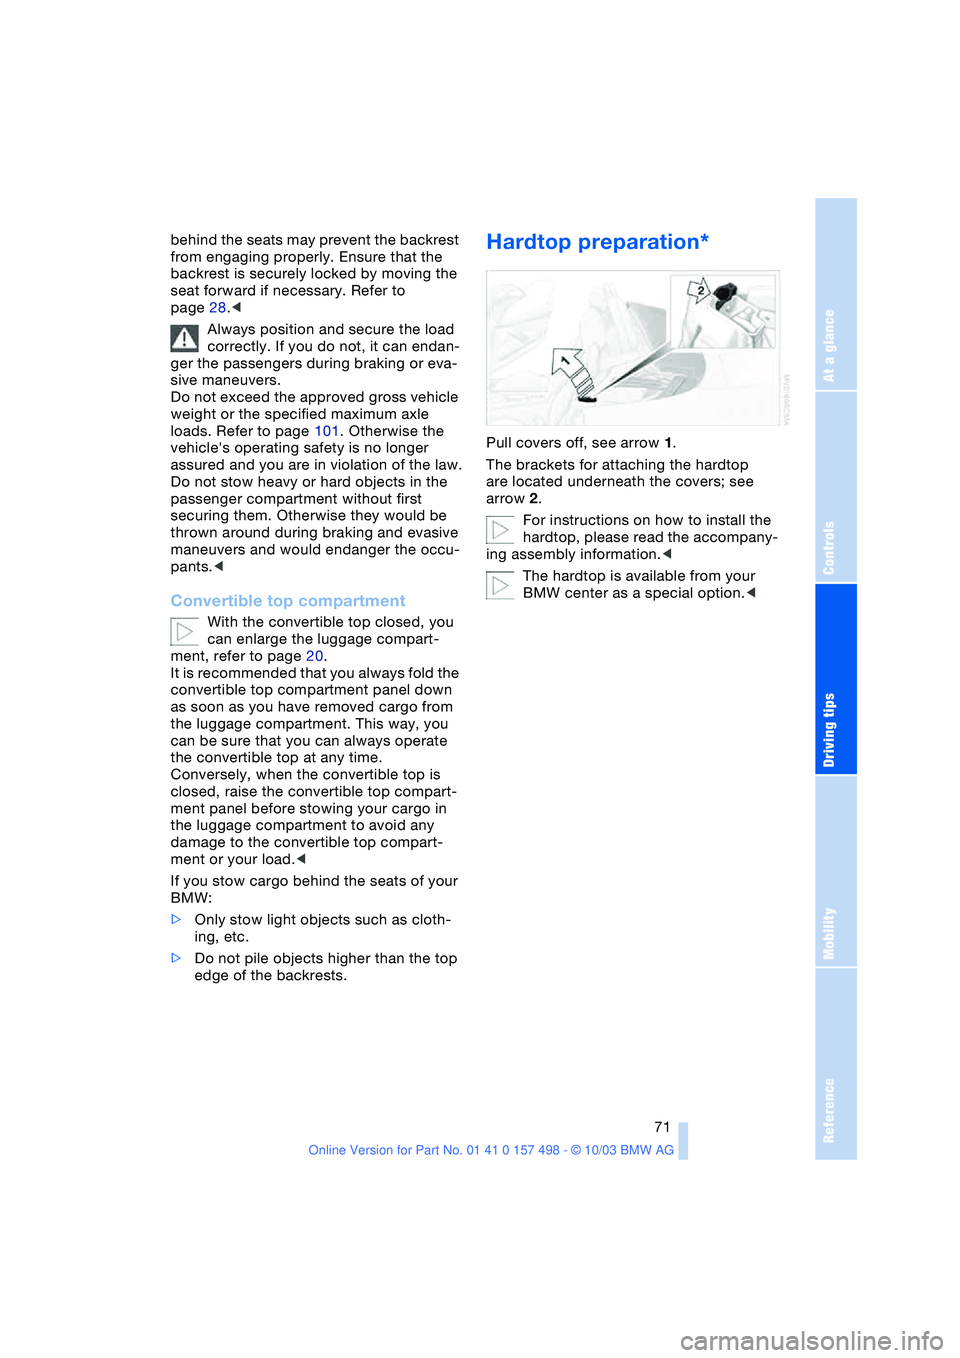
Hardtop preparation*
Pull covers off, see arrow 1.
The brackets for attaching the hardtop
are located underneath the covers; see
arrow 2.
For instructions on how to install the
hardtop, please read the accompany-
ing assembly information.<
The hardtop is available from your
BMW center as a special option.<
Page 98 of 120
Giving and receiving assistance
96
Towing the vehicle
Always observe all applicable towing
laws and regulations.<
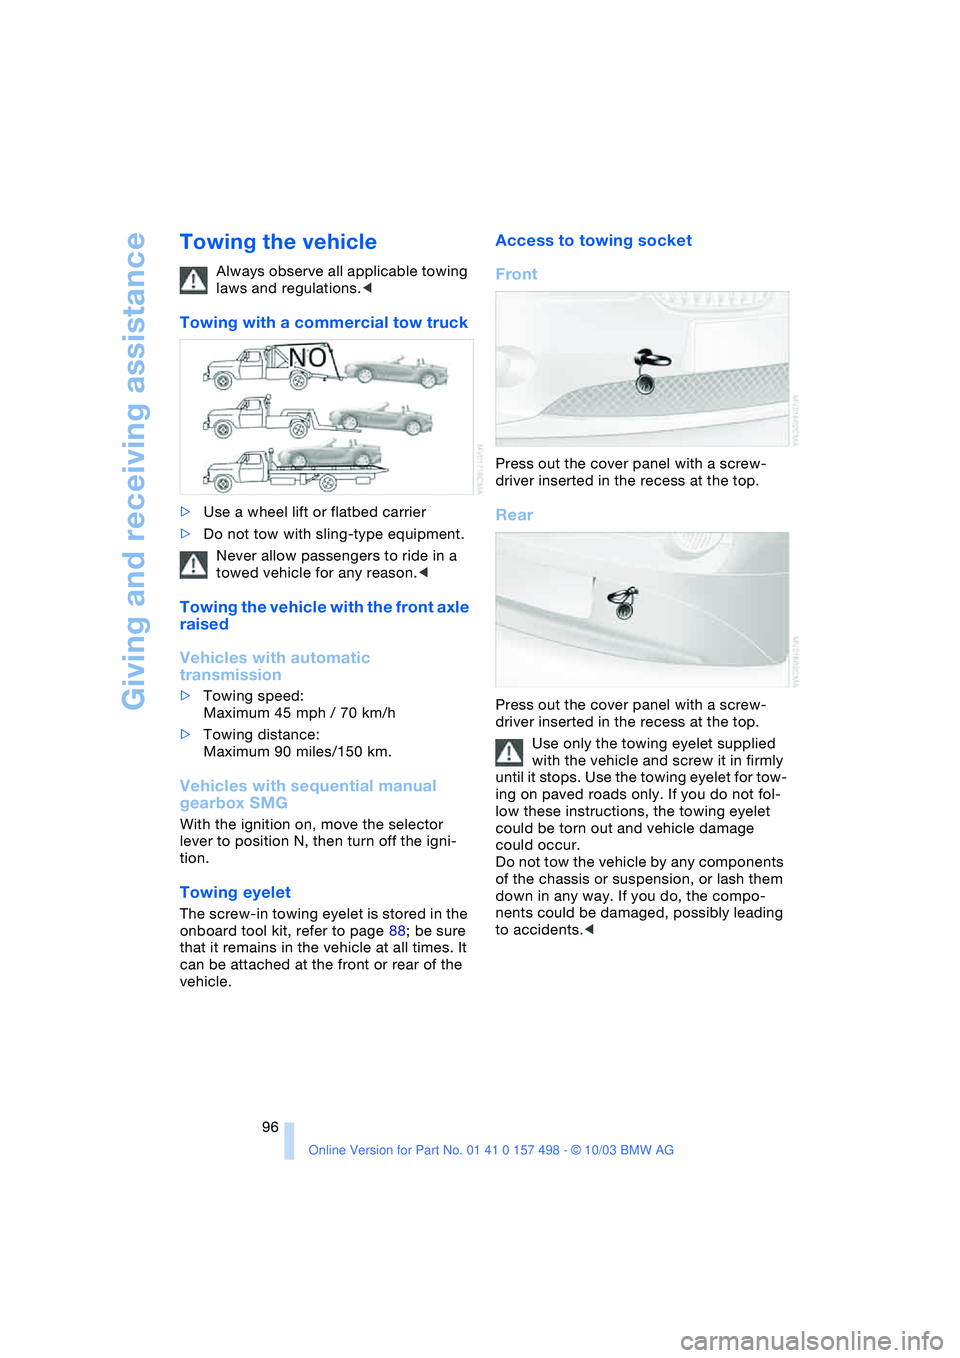
Towing with a commercial tow truck
>Use a wheel lift or flatbed carrier
>Do not tow with sling-type equipment.
Never allow passengers to ride in a
towed vehicle for any reason.<
Towing the vehicle with the front axle
raised
Vehicles with automatic
transmission
>Towing speed:
Maximum 45 mph / 70 km/h
>Towing distance:
Maximum 90 miles/150 km.
Vehicles with sequential manual
gearbox SMG
With the ignition on, move the selector
lever to position N, then turn off the igni-
tion.
Towing eyelet
The screw-in towing eyelet is stored in the
onboard tool kit, refer to page 88; be sure
that it remains in the vehicle at all times. It
can be attached at the front or rear of the
vehicle.
Access to towing socket
Front
Press out the cover panel with a screw-
driver inserted in the recess at the top.
Rear
Press out the cover panel with a screw-
driver inserted in the recess at the top.
Use only the towing eyelet supplied
with the vehicle and screw it in firmly
until it stops. Use the towing eyelet for tow-
ing on paved roads only. If you do not fol-
low these instructions, the towing eyelet
could be torn out and vehicle damage
could occur.
Do not tow the vehicle by any components
of the chassis or suspension, or lash them
down in any way. If you do, the compo-
nents could be damaged, possibly leading
to accidents.<
Page 109 of 120
Reference
At a glance
Controls
Driving tips
Mobility
107
Electric Power Steering
EPS 43
– indicator lamp 13
Electric power windows 20
Electronic Stability
Program ESP, refer to
Dynamic Stability Control
DSC 52
Electronic transmission
control module 40
Emergency call 93
Emergency operation, refer
to Manual operation
– convertible top 23
– driver's door 18
– fuel filler door 74
– storage compartments 64
Engine 36
– break-in procedures 68
– data 100
– electronics 13
– indicator lamp 13
– speed 48
– starting 36
– switching off 37
Engine compartment 82
Engine coolant 84
Engine coolant
temperature gauge 48
Engine data 100
Engine oil 83
– alternative oils 84
– approved oils 84
– capacity 103
– indicator lamp 13
Engine oil level 83
– indicator lamp 13
Engine oil pressure 83
– indicator lamp 13
Engine oil sensor 83
– indicator lamp 13
Engine output, refer to
Engine data 100
Engine speed, refer to
Engine data 100
EPS Electric Power
Steering 43
Equipment range, see
Service and Warranty
Information Booklet for US models, Warranty and
Service Guide Booklet for
Canadian models
ESP Electronic Stability
Program, refer to
Dynamic Stability Control
DSC 52
Exhaust system, refer to
High temperatures 69
Exterior mirrors 31
– automatic dimming
feature 31
Eyelet, towing 96
F
False alarm, stopping
alarm 26
Fasten safety belts 30
– warning lamp 13, 30
Filter, refer to
– Microfilter 59
– Microfilter/activated-
charcoal filter 63
Fine wood, refer to the
Caring for your vehicle
brochure
First aid, refer to First-aid
kit 94
First-aid kit 94
Flat tire
– Flat Tire Monitor 54
– indicator/warning
lamp 13
Flat tire, refer to Tire
condition 78
Flat Tire Monitor 54
– indicator lamp 13, 55
– initializing 55
Flooding, refer to Driving
through water 69
Floor covers, carpets, refer
to the Caring for your
vehicle brochure
Floor mats, refer to the
Caring for your vehicle
brochure
Fluid reservoir
– washing systems 83
Fog lamps 47
– indicator lamp 13Follow me home lamps 46
Footbrake, refer to Driving
notes 69
Front airbags 56
Front turn signal indicators
– bulb replacement 90
Fuel
– average
consumption 51
– content, refer to
Capacities 103
– display 48
– preparation, refer to
Engine data 100
– quality 74
Fuel display, refer to Fuel
gauge 48
Fuel filler door 74
– unlocking in case of
electrical fault 74
Fuel gas cap 74
Fuel tank capacity, refer to
Capacities 103
Fuses 92
G
Gasoline, refer to Fuel
quality 74
Gasoline gauge, refer to
Fuel gauge 48
Gear indicator 40
Gear lever
– automatic transmission
with Steptronic 39
– manual transmission 38
Glove compartment 64
Gross weight, refer to
Weights 101
H
Handbrake, refer to Parking
brake 38
Hands-free microphone,
refer to Preparations for
the cellular phone 65
Hands-free system 65
Hardtop, refer to the
separate Owner's Manual
Hardtop preparation 71
Page 110 of 120
Everything from A to Z
108 Hazard warning flashers 10
Headlamp cover, care,
refer to the Caring for
your vehicle brochure
Headlamp flasher 43
– indicator lamp 13
Headlamps
– bulb replacement 88
– care, refer to the Caring
for your vehicle brochure
– cleaning 44
Headlamps, automatic
control 46
Headlamp washer
reservoir 83
– content, refer to
Capacities 103
Headlamp washer
system
– cleaning the
headlamps 44
– washing fluids 83
Head restraints 28
Heated mirrors 31
Heated seats 30
Heating 58
– exterior mirrors 31
– rear window 59, 63
– seats 30
Heavy loads, refer to
Stowing cargo 70
Height, refer to
Dimensions 102
Height adjustment
– seats 28
– steering wheel 30
High beams 47
– bulb replacement 89
– headlamp flasher 43
– indicator lamp 13
High Performance
Synthetic Oil 84
– alternative oils 84
– approved oils 84
High temperatures 69
Holders for beverages 65
Hood 81
Horn 10
Hydraulic Brake Assistant,
refer to Dynamic Brake
Control DBC 52Hydraulics
– brakes 85
Hydroplaning 69
I
Ice warning 50
Identification mark
– Run Flat tires 80
Ignition 36
Ignition key 16
Ignition lock 36
Inclines 69
Index 104
Indicator/warning lamp
– airbags 57
– alarm system 26
– brakes 13
– coolant temperature 49
– DSC 52
– engine temperature 48
– Flat Tire Monitor 55
– fog lamps 47
– passenger airbags 34
– please fasten safety
belts 30
– reserve 48
Indicator and warning
lamps, overview 12
Individual air
distribution 59, 62
Individual settings, refer to
Vehicle Memory,
Key Memory 31
Inflation pressure, tires 75
Inflation pressure
monitoring, refer to Flat
Tire Monitor 54
INSPECTION 49
Instrument cluster 12
Instrument lighting 47
Instrument panel, refer to
Cockpit 10
Interior lamps 47
– remote control 17
Interior motion sensor 26
Interior rearview mirror 31
– automatic dimming
feature 31
Interior temperature
– adjusting 59, 62Interlock, refer to
Steering lock 36
Intermittent
– operation, wipers 44
Interval
– display, service 49
J
Jack 91
Jacking points 91
Jets, refer to
Ventilation 59, 63
Jump-starting 94
K
Key Memory 31
Keys 16
Key switch for passenger
airbags 33
Kickdown 39
Knock control 74
L
Lamps 46
Lamps and bulbs 88
LATCH, child-restraint
mounting system 35
Leather care, refer to the
Caring for your vehicle
brochure
Length, refer to
Dimensions 102
License plate lamps
– bulb replacement 91
Light-alloy wheels, care,
refer to the Caring for
your vehicle brochure
Lighter 65
Lighting
– of the instruments 47
Lighting of the instruments,
refer to Instrument
lighting 47
LIGHTS ON warning 46
Light switch 46
Loads, refer to Cargo
loading 70
Loads, securing 70