Page 49 of 120

3-2
E
�Avoid overfilling the fuel tank. Stop fill-
ing when the fuel level just reaches the
bottom of the filler tube. Do not fill up
the filler tube because fuel expands as
it warms up and could overflow. If tem-
porarily leaving the watercraft with a
full fuel tank, do not leave it in direct
sunlight. Leave it in a well-ventilated
area with the watercraft in a horizontal
position.
�Tighten the filler cap securely after
refueling.
�If you should swallow some gasoline,
inhale a lot of gasoline vapor, or get
gasoline in your eyes, get immediate
medical attention.
�If any gasoline spills onto your skin,
immediately wash with soap and
water. Change clothing if gasoline
spills on it.
@
CAUTION:@ �Do not use leaded gasoline. Leaded
gasoline can seriously damage the
catalytic converter.
�Use only fresh gasoline that has been
stored in clean containers.
@
Recommended gasoline:
Regular unleaded gasoline with
a minimum octane rating of
86 (Pump octane number) = (R+M)/2
90 (Research octane number)
UF1G70.book Page 2 Wednesday, December 18, 2002 3:35 PM
Page 50 of 120
3-3
E
EJU18320
Gasohol
There are two types of gasohol: gasohol
containing ethanol and that containing meth-
anol.
Gasohol containing ethanol can be used
if ethanol content does not exceed 10% and
the fuel meets minimum octane ratings.
Gasohol containing methanol is not rec-
ommended by Yamaha because it can
cause fuel system damage or engine perfor-
mance problems.
EJU11870
2-stroke engine oil
CAUTION:@ Use only YAMALUBE 2-W oil. Using
another oil can seriously damage the cat-
alytic converter and other engine compo-
nents.
@
NOTE:@ YAMALUBE 2-W is developed for this water-
craft and available from a Yamaha dealer.
@
Recommended engine oil:
YAMALUBE 2-W oil only
UF1G70.book Page 3 Wednesday, December 18, 2002 3:35 PM
Page 51 of 120
3-4
E
EJU20190
Filling the fuel tank
CAUTION:@ Be careful when refueling. Avoid getting
water or other contaminants in the fuel
tank. Contaminated fuel can cause poor
running or engine damage.
@
1. Open the hood and remove the front
storage compartment, to check the fuel
level. (See page 2-20 for front storage
compartment.)
2. Open the fuel tank filler cap, and slowly
add fuel to the fuel tank.
3. Stop filling when the fuel just reaches the
bottom of the filler tube on the fuel tank.
Do not fill into the filler tube, because
fuel could spill out.
Fuel tank capacity:
Total: 60 L (15.9 US gal, 13.2 Imp gal)
UF1G70.book Page 4 Wednesday, December 18, 2002 3:35 PM
Page 52 of 120
3-5
E
EJU10460
Filling the oil tank
WARNING@ �Do not add gasoline to the oil tank.
Fire or explosion could result.
�Oil in the bilge is a serious fire hazard.
Wipe up any spilled oil immediately.
@
CAUTION:@ Do not allow the oil tank to become com-
pletely empty. If the oil tank becomes
empty the oil injection pump must be
bled to ensure proper oil flow, otherwise
engine damage may occur. If bleeding of
the oil pump is necessary, have a
Yamaha dealer bleed it.
@
1. Remove the seat to watch the oil level.
(See page 2-5 for seat.)
2. Open the oil tank filler cap, and very
slowly add engine oil to the oil tank.
3. Stop filling when the oil just reaches the
top of oil tank visible.
Oil tank capacity:
5.5 L (1.5 US gal, 1.2 Imp gal)
UF1G70.book Page 5 Wednesday, December 18, 2002 3:35 PM
Page 53 of 120

3-6
E
EJU13460
Pre-operation checks
EJU13470
Pre-operation check list
Before operating this watercraft, perform the checks in the following check list. See the
accompanying text in this chapter for details on how to perform the checks.
WARNING@ If any item in the pre-operation check list is not working properly, have it inspected
and repaired before operating the watercraft, otherwise an accident could occur.
@
POC-***
NOTE:@ Pre-operation checks should be made thoroughly each time the watercraft is used. This pro-
cedure can be completed in a short time. It is worth the time spent to assure safety and reli-
ability.
@
ITEM ROUTINE PAGE
Engine compartment Remove the seat and front storage compartment
to ventilate engine compartment. Check for fuel
vapors or loose electrical connections3-7
Bilge Check for water and fuel residue and remove if
necessary3-8
Throttle Check that the throttle lever springs back 3-11
Steering system Check for proper steering system operation 3-11
Fuel and oil Check fuel and oil level and add if necessary
Check hoses and tanks for leakage3-7
Water separator Check for water and drain if necessary 3-8
Battery Check electrolyte level and battery condition 3-9
Hood Check that the hood is properly secured 2-6
Seat Check that the seat is properly secured 2-5
Hull/Deck Check the hull and deck for cracks or other dam-
age—
Jet unit Check for debris and remove if necessary 3-12
Fire extinguisher Check the condition and replace if necessary 3-10
Engine shut-off cord Check condition and replace is frayed or broken 3-12
Switches Check the start switch, engine stop switch and
engine shut-off switch for proper operation when
the watercraft is in the water3-13
Cooling water pilot outlet Check that water is discharged while the engine
is running and the watercraft is in the water3-13
Multifunction information center Check for warning indications and proper opera-
tion3-13
UF1G70.book Page 6 Wednesday, December 18, 2002 3:35 PM
Page 54 of 120

3-7
E
EJU10480
Pre-operation check points
EJU10500
Engine compartment
Ventilate the engine compar tment before
each use.
To ventilate the engine compartment,
remove seat and front storage compart-
ment. (See page 2-5 for seat, and 2-20 for
front storage compartment.) Allow the
engine compartment to remain open for a
few minutes to allow any fuel vapors to
escape. Also, check for loose electrical con-
nections.
WARNING@ Failure to ventilate the engine compart-
ment could result in fire or explosion. Do
not start the engine if there is a fuel leak
or a loose electrical connection.
@
EJU20071
Fuel and oil systems
Check the fuel system for leakage, cracks
or malfunctions before each use. (See page
4-10 for check points and correct proce-
dures.)
1. Remove the fuel tank filler cap to release
any pressure that might have built up in
the fuel tank.
2. Remove seat and front storage compart-
ment. (See page 2-5 for seat, and 2-20
for front storage compartment.)
3. Check the fuel and oil levels in the tanks
and replenish if necessary. (See pages
3-4 and 3-5 for filling instructions.)
UF1G70.book Page 7 Wednesday, December 18, 2002 3:35 PM
Page 55 of 120

3-8
E
EJU19610
Water separator
Check the water separator 1 for water.
Normally the water separator is empty. The
water separator retains any water entering
through the fuel tank breather hose if the
watercraft is capsized.
If water remains in the water separator,
drain it by removing the drain screw 2.
Place a drain pan under the water separator
to catch the draining water or use a dry cloth
to soak up any water that could spill into the
watercraft. If any water spills into the water-
craft, be sure to wipe it up with a dry cloth.
Be sure to install the drain screw after drain-
ing the water separator.
EJU20200
Bilge
Check for moisture and fuel residue in the
bilge.
This watercraft is equipped with a conven-
tional jet vacuum bilge draining system and
an electric bilge draining system. The elec-
tric bilge draining system is operated when
the engine is running. When excess water
reaches the water inlet of the electric bilge
pump, the water is discharged via the
exhaust passage from the jet thrust nozzle.
A small quantity of water will remain in the
bilge and should be removed manually. To
remove any residual water, perform the fol-
lowing procedure.
To remove water from the bilge:
1. Remove the stern drain plugs.
2. Raise the bow of the watercraft until the
water drains.
3. After the water has drained, wipe the
bilge with dry rags to make sure that the
bilge is thoroughly dry.
4. Install the drain plugs.
UF1G70.book Page 8 Wednesday, December 18, 2002 3:35 PM
Page 56 of 120

3-9
E
CAUTION:@ �Make sure that the stern drain plugs
are tightened securely before launch-
ing the watercraft.
�Clean any foreign materials, such as
dirt or sand, from the drain plug
threads before installing the drain
plugs.
@
EJU19690
Battery
Check the battery condition and the elec-
trolyte level.
Check that the battery leads are tightened
securely and there is no corrosion on the
battery terminals.
WARNING@ �The battery must always be fully
charged and in good condition. Loss
of battery power may leave you
stranded. Never operate the watercraft
if the battery does not have sufficient
power to start the engine or if it shows
any other signs of decreased power.
�Be sure to connect the breather hose
to the battery. Fire or explosion could
result if the breather hose is damaged,
obstructed, or not connected properly.
@
Make sure that the battery is securely
held in place.
1
Positive (+): Red lead
2
Negative (–): Black lead
3
Breather hose
UF1G70.book Page 9 Wednesday, December 18, 2002 3:35 PM
 1
1 2
2 3
3 4
4 5
5 6
6 7
7 8
8 9
9 10
10 11
11 12
12 13
13 14
14 15
15 16
16 17
17 18
18 19
19 20
20 21
21 22
22 23
23 24
24 25
25 26
26 27
27 28
28 29
29 30
30 31
31 32
32 33
33 34
34 35
35 36
36 37
37 38
38 39
39 40
40 41
41 42
42 43
43 44
44 45
45 46
46 47
47 48
48 49
49 50
50 51
51 52
52 53
53 54
54 55
55 56
56 57
57 58
58 59
59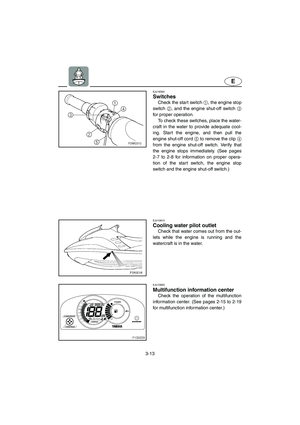 60
60 61
61 62
62 63
63 64
64 65
65 66
66 67
67 68
68 69
69 70
70 71
71 72
72 73
73 74
74 75
75 76
76 77
77 78
78 79
79 80
80 81
81 82
82 83
83 84
84 85
85 86
86 87
87 88
88 89
89 90
90 91
91 92
92 93
93 94
94 95
95 96
96 97
97 98
98 99
99 100
100 101
101 102
102 103
103 104
104 105
105 106
106 107
107 108
108 109
109 110
110 111
111 112
112 113
113 114
114 115
115 116
116 117
117 118
118 119
119

