2003 VOLVO XC70 wheel
[x] Cancel search: wheelPage 103 of 257
2003 VOLVO XC70
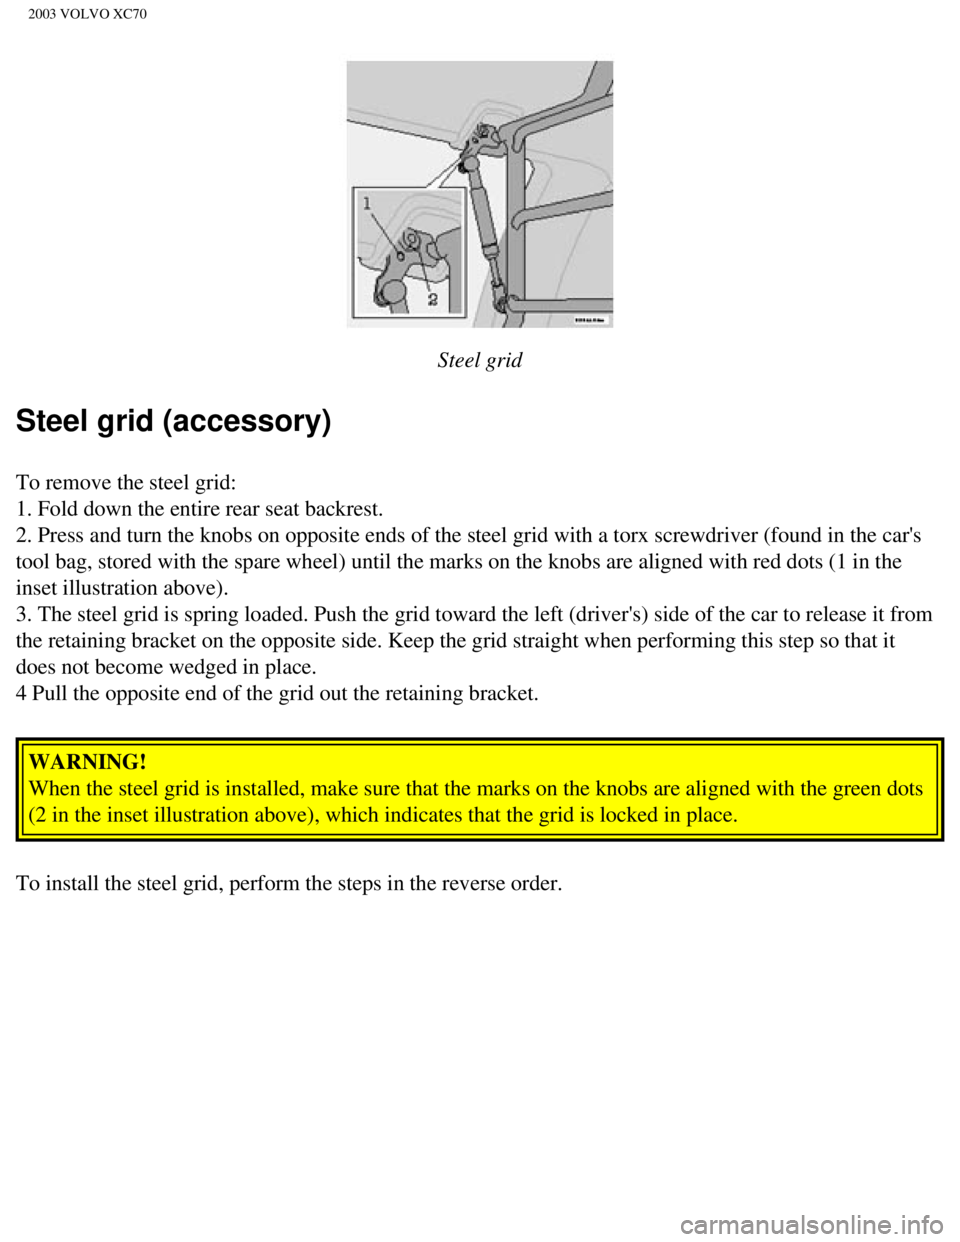
Steel grid
Steel grid (accessory)
To remove the steel grid:
1. Fold down the entire rear seat backrest.
2. Press and turn the knobs on opposite ends of the steel grid with a to\
rx screwdriver (found in the car's
tool bag, stored with the spare wheel) until the marks on the knobs are\
aligned with red dots (1 in the
inset illustration above).
3. The steel grid is spring loaded. Push the grid toward the left (driv\
er's) side of the car to release it from
the retaining bracket on the opposite side. Keep the grid straight when \
performing this step so that it
does not become wedged in place.
4 Pull the opposite end of the grid out the retaining bracket. WARNING!
When the steel grid is installed, make sure that the marks on the knobs \
are aligned with the green dots
(2 in the inset illustration above), which indicates that the grid is \
locked in place.
To install the steel grid, perform the steps in the reverse order.
file:///K|/ownersdocs/2003/2003_XC70/03xc70_04b.htm (12 of 21)12/30/20\
06 4:17:57 PM
Page 108 of 257
2003 VOLVO XC70
l Unscrew and remove the accessory plastic floor tray (if fitted).
l Unstrap and lift out the jack and tool kit.
l Unscrew the securing bracket and remove the spare tire from the storage \
well.
l When putting the tire back into the well, perform these steps in reverse\
order. Make sure the spare
tire, jack and tool kit are properly secured.
WARNING!
Make sure that the spare tire, jack and tool kit are properly secured wi\
th the securing bracket and
strap to help keep these components in place in the event of a sudden st\
op.
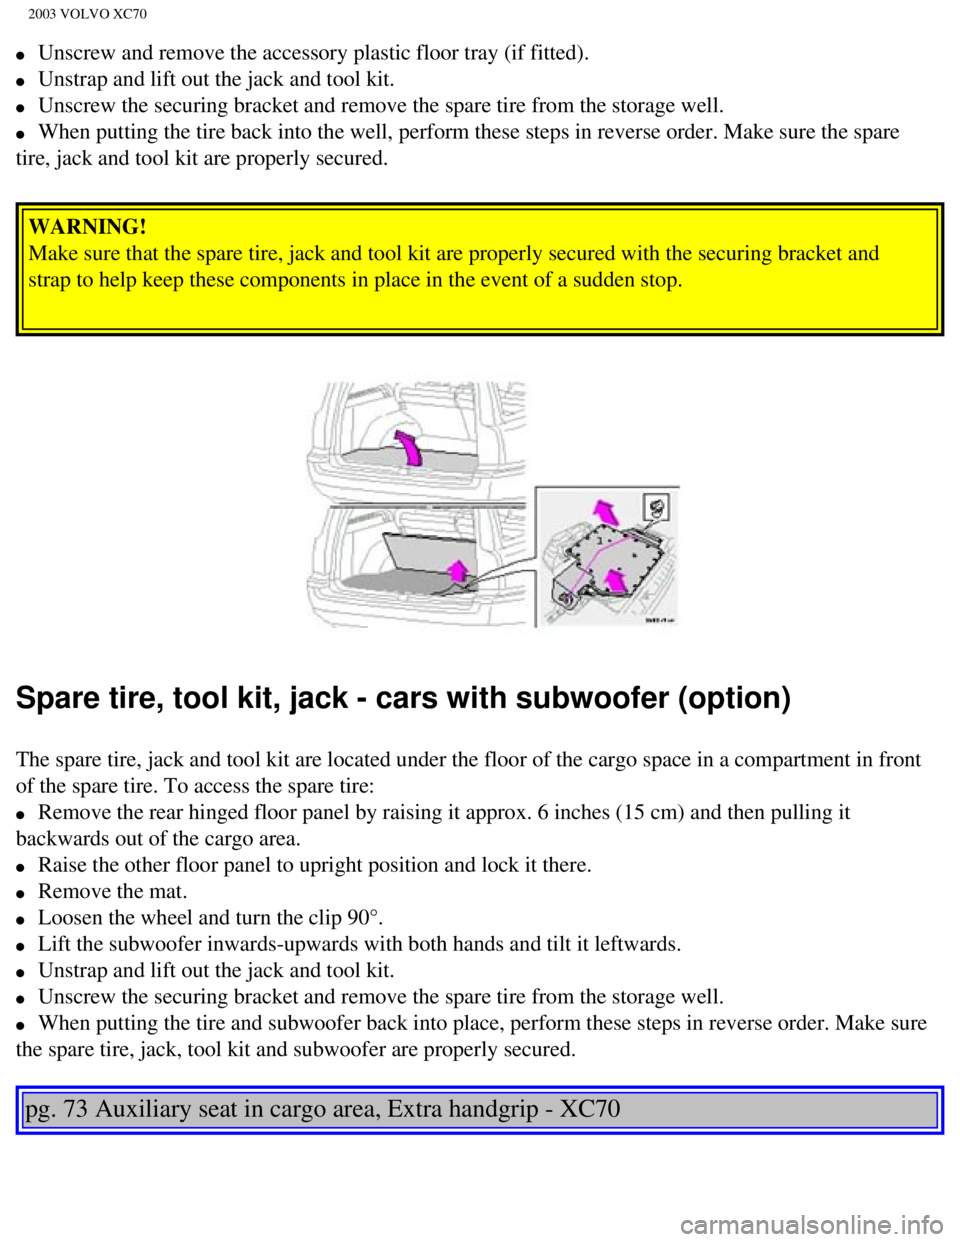
Spare tire, tool kit, jack - cars with subwoofer (option)
The spare tire, jack and tool kit are located under the floor of the car\
go space in a compartment in front
of the spare tire. To access the spare tire:
l Remove the rear hinged floor panel by raising it approx. 6 inches (15 c\
m) and then pulling it
backwards out of the cargo area.
l Raise the other floor panel to upright position and lock it there.
l Remove the mat.
l Loosen the wheel and turn the clip 90°.
l Lift the subwoofer inwards-upwards with both hands and tilt it leftwards\
.
l Unstrap and lift out the jack and tool kit.
l Unscrew the securing bracket and remove the spare tire from the storage \
well.
l When putting the tire and subwoofer back into place, perform these steps\
in reverse order. Make sure
the spare tire, jack, tool kit and subwoofer are properly secured.
pg. 73 Auxiliary seat in cargo area, Extra handgrip - XC70
file:///K|/ownersdocs/2003/2003_XC70/03xc70_04b.htm (17 of 21)12/30/20\
06 4:17:57 PM
Page 114 of 257

2003 VOLVO XC70
Two keys are provided with your car; a master key and a service key. The\
master key, the remote
control, and the central locking button may all be used to lock and unlo\
ck all of your car's locks.
The service key will operate only the driver's door and the ignition swi\
tch. It is intended to help deter
unwanted entry into the glove compartment and trunk.
Turn the key once to unlock the driver's door and the fuel filler door.
Turn the key again (within 10 seconds) to unlock all doors and the tailgate. One turn with the key
towards lock in the drivers door locks all doors and tailgate.
Use the switch on the front door armrests to lock/unlock the car from th\
e inside. WARNING!
If the doors are locked while driving, this may hinder rapid access to t\
he occupants of the car in the
event of an accident. (Also see information on "Child safety locks"). \
NOTE: To help prevent accidentally locking the keys in the car, the central lo\
cking system is designed
to unlock the doors immediately if the key is left in the ignition switc\
h, the car is locked using the lock
button on the door and the door is then closed. A sound from the lock will be audible at this time.
Please note that this function will not unlock the doors if the engine i\
s running.
Immobilizer (start inhibitor)
Each of the keys supplied with your car contains a coded transmitter. Th\
e code in the key is transmitted
to an antenna in the ignition switch where it is compared to the code st\
ored in the start inhibitor module.
The car will start only with a properly coded key. If you misplace a key\
, take the other keys to an
authorized Volvo retailer for reprogramming as an antitheft measure.
*This key operates only driver's door and ignition switch/steering wheel\
lock.
This device complies with part 15 of the FCC rules. Operation is subject\
to the following condition: (1)
This device may not cause harmful interference, and (2) this device mu\
st accept any interference
received, including interference that may cause undesired operation.
file:///K|/ownersdocs/2003/2003_XC70/03xc70_05.htm (2 of 11)12/30/2006\
4:17:58 PM
Page 115 of 257
2003 VOLVO XC70
Exterior courtesy lights
Home Safe System
When you leave your car at night, you can make use of the courtesy light\
ing function:
l Remove the key from the ignition switch.
l Pull the direction indicator lever towards the steering wheel (as when \
activating the high beams).
l Exit the car and lock the doors.
The headlights, parking lights, license plate lights and the lights in t\
he sideview mirrors will now come
on and remain on for 30, 60 or 90 seconds (the time interval is at your\
discretion and can be changed by
an authorized Volvo retailer).
Approach lighting
When approaching the car at night, press the yellow button in the centra\
l locking remote control (see
illustration on
page 77). This lights up the interior courtesy light, parking lights, license \
plate lights and
the lights in the sideview mirrors.
pg. 77 Remote keyless entry system
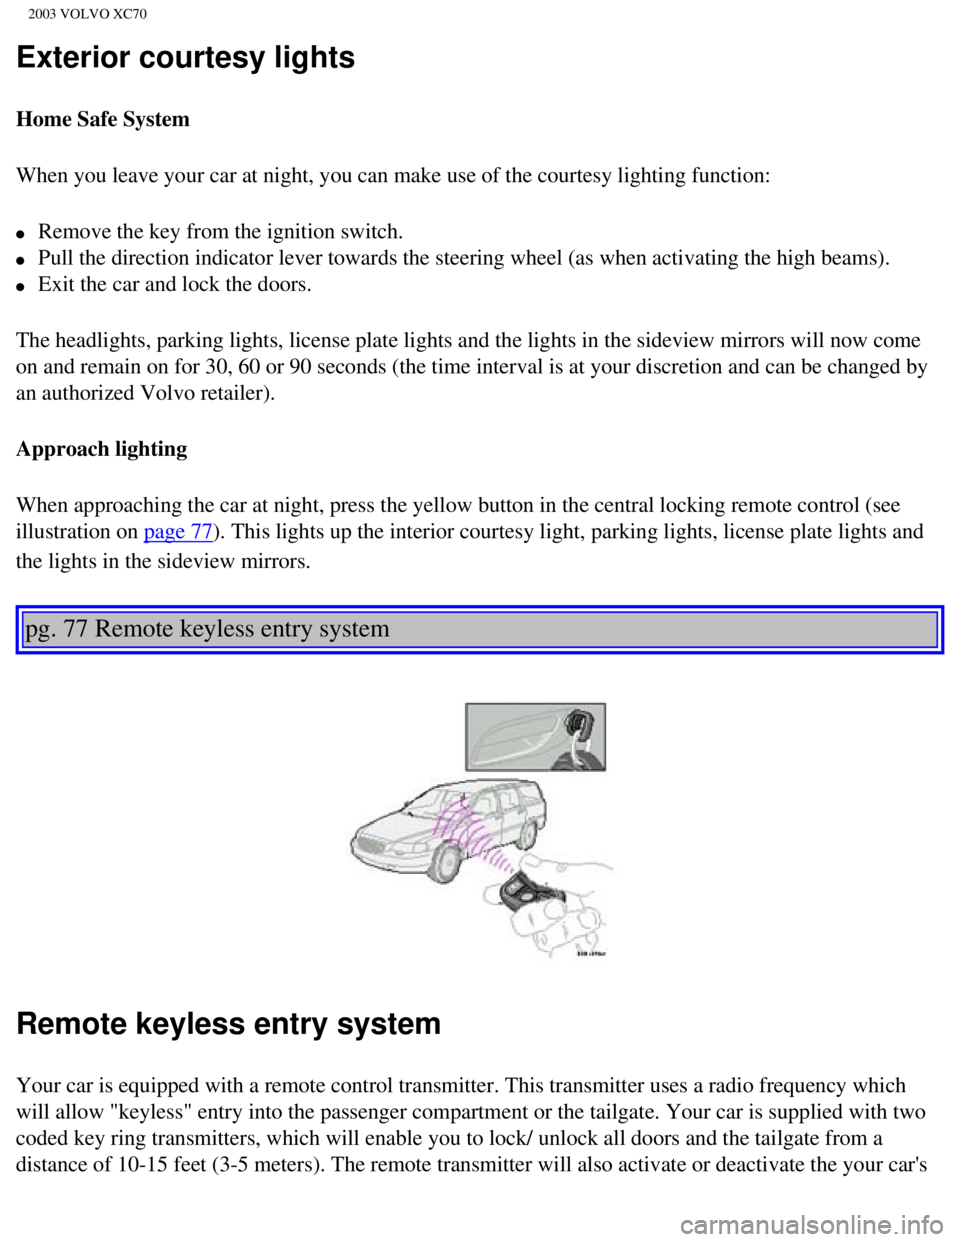
Remote keyless entry system
Your car is equipped with a remote control transmitter. This transmitter\
uses a radio frequency which
will allow "keyless" entry into the passenger compartment or the tailgat\
e. Your car is supplied with two
coded key ring transmitters, which will enable you to lock/ unlock all d\
oors and the tailgate from a
distance of 10-15 feet (3-5 meters). The remote transmitter will also \
activate or deactivate the your car's
file:///K|/ownersdocs/2003/2003_XC70/03xc70_05.htm (3 of 11)12/30/2006\
4:17:58 PM
Page 124 of 257
2003 VOLVO XC70
2 0 0 3
VOLVO XC70
Chapter 6 - Starting and driving
pg. 83 Starting and driving
Fuel requirements 84
Fuel Formulations 85
Refueling 86
Starting the engine 87
Manual transmission 89
Automatic transmission (AW5) 90
Automatic transmission
(Geartronic) 92
All Wheel Drive 94
Driving economy 95
Points to remember 96
Roof racks/load carriers 97
Emergency towing 99
Vehicle towing information 100
Towing a trailer 101
Detachable trailer hitch 102
Jump starting 103
file:///K|/ownersdocs/2003/2003_XC70/03xc70_06a.htm (1 of 22)12/30/200\
6 4:17:59 PM
Page 127 of 257
2003 VOLVO XC70
With the exception of gas line antifreeze during winter months, do not a\
dd solvents, thickeners, or other
store-bought additives to your car's fuel, cooling, or lubricating syste\
ms. Overuse may damage your
engine, and some of these additives contain organically volatile chemica\
ls. Do not needlessly expose
yourself to these chemicals.
pg. 86 Refueling
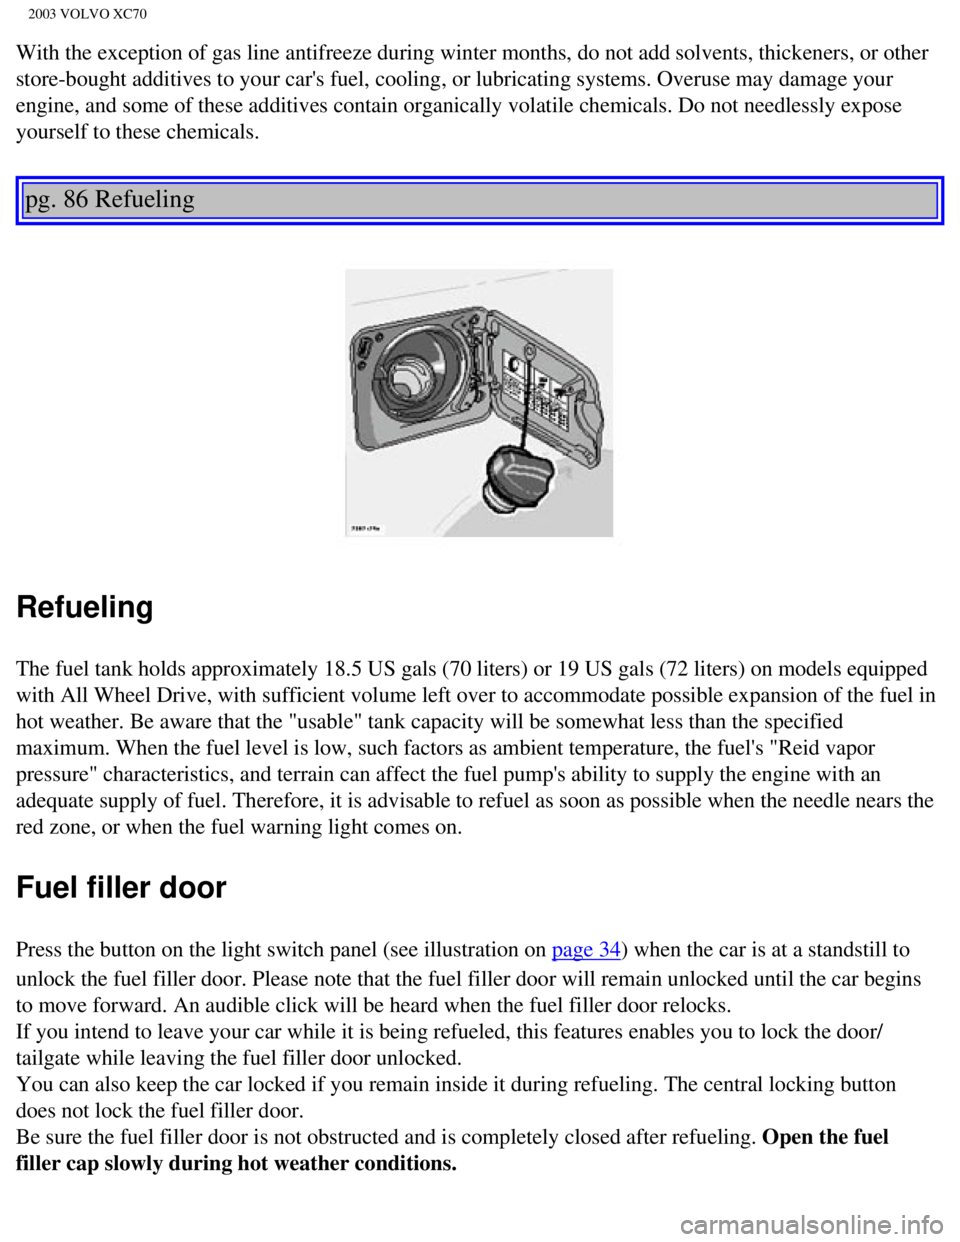
Refueling
The fuel tank holds approximately 18.5 US gals (70 liters) or 19 US ga\
ls (72 liters) on models equipped
with All Wheel Drive, with sufficient volume left over to accommodate po\
ssible expansion of the fuel in
hot weather. Be aware that the "usable" tank capacity will be somewhat l\
ess than the specified
maximum. When the fuel level is low, such factors as ambient temperature\
, the fuel's "Reid vapor
pressure" characteristics, and terrain can affect the fuel pump's abilit\
y to supply the engine with an
adequate supply of fuel. Therefore, it is advisable to refuel as soon as\
possible when the needle nears the
red zone, or when the fuel warning light comes on.
Fuel filler door
Press the button on the light switch panel (see illustration on page 34) when the car is at a standstill to
unlock the fuel filler door. Please note that the fuel filler door will \
remain unlocked until the car begins
to move forward. An audible click will be heard when the fuel filler doo\
r relocks.
If you intend to leave your car while it is being refueled, this feature\
s enables you to lock the door/
tailgate while leaving the fuel filler door unlocked.
You can also keep the car locked if you remain inside it during refuelin\
g. The central locking button
does not lock the fuel filler door.
Be sure the fuel filler door is not obstructed and is completely closed \
after refueling. Open the fuel
filler cap slowly during hot weather conditions.
file:///K|/ownersdocs/2003/2003_XC70/03xc70_06a.htm (4 of 22)12/30/200\
6 4:17:59 PM
Page 128 of 257

2003 VOLVO XC70
NOTE: During a transitional period, a small number of service stations may sti\
ll have fuel nozzles that
are not compatible with the fuel filler neck on cars equipped with the e\
vaporative control system. Please
refer to
page 130 for additional information.
CAUTION:
l Do not refuel with the engine running *. Turn the ignition off or to pos\
ition I. If the ignition is on, an
incorrect reading could occur in the fuel gauge.
l After refueling, close the fuel filler cap by turning it clockwise until\
it clicks into place *.
l Allow for fuel expansion by not overfilling the tank. Overfilling could \
also cause damage to the
emission control systems.
l Avoid spilling gasoline when refueling. In addition to causing damage to\
the environment, gasolines
containing alcohol can cause damage to painted surfaces, which may not b\
e covered under the New
Vehicle Limited Warranty.
l Do not use gasolines containing methanol (methyl alcohol, wood alcohol)\
. This practice can result in
vehicle performance deterioration and can damage critical parts in the f\
uel system. Such damage may
not be covered under the New Vehicle Limited Warranty.
* If the fuel filler cap is not closed tightly or if the engine is runni\
ng when the car is refueled, the Check
Engine light (malfunction indicator lamp) may indicate a fault. Howeve\
r, your vehicle's performance
will not be affected. Use only Volvo original or approved fuel filler ca\
ps.
pg. 87 Starting the engine
Starting the engine
1. Fasten the seat belt.
WARNING!
Before starting, check that the seat, steering wheel and mirrors adjuste\
d properly. Make sure the brake
pedal can be depressed completely. Adjust the seat if necessary. See
page 56.
2. Apply the parking brake, if not already set. The gear selector (automatic transmission) is locked in
the (P)ark position (SHIFT-LOCK). Manual transmission: the clutch must be fully depressed.
3. Without touching the accelerator pedal, turn the ignition key* to the starting position. Allow the
starter to operate for up to 10 seconds. Release the key as soon as the \
engine starts. If the engine fails to
start, repeat this step.
file:///K|/ownersdocs/2003/2003_XC70/03xc70_06a.htm (5 of 22)12/30/200\
6 4:17:59 PM
Page 138 of 257

2003 VOLVO XC70
downshift will not occur until the speed has decreased enough to allow t\
he lower gear to be used.
l If you slow down to a very low speed, the transmission will automaticall\
y shift down.
l When starting in the (MAN)ual position, 3rd gear is the highest gear t\
hat may be selected.
NOTE: Kickdown (see previous page) does not function when the transmission is in the manual shift
(geartronic) mode. The gear selector must be in the D (Drive) positi\
on.
W Winter/Wet driving mode - enhanced vehicle traction
l Mode W will function only if the gear selector is in the (D)rive posit\
ion.
l Press the button at the base of the gear selector to engage/disengage th\
is driving mode (see
illustration).
l An LED in the button will light up to indicate that W is engaged and this will also be displayed in the
instrument panel (see
page 27).
l This mode may be selected for starting/moving off on slippery roads.
pg. 94 All Wheel Drive - option
All Wheel Drive (AWD) - general information
Your Volvo can be equipped with permanent All Wheel Drive, which means t\
hat power is distributed
automatically between the front and rear wheels. Under normal driving co\
nditions, most of the engine's
power is directed to the front wheels. However, if there is any tendency\
for the front wheels to spin, an
electronically controlled coupling distributes power to the wheels that \
have the best traction.
Tire dimensions
Volvo recommends that you always drive on tires of the same brand, size,\
construction (radial), tread
file:///K|/ownersdocs/2003/2003_XC70/03xc70_06a.htm (15 of 22)12/30/20\
06 4:18:00 PM