Page 1693 of 2234

B64861
Claw
Claw
B50126
Hog Ring Pliers
B50126
Hog Ring Pliers
±
SEAT REAR SEAT ASSY (40/60 FOLDING)
72±29
AVENSIS REPAIR MANUAL (RM1018E)
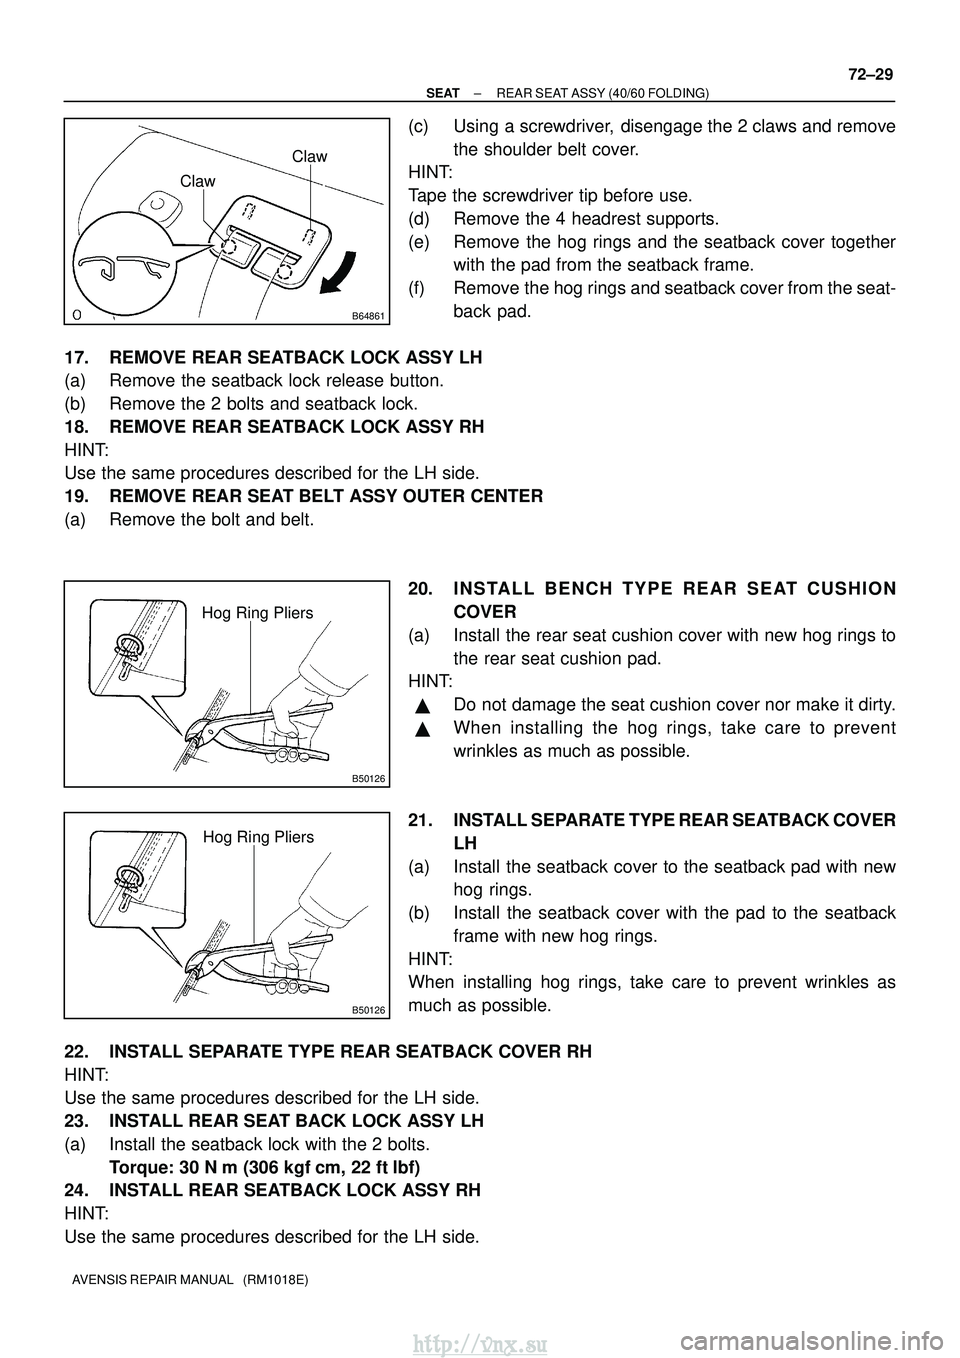
(c) Using a screwdriver, disengage the 2 claws and remove
the shoulder belt cover.
HINT:
Tape the screwdriver tip before use.
(d) Remove the 4 headrest supports.
(e) Remove the hog rings and the seatback cover together with the pad from the seatback frame.
(f) Remove the hog rings and seatback cover from the seat- back pad.
17. REMOVE REAR SEATBACK LOCK ASSY LH
(a) Remove the seatback lock release button.
(b) Remove the 2 bolts and seatback lock.
18. REMOVE REAR SEATBACK LOCK ASSY RH
HINT:
Use the same procedures described for the LH side.
19. REMOVE REAR SEAT BELT ASSY OUTER CENTER
(a) Remove the bolt and belt.
20. INSTALL BENCH TYPE REAR SEAT CUSHIONCOVER
(a) Install the rear seat cushion cover with new hog rings to the rear seat cushion pad.
HINT:
�Do not damage the seat cushion cover nor make it dirty.
�When installing the hog rings, take care to prevent
wrinkles as much as possible.
21. INSTALL SEPARATE TYPE REAR SEATBACK COVER LH
(a) Install the seatback cover to the seatback pad with new hog rings.
(b) Install the seatback cover with the pad to the seatback frame with new hog rings.
HINT:
When installing hog rings, take care to prevent wrinkles as
much as possible.
22. INSTALL SEPARATE TYPE REAR SEATBACK COVER RH
HINT:
Use the same procedures described for the LH side.
23. INSTALL REAR SEAT BACK LOCK ASSY LH
(a) Install the seatback lock with the 2 bolts. Torque: 30 N �m (306 kgf� cm, 22 ft�lbf)
24. INSTALL REAR SEATBACK LOCK ASSY RH
HINT:
Use the same procedures described for the LH side.
http://vnx.su
Page 1695 of 2234
720JD±01
B70148
Bench Type Rear Seatback CoverBench Type Rear Seat Cushion Cover
Rear Seat Headrest Assy
Rear Seat Headrest Assy Center
Bench Type Rear Seatback Pad
Bench Type Rear Seat Cushion Pad �
Hog Ring
� Non±reusable part Rear Seat Headrest Support Assy
� Hog Ring
Rear Seat Headrest Assy
Rear Seat Headrest Support Assy
18 (185, 13)
18 (185, 13)
18 (185, 13)
N
�m (kgf� cm, ft�lbf) : Specified torque
±
SEAT REAR SEAT ASSY (UNITED FIXED)
72±31
AVENSIS REPAIR MANUAL (RM1018E)
REAR SEAT ASSY (UNITED FIXED)
COMPONENTS
http://vnx.su
Page 1696 of 2234

720JE±01
B51101
AA: 100 mm (3.94 in.)
or less
B50126
Hog Ring Pliers
B50126
Hog Ring Pliers
72±32
±
SEAT REAR SEAT ASSY (UNITED FIXED)
AVENSIS REPAIR MANUAL (RM1018E)
OVERHAUL
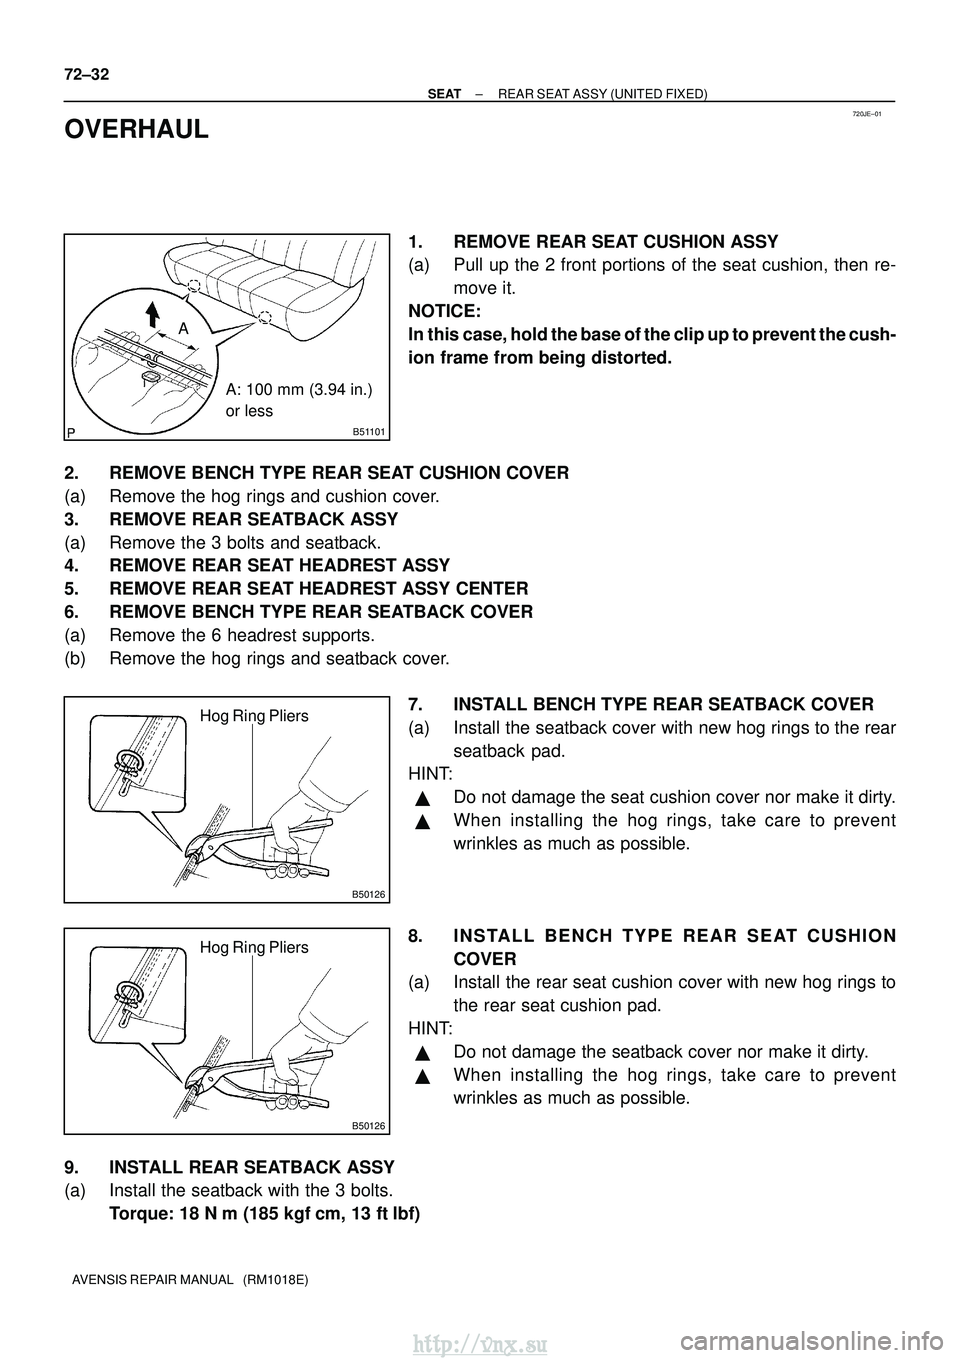
1. REMOVE REAR SEAT CUSHION ASSY
(a) Pull up the 2 front portions of the seat cushion, then re- move it.
NOTICE:
In this case, hold the base of the clip up to prevent the cush-
ion frame from being distorted.
2. REMOVE BENCH TYPE REAR SEAT CUSHION COVER
(a) Remove the hog rings and cushion cover.
3. REMOVE REAR SEATBACK ASSY
(a) Remove the 3 bolts and seatback.
4. REMOVE REAR SEAT HEADREST ASSY
5. REMOVE REAR SEAT HEADREST ASSY CENTER
6. REMOVE BENCH TYPE REAR SEATBACK COVER
(a) Remove the 6 headrest supports.
(b) Remove the hog rings and seatback cover. 7. INSTALL BENCH TYPE REAR SEATBACK COVER
(a) Install the seatback cover with new hog rings to the rearseatback pad.
HINT:
�Do not damage the seat cushion cover nor make it dirty.
�When installing the hog rings, take care to prevent
wrinkles as much as possible.
8. INSTALL BENCH TYPE REAR SEAT CUSHION COVER
(a) Install the rear seat cushion cover with new hog rings to
the rear seat cushion pad.
HINT:
�Do not damage the seatback cover nor make it dirty.
�When installing the hog rings, take care to prevent
wrinkles as much as possible.
9. INSTALL REAR SEATBACK ASSY
(a) Install the seatback with the 3 bolts. Torque: 18 N �m (185 kgf� cm, 13 ft�lbf)
http://vnx.su
Page:
< prev 1-8 9-16 17-24