Page 136 of 425

Instruments and controls
3-15
– CONTINUED –
Always make sure this light is out before you start to drive. �Front-wheel drive warning light
(for AT vehicles – if equipped)
This light comes on when All Wheel Drive is disen-
gaged and the drive mechanism is switched to FrontWheel Drive for maintenance or similar purposes. � Shift position indicator (AT vehicles)
This indicator shows the position of the shift lever. � Turn signal indicator lights
These lights show the operation of the turn signal or
lane change signal.
If the indicator lights do not blink or blink rapidly, the
turn signal bulb may be burned out. Replace thebulb as soon as possible. Refer to the “Replacing
bulbs” section in chapter 11.
� High beam indicator light
This light shows that the headlights are in the highbeam mode.This indicator light also comes on when the head-
light flasher is operated. Clock
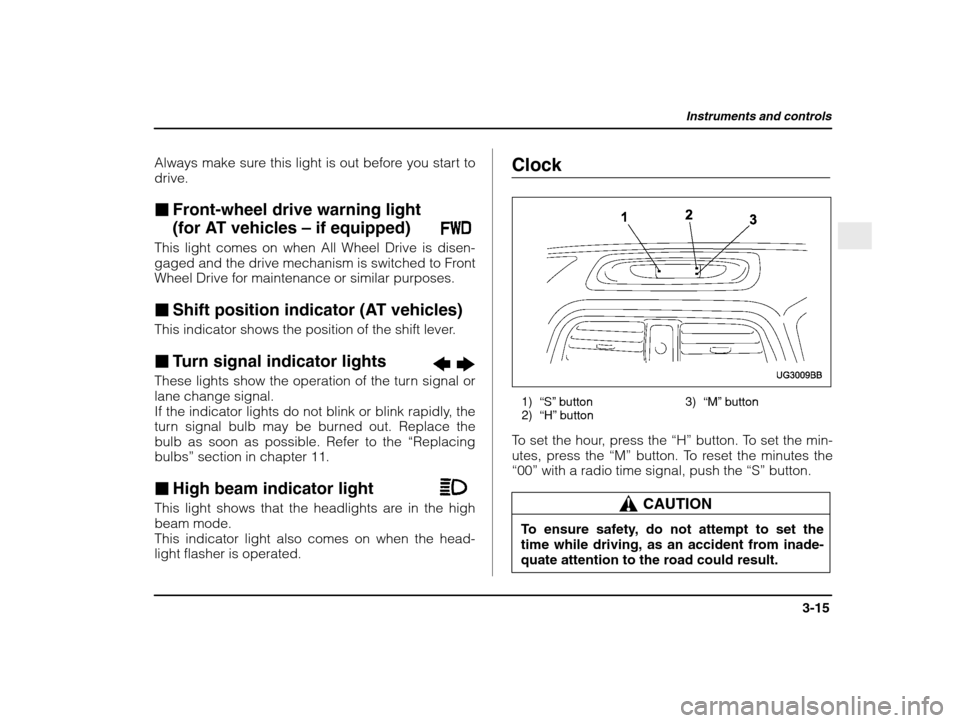
1) “S”
button
2) “H” button 3) “M”
button
To set the hour, press the “H” button. To set the min-
utes, press the “M” button. To reset the minutes the
“00” with a radio time signal, push the “S” button.
CAUTION
To ensure safety, do not attempt to set the
time while driving, as an accident from inade-quate attention to the road could result.
Page 159 of 425

Climate control
4-6
(Outside air): Outside air is drawn into the
passenger compartment.
WARNING
Continued operation in the position may
fog up the windows. Switch to the posi-
tion as soon as the outside dusty condition clears.
� Heater operation
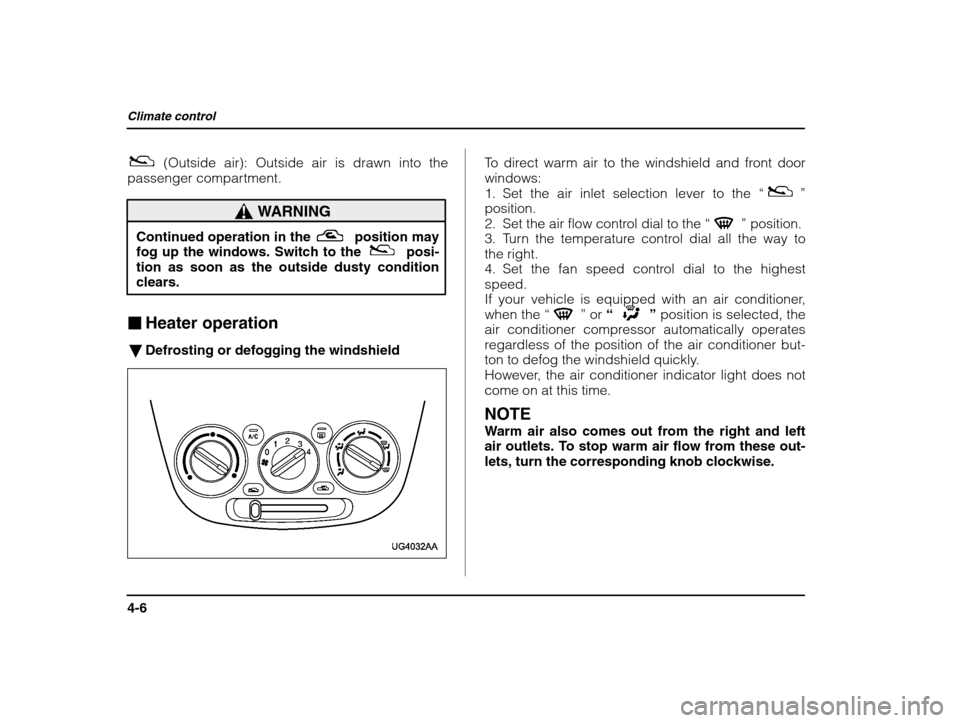
� Defrosting or defogging the windshield
To direct warm air to the windshield and front door windows:
1. Set the air inlet selection lever to the “
”
position.
2. Set the air flow control dial to the “
” position.
3. Turn the temperature control dial all the way to the right.
4. Set the fan speed control dial to the highestspeed.
If your vehicle is equipped with an air conditioner,when the “
” or “” position is selected, the
air conditioner compressor automatically operates
regardless of the position of the air conditioner but-
ton to defog the windshield quickly.
However, the air conditioner indicator light does not
come on at this time. NOTE
Warm air also comes out from the right and left
air outlets. To stop warm air flow from these out- lets, turn the corresponding knob clockwise.
Page 160 of 425
Climate control
4-7
– CONTINUED –
�Heating and defrosting
To direct warm air toward the floor and the wind- shield:
1. Set the air inlet selection lever to the “
”
position.
2. Set the air flow control dial to the “
” position.
3. Set the temperature control dial to the most com-
fortable level.
4. Set the fan speed control dial to the desiredspeed.
If your vehicle is equipped with an air conditioner,when the “
” or “” position is selected, the
air conditioner compressor automatically operates
regardless of the position of the air conditioner but- ton to defog the windshield quickly.
However, the air conditioner indicator light does not
come on at this time. NOTE
Warm air also comes out from the right and left
air outlets. To stop warm air flow from these out-lets, turn the corresponding knob clockwise.
� Heating
To direct warm air toward the floor:
1. Set the air inlet selection lever to the “”
position
2. Set the air flow control dial to the “
” position.
Page 161 of 425
Climate control
4-8
3. Set the temperature control dial to the most com-
fortable level.
4. Set the fan speed control dial to the desiredspeed. NOTE
Warm air also comes out from the right and left
air outlets. To stop warm air flow from these out- lets, turn the corresponding knob clockwise.� Bi-level heating
This setting allows you to direct air of different tem-
peratures from the instrument panel and foot outlets.
The air from the foot outlets is slightly warmer than from the instrument panel outlets.
1. Set the air inlet selection lever to the
“
”
position.
2. Set the air flow control dial to the “
” position.
3. Set the temperature control dial to the desired
temperature level.
4. Set the fan speed control dial to the desired speed.
Setting the temperature control dial fully turned to
the red area or blue area decreases the temperature
difference between the air from the instrument panel
outlets and the air from the foot outlets.
� Ventilation
Page 174 of 425
Audio
5-7
– CONTINUED –
DisplayControl mode
Turn counterclockwiseTurn clockwise
BASBass controlFor less bassFor more bass
TRETreble controlFor less trebleFor more treble
BALBalance con- trolTo increase left speaker volume and decrease
right speaker volumeTo increase right speaker volume anddecrease left speaker volume
FA DFader controlTo increase rear speaker volume and decrease front speaker volumeTo increase front speaker volume anddecrease rear speaker volume
VOLVolume con- trolFor less volumeFor more volume
Page 185 of 425
Audio
5-18
DisplayControl mode
Turn counterclockwiseTurn clockwise
BASBass controlFor less bassFor more bass
TRETreble controlFor less trebleFor more treble
BALBalance controlTo increase left speaker volume anddecrease right speaker volumeTo increase right speaker volume and decrease left speaker volume
FA DFader controlTo increase rear speaker volume anddecrease front speaker volumeTo increase front speaker volume and decrease rear speaker volume
VOLVolume controlFor less volumeFor more volume
Page 187 of 425

Audio
5-20
�Manual tuning (TUNE)
�� : Tuning to a higher frequency
�� : Tuning to a lower frequency
�� ❚: Seeking the next higher station
❚ �� : Seeking the next lower station
n Manual tuning
Turn the tuning knob (4) clockwise and release it im-
mediately to increase the tuning frequency and turn
the tuning knob counterclockwise and release it im-
mediately to decrease the tuning frequency.
Each time the knob is turned, the frequency changes 10 kHz in the AM waveband and 0.2 MHzin the FM waveband. n
Seek tuning
Turn the tuning knob (4) and hold it for more than a
half second. Seek tuning will operate and stop auto-
matically on the next station.
Continue this operation until you find the desiredstation.
� Automatic tuning (SCAN)
Press the “SCAN” button (3) to change the radio to
the SCAN mode. In this mode, the radio scans
through the radio band until a station is found. Theradio will stop at the station for five seconds while
displaying the frequency, after which scanning will
continue until the entire band has been scanned
from the low end to the high end.
Press the “SCAN” button again to cancel the SCAN
mode and to stop on any displayed frequency.
When the “SCAN” button is pressed for automatic
tuning, stations are scanned in the direction of low
frequencies to high frequencies only.
Automatic tuning may not function properly if the sta-
tion reception is weakened by distance from the sta-
tion or proximity to tall buildings and hills.
� Selecting preset stations
Presetting a station with a preset button (5) allowsyou to select that station in a single operation. Up to
six AM, FM1 and FM2 stations each may be preset.
Page 388 of 425
Maintenance and service
11-65
– CONTINUED –
�Front turn signal light bulbs
1. Remove the bulb socket from the headlight as-
sembly by turning it counterclockwise.
2. Pull the bulb out of the socket. Install a new bulb.
3. Set the bulb socket into the headlight assembly
and turn it clockwise until it locks.
� Parking light bulbs
The headlight assembly must be removed before
the parking light bulbs can be replaced. When the
headlight assembly has been removed and then re-
installed, it may become necessary to make a head-
light aiming adjustment. It may be difficult to replace
the bulbs. Have your SUBARU dealer replace the bulbs if necessary.�
: Clip � : Hook