2003 SUBARU FORESTER ECO mode
[x] Cancel search: ECO modePage 194 of 420
5-19
Audio
– CONTINUED –
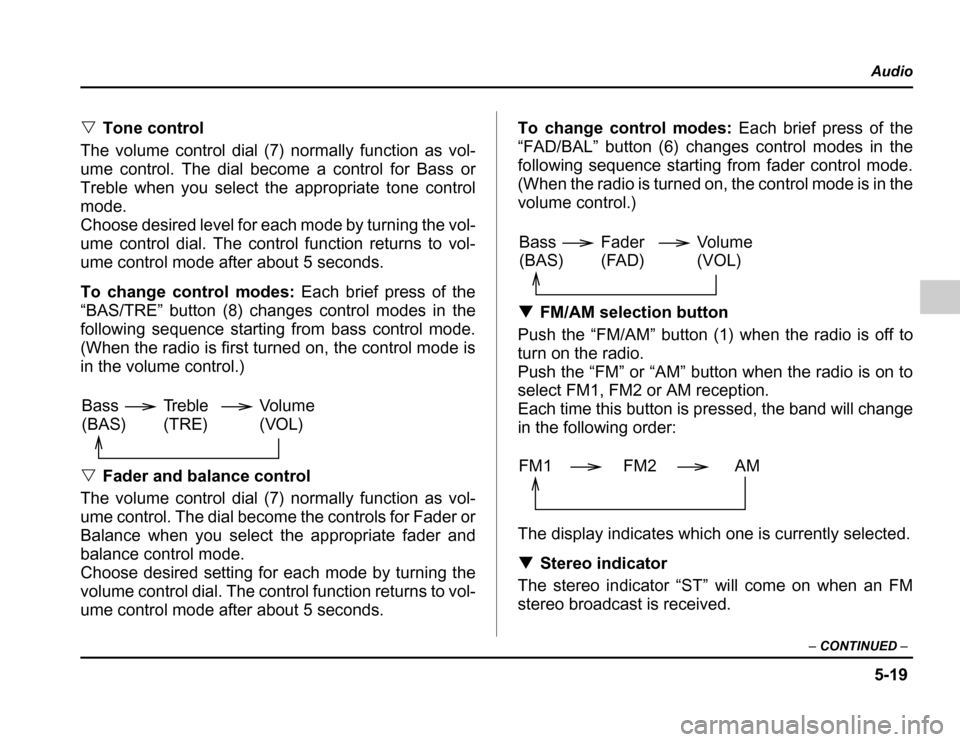
�Tone control
The volume control dial (7) normally function as vol-
ume control. The dial become a control for Bass or
Treble when you select the appropriate tone control
mode.
Choose desired level for each mode by turning the vol-
ume control dial. The control function returns to vol-
ume control mode after about 5 seconds.
To change control modes: Each brief press of the
“BAS/TRE” button (8) changes control modes in the
following sequence starting from bass control mode.
(When the radio is first turned on, the control mode is
in the volume control.) � Fader and balance control
The volume control dial (7) normally function as vol-
ume control. The dial become the controls for Fader or
Balance when you select the appropriate fader and
balance control mode.
Choose desired setting for each mode by turning the
volume control dial. The control function returns to vol-
ume control mode after about 5 seconds. To change control modes:
Each brief press of the
“FAD/BAL” button (6) changes control modes in the
following sequence starting from fader control mode.
(When the radio is turned on, the control mode is in the
volume control.) � FM/AM selection button
Push the “FM/AM” button (1) when the radio is off to
turn on the radio.
Pushthe“FM”or“AM”buttonwhentheradioisonto
select FM1, FM2 or AM reception.
Each time this button is pressed, the band will change
in the following order:
The display indicates which one is currently selected. � Stereo indicator
The stereo indicator “ST” will come on when an FM
stereo broadcast is received.
Volume
(VOL)
Bass(BAS) Treble(TRE)
Volume (VOL)
Bass(BAS) Fader
(FAD)
FM1 FM2 AM
Page 195 of 420
5-20
Audio
�
Weather band button (WB)
Push the “WB” button (2) when the radio is off to turn
on the radio in the weather band.
Press the “WB” button when the radio is on to select
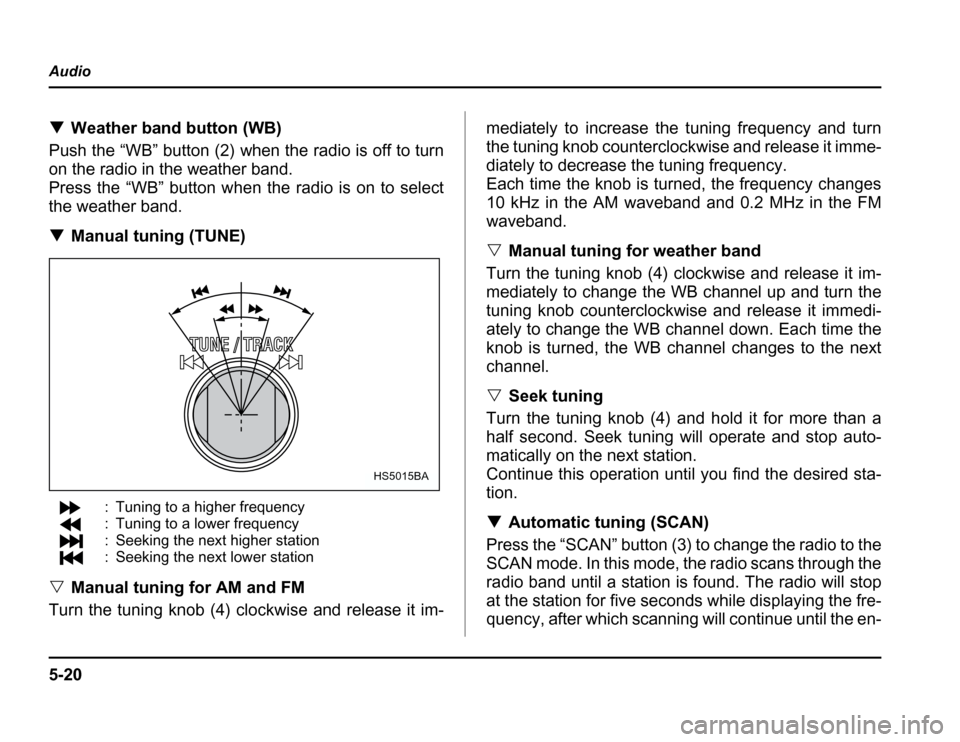
the weather band. � Manual tuning (TUNE)
: Tuning to a higher frequency
: Tuning to a lower frequency
: Seeking the next higher station
: Seeking the next lower station
� Manual tuning for AM and FM
Turn the tuning knob (4) clockwise and release it im- mediately to increase the tuning frequency and turn
thetuningknobcounterclockwiseandreleaseitimme-
diately to decrease the tuning frequency.
Each time the knob is turned, the frequency changes
10 kHz in the AM waveband and 0.2 MHz in the FM
waveband. �
Manual tuning for weather band
Turnthetuningknob(4)clockwiseandreleaseitim-
mediately to change the WB channel up and turn the
tuning knob counterclockwise and release it immedi-
ately to change the WB channel down. Each time the
knob is turned, the WB channel changes to the next
channel. � Seek tuning
Turn the tuning knob (4) and hold it for more than a
half second. Seek tuning will operate and stop auto-
matically on the next station.
Continue this operation until you find the desired sta- tion. � Automatic tuning (SCAN)
Press the “SCAN” button (3) to change the radio to the
SCAN mode. In this mode, the radio scans through the
radio band until a station is found. The radio will stop
at the station for five seconds while displaying the fre-
quency, after which scanning will continue until the en-
HS5015BA
Page 196 of 420
5-21
Audio
– CONTINUED –
tire band has been scanned from the low end to the
high end.
Press the “SCAN” button again to cancel the SCAN
mode and to stop on any displayed frequency.
When the “SCAN” button is pressed for automatic tun-
ing, stations are scanned in the direction of low fre-
quencies to high frequencies only.
Automatic tuning may not function properly if the sta-
tion reception is weakened by distance from the sta-
tion or proximity to tall buildings and hills. �Selecting preset stations
Presettingastationwithapresetbutton(5)allowsyou
to select that station in a single operation. Up to six
AM, FM1, FM2 and WB stations each may be preset. � How to preset stations
1. Press the “FM/AM” selection button to select AM,
FM1 or FM2 reception.
OR
Press the “WB” button (2) to select the weather band.
2. Press the “SCAN” button (3) or tune the radio man-
ually until the desired station frequency is displayed.
3. Press one of the preset buttons (5) for at least 1.5
seconds to store the frequency. The frequency of the
station will flash once on the display at this time. If the
button is pressed for less than 1.5 seconds, the pre- ceding selection will remain in memory.
NOTE
If the connection between the radio and battery is
broken for any reason such as vehicle mainte-
nance or radio removal, all stations stored in the
preset buttons are cleared. If this occurs, it is nec-
essary to reset the preset buttons.
Page 199 of 420

5-24
Audio
�
Tape program sensor button (TPS)
� Blank skip
When the “TPS” button (13) is pressed, the “TPS” in-
dicator will come on and the player will automatically
skip any blank portion of 15 second or more and play
the next program, even if it is on the other side. To
cancel blank skip mode, press the “TPS” button again. � Blank search
Press “TPS” button (13) during playback to return to
the beginning of the current selection or to skip to the
beginning of the next selection. To use this function,
press the “TPS” button to turn on the “TPS” indicator.
If the fast-forward button “FF” (15) is then pressed, the
player advances the tape to the beginning of the next
selection and starts playing it. If the rewind button
“REW” (17) is pressed instead, the player rewinds the
tape to the beginning of the current selection and
starts replaying it. The “TPS” function may not operate
properly under the following conditions: � When the recording level is low.
� When there are long pauses in the middle of a se-
lection. � When the tape contains verbal material such as
conversations.� When the blanks between selections are shorter
than five seconds. �
When there are no blanks between selections (live
concerts, etc.). � Repeat button (RPT)
Push the “RPT” button (11) to repeat the piece of mu-
sic being listened to. To use this function, push the
“RPT” button while the piece you want to hear again is
being played. “RPT” will be indicated on the display.
When the selection ends, the cassette player automat-
ically rewinds to the beginning of the piece and the se-
lection begins again. To cancel the repeat function,
push the “RPT” button again. Until the repeat function
is cancelled, the same piece of music will be repeated
indefinitely. The “RPT” function may not operate prop-
erly under the following conditions: � When the recording level is low.
� When there are long pauses in the middle of a se-
lection.� When the tape contains verbal material such as
conversations. � When the blanks between selections are shorter
than five seconds. � When there are no blanks between selections (live
concerts, etc). � Dolby B NR button ( )
Press “ ” button (14) when playing tapes recorded
using the Dolby NR system*. The “ ” indicator will
Page 202 of 420
5-27
Audio
– CONTINUED –
NOTE
Make sure to always insert a disc with the label
side up. If a disc is inserted with the label side
down, it might be ejected or the player might shut off. �How to insert a CD(s)
� Inserting a CD
1. Press “LOAD” button (18). If the magazine in the
player has an idle position where you can insert a disc,
the “DISC” indicator associated with the idle position
will blink.
If no indicator blinks, it means that there is no idle po-
sition in the magazine.
2. As soon as the “DISC” indicator begins to blink, the
“IN” will appear on display for a period of 15 seconds.
Insert a disc during the period. The disc will be then
automatically drawn in, and the player will begin to
play back the first number of the disc. � To insert more discs in succession, repeat Steps 1
and 2. The magazine will be loaded with discs in the
ascending order of position number.
If you do not insert any disc in 15 seconds after you
have pressed the “LOAD” button, the player will begin
to play back the first number of the last disc you have
inserted. �
The disc indicator steadily lights up if a disc is al-
ready inserted in the corresponding position of the
magazine. � While the player is in the loading mode, if you press
any of the other mode buttons “FM/AM” (1), “WB” (2)
and “TAPE” (12), the player will enter the standby
mode. Press the “CD” button (21) to start playback. � Inserting a disc in a desired position
1. Press the “LOAD” button. If the magazine in the
player has an idle position where you can insert a disc,
the “DISC” indicator associated with the idle position
will blink.
The positions in the magazine the indicator of which
steadily lights up are already loaded with discs.
2. Press the “DISC SELECT” button (26) at the posi-
tion where you want to insert a disc. The associated
“DISC” indicator will blink, and the “IN” will be dis-
played.
3. If you insert a disc during the 15-second period
while the “IN” is on display, the disc will be automati-
cally drawn in, and the player will start playback of the
disc, beginning with the first number. � To insert more discs in succession, repeat Steps 1
and 2. � While the player is in the loading mode, if you press
any of the other mode buttons “FM/AM” (1), “WB” (2)
Page 203 of 420
5-28
Audio
and “TAPE” (12), the player will enter standby mode.
Press the “CD” button to start playback. �
Loading all the magazine (Full disc loading mode)
1. If you continue to press the “LOAD” button for more
than 1.5 seconds, the player will produce beep sound
and will enter the full disc loading mode.
2. A “DISC” indicator will blink, and the “IN” will be on
display for a period of 15 seconds. If a disc is success-
fully loaded during this period, the “DISC” indicator will
stop blinking and will steadily light.
3. When the loading of a disc is complete, the next
“DISC” indicator will blink. Then repeat Step 2.
4. When the magazine is filled with discs by repeating
Steps 2 and 3, the player will start playback of the
discs, beginning with the one inserted first.
If you fail to insert any disc during each 15-second in-
terval, the full disc loading mode will be canceled, and
the player will start playback of the disc inserted first. � How to play back a CD or make a pause
� When there is no CD inserted:
Insert a CD by referring to “How to insert a CD(s)”.
When a CD is loaded, the player will start playback of
the CD, beginning with the first number. �
When there are CDs loaded:
Press a desired one of the “DISC SELECT” buttons
(26) the “DISC” indicator of which steadily lights up.
The player will then start playback of the selected CD,
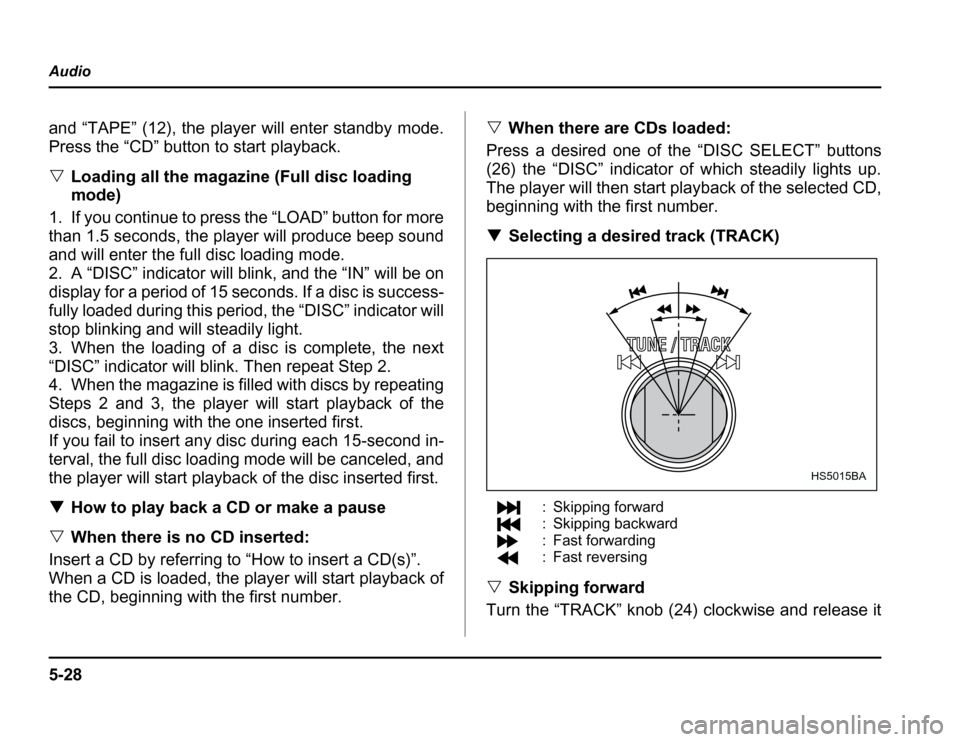
beginning with the first number. � Selecting a desired track (TRACK)
: Skipping forward
: Skipping backward
: Fast forwarding
: Fast reversing
� Skipping forward
Turn the “TRACK” knob (24) clockwise and release it
HS5015BA
Page 204 of 420

5-29
Audio
– CONTINUED –
immediately to skip to the beginning of the next track.
Each time the knob is turned and released, the indicat-
ed track number will increase. �Skipping backward
Turn the “TRACK” knob (24) counterclockwise and re-
lease it immediately to skip to the beginning of the cur-
rent track. If you continue to turn and release the knob,
the indicated truck number will decrease. � Fast forwarding
Turn the “TRACK” knob (24) clockwise and hold it con-
tinuously for more than 2 seconds to fast forward the disc.
Release the knob to stop fast forwarding. � Fast reversing
Turn the “TRACK” knob (24) counterclockwise and
hold it continuously for more than 2 seconds to fast re-
verse the disc.
Release the knob to stop fast reverse. � Repeat playback
Press the “RPT” button (25) while a song is playing to
play the song repeatedly. The “RPT” indicator will
come on and the song will be played continuously. To
cancel the repeat mode, press the button again. Then
the “RPT” indicator goes out, and normal playback mode is restored. �
Random playback
Press the “RDM” button (23) while a disc is being
played back to play all songs on the disc in a random
order. The “RDM” indicator will come on and all songs
on the disc will be played in a random order.
To cancel the random mode, press the button again.
Then the “RDM” indicator goes out, and normal play-
back mode is restored. � Scan
When the “SCAN” button (19) is pressed while the disc
is being played back, you can hear the first 10 seconds
of each track to search for the desired program. To
continue listening to the program, press the “SCAN”
button again. After all tracks on the disc have been
scanned, normal playback mode is restored. � How to unload CDs from the player
� Ejecting a CD from the player
Of the discs loaded, you can select and remove only
one disc.
1. Press the “DISC SELECT” button (26) of the disc
whose “DISC” indicator is ON.
2. Press the “EJECT” button (22). Then the “DISC” in-
dicator associated with the disc you have selected will
Page 208 of 420

5-33
Audio
– CONTINUED –
2. Press the “Eject button” (4). The selected disc will
be ejected and the indicator light will begin blinking.
3. To remove another disc, repeat step 1 and 2
choosing a different “Disc select” button.
(To remove discs when the ignition switch is in the
“Lock” position, press the “Eject” button, and the first
disc will be ejected. Press the “Eject” button again,
and the next disc will be ejected and so on. At this
time, the “Disc select” buttons are disabled.) �To remove all discs at one time
1. Press and hold the “Eject” button (4) until all “Disc”
indicators begin blinking (about 1.5 seconds), and the
first disc will be ejected.
2. When the disc is removed, the next one will be
ejected, and so on. � To replace a playing disc with another
Simply press the desired one of “Disc select” buttons
(3) (numbered from 1 to 6) or press the “DISC UP” or
“DISC DOWN” button on the radio unit to select the
desired disc, and the disc will begin to play. � Disc indicators
Lit: when the corresponding storage tray is occupied
by a disc.
Blinking: Disc player is either in loading, eject or
changing mode. OFF: No disc is loaded or the ignition switch is in the
“LOCK” position. �
Function control
Refer to CD changer control operating instructions de-
scribed in the “Type A audio set” section.