Page 58 of 400

1-34
HB1148CAHB1145BA
3. Insert the tongue plate into the buckle.
4. Pull out the seatbelt fully from the retractor to change the retractor
over from the Emergency Locking Retractor (ELR) to the Automatic
Locking Retractor (ALR) function. Then allow the belt to rewind into
the retractor. As the belt is rewinding, clicks will be heard which indi-
cate the retractor function as ALR.
5. While pushing the child restraint into the seat cushion and moving
it back and forth, tighten the seatbelt securely by taking up the slackin the belt.
6. Before having a child sit in the child restraint system, move it back
and forth to check if it is firmly secured.
7. To remove the child restraint system, press the release button on
the seatbelt buckle and allow the belt to retract completely. The belt
will return to ELR mode.
If you have any question concerning proper child restraint system
installation, ask your SUBARU dealer. �Installation of child restraint systems by use of lower and teth- er anchorages
Some types of child restraint systems can be installed on the rear
seat of your vehicle without use of the seatbelts. Such child restraint
systems are secured to the dedicated anchorages provided on the
vehicle body. The lower and tether anchorages are sometimes re-
ferred to as the LATCH system ( Lower Anchors and Tethers for CHil-
dren).
Page 59 of 400
Seat, seatbelt and SRS airbags1-35
–
CONTINUED –
HB1154BA
Your vehicle is equipped with four lower anchorages (bars) on the
back panel behind the markings on the bottom part of the rear seat-back and two upper anchorages (tether anchorages) on the back
side of the seatback for accommodating such child restraint systems.
HB11132BAHB1133BA
The lower anchorages (bars) are used for installing a child restraint
system on the rear seat. For each seating position of the rear seat,
two lower anchorages are provided.
The tether anchorages (upper anchorages) are also provided for each
seating position of the rear seat.
You will find marks “
” at the bottom of the rear seat seatbacks.
These marks indicate the positions of the lower anchorages (bars).
Each lower anchorage is located where the seat cushion meets theseatback.
Page 60 of 400
1-36
CAUTION
When you install a child restraint system, follow the manufactur- er ’s instructions supplied with it. After installing the child restraint
system, check to ensure that it is held securely in position. If it is
not held tight and secure, the danger of your child suffering per-
sonal injury in the event of an accident may be increased.
1. Place the child restraint system on the rear seat cushion.
HB1134BA
2. Unlock the rear seatback locking knob and fold the seatback for-
ward to see the tether anchorages on the backside of the seatback.
HB1144BA
3. Connect the hook of the upper tether belt onto the tether anchor- age on the backside of the seatback. Do not allow slack in the tetherbelt.
Page 61 of 400
Seat, seatbelt and SRS airbags1-37
–
CONTINUED –
HB1146BA
4. Put the other end of the tether belt through under the headrest.
5. Return the seatback to the locked position. Confirm that the redmark on the locking knob is no longer visible and check if the seat-
back has been securely locked by moving it back and forth.
HB1154BA
6. While following the instructions supplied by the child restraint sys-
tem manufacturer, connect the lower hooks onto the lower anchor-ages located at “
” marks on the bottom of the rear seatback.
When the hooks are connected, make sure the adjacent seatbelts are not caught.
Page 62 of 400
1-38
HB1131BA
7. [If your child restraint system is of a flexible attachment type
(which uses tether belts to connect the child restraint system properlyto the lower anchorages)]
While pushing the child restraint into the seat cushion, pull both left
and right lower tether belts up to secure the child restraint system
firmly by taking up the slack in the belt.
HB1147BA
8. Pull the upper tether belt straight up to secure the child restraint
system firmly by taking up the slack in the belt.
9. Put the loose end of the tether belts behind the seatback.
10. To remove the child restraint system, follow the reverse proce-
dures of installation.
If you have any question concerning proper child restraint system
installation, ask your SUBARU dealer.
Page 63 of 400

Seat, seatbelt and SRS airbags1-39
–
CONTINUED –
*SRS airbag (Supplemental Restraint System airbag)
*SRS: This stands for supplemental restraint system. This name is used because the airbag system supplements the vehicle ’s seatbelts.
� Vehicle with driver ’s and front passenger ’s SRS air-
bags and lap/shoulder restraints
WARNING
� To obtain maximum protection in the event of an accident, the
driver and all passengers in the vehicle should always wear seat-belts when the vehicle is moving. The SRS airbag is designed
only as a supplement to the primary protection provided by the
seatbelt. It does not do away with the need to fasten seatbelts. In
combination with the seatbelts, it offers the best combinedprotection in case of a serious accident.Not wearing a seatbelt increases the chance of severe injury ordeath in a crash even when the car has the SRS airbag.
For instructions and precautions concerning the seatbelt system,see the “Seatbelts” sections in this chapter.
� Do not sit or lean unnecessarily close to the SRS airbag. Be-
cause the SRS airbag deploys with considerable speed – faster
than the blink of an eye – and force to protect in high speed colli-
sions, the force of an airbag can injure an occupant whose bodyis too close to SRS airbag. It is also important to wear your seatbelt to help avoid injuriesthat can result when the SRS airbag contacts an occupant not inproper position such as one thrown forward during pre-accidentbraking.Even when properly positioned, there remains a possibility thatan occupant may suffer minor injury such as abrasions andbruises to the face or arms because of the SRS airbag deploy-ment force.
Page 64 of 400

1-40
�The SRS airbags deploy with considerable speed and force.
Occupants who are out of proper position when the SRS airbag
deploys could suffer very serious injuries. Because the SRS air-bag needs enough space for deployment, the driver should al-ways sit upright and well back in the seat as far from the steeringwheel as practical while still maintaining full vehicle control and
the front passenger should move the seat as far back as possibleand sit upright and well back in the seat.� Do not place any objects over or near the SRS airbag cover or
between you and the SRS airbag. If the SRS airbag deploys,those objects could interfere with its proper operation and could
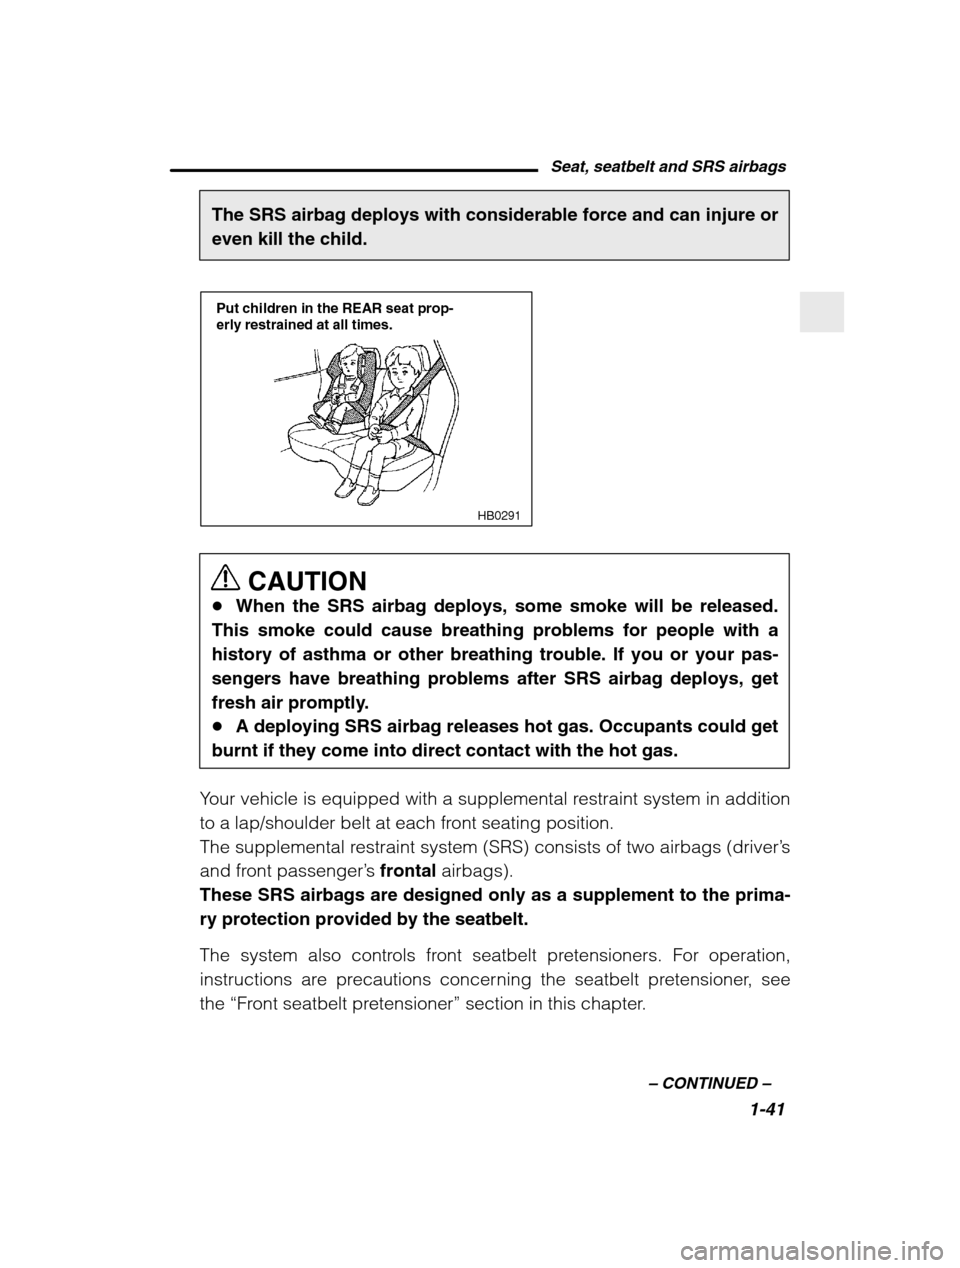
be propelled inside the car and cause injury.� Put children aged 12 and under in the rear seat properly re-
strained at all times. The SRS airbag deploys with considerablespeed and force and can injure or even kill children, especially ifthey are 12 years of age and under and are not restrained or im-properly restrained. Because children are lighter and weaker than
adults, their risk of being injured from deployment is greater.
For that reason, we strongly recommend that ALL children(including those in child seats and those that have outgrownchild restraint devices) sit in the REAR seat properly restrained atall times in a child restraint device or in a seatbelt, whichever isappropriate for the child ’s age, height and weight.
Secure ALL types of child restraint devices (including forwardfacing child seats) in the REAR seats at all times.According to accident statistics, children are safer when properlyrestrained in the rear seating positions than in the front seatingpositions.For instructions and precautions concerning the child restraint
system, see the “Child restraint systems ” section in this chapter.
� NEVER INSTALL A REARWARD FACING CHILD SEAT IN THE
FRONT SEAT. DOING SO RISKS SERIOUS INJURY OR DEATH TOTHE CHILD BY PLACING THE CHILD ’S HEAD TOO CLOSE TO
THE SRS AIRBAG.� Never allow a child to stand up, or to kneel on the front pas-
senger’ s seat, or never hold a child on your lap or in your arms.
Page 65 of 400

Seat, seatbelt and SRS airbags1-41
–
CONTINUED –
The SRS airbag deploys with considerable force and can injure or even kill the child.
HB0291
Put children in the REAR seat prop- erly restrained at all times.
CAUTION
� When the SRS airbag deploys, some smoke will be released.
This smoke could cause breathing problems for people with a history of asthma or other breathing trouble. If you or your pas-
sengers have breathing problems after SRS airbag deploys, get
fresh air promptly.� A deploying SRS airbag releases hot gas. Occupants could get
burnt if they come into direct contact with the hot gas.
Your vehicle is equipped with a supplemental restraint system in addition
to a lap/shoulder belt at each front seating position.
The supplemental restraint system (SRS) consists of two airbags (driver ’s
and front passenger ’s frontal airbags).
These SRS airbags are designed only as a supplement to the prima-ry protection provided by the seatbelt.
The system also controls front seatbelt pretensioners. For operation,
instructions are precautions concerning the seatbelt pretensioner, seethe “Front seatbelt pretensioner ” section in this chapter.