2003 PONTIAC GRAND PRIX engine
[x] Cancel search: enginePage 98 of 378
Engine Exhaust
Engine exhaust can A. It contains the gas
carbon monoxide (CO), which you can’t see or
smell.
It can cause unconsciousness and
death.
You might have exhaust coming
in if:
Your exhaust system sounds strange or
different.
Your vehicle gets rusty underneath.
0 Your vehicle was damaged in a collision.
e Your vehicle was damaged when driving
over high points on the road or over road
debris.
CAUTION: (Continued)
Repairs weren’t done correctly.
Your vehicle or exhaust system had been
modified improperly.
If you ever suspect exhaust is coming into
your vehicle:
Drive it only with all the windows down to
* Have your vehicle fixed immediately.
blow out any
CO; and
2-31
Page 99 of 378
Running Your Engine While You
Are Parked
It’s better not to park with the engine running. But if you
ever ha.-- to, here are som- ‘hings to know.
Idling the engine with the climate control
system
off could allow dangerous exhaust into
your vehicle. See the earlier Caution under
“Engine Exhaust.”
Also, idling
in a closed-in place can let deadly
carbon monoxide (CO) into your vehicle even
if the fan
is at the highest setting. One place
this can happen is a garage. Exhaust - with
CO - can come in easily. NEVER park in a
garage with the engine running.
Another closed-in place can be a blizzard. See “Winter Driving” in the Index.
It can be dangerous to get out of your vehicle
if the
shift lever is not fully in PARK (P) with
the parking brake firmly set. Your vehicle can
roll. Don’t leave your vehicle when the engine
is running unless you have to.
If you’ve left the
engine running, the vehicle can move
suddenly. You or others could be injured.
To
be sure your vehicle won’t move, even when
you’re on fairly level ground, always set your parking brake and move the shift lever to
PARK
(P).
Follow the proper steps to be sure your vehicle won’t
move. See Shifting
Into Park (P) on page 2-28.
If you are parking on a hill and if you’re pulling a trailer,
also see Towing a Trailer
on page 4-37.
2-32
Page 119 of 378
Arming and Disarming the Content
Theft-Deterrent System
To arm and disarm the content theft-deterrent system,
if equipped, the system must be turned on by using
Mode
2 listed previously in this section under Content
Theft-Deterrent System
on page 2-51.
With the arming and disarming feature, you can do the
following:
Arm the system when you lock the doors using
either power door lock switch while any door is open
and the key is removed from the ignition.
Arm the system when you lock the doors with your
remote keyless entry transmitter and the key is
removed form the ignition.
0 Disarm the system when you unlock the doors with
your key or remote keyless entry transmitter.
Programmable Modes
Mode 1: Power Door Lock Switch Arming Off
The content theft-deterrent system will arm when
you lock the doors with the remote keyless entry
transmitter, The key must be removed from
the ignition when you lock the doors or the content
theft-deterrent system will not arm.
The content theft-deterrent system will disarm when
you unlock the doors with the keys or the remote
keyless entry transmitter.
Mode 2: Remote Keyless Entry Transmitter Arm/Disarm
Only
The content theft-deterrent system will arm when
you lock the doors with the remote keyless entry
transmitter. The key must be removed from
the ignition when you lock the doors or the content
theft-deterrent system will not arm.
The content theft-deterrent system will disarm when
you unlock the doors with the remote keyless entry
transmitter.
While this mode provides increased security,
it can be a
problem
if the remote keyless entry transmitter is
damaged, lost or
if it fails to operate for any reason
while the content theft-deterrent system is armed. The
content theft-deterrent system must be disarmed for
the engine
to run and while in Mode 2, the key can no
longer disarm the system.
If your vehicle is equipped with the Onstar@ system,
Onstar@ will not be able to remotely unlock your vehicle
if it has been programmed to Mode 2.
2-52
Page 122 of 378

Section 3 Instrument Panel
Instrument Panel Overview .......................... -3-2
Hazard Warning Flashers
-3-3
Other Warning Devices ................................... 3.4
Horn
............................................................. 3.4
Tilt Wheel
..................................................... 3.4
Turn Signal/Multifunction Lever
......................... 3.5
Exterior Lamps
............................................. 3.10
Interior Lamps
.............................................. 3.12
Head-Up Display (HUD)
................................. 3-15
Accessory Power Outlets
............................... 3.18
Auxiliary Power Connection (Power Drop)
......... 3.19
Ashtrays and Cigarette Lighter
........................ 3-19
Climate Controls ............................................ 3.20
Dual Climate Control System
.......................... 3.20
Outlet Adjustment
......................................... 3.22
Warning Lights, Gages and Indicators ............. 3.23
Instrument Panel Cluster
................................ 3.24
Speedometer and Odometer
........................... 3.25
Tachometer
................................................. 3.25
Safety Belt Reminder Light
............................. 3.26
Air Bag Readiness Light
................................ 3-26
Charging System Light
.................................. 3.27
Brake System Warning Light
......................... -3-28
Anti-Lock Brake System Warning Light
............. 3.29
Traction Control System (TCS) Warning Light
...... 3.29
Enhanced Traction System Warning Light
........ -3-30
.. ...............................
Low Traction Light ....................................... -3-30
Engine Coolant Temperature Gage
.................. 3-31
Malfunction Indicator Lamp
............................ -3-32
Oil Pressure Light
........................................ -3-35
Security Light
............................................... 3-36
Fuel Gage
................................................... 3-37
Low Fuel Warning Light
................................. 3-37
Driver Information Center (DE) ....................... 3-38
Trip Computer ................................... ..... 3-40
Control Buttons
............................................ 3-42
Functions
.................................................... 3-42
Audio System(s) ............................................. 3-44
Setting the Time
........................................... 3-44
Radio with Cassette
...................................... 3-45
Radio with CD (Base Level)
........................... 3-48
Radio with CD
(Up Level) .............................. 3-51
Theft-Deterrent Feature
.................................. 3-54
Engine
Coolant Temperature 'Warning Light
...... 3.31
Low Oil Level Light ....................................... 3-36
Audio Steering Wheel Controls
....................... 3-56
Understanding Radio Reception
...................... 3-57
Care of Your Cassette Tape Player
................. 3-58
Care
of Your CDs ......................................... 3-59
Care of Your CD Player
................................ 3-59
Backglass Antenna
....................................... 3-59
3-
1
Page 129 of 378
Cruise Control
With cruise control, you can maintain a speed of about
25 mph (40 km/h) or more without keeping your foot
on the accelerator. This can really help on long
trips. Cruise control does not work at speeds below
approximately
25 mph (40 km/h).
When you apply the brakes, the cruise control
shuts
off.
If your vehicle is in cruise control when the traction
control system on the
3800 Supercharged V6 engine or
the enhanced traction system on the 3100 V6 and
3800 V6 engine begins to limit wheel spin, the cruise
control will automatically disengage. See Traction
Control System (TCS) on page
4- 10 or Enhanced
Traction System (ETS) on page
4-1 1. When road
conditions allow you to safely use it again, you may
turn the cruise control back on.
Setting Cruise Control
Cruise control can be dangerous where
you can’t drive safely at a steady speed.
So, don’t use you’r cruise control on
winding roads or in heavy traffic.
Cruise control can be dangerous on
slippery roads. On such roads, fast
changes
in tire traction can cause
needless wheel spinning, and you could
lose control. Don’t use cruise control on
slippery roads.
I
If you leave your cruise control on when you’re
not using cruise, you might hit a button and go
into cruise when you don’t want to. You could
be startled and even lose control. Keep the
cruise control switch off until you want to use
cruise control.
1. Move the cruise control switch to ON.
2. Get up to the speed you want.
3. Push in the SET button at the end of the
4. Take your foot off the accelerator pedal.
multifunction lever
and release it.
3-8
Page 137 of 378

The HUD also shows the following lights when they are
lit on the instrument panel cluster:
Turn Signal Indicators
High-Beam Indicator Symbol
Low Fuel Symbol
The HUD will display CHECK GAGES when the
following items are lit on the instrument panel cluster:
Oil Warning Symbol
Coolant Temperature Symbol
Charging System Symbol
When the ignition key is turned to RUN, the entire HUD
image will come on. Then the Head-Up Display will
operate normally.
Notice: Although the HUD image appears to be
near the front
of the vehicle, do not use it as
a parking aid. The
HUD was not designed for that
purpose.
If you try to use it as such, you may
misjudge the distance and damage your vehicle.
When the HUD is on, the speedometer reading will be
displayed continually. The current radio station
or
CD track number will only be displayed for three
seconds after the radio or CD track status changes.
This will happen whenever one of the radio controls is
pressed, either on the radio itself or on the optional
steering wheel controls. To
adjust the HUD
so you can see it properly do the
following:
1. Adjust your seat, if necessary, to a comfortable
position.
2. Start the engine and adjust the HUD controls
located on the instrument panel, to the right
of
the steering wheel. Move the DIM thumbwheel up
or down to adjust brightness.
3-1 6
Page 142 of 378
A/C (Air Conditioning): Press this button to turn the
air-conditioning system on or
off. When A/C is pressed,
an indicator light above the button will come on to let
you know that
A/C is active. The instrument brightness
control may have to be adjusted to
the highest setting
during the daytime in order to see the indicator light.
On hot days, open the windows to let hot inside
air escape; then close them. This helps to reduce the
time it takes for your vehicle to cool down. It also helps
the system to operate more efficiently.
For quick cool down
on hot days:
1. Select the MAX recirculation mode.
2. Select A/C.
3. Select the coolest temperature.
4. Select the highest fan speed.
Using these settings together for long periods of time
may cause the air inside your vehicle to become too dry.
To prevent this from happening, after the air in your
vehicle has cooled, change the mode from MAX
to another mode such as bi-level.
The air-conditioning system removes moisture from the
air,
so you may sometimes notice a small amount of
water dripping underneath your vehicle while idling
or after turning
off the engine. This is normal.
Defogging and Defrosting
There are two modes to clear fog from your windshield.
Use the floor/defog mode
to clear the windows of fog
or moisture and warm the passengers. Use the defrost
mode to remove fog or frost from the windshield
more quickly.
Turn the mode knob to select the defog or defrost mode.
,2 (Floor/Defog): This mode directs the air equally
between the windshield and the floor outlets. When you
select this mode, the system turns on the
air-conditioning compressor unless the outside
temperature is at or below freezing.
9 FRONT (Defrost): Pressing FRONT directs most
of the air to the windshield and the side window
outlets, with some air directed to the floor outlets. In this
mode, the system will automatically run the
air-conditioning compressor, unless the outside
temperature is at or below freezing.
3-21
Page 143 of 378
Rear Window Defogger
The rear window defogger uses a warming grid to
remove fog or frost from the rear window.
The rear window defogger will only work when the
ignition is in
RUN.
REAR: Press this button to turn the rear window
defogger on or
off. When this button is pressed an
indicator light above the button will come on to show that
the rear window defogger is active. The instrument
brightness control may have to be adjusted to the
highest setting during the daytime in order to see the
indicator light.
Be sure to clear as much snow from the rear window
as possible.
The rear window defogger will turn
off approximately
15 minutes after the button is pressed. If turned on
again, the defogger will only run for approximately seven
and one-half minutes before turning
off. The defogger
can also be turned
off by pressing the button again or by
turning
off the engine.
Notice: Don’t use a razor blade or something else
sharp on the inside of the rear window.
If you
do, you could cut or damage the defogger and the
repairs would not be covered by your warranty.
Do not attach a temporary vehicle license, tape, a
decal or anything similar to the defogger grid.
3-22
Outlet Adjustment
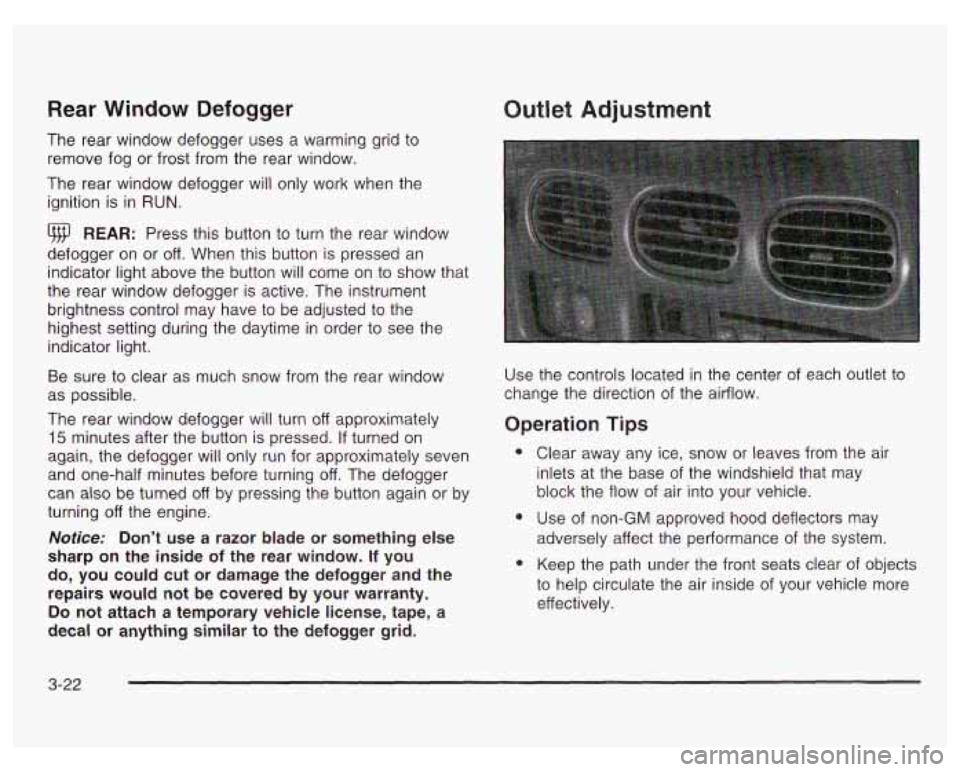
Use the controls located in the center of each outlet to
change the direction
of the airflow.
Operation Tips
e
e
Clear away any ice, snow or leaves from the air
inlets at the base of the windshield that may
block the flow of air into your vehicle.
Use of non-GM approved hood deflectors
may
adversely affect the performance of the system.
Keep the path under the front seats clear of objects
to help circulate the air inside
of your vehicle more
effectively.